


Would you like to build your Minecraft world where, with your friends, you can make up the rules, but would rather not deal with latency, network issues, and too much crashing? Perhaps what you’re looking for is a robust, tailor-made digital domain, not really just a server. This is a problem most of us face every day from hobbyists maintaining personal projects to small business owners operating e-commerce platforms and even independent contractors updating client websites. Beginning with Minecraft provides a handy, low-stakes environment to teach how to administer and maintain a reliable server, which is an important skill.
First, there’s the free DIY PC Host, which requires passing familiarity with Java and network configuration, including port forwarding. It’s ideal for those comfortable with handling resources and digging into the terminal. Secondly, there is the reliable Hosting Provider option, such as UltaHost. This solution instantly takes away the technical overhead and reliance on a home Internet connection by offering very good 24/7 uptime. Stable performance and easy scalability. It is often opted for by people who want dependability and stability above everything else, just like when choosing a web host for a critical production site.
Pragmatism is the name of the game here. This is not an in-depth exploration of enterprise IT but rather a no-nonsense approach. This tutorial is aimed at freelancers, small business owners, or dedicated hobbyists needing a workable server solution. By the end, you will be set up to choose the hosting model best matching your technological comfort level and resource constraints so as to make sure your new Minecraft world is well-founded.
Key Takeaways
- Knowing the DIY PC Host: It will cover settings and resources needed to have your own Minecraft server using your home computer. It will involve the testing of hardware, mainly Dedicated RAM. Setting up a good line of communication via networking with enough upload speed. Technical setup steps like typing into the Terminal, managing server file types, and installing Java. You’ll learn about the balance of some of the security implications of port forwarding with continued uptime management at no cost.
- The Case for Professional Hosting with UltaHost: You are going to learn just which point it becomes the best idea to start using a dedicated host like UltaHost. This decision is not clear-cut and depends on several factors among them the requirement for native DDoS protection. You can confidently rely on this information to make up your mind as to the most stable, high-performing, or in general. The best route for times when uptime or continuous access is of the essence.
- Proficiency in the management and maintenance of the server: The skill set that this guide will entail for operating your Minecraft server includes the technical ability to invite friends. Therefore, giving them the correct IP address. To manage your server practically through changing the server.properties file for game rules, difficulty, and player limits. To grasp the concepts for its maintenance by the time through proper RAM allocation and monitoring of console activity.
Expert Opinion In 2025
The immediate strategic benefit that comes with migrating to a dedicated hosting service for a Minecraft server is an immediate alleviation of critical technical burdens. You are literally passing on hard tasks, which include keeping it up continuously. High bandwidth for seamless gameplay. Tough attack protection, like DDoS mitigation, is provided to the professional infrastructure of the provider. Not an act of convenience, handing over such hefty resources is an act of premeditation, aimed at freeing your resources and focus. – UltaHost Gaming Expert.
Host Minecraft Server Locally
Learn how to set up and run a Minecraft server on your PC step by step.
Why Host a Minecraft Server
The following are the key benefits and reasons to make a Minecraft dedicated server of your own.
- Unlimited Customization and Control: You’re practically a god in your world. You can even set up your own rules, define a world seed of your choice, manage a whitelist, and install whatever plugins or mods you want to change the game in whatever way you want, be it Spigot, Forge, or Fabric.
- Community: Whether it be your own personal playground, or friends, family, or your very trusted few, hosting allows you to choose precisely who will be in your playing environment. Moreover, it disengages the unknown characteristics, disorder, and limitations that come with reliance on big public servers or low-scale Mojang Realms.
- Big Performance Gains: The performance of your own powerful PC or that of a professional provider will be better and more stable than that of a cheap, low-tier shared hosting solution. In fact, the studies indicated that server administrators have caused the departure of players due to the occurrence of lag and server downtime; thus, performance is very crucial in building a community.
- Gain knowledge of real-world trade-offs: Server operation activities will provide you with quite a few practical lessons on the realities of such operations: for instance, it is a very important difference between depending on a home internet connection with slow upload speeds, which is not meant for 24/7 reliability, and using professional hosting that provides high bandwidth and uptime. Being always online is an absolutely vital factor for a shared world in which it is critical for a great and seamless experience for all players.
Two Paths to Hosting – On Your PC vs Using a Hosting Provider
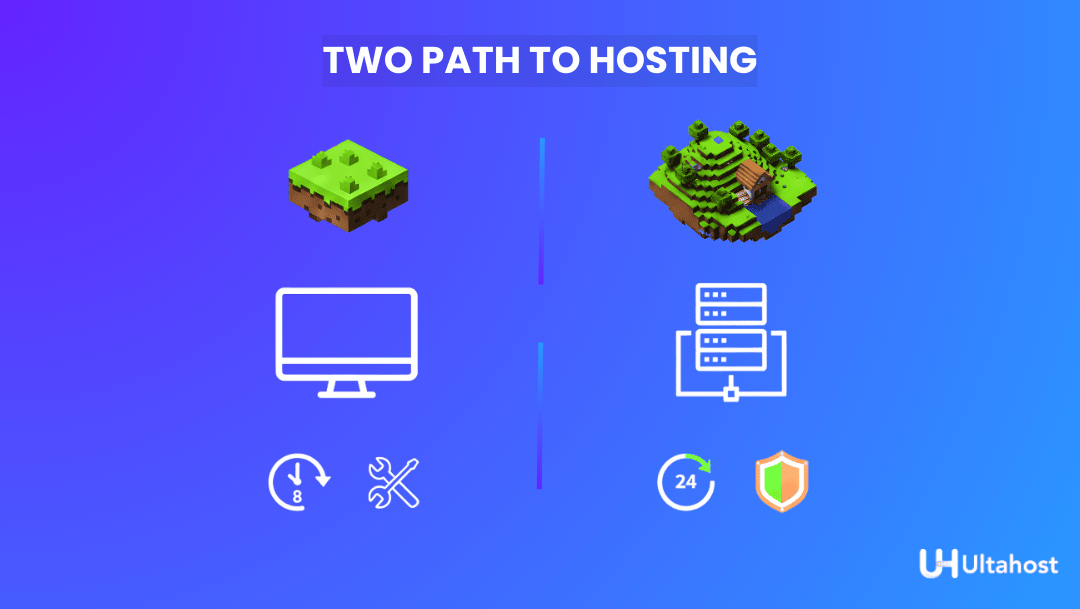
The most crucial decision regarding your future server will be where to put it, i.e., usually deciding between sacrificing the cost for reliability. This part contrasts the do-it-yourself PC Host model with the Professional Minecraft Hosting model.
Minecraft PC Hosting (Self-Hosting)
- Self-hosting: Involves the installation and running of server software for Minecraft on the household computer directly. The fact that the price during is quite low is the main reason why people are attracted to self-hosting; however, there are quite a few limitations in terms of security and stability of the setup. Briefly, what you need and what will consume your resources.
- PC Specifications: The server is the one that requires the most rigorous and dedicated resources to be allocated for it. RAM-2GB at the very least is a must, and a powerful CPU that can handle world generation and entity tracking in a smooth manner is paramount. In the majority of cases, this would therefore be one of the latest processors with high single-core performance.
- Network: A wired connection is highly recommended for stability. Importantly, you need to have enough upload bandwidth – not download speed – with your Internet Service Provider, as that becomes the choke point for all of your friends connecting to the server.
- DNS: You need to manage your IP address, which could be a dynamic DNS, frequently changing, and would involve a separate service to keep the connection address the same for your players.
Pros: Why It Is Appealing
- Full Control: This means you have total administrative control over every file, every setting, and every piece of hardware without any kind of third-party restrictions.
- Possibly Lower Cost: If you already have a powerful computer and you pay for high-speed internet, the direct cost is simply electricity.
Cons: The Major Drawbacks
- PC Must Remain On: For the world to be accessible 24/7 for your community, your personal computer must be on and running the server software at all times.
- Performance Limitations: Upload speeds in your home could greatly limit the number of people who can play on that server before lag ensues. Also, your computer has to split its performance between operating the server and operating your own game client.
- Technical Overhead & Security: You are personally responsible for the management of complex network settings, such as port-forwarding, opening a specific port on your router to the internet, and all associated network security firewall configuration.
- Downtime: The server is at the mercy of your home’s power outages, interruptions in Internet service, or just simple PC crashes.
Using a Hosting Provider such as UltaHost
This is a process of renting a virtual or dedicated slice of a high-performance, professional data center server for a monthly fee.
Benefits
- Uptime and Performance Guaranteed: The servers run on enterprise-grade hardware, including high-speed NVMe SSDs and powerful processors. These ensure stable, lag-free gameplay at a high tick rate and a guaranteed 24/7 uptime backed by an SLA.
- Superior Security: Hosting providers provide immediate, out-of-the-box protection against common threats such as DDoS. This protects your server and your personal IP address from large-scale network attacks.
- Dedicated Support: You have access to professional, round-the-clock expert support so that you can address any technical issues or hardware failures. Problems with software are resolved as fast as possible. You will never have to troubleshoot complex server issues on your own.
Less Technical Set-up
- Simplified Access: You will have an intuitive web-based Control Panel with which you can have full access to the server, install mods, perform configurations, and so on.
- No Worries about the Network: You don’t need to concern yourself with the tweaking of router settings or even firewalls on home networks, much less port forwarding. Friends can join in using an easy, dedicated IP address provided by the host.
- Reliability: It is independent of power outages in your home, bottlenecks on the internet, or use by personal computers; it’s always there for your community.
Scale-Friendly and Flexible
- Easy Upgrades: If your player base or mod demands increase, upgrade your RAM, CPU, or storage resources instantly and easily from the control panel. There’s no need to buy new hardware.
- Data Center Locations: Most of these have multiple locations; one can choose which one is closest to where their player base will be for low latency.
- Decision Criteria PC Hosting: You should use PC Hosting for only a very small, tight-knit group of friends, temporary testing of mods/plugins, or you simply enjoy the technical challenge – and you don’t mind that the server is offline when you are not playing.
Note: You want high uptime for mods and/or a lot of players, and high performance, or you want less technical overhead, or you want the security and scalability inherent in professional infrastructure.
Beginner-Friendly, Step-by-Step Setup on Your PC
1. Requirements Checklist
First of all, make sure your system is ready for hosting; using your PC in this manner is a resource-intensive process.
- Minimum Hardware & Resources: The CPU should be relatively modern with strong single-core performance since Minecraft servers use one or two cores for core logic. Assign how much RAM the server is going to use. For a small group, 1-4 players, running vanilla, but if you plan on running mods, plugins, or hosting more players, make sure to scale it up to 4GB or even 8GB. Also, remember that the PC will be running your Operating System and the Minecraft game client.
- Internet Connection Quality: Unlike browsing, hosting depends upon your upload speed. If you have less than 1 Mbps upload per player, you will probably experience lag. Find out what your upload rate is using a service such as Speedtest.net. Wired Ethernet is highly preferred over Wi-Fi due to reasons of stability and performance.
- Server Edition Selection: Java Edition is PC-only, but it’s the most mature and mod-friendly platform out there, supporting Spigot, Forge, Fabric, and many others. That’s what this guide focuses on. Crossplay between PC, Console, and Mobile in Bedrock Edition uses a different configuration process and has fewer mods.
- Router Access: This is a configuration requirement that allows the joining of the server to external players, and it requires an administrative level of access to your home router.
2. Download and Install the Server Software
This is the process for obtaining the server files and making whatever legal agreement is necessary.
- Official Server File: Download First, navigate to Minecraft’s Java Edition server download page. Download the .jar file for the server; the name will look something like minecraft_server.1.20.4.jar, depending on the version.
- Organize Your Files: Create a folder on your desktop for ease of access, and name it something like Minecraft Server. You should put the .jar you downloaded into it. All of your world data and config files will live here.
- Generate Configuration Files: To have the server generate all its configuration files, it needs to run once. You can start the server from the command line or a temporary script. It will start up and immediately quit, telling you to accept the EULA.
- Accept the EULA: Locate and open the newly generated eula.txt file in a simple text editor like Notepad. Edit the line which says eula=false to eula=true. Save and close this file. You may now legally launch the server.
3. Configuring the Server
Now you are configuring world settings and assigning system resources.
- Customize World Settings: All of the settings for the game are kept within the server.properties file. You can edit key variables here: set the maximum number of players; enter a specific world-seed for world generation; enable the whitelist for private control; change the view-distance to lower values to save CPU/RAM.
- Allocate RAM – Essential step: you have to create a small start-batch file (either .bat or .sh) in order to start the server, and mention the allocation of the RAM. For that, you have to open the file in edit mode and introduce something like $Xmx2G$, which specifies the limit (in this case, 2 Gigabytes) of the amount of memory the server should use. Xms1G sets the initial amount of memory used, which in this case, is 1 Gigabyte. Setting these ensures the server has a stable memory reserve.
- Start the Server: Double-click on your saved start file, such as start.bat. A console window opens, and the server starts. It will start generating the worlds. Wait for the “Done!” message.
4. Network & Access for Friends
This is the most technically challenging step; thus, it allows external connections to reach your internal PC.
- Local Testing: Start your Minecraft client and connect to localhost in the server address slot through Multiplayer → Add Server. If this connects, the server software is working fine.
- Set Static Internal IP (Recommended): Your router assigns to your PC a local IP address, ex: $192.168.1.10$. If this address changes, your port forwarding will break. It’s highly recommended that you reserve.
- Port Forwarding in Your Router: Go to your router’s administration page. Depending on the brand and model of your router, this can be done in various ways. Look for something like ‘Port Forwarding’ or ‘Virtual Server’. Now, forward all incoming traffic on TCP/UDP Port 25565 to the internal static IP address of your hosting PC.
- Share Your Public IP: Your public IP address can be found by simply googling “What is my IP”. That is the address that your friends will use to connect to you. In case it changes quite often, you will need to set up a dynamic DNS service so that you can get a domain name that will be consistent and easy for you and your friends to remember.
- Firewall Rules: On your computer, in order to allow the Java or server process to accept incoming connections on Port 25565, the firewall must be configured to enable that. This is something that you will do on Windows Defender or macOS Firewall.
- Security Notice: The best practice is to only invite people that you trust since you are exposing your home IP. There is an inherent risk, though very small, that in this manner you can become the target of network attacks.
5. Basic Maintenance
Once hosting is done, it becomes a continuous process of reliability that requires routine maintenance.
- Regular Backups: Make it a point to back up server data regularly. As the world folder is the main data, you just have to make a copy along with the server.properties file and plugins folder if you have used one, on another hard drive or cloud storage. This will be your safety net in case of catastrophic data loss caused by corruption or hardware failure of the world.
- Keep Software Up to Date: Every once in a while, check for updates for your Minecraft server and make sure to always keep the Java version you are running up to date, as it’s usually the one that comes with security fixes and performance improvements.
- Performance Monitoring: You should check the utilization of your CPU and RAM while players are online. If you discover that the server lag occurs at the same time as the number of players increases, this means that the hardware limit has been reached ,which is an indication that you have to switch to a professional hosting provider.
- Monitor Uptime: Be aware of the conditions under which you run on your PC. If at any time it is turned off unintentionally, or your internet connection is down, players will not be able to connect. Therefore, constant uptime necessitates a dedicated solution.
How UltaHost Helps You to Host a Minecraft Server Easily
UltaHost converts the intricacies of server management into a smooth, dependable operation that directly addresses the limitations inherent in self-hosting from a home PC.
- Performance on Enterprise-Grade Infrastructure: Each of the several game server hosting plans is fitted out with high-speed NVMe SSD storage for ultra-fast world loading and reduced lag, even with heavy mods. They boast unlimited bandwidth and are designed for high clock speed CPUs. These will put an end to common self-host headaches brought about by slow home internet upload speeds or fragmented hard drives.
- It Guarantees High Uptime: usually 99.99%, which really means the server is always on, 24/7/365, with no downtime due to power outages or any sort of disconnection from your home. All packages have free data center-quality DDoS protection, protecting your game server and community from malicious attacks without forcing you to deal with complicated firewalls.
- Zero Home Network Management Required: You are instantly freed from the most frustrating technical tasks of self-hosting, such as configuring port forwarding on your home router, managing your local network security, or dealing with dynamic IP addresses. The host just provides a simple, dedicated IP address to which people connect. It also means you don’t have to rely on your personal computer being constantly on.
- Expert Support and Global Reach: UltaHost provides 24/7 human support by specialized teams that will be able to help you troubleshoot mod conflicts, server crashes, or configuration issues-you don’t have to become the sole, round-the-clock IT administrator. Thanks to global data centers, you will be able to select a location that is geographically close to your main player base, which reduces latency (ping) dramatically for smoother gameplay.
- Easy Scaling and Migration: UltaHost is a very good option when it comes to future-proofing the situation. In simple terms, you can just purchase a small plan pack and upgrade your resources, such as RAM and CPU, as you grow your player base or mod without having to be involved in the migration process that is complicated and painful. This feature is very significant, taking into consideration that research shows that the top reason for users to stop playing on a server is continuous lag or downtime caused by bad hosting.
Migration Path – When & How to Move from PC Hosting to a Provider
Self-hosting is nice, but the server that has been your home will inevitably reach a point where it is not enough. Transferring your world to a professional server hosting provider will mean more power, higher reliability, and easier management. These are the main points that will assist you in figuring out your next step if self-hosting has become too limiting.
| Hosting your own Minecraft server teaches real-world server management, from DIY control to professional reliability with UltaHost—helping you build a stable world that’s ready to grow. |
1. Triggers to Switch: When You’ll Know It’s Time
The question of whether to move your server to a professional provider will arise when you experience the following limitations, either singly or in combination.
- Downtime on a regular basis: Your server may be crashing or lagging frequently because of the excessive utilization of resources.
- Most Concurrent Players: More than 10 players are the norm; thus, 10 players may require more dedicated resources than the average home PC can usually manage.
- Heavy mods/plugins: Big modpacks like Tekkit or RLCraft and complex plugins like advanced economy systems need large amounts of RAM and CPU.
- Power and Internet for a Home PC: The server is slowing down your personal gaming or other household internet activities significantly; your upload speed is not enough for the traffic you have.
- 24/7 You Want It to Work: If at any time players are to be able to connect and you don’t have to keep your personal computer on and running, then a provider is necessary.
2. Selecting a Hosting Plan: Main Features to Compare
Hosting plans can be confusing at first glance. However, in reality, you only need to consider a few critical specifications that will dictate whether the plan you choose meets your needs or not.
Run Your Own Server
Create and manage a Minecraft server on your PC for friends or private play.
- RAM/Memory: This is the main deciding factor. The larger the RAM, the less lag there will be, especially when playing with a large number of players or when mods are being run. As an example, 4GB might be enough for a vanilla server with 5-10 players, 8GB or more may be required for running modpacks.
- CPU (Processor): The providers should ensure that the CPUs they use are up-to-date and that they have a high clock speed ,as Minecraft is very demanding on a single-core basis.
- SSD Storage: In order to have better world loading and chunk generation, the plan should be to use SSDs rather than older HDDs.
- Bandwidth: Though it is rarely an issue with reliable hosts, unlimited or a very generous bandwidth will make sure that the game connection is kept stable for everyone who is playing.
- Player Slots: There are some hosts who limit the number of players. Therefore, you should make sure that the slot number matches the size of your community.
- Location Latency: To minimize latency, select a physical server location that is most central to the large of your players.
3. Migrating Your World in Easy Steps
Moving a world you have already created is quite straightforward since the same server architecture is being used.
- Export your world folder from your PC: First, you need to stop your local server. Then, locate your main world folder, which should be the one named world or whatever it is you have set in server.properties. After that, zip or compress the entire folder.
- Open the Provider’s Control Panel: Log in to your new hosting provider management interface, which is usually a platform like Multicraft or Pterodactyl.
- Upload via Control Panel: If you are using the provider’s native File Manager, upload the zipped file of your world folder, which you have previously downloaded. If you are an FTP user and not using the provider’s File Manager, then open your FTP client like FileZilla and upload the file.
- Import-Unzip: Unpack the world file on the provider’s server with the help of their instruments.
- Configure and Test: Define the world name parameter in the new server’s server.properties to be the name of the directory you have uploaded. Turn on the new server, connect to it yourself, and verify whether everything is present and correct, including spawn points and player inventory.
- Backup: Do not forget to create a brand new backup on the new host before you allow other players to connect to the server.
4. Communication to Your Players
In order to have a smooth transition, it is necessary to have clear communication with your community.
- Schedule a Window Maintenance: Inform that there will be a certain time and date when the server will be down due to migration, in order to reduce the disruption.
- Redirect Invites/Links: Update any website, Discord, or forum links with new connection information. Make sure that your old server is not dead yet, though. If it is possible, keep your old PC server running for a couple of days with a “Migration Complete – See New IP” message in the MOTD so that those who have not yet figured it out will get the new information.
FAQs
Can I run a free Minecraft server on my computer?
If you have a powerful enough PC and a good internet connection, then it is possible to self-host without any additional costs. However, you will have to face the downside: your PC will have to be running all the time; the upload speed of your internet connection will limit the number of players that can join you online, and you will have to take care of backups, security, and uptime yourself.
How many players can I support on my PC?
This is determined by your hardware, RAM, and internet upload speed. Usually, home setups are great for 2-10 players, but if you want to have more players, mods, or a lag-free experience, you need to live on a server.
What is the major difference between Java Edition and Bedrock Edition server hosting?
Java Edition is designed for PC and is compatible with most mods/plugins, while Bedrock is for consoles/mobiles but uses a different server software and may have fewer mod options; thus, the decision should be based on the platforms your friends use and whether you need mods or not.
Will it be significantly more expensive to use UltaHost over self-hosting?
In exchange for a monthly hosting fee, you get reliability, speed, DDoS protection, no home network dependencies, and 24/7 support, which most people who are concerned about uptime and player retention find worth the cost. Get your Minecraft VPS hosting right away.
Must I buy a domain, or can I just share my site’s IP address?
Yes, you can certainly share an IP, but for the players, a domain or sub-domain is much easier to remember, and in case you change servers, you can redirect it.


