


In the most recent 7 Days to Die update, game version 1.0, the game’s creators brought some radical changes to the way trading is done in the game. These changes add a more systematic and engaging way of accepting quests and earning experience points (XP) but they also come with a cost.
This article is intended to deliver all the necessary information about the new 7 Days to Die 1.0 traders, including where to find them, familiarizing yourself with their quests, and claiming rewards too.
You like to play zombie survival games. Give Humanitz a try and come join thousands of other surviving players. Kill the zombies, find the items you need to survive, and be creative in constructing your way to survival with our complete user guide.
Accessing Trader Quests
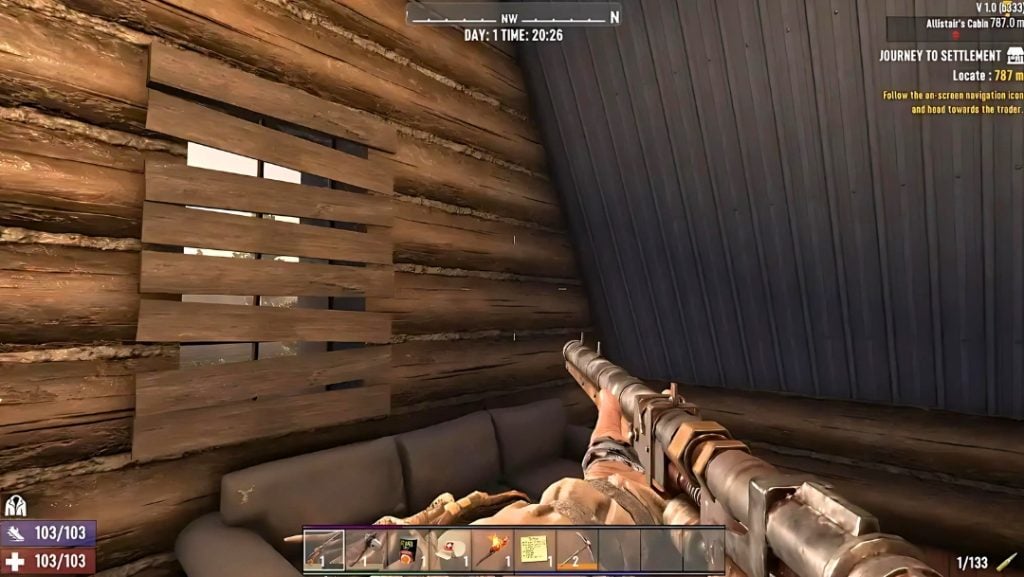
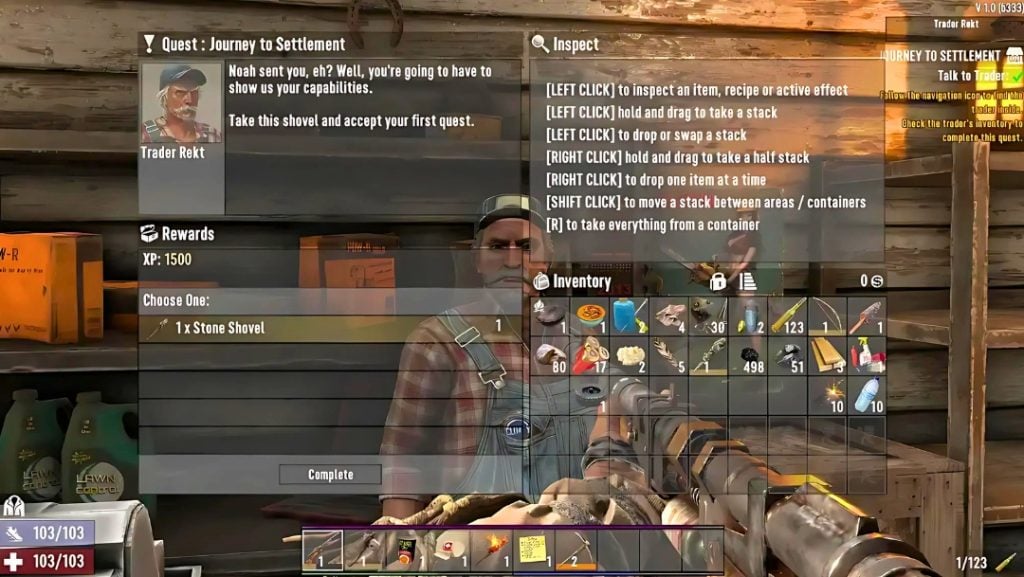
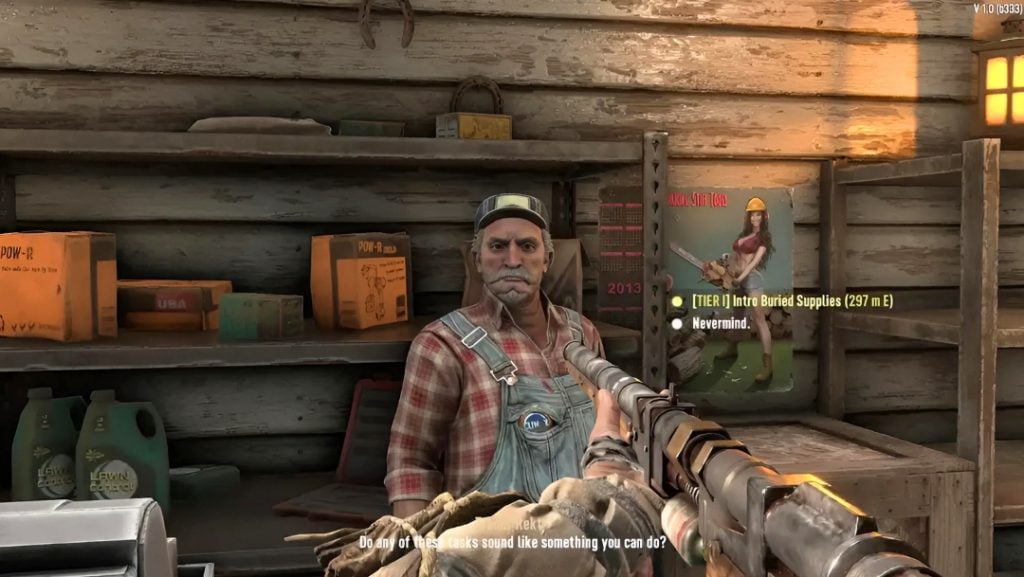
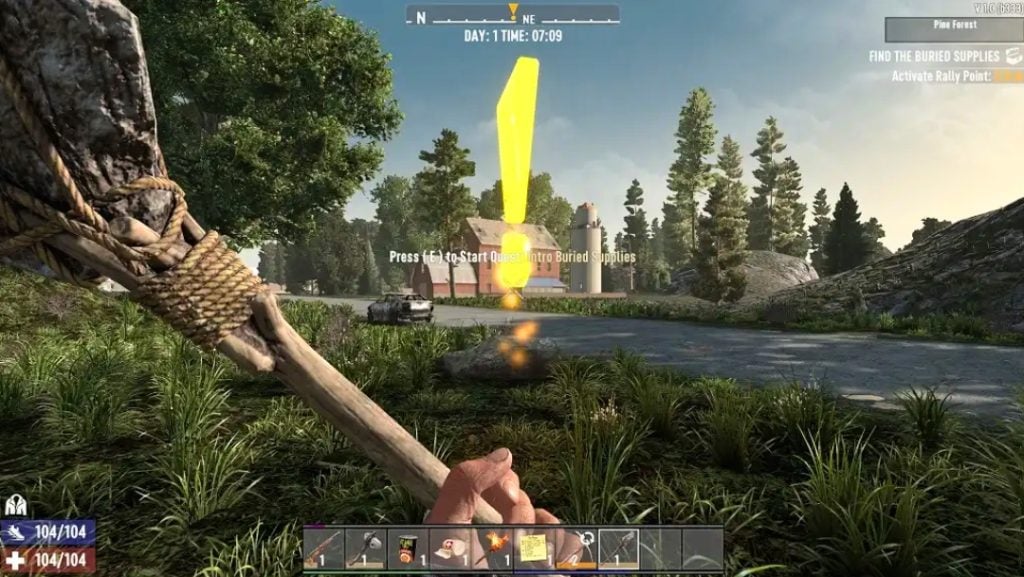
In the past, traders were just a few steps away from the player; however, the new challenge system now involves staying with a single trader for the task which means players have to reach the outskirts of a specific designated territory prior to entering the trader quest zone. This is achieved by completing the first task ‘Journey to Settlement’, which prompts you locate the trader named Rekt in the Pine Forest biome, a faraway place. After engaging with him, the Stone Shovel will be your reward for completing the first task. Next get Rekt’s quest of finding beneath the ground supplies. What’s more, this unlocks other trader quest chains and will help you choose from multiple directions for your following mission more easily as well.
On the other hand, players should be informed that the traders and their bases are operational from 4:05 to 21:50 in-game time.
Character Development of the Trader NPC
The progression below shows the sequence of meetings with the traders in 7 Days to Die 1.0:
- Rekt is found in the Pine Forest biome, and it is good at selling food and agricultural stuff.
- Jen is based in the Burnt Forest area, and she is selling medical supplies.
- Bob is established in the Desert region, where the exclusive selling of vehicle-related goods and equipment is his main business.
- Hugh is the guy who is in search of Snow area as his inventory of weapons and ammunition is very much dominating there.
- Joel is located in the Wasteland zone, distributing various protective gear sets.
All traders from trader 1 will be unlocked after completing the character that was the last trader’s highest tier quest, and it will gradually explore the different biomes and expand your item selection.
Tier Points (TP)
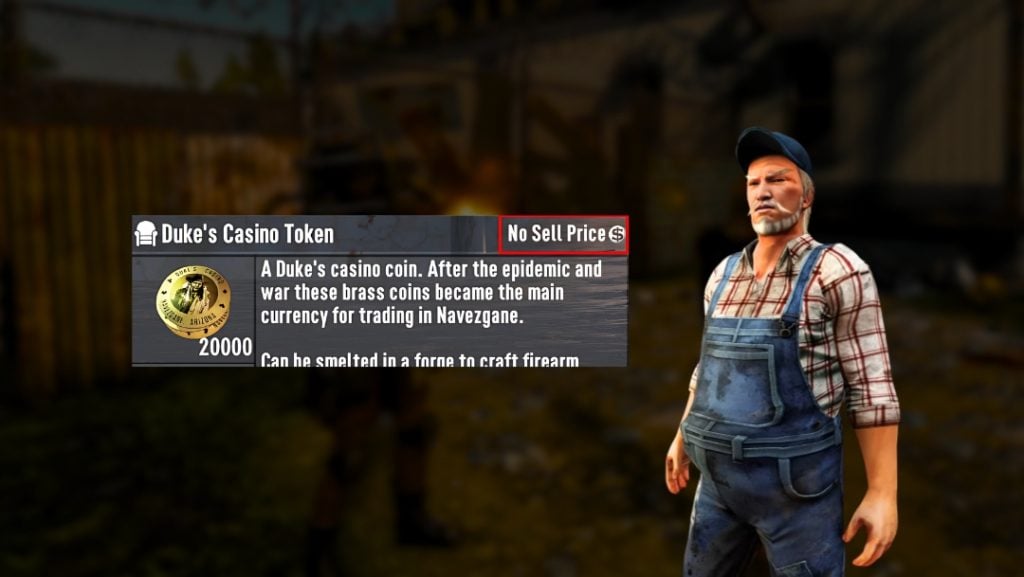
The quests offered by the trader are the ones that give us not only the XP and Duke’s Casino Tokens (Dukes) but also Tier Points (TP). In addition, having a certain amount of TP will make it possible for a trader to move on to the next quest, which they will end with the their own unique items, that is not obtainable at the other traders’ places. Here we have a list showing the TP requirements and the corresponding level cap advantages there are:
- Tier 1: Needs 10 TP and grants 1 TP on each quest.
- Tier 2: Needs 20 TP and grants 2 TP on each quest.
- Tier 3: Needs 30 TP and grants 3 TP on each quest.
- Tier 4: Needs 40 TP and grants 4 TP on each quest.
- Tier 5: Needs 50 TP and grants 5 TP on each quest.
Upon achieving Tier 5, there will be a sixth and ultimate tier to get through that would only have unique inventory assortments for certain traders.
Nevertheless, to have complete hassle-free 7 days to die, Ultahost introduces professional server hosting services that feature installation, configuration, and maintenance. Explore the quickest, most stable, and the most user-friendly Best 7 Days to die Server Hosting managed by professionals with 24/7 customer support and top-tier infrastructure that is specifically for 7 days to die.
Trader Quests and Rewards
With this major gameplay update, there have been six main quest categories for the traders in 7 Days to Die 1.0, each with its own level of difficulty and corresponding rewards. Besides, the full chart has been provided that comprises each mission, their details, and the compensation that follows:
Buried Supplies
Players uncover hidden items using a shovel at specified locations in 7 Days to Die 1.0.
- Tier 1 Rewards: 2,500 XP and 250 Dukes
- Tier 2 Rewards: 2,500 XP and 500 Dukes
Fetch
The individuals move towards previously defined POIs and remove bags from concealed places in 7 Days to Die 1.0.
- Tier 1 Rewards: 2,500 XP and 100 Dukes
- Tier 2 Rewards: 3,750 XP and 200 Dukes
- Tier 3 Rewards: 5,000 XP and 300 Dukes
Clear Zombies
Target all the zombies present in a specific locality and eliminate them in the game 7 Days to Die 1.0.
- Tier 1 Rewards: 3,000 XP and 400 Dukes
- Tier 2 Rewards: 4,500 XP and 500 Dukes
- Tier 3 Rewards: 6,000 XP and 800 Dukes
- Tier 4 Rewards: 7,500 XP and 1,000 Dukes
- Tier 5 Rewards: 15,000 XP and 2,000 Dukes
Fetch/Clear
A mission with the objectives of clear zombies and fetch combined in 7 Days to Die 1.0.
- Tier 2 Rewards: 5,060 XP and 700 Dukes
- Tier 3 Rewards: 6,750 XP and 1,000 Dukes
- Tier 4 Rewards: 8,400 XP and 1,500 Dukes
- Tier 5 Rewards: 16,900 XP and 2,000 Dukes
Restore Power
Turn on the generators situated in marked POIs which are available during the nighttime only.
- Tier 2 Rewards: 5,060 XP and 800 Dukes
- Tier 3 Rewards: 6,750 XP and 1,500 Dukes
- Tier 4 Rewards: 8,400 XP and 2,000 Dukes
Enhance Your 7 Days to Die Experience Now!
Instead of hosting your gaming server at home, use Ultahost’s Server Hosting solution to level up your gameplay. Get the benefit of latency that is low and smooth performance. Plus a chance to customize your own settings. Get in touch with our experts to have our exclusive resources. Along with their support for reaching the top of the gaming world.
Infestation
Dispose of all normal, feral, and even irradiated zombies that have occupied the chosen POIs.
- Tier 2 Rewards: 5,625 XP and 1,000 Dukes
- Tier 3 Rewards: 7,500 XP and 2,000 Dukes
- Tier 4 Rewards: 9,375 XP and 3,000 Dukes
- Tier 5 Rewards: 15,000 XP and 3,000 Dukes
- Tier 6 Rewards: 30,000 XP and 6,000 Dukes
Give a quest a go by talking the hovering yellow exclamation mark that indicates the active task. Be aware that task interaction would mean the place would have to restart to repopulate enemies and possible dangers if it is a POI. When task finished, grasp the chance to hear a sound that means the quest has been successfully accomplished. Simply delete an unwanted task following the Quests’ tab placed in the player’s inventory screen.
Maximize Your Experience Points
By doing multiple activities at the same time like finding various biomes, encountering several NPC Traders, and unearthing treasures. Along with playing well are the best ways to maximize your experience points (XP). Also gather Duke’s Casino Tokens (Dukes) plus valuable resources during your journey, through the various worlds in the game. There are also several tips and strategies. That can be used to take advantage of the game and improve your gameplay experience:
Plan Efficient Travel Paths
By learning at least one Point of Sale’s place the merchants are located you can make a plan of your own on how you want to get to them without any obstruction. In addition, only go to those sellers who possess your favorite goods or are working on the next tier quests that are closest to you. Besides, taking this method minimizes time taken for traveling and saves your enthusiasm instead of spreading it doing futile things.
Balance Quest Types
Every type of quest comes with its own set of unique rewards which are especially catered to certain needs, so having a good balance is a must. Thus, if, for example, you are in the early game, and you are already playing 7 days to die, the most important thing would be to conduct the Buried Supplies or farming supplies in 7d2d resourcing operation asap. The latter is immediately followed by Medical or Tool-based missions that one would do based on his/her playstyle. With the advance of skill, it’s time to get more and more Infestations if your aim is to produce more Dukes and power-level your character.
Monitor Daily Cycles
Some quest types are only available at certain times of the day such as Night. The most typical example here is Restore Power tasks which can be activated only at night. The necessity for time management becomes really severe when we talk about managing multiple goals at once. Using this moonlight time wisely gives you a platform upon which all those great deals, which are there in the darkness of the night, can be realized.
Maintain Healthy Relationships
There is a good chance that you still have to face all kinds of problems related to dangerous, aggressive undead creatures, so try to be careful all the time and thus keep your health and stamina at good levels. In addition, injuries that are taking place reduce to a great extent the effectiveness of a fighter. This means that the tasks will be carried out effectively and that the unnecessary risks linked to exhaustion or incapacitation will be limited if the physical and mental health is kept at the highest level
Utilize Fast Travel Judiciously
Leveraging fast travel options strategically reduces travel time and expedites objective attainment. However, abusing this feature may result in missed encounters, overlooked scenery, and also neglected exploration opportunities. Furthermore, implement sparingly to strike a harmonious balance between convenience and immersion.
Choosing the most appropriate times for fast travel significantly reduces the time spent traveling and facilitates reaching the goals. The downside of fast travel heavily happening can take the character away from many unknown fight encounters, exclude the discovering of out-of-sight sceneries, and bringing up forgotten exploration opportunities. Business and personal areas should improve the technology resource skills, the competence of the employees, and the interaction with the customer and lead to the Ideation learning commitment between companies.
Optimize Equipment Management
Make sure that you always manage your inventory space well before receiving new tasks. Having too much load may not only clutter your movement but also make you incapable of executing the quick reactions that the situation demands. Periodically review your equipment needs, dispose of unessential trash, and also update weapons where necessary in order to stand up to the top efficiency.
Conclusion
Summing up, finding your way to different trader locations in 7 Days to Die 1.0 triggers a chain of thrilling events with new quests to complete and treasures to be won. First with Rekt, the adventurers visit one world to another, uncovering smaller dealers such as Jen, Bob, Hugh, and Joel, who address specific wants of the farmer, the doctor, the van driver, the gunsmith, and the guard. In the course of the journey, discovering some hidden missions is quite probable. Ultimately, acquiring a high level of trader interactions expertise leads to higher player survivability and immersion in the exciting world of 7 Days to Die 1.0.
If you are a fan of 7 Days to Die and this article has had a strong impact on you, do not forget to think about how a new machine for gaming can change your gaming experience. Create a new environment for your 7 Days to Die activities by choosing NVMe VPS hosting from Ultahost. NVMe VPS hosting from Ultahost has an extremely rapid loading speed and provides top-notch performance. Consequently, you will get around the map effortlessly, ensuring a better and more immersive gaming experience.
FAQ
How do I access trader quests?
Complete the “Journey to Settlement” challenge to meet Rekt, your first Trader NPC.
What are Tier Points (TP)?
Earned by completing trader quest tiers; needed to advance through higher levels of objectives.
When can I visit specific traders?
Traders operate between 4:05 – 21:50 in-game time.
Should I focus on certain quest types early game?
Prioritize Buried Supplies or Medical missions for initial farming supplies and also healing items.
Why should I balance my quest selections?
Each type offers unique benefits catering to different needs; variety ensures comprehensive growth.
Can I restore power during daytime hours?
No, Restore Power tasks activate only at nighttime, so plan accordingly.
Is it necessary to keep all quest items after completion?
Manage inventory space wisely; discard unnecessary items and also upgrade gear regularly.


