


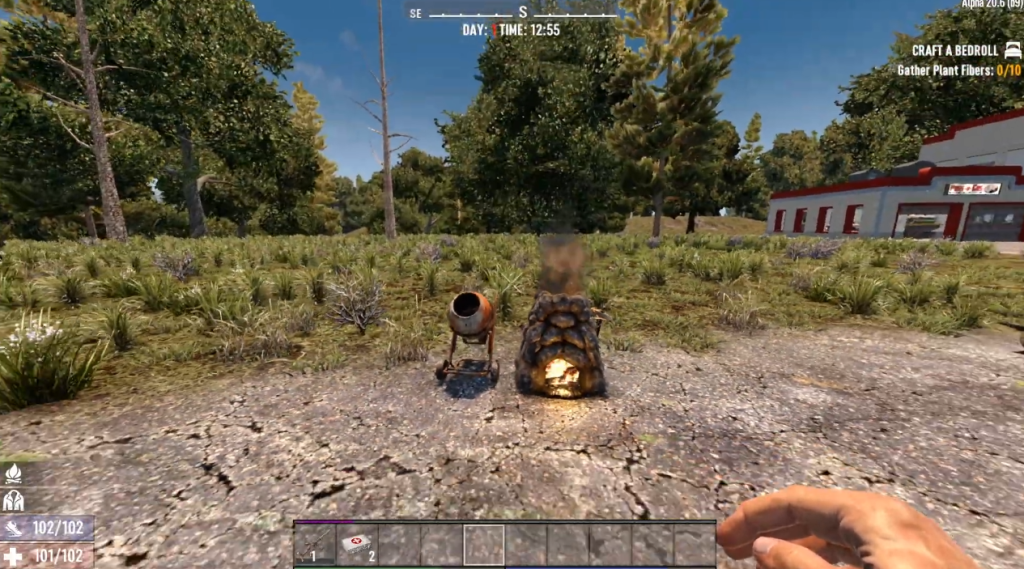
In the world of 7 Days to Die, building and fortifying your base is crucial for survival against hordes of zombies. One essential item in construction is the Cement Mixer, used to create various concretes and strengthen structures.
7 Days to Die focuses on realistic survival scenarios, requiring smart planning for survival. Similarly, Ultahost’s Best 7 Days to die server hosting suits gamer’s needs with fitting tools and features for popular games and modifications. User friendly controls, continuous assistance, free anti interference measures, and instant activation describe Ultahost’s gaming hosting package.
This guide covers everything you need to know about obtaining, crafting, and using the Cement Mixer in 7 Days to Die.
If you enjoy playing survival games, then you should check out Conan Exiles. This highly popular multiplayer survival game can also be deployed.
Obtaining the Cement Mixer
There are several ways to acquire the Cement Mixer in 7 Days to Die. If luck is on your side, you might stumble upon a fully crafted mixer while exploring the world. However, if you prefer a more reliable approach, consider these options:

- Crafting: To craft the Cement Mixer, visit the Intellect tab in your skill tree and invest a perk point in Advanced Engineering within the Trade skill category. Once unlocked, you will require the following resources: 25 Forged Iron, 4 springs, 1 Engine, and 10 Mechanical Parts. Note that resource gathering may take some time, especially if you are starting.
- Purchasing from Traders: Keep an eye on wandering traders who occasionally carry the Cement Mixer in their stock. These merchants restock every three days, making regular checks worthwhile.
Also, you can check the Top 5 Perks in 7D2D because it will help you in Crafting.
Crafting Materials
Before diving into creating concrete mixtures, ensure you have gathered all the necessary components. Also, The primary materials needed include Brick Sand, Small Stone, and Cement. Here’s a breakdown of each component:
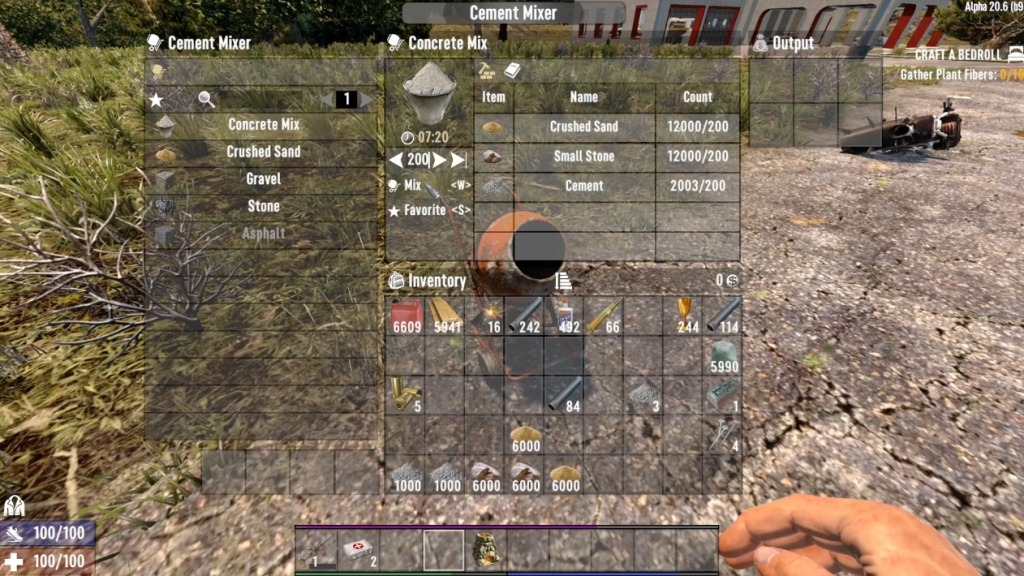
- Brick Sand: You can collect Brick Sand from gravel piles found throughout the world. Alternatively, crush sandstone blocks using a Rock Breaker or Industrial Grinder to produce brick sand.
- Small Stone: Gather Small Stones during the day through exploration or mining at night. Smelting two Small Stones yields one piece of Rough Stone, which can be further processed into Crushed Stone. Combine Crushed Stone with Water in a Forge to obtain Cement.
- Wood: Although not directly related to the Cement Mixer itself, wood serves as fuel for smelters and forges. Ensure you always have a steady supply available.

Using the Cement Mixer
Now that you possess the coveted Cement Mixer, it’s time to learn how to wield its power. Follow these steps for success:
- Approach your Workbench and interact with it to open the crafting menu.
- Select the “Concrete Mix” option under the Resources tab.
- Choose the desired quantity—the system defaults to 200 units but allows customization based on your needs and available resources.
- Confirm your selection, ensuring you have enough raw materials (Brick Sand, Small Stone, and Cement) in your inventory.
- Watch as your creation comes to life! With patience and dedication, your once-empty plot will transform into a solid foundation fit for any apocalypse survivor.
Ready to take on the Cement Mixer?
Try these camp designs and strategies. Share your experiences with the community. For an enhanced experience, upgrade to premium server hosting at Ultahost. For more guides, stay tuned and happy surviving!
Maintaining Your Stockpile
To keep production flowing smoothly, manage your supplies efficiently. Adhere to these recommendations:
- Establish designated zones for resource collection, such as separate areas for harvesting sand, stone, and wood.
- Regularly scavenge nearby locations for additional materials. Remember, no resource pile is too insignificant!
- Cycle between day and night shifts; focus on aboveground exploration during daylight hours and subterranean excavation after dark.
- Consider utilizing modular storage systems to organize and access resources quickly.
Consider utilizing modular storage systems to organize and access resources quickly. Also, you can learn how to survive your first night in 7 days to die.
Tips and Tricks for Efficient Use
As you progress through 7 Days to Die, optimizing your strategies becomes increasingly important. Implement these suggestions to enhance your experience:
- Prioritize Skill Points: Investing in Advanced Engineering early on ensures quicker access to both the Workbench and Cement Mixer recipes. Focus on accumulating sufficient XP and allocate points judiciously.
- Plan Accordingly: Before embarking on ambitious projects, sketch blueprints detailing materials requirements, dimensions, and placement. By preparing thoroughly, avoid wasting valuable resources due to miscalculations or oversights.
- Automate Production: Utilize automated processes whenever feasible. Set up conveyors connecting your Forge, Quarry, and Storage Boxes to streamline raw material transportation and reduce manual labor.
- Manage Inventory Space: Monitor inventory capacity closely. Discard unnecessary items regularly and prioritize high-demand resources like Small Stone, Cement, and Brick Sand.
- Fortify Defensively: Strengthen weak spots by reinforcing walls, ceilings, and floors with Concrete Mixtures. Strategically position turrets and traps along perimeters to deter unwanted guests.
- Explore Creative Opportunities: Experiment with different textures, colors, and designs to personalize your creations. Add decorative elements such as windows, paintings, or lighting fixtures to elevate your base’s aesthetics without compromising functionality.
Troubleshooting Common Issues
Encounter challenges? Refer to our troubleshooting section below:
Issue: Insufficient Raw Materials
Solution: Expand your search radius and explore new biomes teeming with diverse flora and fauna. Engage allies for assistance or trade excess items for necessities.
Issue: Overwhelming Zombie Hordes
Solution: Bolster defenses around entry points and vulnerable sections. Schedule daily patrols, maintain weapons proficiency, and coordinate with fellow survivors to repel attacks effectively.
Issue: Lagging Frame Rate
Solution: Lower graphical settings, decrease view distance, disable post-processing effects, or limit active entities displayed simultaneously. Additionally, verify game file integrity and ensure hardware meets minimum specifications.
Conclusion
The Cement Mixer plays an indispensable role in shaping formidable sanctuaries within the unforgiving landscape of 7 Days to Die, moreover, through diligent resource management, strategic planning, and persistent refinement, aspiring builders can cultivate resilient bastions capable of weathering relentless adversity. So gear up, arm yourself with knowledge, and embrace the journey toward becoming a revered architect in this enthralling survival sandbox adventure.
If you enjoyed exploring the 7 days to die complete cement mixer guide. Elevate your gameplay with Ultahost’s Gaming hosting. For more survival tips and tricks, stay tuned and happy surviving.
FAQ
What is the purpose of the Cement Mixer in 7 Days To Die?
The Cement Mixer enables players to craft Concrete Mixtures, enhancing base defense and structural stability.
Where can I find a Cement Mixer?
Players can either purchase them from traveling vendors, locate prefabricated ones scattered across the map, or craft their own via the Intellect skill tree.
How do I craft a Cement Mixer?
Unlock the Recipe Book by investing in Advanced Engineering within the Trades kills category. Then gather necessary materials (25 Forged Iron, 4 Springs, 1 Engine, and 10 Mechanical Parts).
Which resources are required for manufacturing Concrete Mixtures?
Combine Brick Sand, Small Stone, and Cement in a Cement Mixer to yield Concrete Mixtures.
Are there any advantages to automating Concrete Mixer production?
Yes, automation reduces manual input, saves time, and increases efficiency by allowing simultaneous production of multiple batches.


