


Let’s take a trip back in Time to the early 2000s, when the iconic Command & Conquer series made a huge jump into the first-person shooter world with Renegade. This game was so much more than a simple spin-off; it gave us a thrilling mix of infantry and vehicle combat, and a big part of that excitement came from its awesome maps.
These battlefields were not just backdrops; they were the heart of every match. Each one was designed to force a different kind of strategy, from tight choke points that led to chaotic shootouts to wide-open fields perfect for tank battles. The maps truly defined every game and created a playground for both organized tactics and wild, unpredictable genius.
While all the arenas were fun, a few of them really stood out and became legends in the community. So, come with us as we explore the most beloved and strategically rich arenas that kept us glued to our screens for just one more round.
If you love tactical warfare at its most intense, then Natural Selection is just your game. Take on the battlefield with our Natural Selection 2 Guide. Take on the challenges that face you.
Canyon
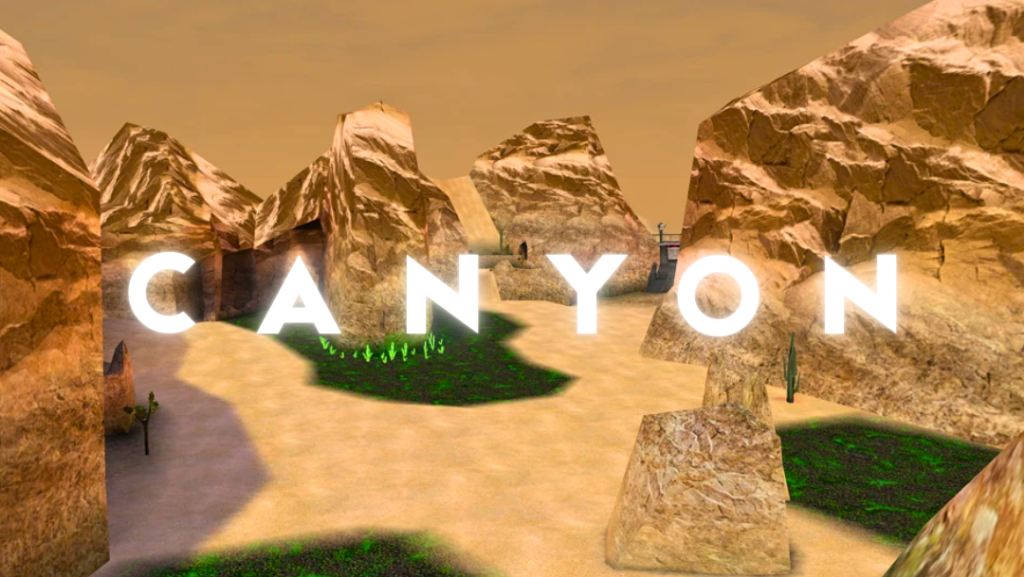
Canyon is a fantastic map for anyone who loves infantry combat and smart tactics in Command & Conquer Renegade. Its winding, narrow paths and big changes in elevation are perfect for intense close-quarters fights and rewarding teams that know how to set up an ambush. There are tons of ways to sneak around, so staying aware of your surroundings is super important for both attacking and defending.
This map’s complicated design means you can get to the enemy base in so many different ways. Plus, there are no automated defenses to help you out. It takes a lot of speed and coordination; a surprise strike through the tunnels can be a game-winner. GDI players often have a slight edge here if they can get their hands on heavy armor.
Key Features
- Winding Passages: Great for up-close combat and setting up ambushes.
- Multiple Infiltration Routes: Teams must remain vigilant to defend against multi-directional attacks.
- No Automated Defenses: This means you and your team are responsible for all base defense.
- Elevation Changes: Use the high ground for tactical advantage and varied approaches.
- GDI Advantage: Heavy armor is especially effective here once GDI can get a rush going.
Tips and Tricks
- Tunnel Assaults: The tunnels are often forgotten. A small, well-organized infantry team can sneak through to hit the enemy refinery for an easy kill and cash bonus.
- Harvester Protection: The harvester’s path is wide open. Keep a close eye on it and have at least one or two infantry units ready to protect it from enemy attacks.
- Commando Rush: Both sides can try a Commando or Rocket Soldier rush. Use a character with anti-vehicle weapons to quickly take down enemy vehicles and a building.
- The High Ground: GDI often gets an advantage on this map if it can get a heavy tank rush. GDI players should work on getting to the high ground to protect their harvesters.
- GDI Strategy: GDI players should focus on getting a vehicle advantage in the early game. Nod players should prioritize killing the GDI harvester and using infantry to take down buildings.
Field

Field is all about vehicles. Its simple design and huge, open terrain make it a dream for tanks, APCs, and buggies. Long-range fights and fast assaults are the name of the game here. This map is about as balanced as it gets, which makes it a great place to test your raw skill.
Even though it is known for vehicles, Field has some great strategic spots for infantry too. Hunting the enemy’s harvester is a great way to cripple their finances. And do not forget to check the back tunnels; a quick strike group of just a few infantry can spell disaster for a base that is not paying attention.
Key Features
- Open Terrain: Perfect for big vehicle battles and long-range combat.
- Strategic Harvester: Harvester hunting is a core part of the map’s strategy.
- Balanced Design: This supports both vehicle dominance and infantry equally.
- Back Tunnels: Provides an effective route for small infantry squads to sneak in.
- Simple Layout: A straightforward design that emphasizes skill and team coordination.
Tips and Tricks
- Harvester Raids: Killing the enemy harvester is a very effective tactic on this map. A quick vehicle can race to the harvester, destroy it, and cripple the enemy’s economy.
- Use Tunnels for Flanking: The back tunnels are a great way to bypass enemy defenses. Send a few infantry players through to attack the base power plant or other buildings from an unexpected angle.
- Vehicle Focus: GDI players should prioritize getting medium tanks and APCs. Nod players should focus on light tanks and buggies.
- Defend with Engineers: Engineers are crucial here. Their repair guns can keep vehicles in the fight and disarm C4 placed by the enemy.
- Communicate: Effective team communication is crucial on a map like Field. Call out enemy positions and work together on vehicle rushes or harvester raids.
Mesa
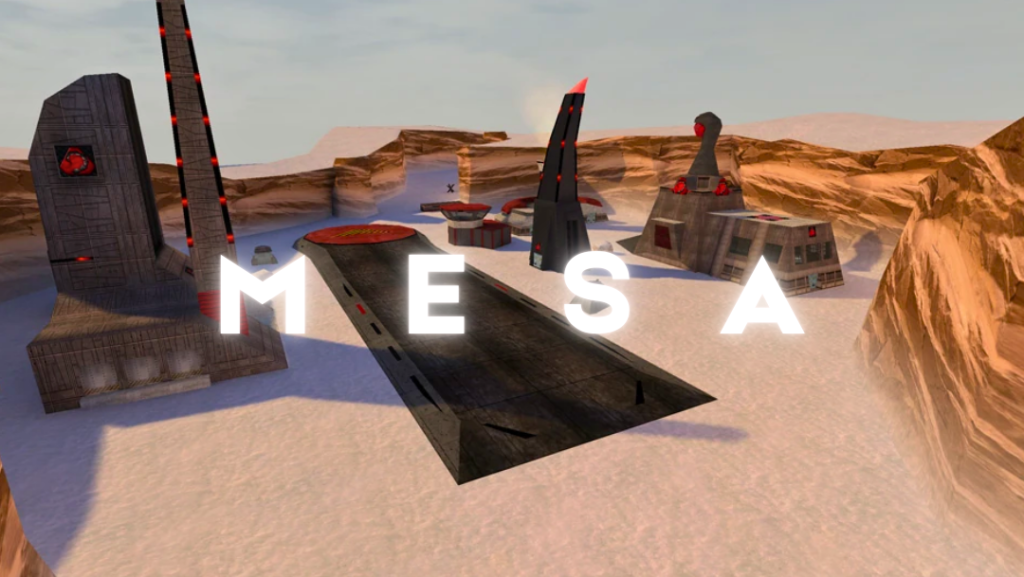
Mesa is a fantastic map for those who love layered combat. It features a flat, open ground level for vehicles and a complex elevated upper level that is perfect for infantry skirmishes and sniper duels. The two layers offer completely different strategic challenges and opportunities for a team.
The verticality of Mesa makes it a unique challenge. You have to be aware of enemies both above and below you. Controlling the upper level provides a major advantage, as you can easily rain down fire on vehicles and infantry below. This map is all about coordinating attacks from both levels.
Key Features
- Two-Level Design: Features a ground level for vehicles and a high ground for infantry.
- Verticality: Forces players to be aware of threats from different elevations.
- Sniper Duels: The open, elevated paths are perfect for snipers.
- Choke Points: Ramps and narrow passages connect the two levels, creating bottlenecks.
- Balanced Terrain: Supports both vehicle and infantry combat with distinct zones.
Tips and Tricks
- Control the High Ground: As an infantry player, your main goal should be to control the upper level. It provides a great view and a strategic advantage.
- Watch the Ramps: The ramps are the most common way to get to the top. Plant explosives or position a rocket soldier there to stop enemy pushes.
- Combine Efforts: A well-coordinated team will have infantry on the high ground protecting vehicles on the low ground.
- Vehicle Strategy: Vehicles should stick to the lower level. Use them to take down enemy vehicles and structures.
- Engineer Focus: Engineers are great for placing C4 on the elevated walkways to catch unaware enemies.
Walls
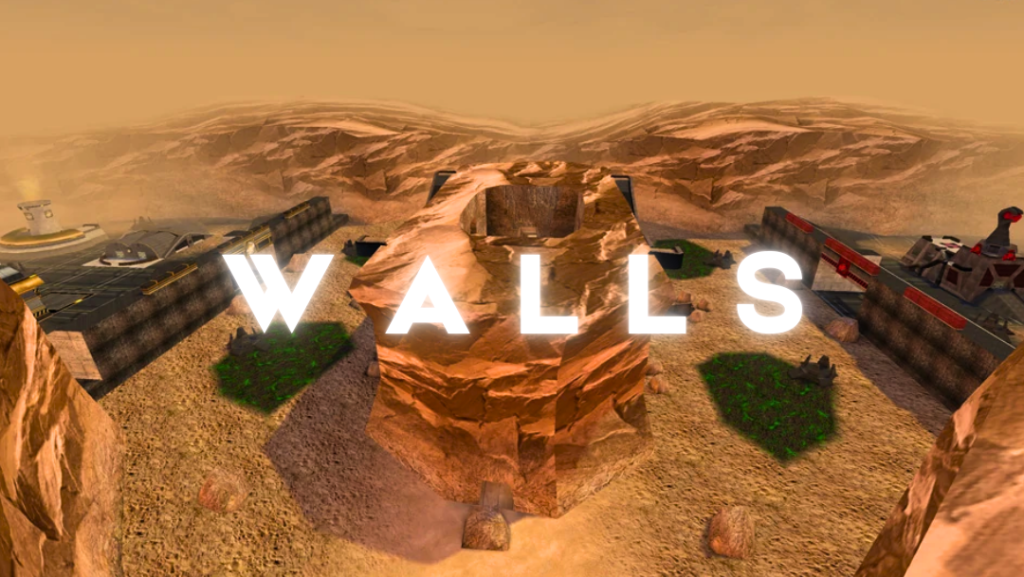
Walls is one of the most classic maps in the game, known for its strong defensive positions and tiered bases. Both GDI and Nod have tall walls protecting their bases, creating a fortress-like feel. The map is set in a desert landscape with multiple routes to the enemy base.
The layout of Walls encourages both long-range vehicle combat and sneaky infantry attacks. Tanks can battle it out in the open areas, while infantry can use the small passages and back entrances to bypass defenses. Controlling the various elevations is key to victory.
Enhance Your Command & Conquer Experience!
Upgrade your Command & Conquer Renegade experience with our Ultahost’s Server Hosting. Enjoy smooth gameplay, low latency, and customization options for an enhanced gaming experience. Dominate the CCR with our exclusive resources and tailored settings.
Key Features
- Fortress Bases: Each base is protected by tall, tiered walls.
- Tiered Layout: The map has different levels of elevation, creating new combat zones.
- Multiple Routes: There are several paths around the walls, allowing for surprise attacks.
- Vehicle and Infantry Mix: Supports both styles of play with open fields and tight passages.
- Strong Defenses: The walls make base defenses very effective against direct assaults.
Tips and Tricks
- Go for the Walls: Do not try to rush the front gates. Instead, find a weak point or go through one of the side passages.
- Use Harvester Routes: The harvester paths are a great place for ambushes. They are often exposed and can lead to a quick kill.
- Vehicle Control: Vehicles are very important on this map. Use them to clear out enemy forces in the open desert.
- The Back Entrance: The back entrance to each base is often less defended. A small team of infantry can take advantage of this.
- Prioritize Power: If you can take out the enemy’s power plant, their base defenses will go down and you can then rush the base.
Volcano
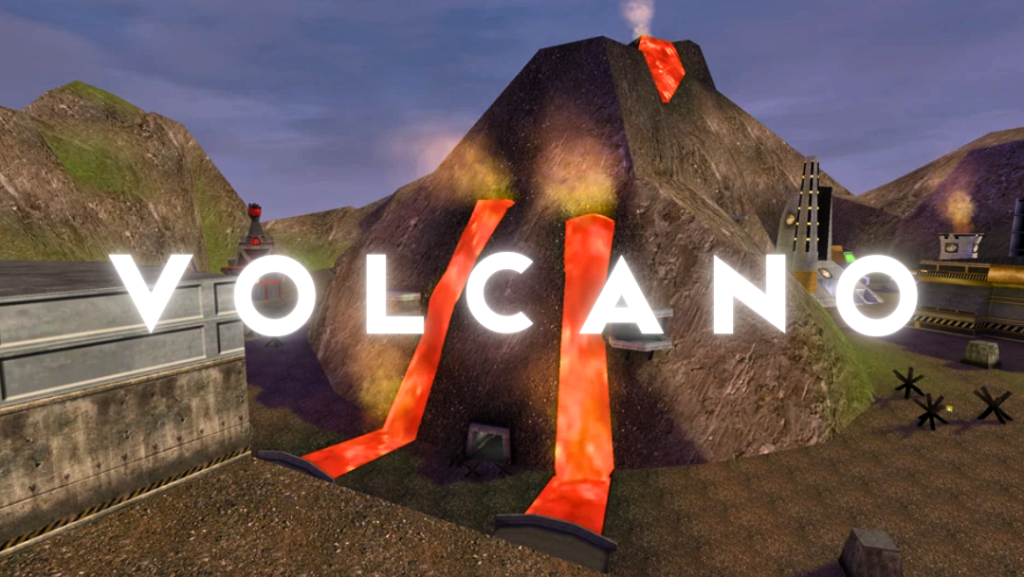
Volcano raises the stakes with its unique environmental hazards and dangerous terrain. Rivers of flowing lava cross the map, and they are a constant threat to both infantry and vehicles, adding a layer of risk and strategy you do not see in other maps.
The volcanic terrain is beautiful but deadly. It is one of the few maps where you have to be careful with every single step, because a seemingly safe route can quickly become a death trap. This map’s design encourages controlling the high ground and remaining vigilant in an unstable environment.
Key Features
- Environmental Hazards: Flowing lava rivers deal significant damage to players and vehicles.
- Explosive Terrain: The volcanic setting creates a dangerous and unpredictable battlefield.
- Strategic Risk: This forces players to think about the environment when planning their moves.
- Key Choke Points: Small, maneuverable areas can become deadly bottlenecks.
- High Ground: Controlling the high ground is essential for survival and dominance.
Tips and Tricks
- Watch Your Step: The most important tip for this map is to avoid the lava. It deals heavy damage very quickly.
- Use the High Ground: The various elevated areas offer a great view of the map and are perfect for sniping and providing fire support for teammates.
- Harvester Protection: The harvester path is very dangerous. Use light vehicles or a small group of infantry to protect it from enemy attacks.
- Team-Based Attacks: The narrow paths and dangerous terrain make solo attacks difficult. Coordinate with your team for successful pushes.
- Engage the Harvester: Because of the difficult terrain, a successful harvester ambush can be a game changer. Send a quick unit to intercept and destroy it.
Islands
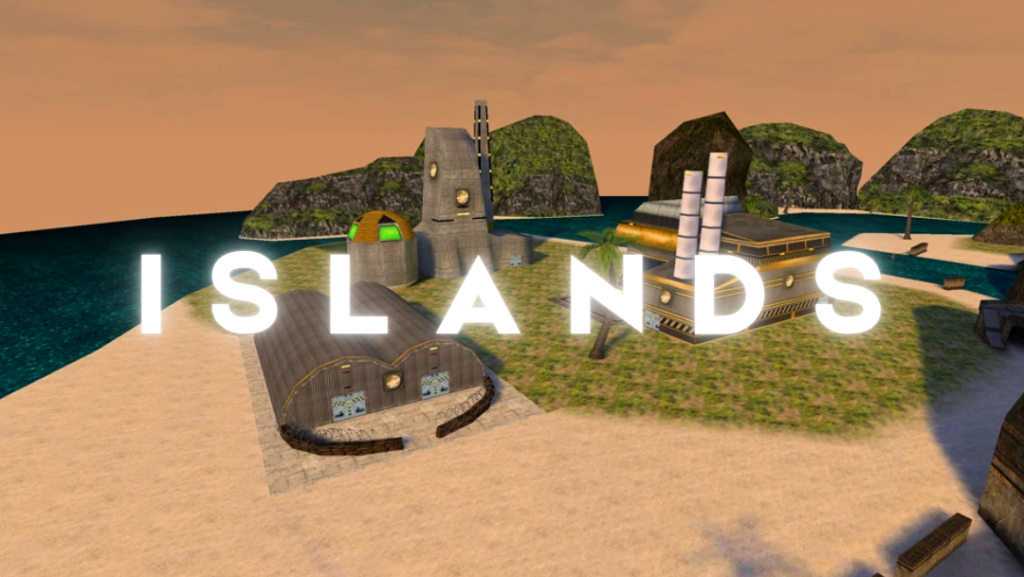
Islands stands out as a unique map because it has no base defenses, which completely changes the gameplay. With no turrets or obelisks, players have to be in a constant State of alert, as the bases are vulnerable from many different directions.
The map’s scattered, interconnected landmasses and multiple entry points demand constant vigilance and quick reactions from both teams. With dozens of sniper points and a series of underwater tunnels, not paying attention to either the vehicle paths or the underwater footpaths can lead to disaster.
Key Features
- No Base Defenses: This puts all the emphasis on player-controlled defense.
- Multiple Entry Points: This requires constant vigilance and quick response times.
- Underwater Tunnels: This adds hidden routes for surprise attacks and infiltration.
- Sniper Heaven: There are numerous vantage points for long-range engagements.
- High-Risk, High-Reward: This offers a unique, fast-paced game mode where one mistake can cost you the game.
Tips and Tricks
- Control Key Points: Control the center bridge and other key points to control the flow of the game and keep the enemy at bay.
- Use the Tunnels: The underwater tunnels are a great way to sneak into the enemy base. A quick, well-timed infiltration can be a game-winning move.
- Defend from All Sides: Do not focus all your defenses on one area. The lack of base defenses means you must spread out your team to defend against attacks from the land, water, and tunnels.
- Vehicle Speed: Vehicle speed is more important than armor here. A quick APC or buggy can get around the map and to an enemy base faster than a tank.
- Engage the Enemy Early: Do not let the enemy get a foothold on the islands. Engage them early and push them back.
You can also set up a Command & Conquer: Renegade server with unmanaged VPS hosting for maximum control and customization on this map and others.
Conclusion
And there you have it, everyone—a fun trip through the maps that defined Command & Conquer: Renegade! Each of these battlegrounds offered something special, which is a big part of why the game is still so loved today. They taught us how to adapt our strategies, from the tight corners of Canyon to the wide-open fields of Volcano. They proved that great map design is about more than just a pretty setting; it is about creating a dynamic and engaging experience that keeps players coming back for years.
If you are a player of the Command & Conquer: Renegade game, then improve your experience with Ultahost’s Gaming VPS Hosting. Dedicated resources and custom settings make your game session smooth and lag-free.
FAQ
What is Command & Conquer: Renegade?
Command & Conquer: Renegade was developed by Westwood Studios, in 2002. It is part of the expansive real-time strategy Command & Conquer franchise.
How can I play Command & Conquer: Renegade in multiplayer mode?
Multiplayer is an interesting mode of Command & Conquer: Renegade. Players face each other on different types of maps.
What are the most popular maps in Command & Conquer: Renegade?
Canyon is a map with rough, rocky surfaces, tight paths, and high cliff walls, perfect for ambushes and close quarters.
What is there a campaign mode in Command & Conquer: Renegade?
The campaign of the gamer in Command & Conquer: Renegade is of a character of Nick Havoc Parker who is GDI commando.
What makes Temple of Nod a popular map in Renegade?
The map includes open spaces for vehicle combat and narrow hallways for infantry skirmishes, offering great diversity in combat experience.
How can I play Command & Conquer: Renegade on modern PCs?
Command & Conquer: Renegade was originally released back in 2002. Compatibility patches or fan-made mods will make sure the game runs smoothly.
How does vehicle combat work in Command & Conquer: Renegade?
Vehicle combat is very significant in multiplayer in Command & Conquer: Renegade, with players having significant power options ranging from attacks to defense.


