



Transitioning from shared hosting to a Virtual Private Server can be a difficult step for many webmasters. When developing a professional web presence, shared hosting is a good solution. However, moving to a Virtual Private Server ensures scalability, peace of mind, and the highest number of visitors a site can accommodate. This may be overwhelming or feel like a lot to learn, but how to install WordPress on VPS step-by step guide will leave you with a high-performance server quickly.
In the following tutorial we will take you through the whole process on an Ubuntu server including security hardening (both with the apache and nginx web server), database setup and configuration through to setting up a VPS.
Key Takeaways
- VPS hosting provides you with dedicated server resources, which increases speed and uptime.
- WordPress on VPS gives you full control over server settings.
- You can use either the LEMP stack with Nginx or the LAMP stack with Apache according to your needs.
- Firewall and SSH security and updates are required to make sure that your VPS is secured.
- Make use of SSL certificates from Let’s Encrypt, which are available for free.
- The performance of your website can be improved by implementing certain optimizations like caching and PHP code optimization.
Before You Start
Before you install WordPress on your VPS, you need to make sure that you have the following prerequisites:
- A VPS (Virtual Private Server) with root or sudo access
- A domain (optional)
- Your VPS IP address registered in a domain name
- A Linux OS (can be any OS)
- A web server (Apache or Nginx)
- PHP
- A MySQL or MariaDB server
- A DB and DB User created for your WordPress installation
- An SSH client (the terminal on your computer will do)
- An Internet connection to download packages and WordPress
- (Recommended) An SSL certificate to secure your VPS
- (Recommended) Firewalls opened for HTTP, HTTPS, and SSH traffic
Move your WordPress site to UltaHost VPS today!
Get started with solution promises performance optimization and complete control, and can handle sudden traffic spikes without any 502 errors. Start your VPS and leave your worries behind.
Why Choose VPS for WordPress in 2026?
A VPS sits between shared hosting and a dedicated server. Unlike shared hosting, where all CPU and RAM is shared amongst hundreds of users, a virtual private server (VPS) runs on top of a dedicated physical server giving you your own isolated environment.
| Feature | Shared Hosting | UltaHost VPS Hosting |
|---|---|---|
| Performance | Variable, depends on neighbors | Consistent, dedicated resources |
| Security | Higher risk of “noisy neighbor” issues | Isolated environment |
| Control | Limited to control panel | Full Root Access |
| Scalability | Limited | High (Upgrade CPU/RAM instantly) |
If your marketing focus is narrow, for example the US, then a VPS USA, means than your VPS will be geographically nearer to your targets, as such experience less lag, and will rank better in SEO terms.
Phase 1: Preparing Your Server Environment
Prior to going further, on the command line, you will need a VPS provider. We suggest taking your first steps with UltaHost VPS based on its NVMe storage for the speed and internal security solutions.
1.1 Accessing Your Server via SSH
Once your VPS is deployed, you will receive an IP address and root password. Use a terminal (Mac/Linux) or PuTTY (Windows) to log in:
ssh root@your_server_ip
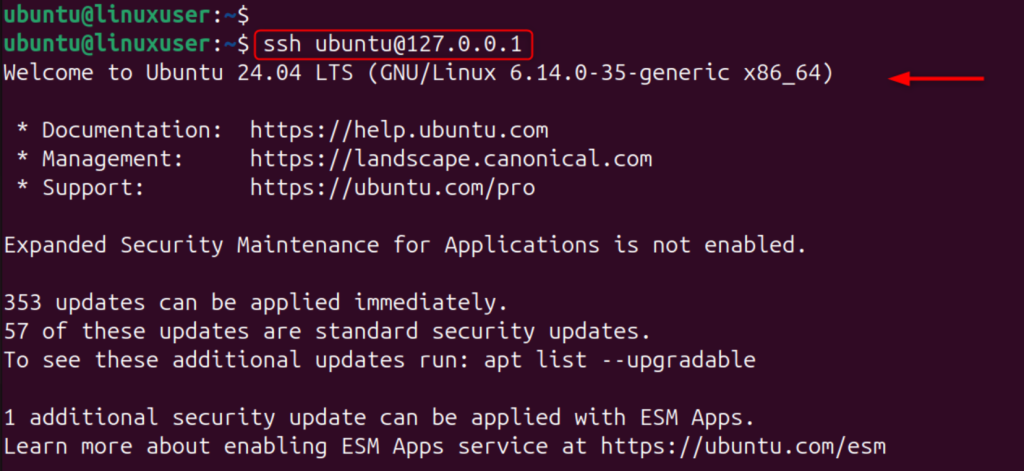
- ssh – this command is used to open a connection to the remote host (SSH) which allows us to make secure connections to other computers over the internet.
- root – the name of the account we log in as. This is the root account on most linux servers.
- your_server_ip – a placeholder for your server’s actual ip address. We use an ip address with no ports attached because we are connecting to the server over SSH
1.2 Update the System
Always start by updating the package manager to ensure you have the latest security patches.
sudo apt update && sudo apt upgrade -y
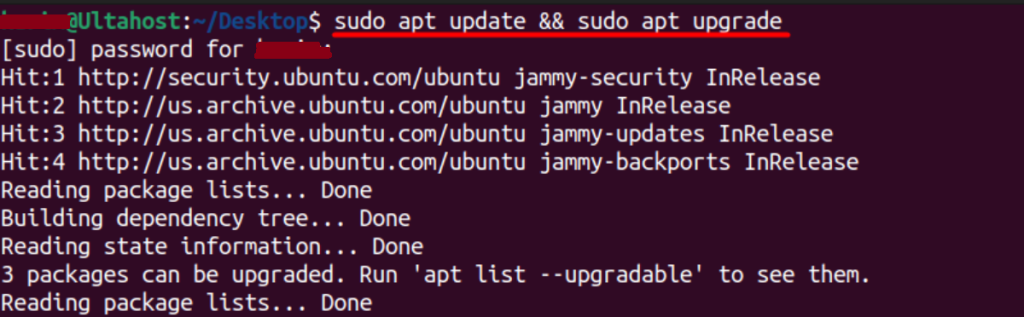
- sudo – a command that allows us to run another command with administrator privileges (as root).
- apt update – updates the list of available software and versions. Does not install any new software.
- && – this && operator executes the command that comes after it if the previous command was successful.
- apt upgrade – upgrades all of our installed software on our system to the latest version
- -y – allows commands to be run without any input from the user. This allows apt upgrade to run without us having to type y when asked.
Phase 2: Choosing Your Web Server Stack
You have two choices for your web server: Apache or Nginx. Apache is known for its .htaccess support, while Nginx is used for its high performance and low memory consumption.
Option A: The LAMP Stack (Linux, Apache, MySQL, PHP)
Apache is the most popular choice for WordPress users.
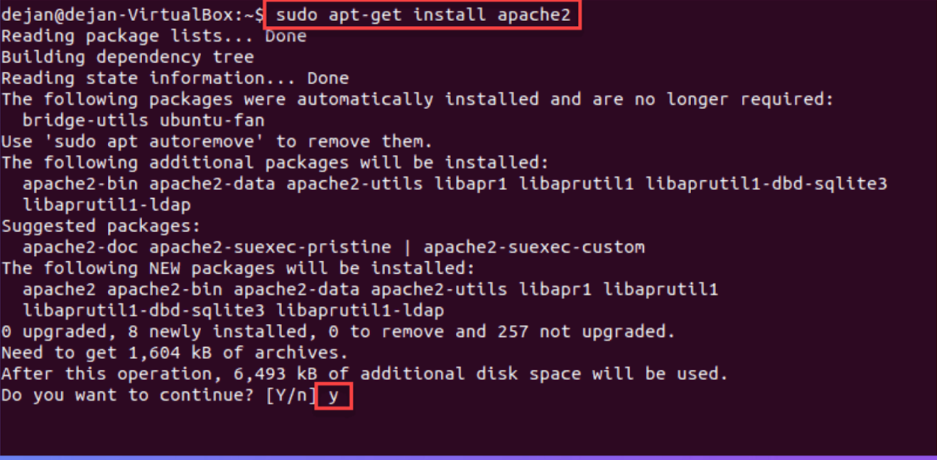
Install apache use the following command:
sudo apt-get install apache2
To install mysql use the following command:
sudo apt install mysql-server -y
To install php use the following command:
sudo apt install php libapache2-mod-php php-mysql php-curl php-gd php-mbstring php-xml php-xmlrpc php-soap php-intl php-zip -y
Option B: The LEMP Stack (Linux, Nginx, MySQL, PHP)
Nginx is often preferred for high-traffic sites using WordPress hosting configurations.
Install Nginx
sudo apt install nginx -y
Install MySQL
sudo apt install mysql-server -y
Configure PHP-FPM
sudo apt install php-fpm php-mysql php-curl php-gd php-mbstring php-xml php-xmlrpc php-soap php-intl php-zip -y
Phase 3: Database Configuration
WordPress stores all its content posts, pages, and user data in a MySQL database.
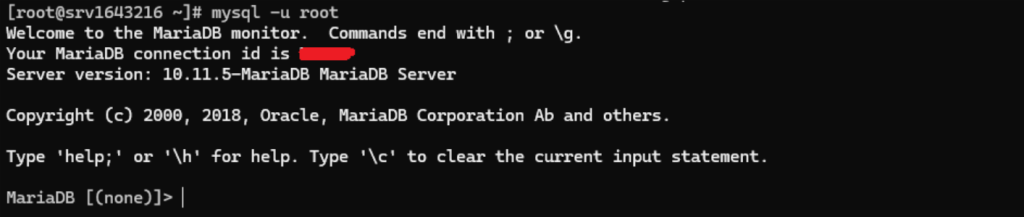
- Log into MySQL:
sudo mysql - Create the Database:
CREATE DATABASE wordpress_db; - Create a User:
CREATE USER 'wp_user'@'localhost' IDENTIFIED BY 'your_strong_password'; - Grant Permissions:
GRANT ALL PRIVILEGES ON wordpress_db.* TO 'wp_user'@'localhost'; - Flush and Exit:
FLUSH PRIVILEGES; EXIT;
Phase 4: Downloading and Configuring WordPress
Now that the environment is ready, we need to download the WordPress core files.
- Navigate to the temp directory:
cd /tmp - Download the latest release:
curl -O https://wordpress.org/latest.tar.gz - Extract the file:
tar xzvf latest.tar.gz - Move files to the web root: For Apache/Nginx:
sudo cp -a /tmp/wordpress/. /var/www/html/
Setting Permissions
The web server needs specific permissions to manage files (like uploading images).
sudo chown -R www-data:www-data /var/www/html/
sudo find /var/www/html/ -type d -exec chmod 755 {} \;
sudo find /var/www/html/ -type f -exec chmod 644 {} \;
Deploy WordPress with Confidence
Get your WordPress VPS from $4.80/month
Phase 5: Configuring the Virtual Host
You must tell your web server where to look for the WordPress files.
For Apache:
Create a new configuration file:
sudo nano /etc/apache2/sites-available/wordpress.conf
Add the following:
<VirtualHost *:80>
    ServerAdmin admin@[suspicious link removed]
    DocumentRoot /var/www/html
    ServerName [suspicious link removed]
    <Directory /var/www/html/>
        AllowOverride All
    </Directory>
</VirtualHost>
Enable the site and the rewrite module:
sudo a2ensite wordpress.conf
sudo a2enmod rewrite
sudo systemctl restart apache2
For Nginx:
Create a new server block:
sudo nano /etc/nginx/sites-available/wordpress
server {
    listen 80;
    server_name [suspicious link removed];
    root /var/www/html;
    index index.php index.html;

    location / {
        try_files $uri $uri/ /index.php?$args;
    }

    location ~ \.php$ {
        include snippets/fastcgi-php.conf;
        fastcgi_pass unix:/var/run/php/php-fpm.sock;
    }
}
Enable the site and the rewrite module:
sudo ln -s /etc/nginx/sites-available/wordpress /etc/nginx/sites-enabled/
sudo systemctl restart nginx
Phase 6: Installing an SSL Certificate (Let’s Encrypt)
In 2026, an SSL certificate is not optional. It protects user data and is a critical Google ranking factor. We will use Certbot to install a free Let’s Encrypt certificate.
- Install Certbot:
sudo apt install certbot python3-certbot-apache(orpython3-certbot-nginxfor Nginx). - Run Certbot:
sudo certbot --apache -d yourdomain.com(or--nginx). - Follow the prompts: Certbot will automatically handle the redirection from HTTP to HTTPS.
Phase 7: Final WordPress Web Setup
With the server configured, open your web browser and navigate to https://yourdomain.com. You will be redirected by the WordPress setup wizard.
- Select Language: Choose your preferred language.
- Database Details: Enter the credentials created in Phase 3.
- Database Name: wordpress_db
- Username: wp_user
- Password: your_strong_password
- Database Host: localhost
- Site Information: Enter your Site Title, Admin Username, and a strong password.
Phase 8: Security Practice
Installing WordPress VPS is only the first step. You must secure your VPS to prevent unauthorized access.
1. Disable Root Login via SSH
Edit the SSH configuration: sudo nano /etc/ssh/sshd_config
Change PermitRootLogin yes to PermitRootLogin no.
Note: Ensure you have created a regular user with sudo privileges before doing this.
2. Configure a Firewall (UFW)
Only allow necessary traffic:
sudo ufw allow OpenSSH
sudo ufw allow 'Apache Full' (or ‘Nginx Full‘)
sudo ufw enable
3. Change Default Table Prefix
During the web installation, change the default wp_ prefix to something unique (e.g., uts_73_) to prevent SQL injection attacks targeting default naming conventions.
Troubleshooting Common WordPress Installation Problems on a VPS
If you have any problems installing WordPress on your VPS, use the following steps to see why the problem might be happening.
I can’t access my VPS
- Make sure the VPS is actually turned on
- Make sure you’re using the right IP address, user name, and password/ssh_key.
- Make sure port 22 is open on your firewall/cloud server.
My web server is not working
- Make sure the web server is installed. If it is, try restarting it
- If that doesn’t work, make sure ports 80 and 443 are open
I’m getting some sort of DB error
- Make sure the MySQL server is running.
- Make sure you have the right DB credentials, including the DB name and password, in your wp-config.php file.
- Make sure the MySQL user has permission to access that DB.
Error Establishing a Database Connection
- Make sure you have the right MySQL credentials.
- Try logging in to MySQL as the user and make sure there are no errors.
- If there are, the user either doesn’t have permission or doesn’t exist.
Checking logs
If you’ve tried out all of the above steps and nothing seems to be working, you can check your server logs. If you see any errors in the log files, you can search for them online:
- For Apache we can check the file at /var/log/apache2/error.log
- For Nginx we can check the file at /var/log/nginx/error.log
Conclusion
Having dominion over installing WordPress on VPS presents you with the maximum authority over enabling your website to be effortlessly fast, secure, and powerful. Although this setup involves more effort in maintenance than shared hosting, the performance boost is indisputable. With this tutorial, you have just upgraded the most basic WordPress site into a professional Ubuntu server capable of handling the needs of 2026.
Ready to take the next step in your web journey? Start with UltaHost VPS from 4.80/month — pre-configured for WordPress performance. Get your WordPress VPS from UltaHost.


