How to Install Yarn on Windows
Yarn is a popular package manager for JavaScript projec...
TCP/IP (Transmission Control Protocol/Internet Protocol) is a set of protocols that define how your PC communicates with other PCs. It ensures data is transmitted or received over a network accurately and efficiently. We can configure TCP IP settings in Windows either using automated Dynamic Host Configuration Protocol (DHCP) or manually. If we use DHCP, our TCP/IP settings will automatically change when we move our PC. However, if we use static IP settings, we’ll need to manually update these configurations when moving to a new location.
In this tutorial, we’ll discuss how to configure TCP/IP settings in Windows using automated DHCP or manually using a static IP address.
The easiest way to configure TCP/IP settings on Windows is to use the automated Dynamic Host Configuration Protocol (DHCP). Specifically, if you choose the Automatic (DHCP) option, your network settings will be managed automatically. DHCP enables the router or network access point to assign an IP address and DNS settings without manual input. This option is recommended for most users as it makes setup easier by managing network settings automatically.
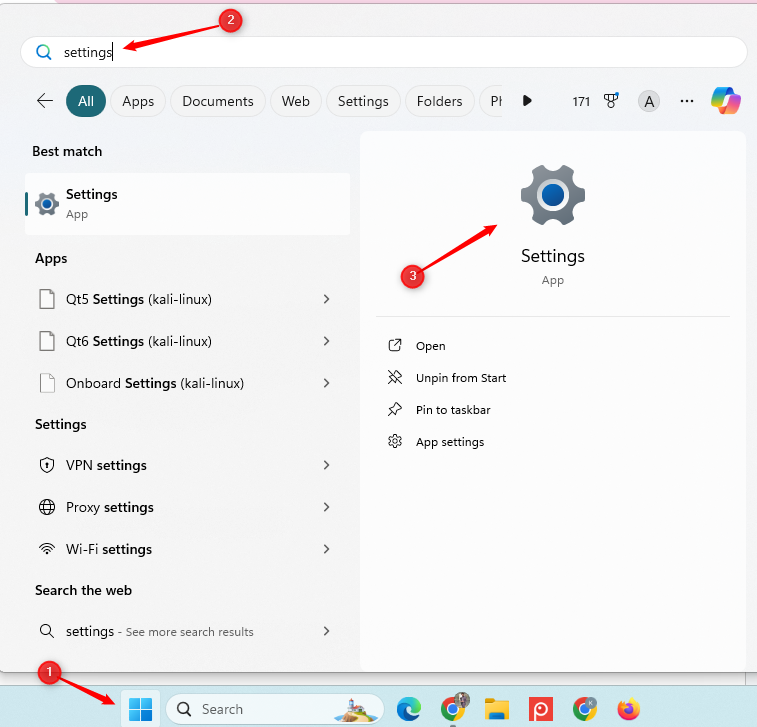
Open the Start menu, enter “settings” in the search bar, and choose the Settings app from the results:
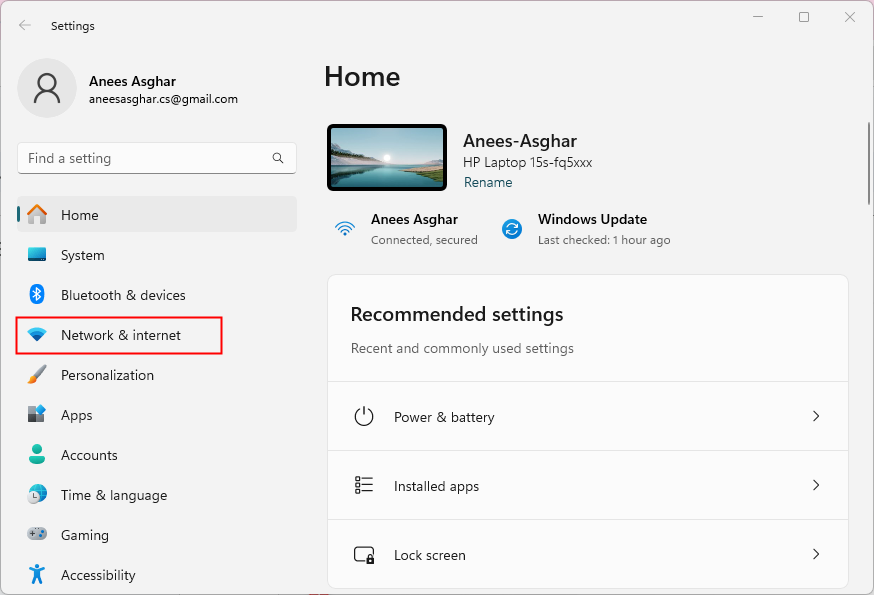
Now select the “Network & Internet” settings:
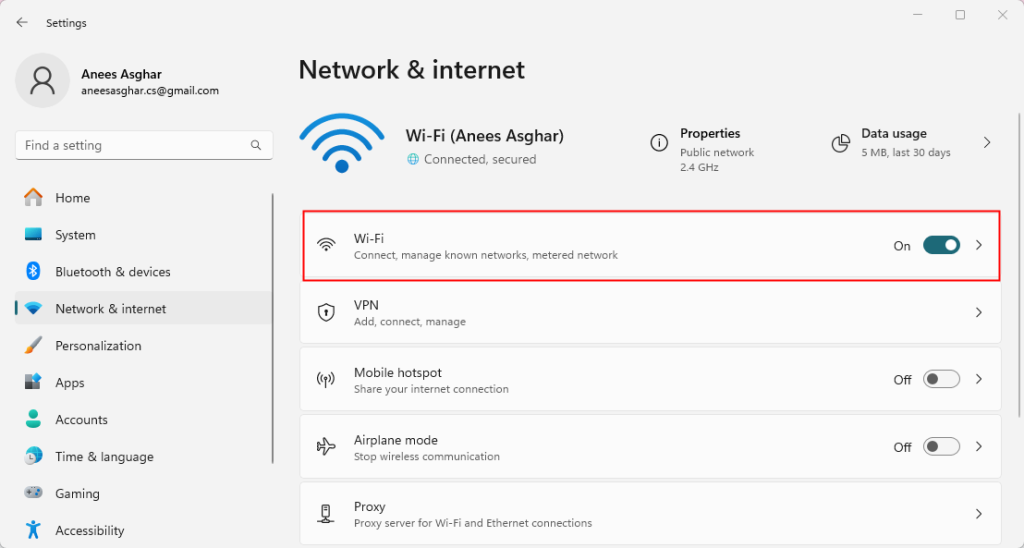
Next, select a network type, i.e., Wi-Fi or Ethernet, depending on your network connection. In our case, we are using WiFi, so we choose the WiFi option:
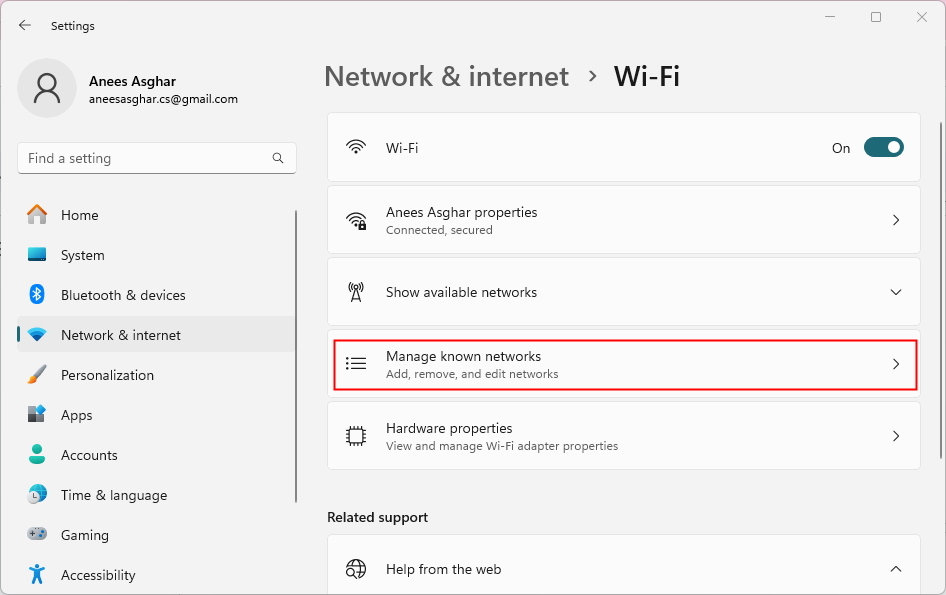
Next, choose “Manage known networks” to handle network settings:
Select the network for which you want to update the settings. For example, we want to change the network settings for Anees Asghar, so we choose the network accordingly:
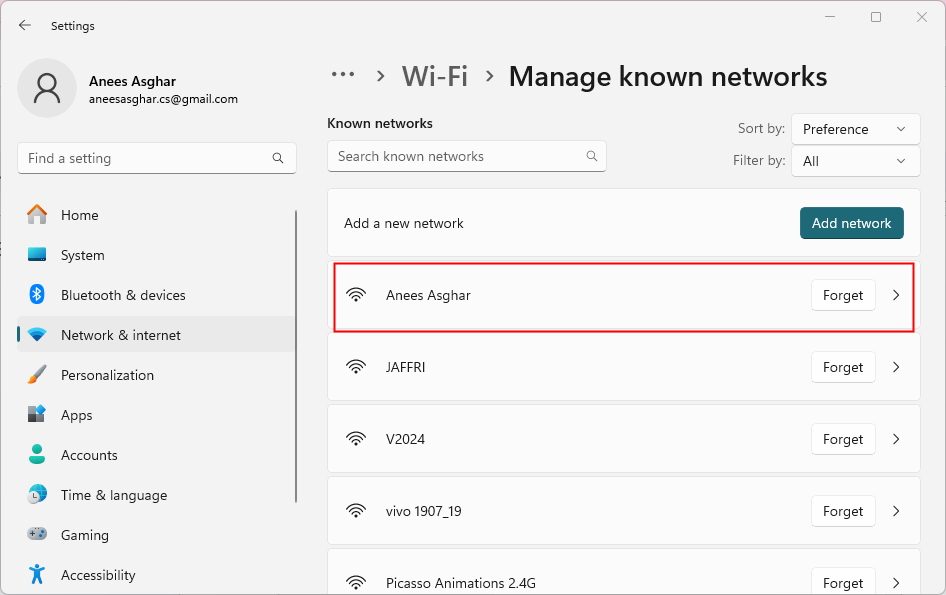
Note: If you’re using an Ethernet connection, click on Ethernet and then select the network you’re connected to.
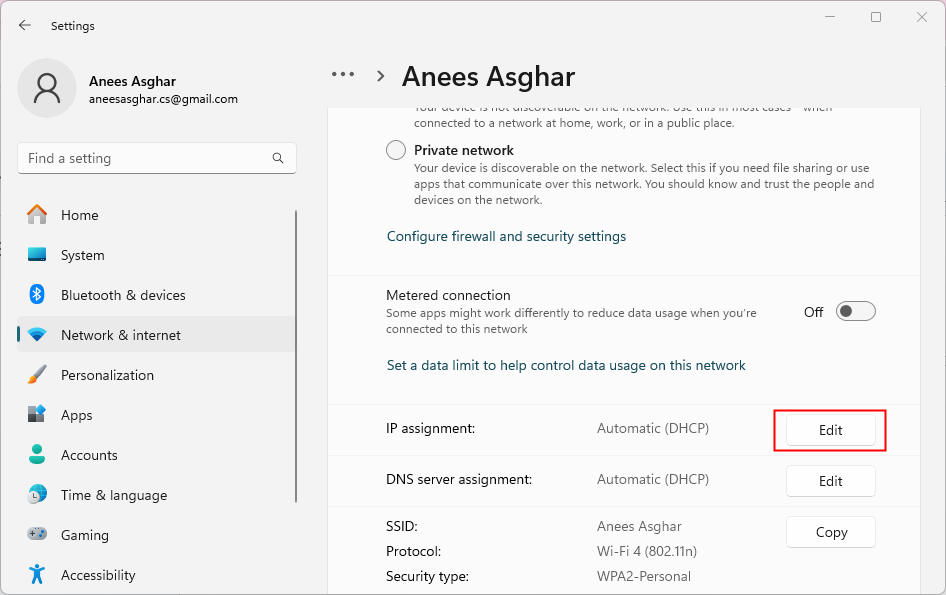
Scroll down to find IP Assignment and click the “Edit” button next to it:
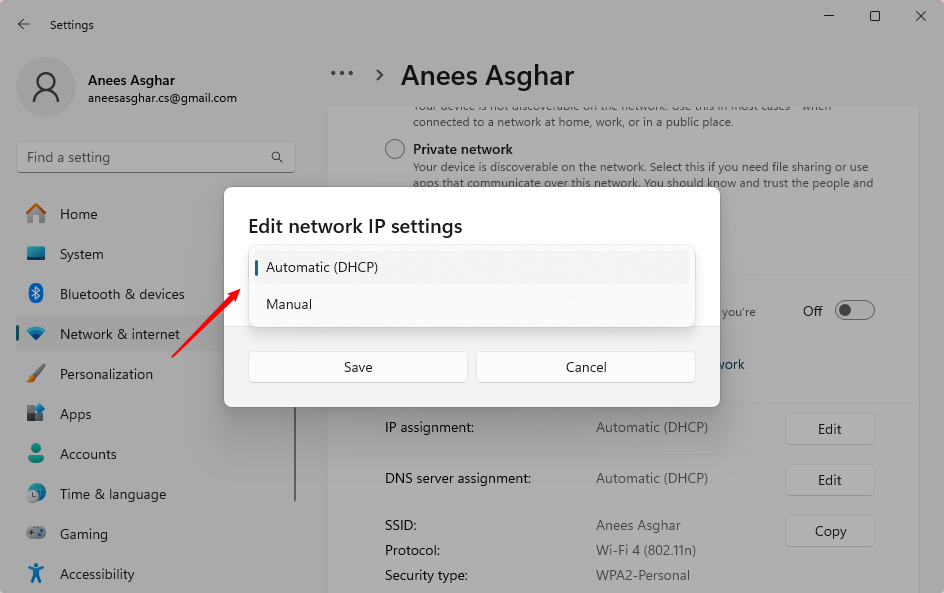
You can select Automatic (DHCP) or Manual in IP assignment settings, as shown in the following screenshot. We select Automatic (DHCP) to configure TCP/IP settings automatically:
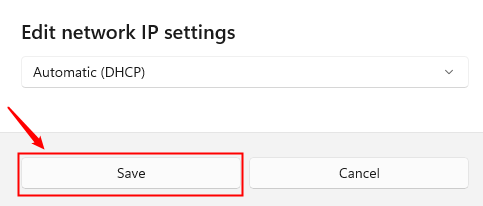
After selecting the Automatic (DHCP) settings, hit the Save button to apply changes:
If your system doesn’t support Automatic (DHCP) or you’re encountering issues while configuring TCP/IP settings automatically, you can set them up manually. For this, you’ll need to manually enter the IP address, subnet mask, and gateway address. This method is recommended for users who want more control over their network configuration or are working in a network with static IP addresses.
Discover the Fast Performance of Windows Server!
For optimal performance, consider Ultahost’s reliable Windows hosting, which offers a high-speed and stable environment.
Note: The first three steps are the same as those discussed in the method above. After this, follow the below stated steps:
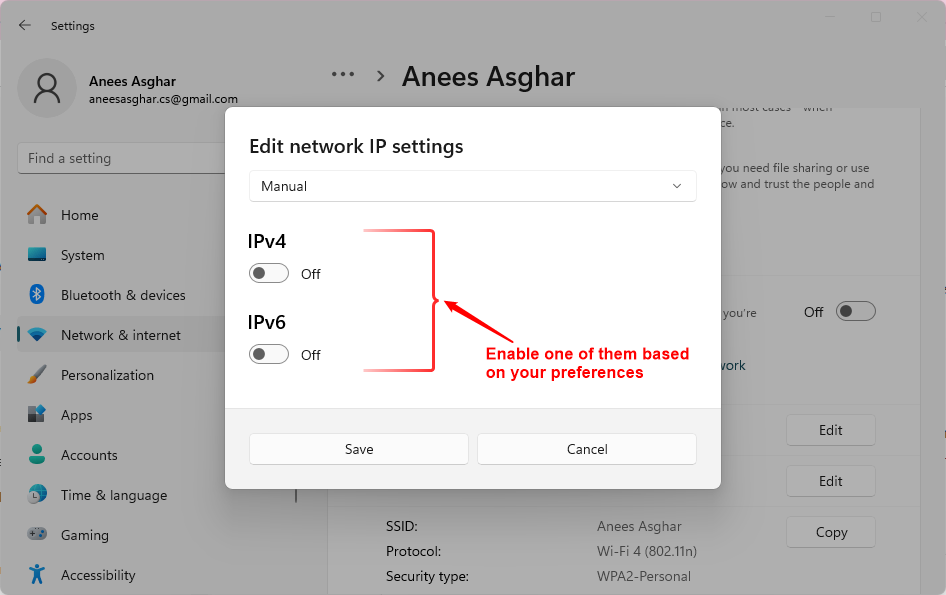
In the network IP settings, select Manual, and then enable either IPv4 or IPv6 according to your preference:
Now specify the IP address, Subnet mask, and Gateway in the respective fields:
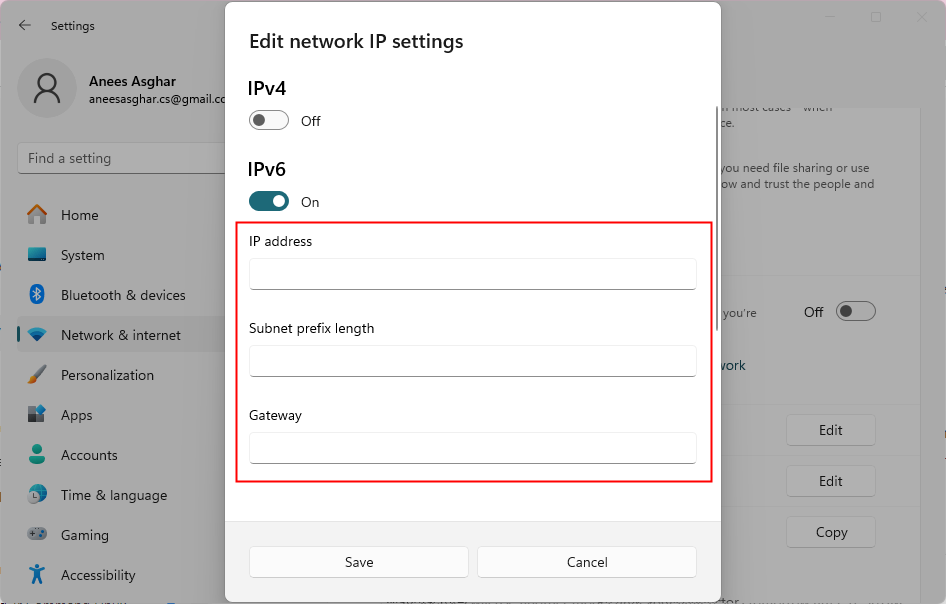
Note: You can find your IP address in Windows using several ways, such as CMD, online tools, nslookup command, etc.
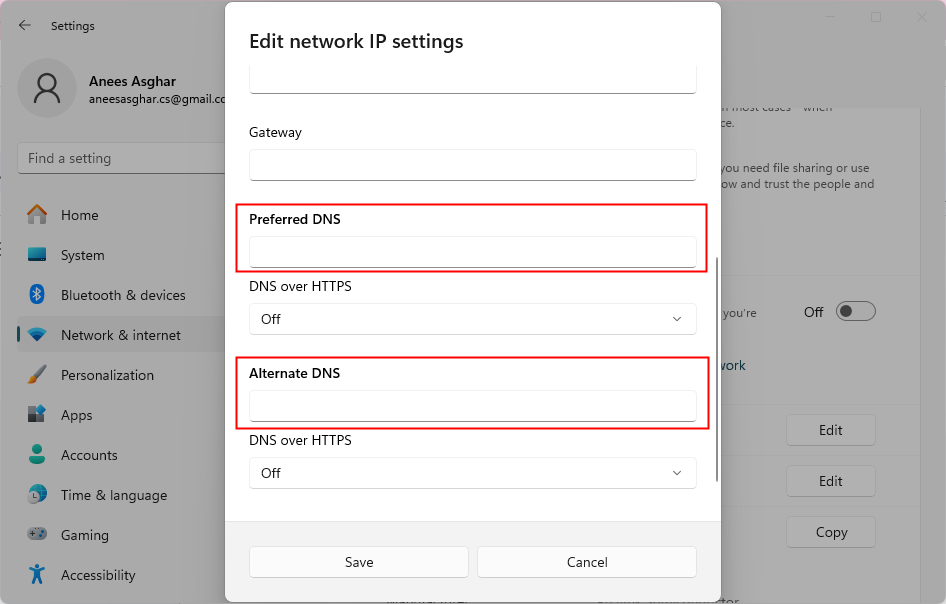
You can also set up the DNS server within the IP address settings. To do this, scroll down a bit and enter the Preferred DNS and Alternate DNS server addresses into the respective fields:
Read also How to Install Jira on Windows
You can set up DNS over HTTPS (DoH) if you want. To do this, turn on DNS over HTTPS for secure DNS requests and choose either automatic or manual settings:
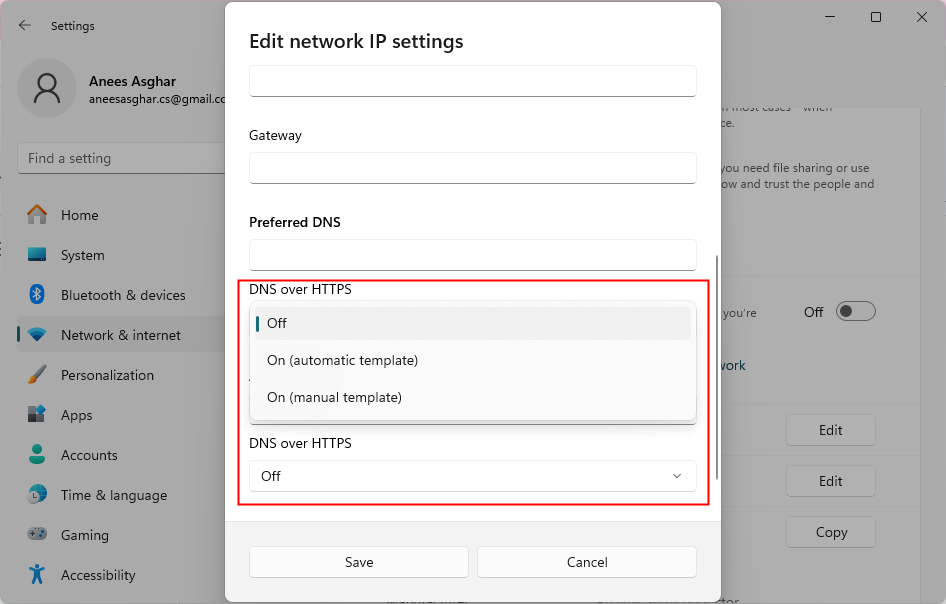
If you’re using DNS over HTTPS (automatic or manual), you can choose whether to enable or disable Fallback to plaintext:
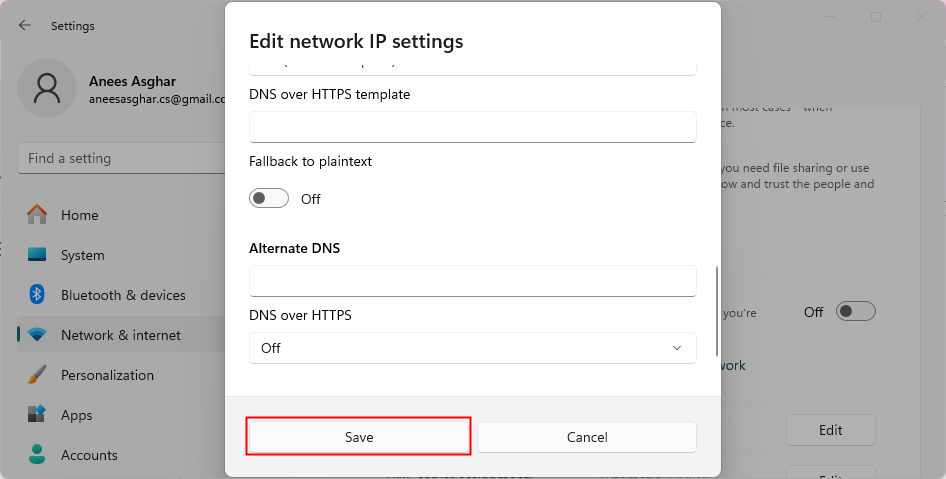
Once you are done with all the configurations, hit the Save button to apply the changes:
This is how you can configure TCP IP settings in Windows.
You can Configure TCP/IP settings in Windows either automatically using DHCP or manually with static IP settings. DHCP simplifies the process by automatically managing IP and DNS settings. This method is ideal for most users because it requires less manual effort. On the other hand, if you need more control or have a network with static IP addresses, you can configure the settings manually. This method involves manually entering the IP address, subnet mask, and gateway address. In this tutorial, we covered both methods of configuring TCP/IP settings in Windows.
Optimize your network configuration on Windows with Ultahost’s cheap Windows VPS hosting. Enjoy better processing power, more memory, and plenty of storage. This helps you manage your network settings smoothly as Ultahost provides the performance you need.
TCP/IP (Transmission Control Protocol/Internet Protocol) is a set of protocols that control how data is transmitted and received over a network.
Configuring TCP/IP settings ensures that your PC communicates correctly with other devices on the network.
DHCP (Dynamic Host Configuration Protocol) automatically assigns IP addresses and DNS settings to your PC, which makes network setup easier without manual input.
Open Network & Internet settings, choose your network type (Wi-Fi or Ethernet), select your network, click on IP Assignment, choose Automatic (DHCP), and save the changes.
You can set up TCP/IP settings manually by specifying the IP address, subnet mask, and gateway. This method is useful for more control or when using static IP addresses.
In the network IP settings, select Manual, then enter the IP address, subnet mask, gateway, and DNS server addresses (Preferred and Alternate DNS).
DNS over HTTPS (DoH) encrypts DNS queries for added security. You can enable it in the network settings by choosing either automatic or manual configurations.