
How to List, Start and Stop Docker Container...
Docker is a platform that allows you to build, deploy, ...


Docker is a containerization platform that enables us to pack, deploy, and deliver applications, software, and programs in an isolated environment. Usually, a container has all the things that are required to run the application or program and due to isolation, it can not directly access the data from the host machine or from other containers.
However, sometimes users do not want to store sensitive files directly in a container image as they may need to share them with others. For this purpose, they may need to save the file on the host or a shared space from which the container can access the required document. In such situations, users are often required to share data between Docker containers or containers and the host system.
In this article, we will demonstrate the method of sharing data between Docker containers and from the host to multiple Docker containers.
Data can be shared between Docker containers using two basic methods:
To share data between Docker containers, first install Docker on Windows, then create an independent volume and mount it to different Docker containers.
Follow the below steps for practical illustrations.
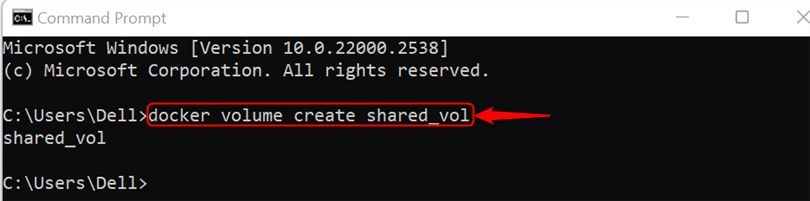
First, create an independent volume in the Docker host through the following command:
docker volume create shared_vol
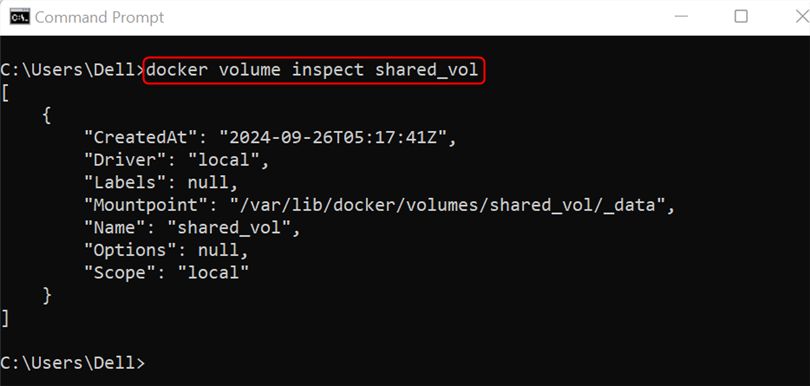
To inspect the created volume use the “docker volume inspect <vol-name>” command:
docker volume inspect shared_vol
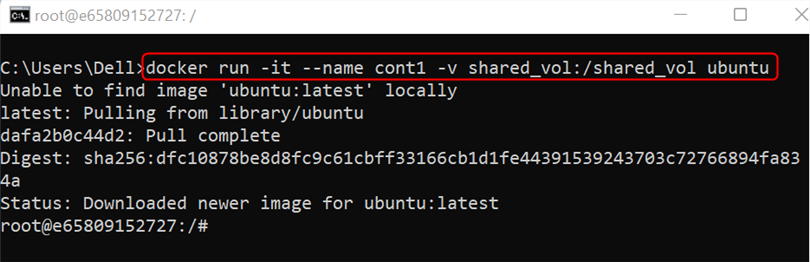
Now, generate the first container and mount the created volume with the container:
docker run -it --name cont1 -v shared_vol:/shared_vol ubuntu
In the above command, “-it” starts the container’s TTY terminal, the “–name” option assigns the unique name to the container and the “-v” option is utilized to mount the shared_vol volume in the container’s shared_vol directory:
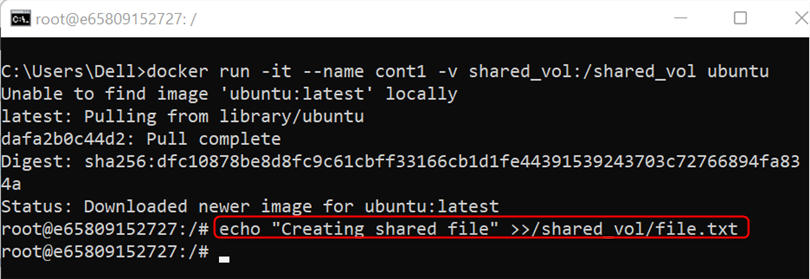
Now, create the file inside the container using the “echo” command:
echo "Creating shared file" >>/shared_vol/file.txt
In the next step, create another container named “cont2” and mount the shared_vol volume:
docker run -it --name cont2 -v shared_vol:/shared_vol ubuntu

Now, check if the data stored by “cont1” is accessible by “cont2” or not. For this purpose, read the file created by cont1 using the “cat <path/to/file>” command:
cat /shared_vol/file.txt
Share Docker Data on Our Cheap Windows VPS!
Experience the power of Windows on Ultahost’s virtual server for fast and reliable performance when sharing data between your Docker containers.
The output shows that data is effectively shared between two containers through independent Docker shared_vol volume:

Volume is external storage that saves the data even if containers are removed. To share data from an existing volume of containers with other containers, even after previous containers have been removed, go through the following section.
First, remove the containers that are using the existing volume. For instance, we are using the above-generated volume and containers.
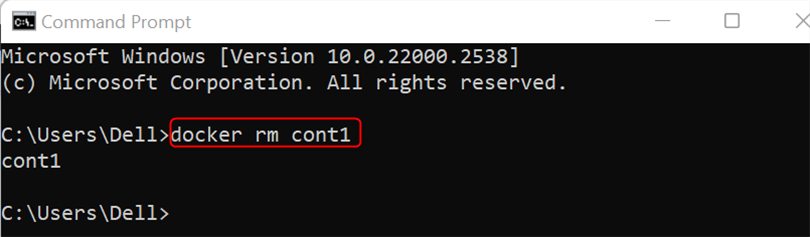
Remove the first container using the “docker rm <container name/id>” command:
docker rm cont1
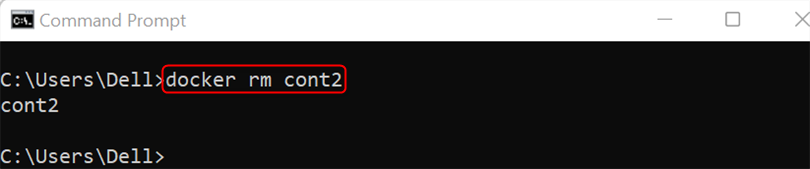
Similarly, remove the second container “cont2”:
docker rm cont2
Now, generate the fresh container, mount the existing volume, and check if this container has access to the data that is generated by removed containers or not:
docker run -it --name cont3 -v shared_vol:/shared_vol ubuntu
To verify the data, just read the file generated by the deleted container using the “cat” command:
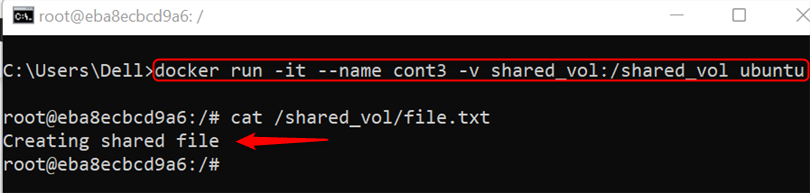
The outcome above confirms that the new container effectively accesses the data through the volume, even though the old container no longer exists.
Read also How to Check and Manage Logs on Docker
Another possible way to share Docker data or files is by using a shared source or directory that different containers can access. Follow these steps to share a single host directory with multiple containers:
First, create a new directory in the host system:
mkdir shared_dir

Now, create a first container and mount the created directory as a shared source on the container path /shared_dir:
docker run -it --name cont-1 -v C:/Users/Dell/Documents/shared_dir:/shared_dir ubuntu

Create a file inside the container through the “echo” command:
echo "file is creating in shared directory" >>/shared_dir/file.txt

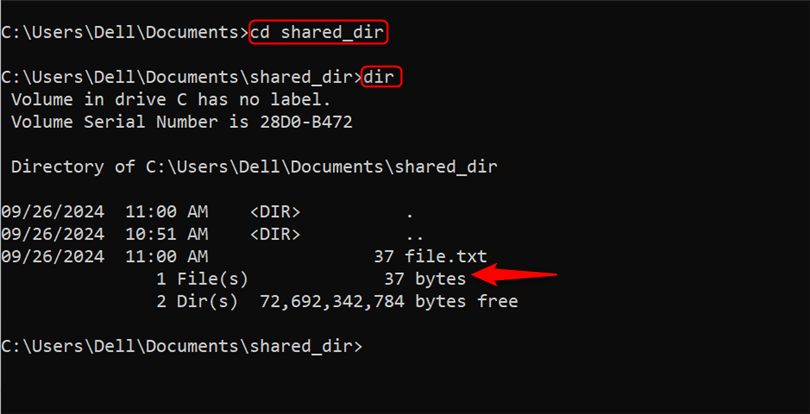
Now, access the shared directory from the host:
cd shared_dir
Also, you can run the following command to check if the file is saved in the mounted directory or not:
dir
The result indicates that file.txt is saved on the host system that is created by the above container:
Now, create another container and mount the same shared host directory to the container’s /shared_dir path:
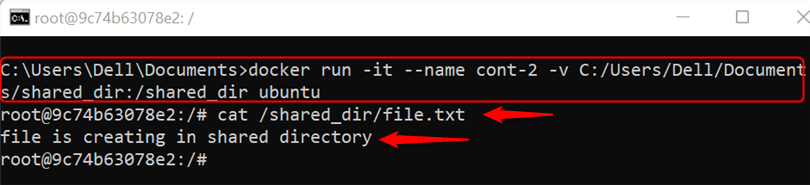
docker run -it --name cont-2 -v C:/Users/Dell/Documents/shared_dir:/shared_dir ubuntu
Next, access the file that is created by the first container and saved in the shared source shared_dir:
That is all about sharing data between Docker containers.
Enhancing flexibility and collaboration is a key feature of sharing data between containers. You can achieve this by either mounting a single independent volume with a container or sharing the same data storage space or directory among different containers. In this article, we explained different methods of docker data sharing, along with screenshots.
Share data between Docker containers easily on Windows Server with Ultahost. It provides strong processing, more memory, and great storage. You can focus on managing your containers, while Ultahost ensures the speed and resources needed for smooth data sharing.
When multiple containers are required to access a similar file or when containers are working in an orchestration system such as Docker Swarm, you may need to share the data between Docker containers either through a shared source or volume.
Mainly two methods are used to share the data between different containers: Docker Volumes and Shared Directories.
To share data using Docker volumes, create a volume using the “docker volume create ” command. Next, mount the volume to multiple containers by utilizing the “-v” option during the container creation process. Finally, the changes made by one container can be accessible to others that have mounted the same volume.
Volume is used to persist the data of the container in an external source. When the container is removed, its data will still persist in the Docker volume. This data can be used for backup purposes by other containers. In other words, the user can reuse this data for other containers.
To share data using a host directory: first, create a simple directory on the host system. Then, mount the directory to multiple containers using the “-v” option. Containers can read and write data to the shared directory. This data can also be accessible from the host system as well as containers.
Yes, multiple containers can simultaneously access the same Docker volume or shared directory. This enables data sharing and collaboration across containers.
Using Docker volumes is more appropriate for storing and sharing data between containers, even after a container is deleted. On the other hand, sharing data through host-shared directories links them to the host filesystem, potentially limiting their portability.
Docker is a platform that allows you to build, deploy, ...
It is often required to run multiple services at a give...
Docker is a powerful tool that simplifies software deve...

Docker is known as the industry leader when it comes to...
Containers are meant to be light, fast, and ephemeral. ...
Docker has revolutionized how we build, deploy, and run...