
How to Check Apache Version in Linux
Apache is a widely used, open-source web server compati...


Jira is a popular project management tool developed by Atlassian. It helps teams plan, track, and manage their projects and issues efficiently. Jira offers a robust set of features that enable teams to collaborate, prioritize tasks, and deliver high-quality software products.
Jira’s primary purpose is to provide a centralized platform for teams to manage their projects, track issues, and collaborate on tasks. Its benefits for Ubuntu users include creating and managing projects, tracking issues and bugs, and assigning tasks to team members. Jira also provides reporting and analytics tools, enabling teams to gain valuable insights into their project’s progress and performance. Additionally, Jira integrates with other popular development tools, such as Git, Jenkins, and Bitbucket.
By installing Jira on Ubuntu, users can take advantage of its features and improve their project management capabilities. This article will provide a step-by-step guide on how to install Jira on Linux, covering system requirements, installation process, and post-installation configuration.
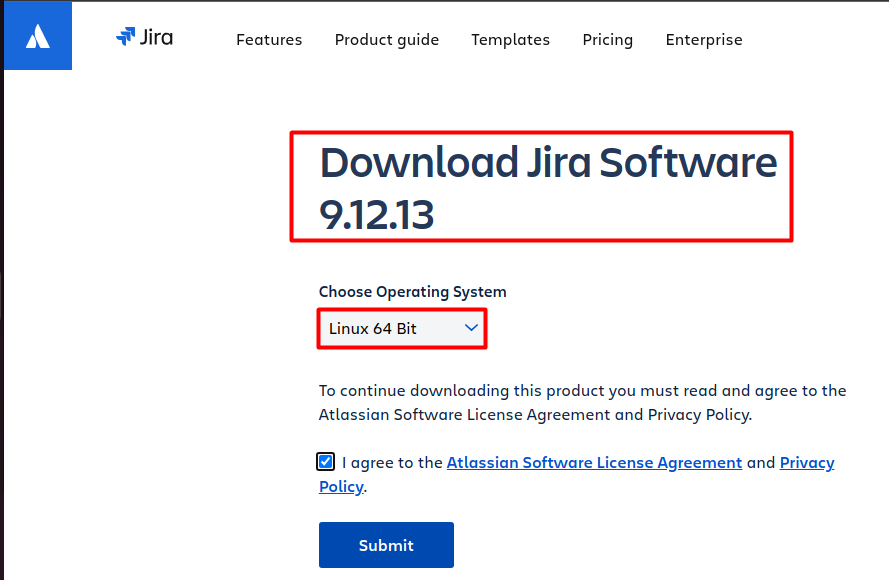
For Jira Linux installation, you need to download the latest version of the software. You can find the latest version of Jira by visiting the Atlassian website:
However, for this article, we will use the wget command to download the latest version directly from the terminal. The wget command is a command-line utility used to download files from the internet. It is a powerful tool that allows you to download files from a URL and save them to your local machine. In this case, we will use the wget command to download the latest version of Jira.
To download the latest version of Jira, execute the following command in your terminal:
wget https://www.atlassian.com/software/jira/downloads/binary/atlassian-jira-software-9.12.13-x64.bin -O atlassian-jira-software.bin
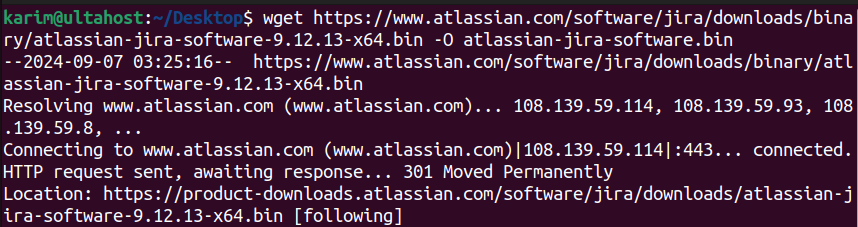
This command will download the latest version of Jira (9.12.13 at the time of writing this article) and save it to a file named `atlassian-jira-software.bin`.
After downloading the Jira installation file, you need to make it executable. This is necessary because the file is downloaded with read-only permissions, and you need to change the permissions to execute it.
To make the file executable, execute the following command:
chmod +x atlassian-jira-software.bin

The `chmod` command is used to change the permissions of a file. The `+x` option adds execute permissions to the file, allowing you to run it as a program.
Install Jira on Our Linux VPS today!
Ultahost offers Linux hosting with NVMe SSD storage. Use our Linux VPS to practice the command and streamline your processes.
Now that the file is executable, you can run it to start to install Jira server on Linux. To do this, execute the following command:
./atlassian-jira-software.bin
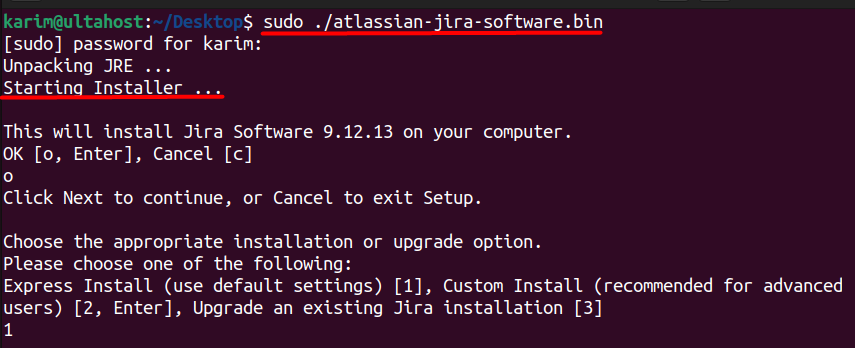
This command will start the Jira installation process. You will be presented with a series of options to configure the installation. You will need to select the installation type, language, and other options. Follow the prompts to complete the installation.
Once the installation is complete, you will see a message indicating that Jira can be accessed via `http://localhost:8080`. The `localhost` refers to your local machine, and `8080` is the port number that Jira is running on. You can access Jira by entering this URL in your web browser.
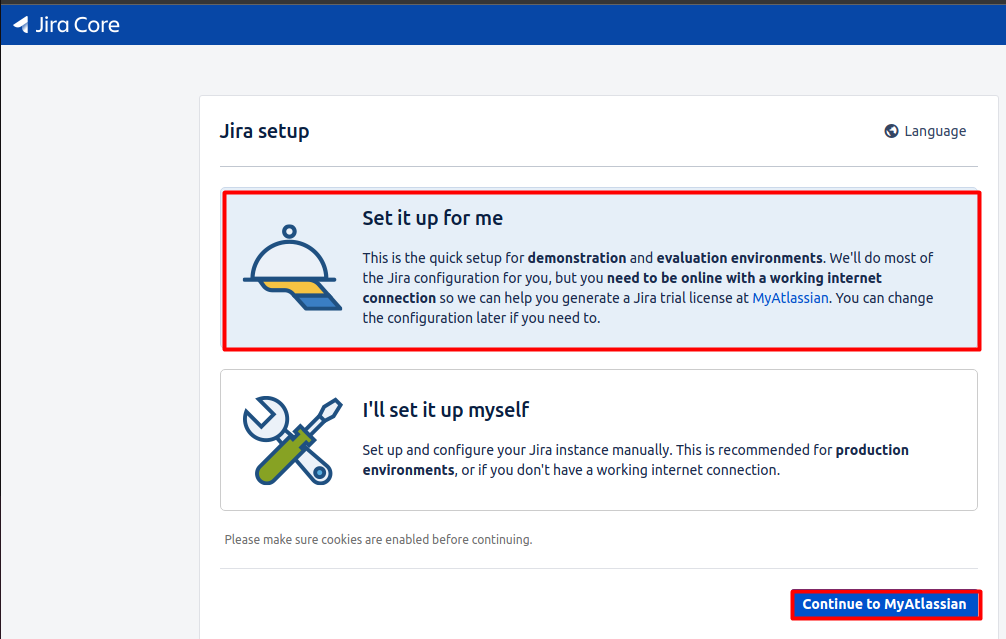
After accessing Jira via http://localhost:8080, you will be presented with the Jira Linux setup wizard. You have two options to complete the setup:
Option 1: Set it up for me
This option allows Jira to configure the setup for you. Jira will create a default configuration, including a database and a user account. This option is recommended for users who are new to Jira.
Option 2: I’ll set it up myself
This option allows you to configure the setup manually. You will need to create a database, configure the database connection, and create a user account. This option is recommended for users who are familiar with Jira and want more control over the setup.
Once you complete the setup, you will be taken to the Atlassian login page. You can log in with your existing Atlassian account or create a new one to access Jira.

Learn also How to Install JIRA on Windows
Jira offers robust project management features that enable teams to plan, track, and deliver projects efficiently. With Jira, you can create and manage projects, set goals and objectives, and assign tasks to team members. Jira also provides a range of reporting and analytics tools, enabling teams to gain valuable insights into their project’s progress and performance.
Jira’s issue tracking feature allows teams to track and manage issues, bugs, and defects throughout the development lifecycle. With Jira, you can create and assign issues, set priorities, and track progress. Jira also provides a range of workflows and approval processes, enabling teams to manage issues efficiently.
Jira enables teams to collaborate and communicate effectively. With Jira, you can create and manage teams, assign roles and permissions, and track team performance. Jira also provides a range of collaboration tools, including commenting, @mentions, and file sharing.
Jira is highly customizable, enabling teams to tailor the platform to their specific needs. With Jira, you can create custom workflows, fields, and screens, and integrate with other popular development tools like Git, Bitbucket, and Jenkins. You can also separately install Jenkins on Ubuntu operating system.
Jira provides a range of reporting and analytics tools, enabling teams to gain valuable insights into their project’s progress and performance. With Jira, you can create custom reports, track key performance indicators (KPIs), and analyze data to make informed decisions.
In this article, we walked through the process of Jira configuration on Linux. We started by downloading the latest version of Jira using the wget command, and then made the file executable using the chmod command. We then ran the installation file and followed the prompts to complete the installation. The installation process was straightforward, and with a few simple commands, we were able to get Jira up and running on our Ubuntu machine.
With Jira installed, we can now take advantage of its powerful project management features, including issue tracking, collaboration, and reporting. Whether you’re a developer, project manager, or team lead, Jira provides a robust platform to streamline your workflows and improve productivity. By following the steps outlined in this article, you can easily install Jira on your Ubuntu machine and start managing your projects with ease.
Configuring Jira on Linux is a simple process depending on different Linux enviourment. Consider Ultahost’s cheap VDS hosting which provides dedicated resources and optimal performance ideal for managing advanced process tasks. It is designed to be scalable and flexible so you can always choose the right amount of resources for your needs.
Go to the Atlassian Jira Software download page. Choose the Linux version and download the installer (usually a .tar.gz file for Jira Software or .bin file for Jira Service Management).
Open a web browser and navigate to http://localhost:8080 (or the IP address/port you configured). Follow the setup wizard.
Jira’s logs are typically located in the log directory within the Jira installation directory, e.g., /opt/atlassian/jira/logs/. Key logs include atlassian-jira.log for application logs and catalina.out for Tomcat logs.
Backup your Jira instance and database. Download the new version of Jira. Follow the same installation steps as above for the new version.
Ensure only necessary ports are open (e.g., port 8080). Set up an SSL/TLS certificate and configure Jira to use HTTPS. Run Jira under a dedicated user with limited permissions.
Yes, you can set up Jira to run as a service using systemd or another init system. You’ll need to create a service file for Jira and configure it to start on boot.
Apache is a widely used, open-source web server compati...
Linux export command is a powerful tool for managing en...

The installation of Fedora using VirtualBox is a great ...

Deployment of Redis in Docker simplifies managing depen...

A firewall safeguards a system by managing what network...