How to Generate Report Using MTR on Windows
MTR (My Traceroute) is a powerful network diagnostic to...

RubyMine is an integrated development environment (IDE) for Ruby and Rails programmers that simplifies coding through intelligent code completion, debugging tools, and support for version control systems. Regardless of whether you are coding web applications, automation scripts, or complex backends, RubyMine simplifies writing, testing, and debugging your code.
Running RubyMine on Windows gives you an entire development environment on your local machine. The IDE is designed for Windows to give you smooth performance and support for a wide range of frameworks and libraries. From writing clean code to debugging issues, RubyMine offers developers tools to boost productivity and reduce errors.
This tutorial will guide you through each step, and before you know it you will be running one of the top Ruby IDEs available today.
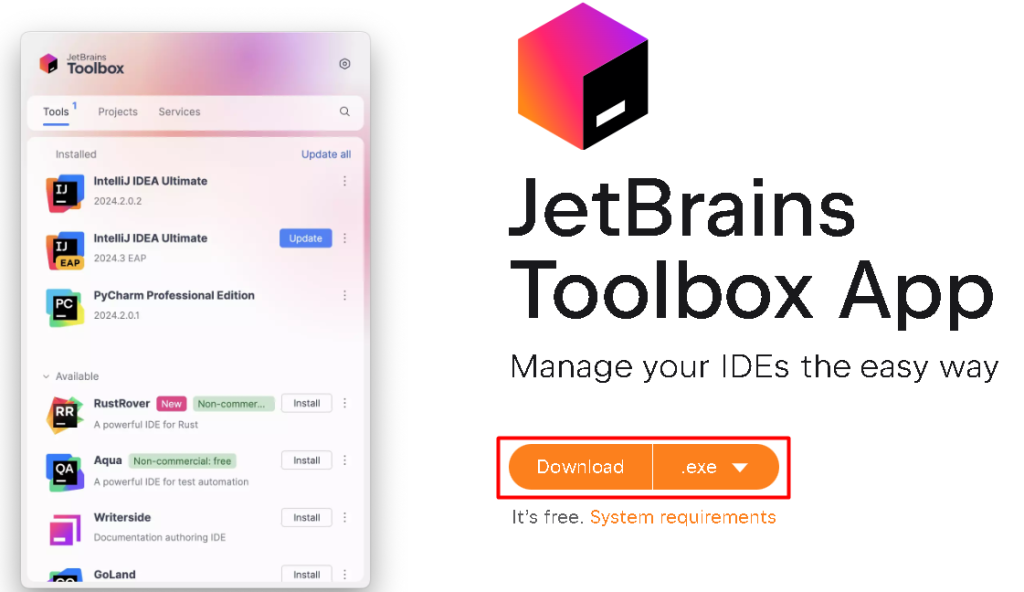
To install RubyMine on Windows, the easiest approach is to use the JetBrains Toolbox application. This handy tool allows you to manage all JetBrains IDEs, including RubyMine, from one central interface. With the Toolbox, you can install, update, and uninstall JetBrains products effortlessly. It also lets you manage multiple versions of the same IDE, making it ideal for developers who need flexibility.
To get started, download the JetBrains Toolbox application from the official website:

Once you visit the page, click the Download button to save the installer. After the download is complete, open the installer file and follow the on-screen instructions to install the Toolbox app on your Windows system.
With the Toolbox installed, you’ll have quick access to all JetBrains products, making it simple to install RubyMine and keep it updated as new versions are released.
Discover the Fast Performance of Windows VPS!
For optimal performance, consider Ultahost’s reliable Windows hosting, which offers a high-speed and stable environment.
Once you’ve installed the JetBrains Toolbox app, you’re ready to install RubyMine. The Toolbox app streamlines the process, ensuring you get the latest version of RubyMine with just a few clicks.
You need to open the Toolbox app from your Start menu or desktop shortcut. When it opens, you’ll see a list of all JetBrains IDEs available for installation, along with updates for any IDEs you may already have installed.
Next, scroll through the list of available tools or use the search bar at the top to quickly find RubyMine. Once located, click on the install button to start the installation process:

The Toolbox app will download and install the IDE. The progress is displayed, and you can monitor the process within the app:

Once the installation is complete, a Start button will appear next to RubyMine in the Toolbox app. Click it to launch RubyMine for the first time. You can also access RubyMine directly from the Start menu or desktop shortcut if you opted to create one during setup:

When RubyMine opens for the first time, you’ll be prompted to configure your IDE. You can:

Before diving into the installation process, let’s explore some of the features that make RubyMine a preferred choice for Ruby developers.
RubyMine provides advanced code completion, real-time error detection, and navigation features. These tools help developers write cleaner, more efficient code by reducing the risk of errors and speeding up routine tasks.
Debugging in RubyMine is intuitive and effective. The IDE offers graphical debugging with breakpoints, watch expressions, and an interactive console, helping developers identify and resolve issues with ease.
If you have installed Git on Windows, RubyMine integrates seamlessly with Git and other version control systems (VCS), allowing developers to track changes, merge branches, and resolve conflicts directly within the IDE.
Testing is a critical part of development, and RubyMine supports popular testing frameworks like RSpec, Cucumber, and Test::Unit. You can run tests, view results, and debug failures without leaving the IDE.
RubyMine’s user interface can be tailored to your needs. Developers can switch between light and dark themes, adjust key bindings, and configure layouts to optimize their workflow.
The IDE includes tools for connecting and working with databases. You can browse tables, run queries, and manage data without needing external applications.
Learn also How to Install RubyMine on Ubuntu.
For the best performance, ensure your system meets the recommended hardware requirements. Consider disabling unused plugins and increasing the memory allocation for the IDE via the settings menu if working on large projects.
RubyMine supports customizable keyboard shortcuts. Learning these shortcuts can save significant time, especially for frequently used commands like running tests or navigating between files.
If you use RubyMine on multiple machines, the Toolbox app allows you to sync settings across devices, ensuring a consistent development experience.
RubyMine includes in-app tutorials and tips for beginners. These resources are especially helpful if you’re new to the IDE or want to explore advanced features.
RubyMine is a feature-rich IDE that simplifies Ruby and Rails development with tools like intelligent code assistance, debugging capabilities, and seamless integration with version control systems. Installing RubyMine on Windows is made easy with the JetBrains Toolbox app, a centralized tool that helps manage installations and updates for JetBrains products. By downloading the Toolbox app, you can quickly locate RubyMine, customize its installation settings, and ensure you have access to the latest version at all times.
Once installed, launching RubyMine and completing the initial setup is straightforward. You can configure the IDE to match your preferences, import existing settings, and install plugins to enhance its functionality. With this guide, you now have a clear understanding of how to download RubyMine Windows and get started with a productive development workflow.
Installing RubyMine on Windows can be a simple process for beginners. Upgrading to an Ultahost cheap VPS hosting provides a more streamlined and efficient solution which is the ideal environment for developers. This eliminates compatibility issues and simplifies the installation process.
RubyMine is an IDE designed for Ruby and Rails development, offering tools like code assistance, debugging, and testing frameworks.
Use the JetBrains Toolbox app to download and install RubyMine easily.
RubyMine requires a subscription, but a free 30-day trial is available for evaluation.
Yes, you can download RubyMine directly from the JetBrains website, but the Toolbox app simplifies installation and updates.
Yes, RubyMine integrates with Git and other version control systems, allowing you to manage repositories seamlessly.
RubyMine requires a Windows 10/11 system with at least 4 GB of RAM and 2.5 GB of storage, though 8 GB RAM is recommended for better performance.
Yes, RubyMine supports plugins to extend its functionality, which you can install from the built-in plugin marketplace.