
How to Install WinSCP in Windows
WinSCP is a popular free and open-source software for W...


WinGet, the Windows package manager, revolutionizes how you install and manage applications on your system. This innovative tool streamlines discovering, installing, and updating software, making it a game-changer for Windows users. By providing a centralized platform for managing applications, WinGet simplifies keeping your system up-to-date and organized. With Winget, you can easily search, install, and update software from a vast repository of packages, eliminating the need to search for individual installers or worry about compatibility issues.
Compared to traditional methods, WinGet offers unparalleled ease of use and efficiency, saving you time and effort. By utilizing WinGet’s capabilities, you can transform how you interact with your Windows system, making it more productive and efficient. In this article, we will guide you through installing WinGet on your Windows system, empowering you to harness its full potential.
In this tutorial, we’ll guide you on how to install WinGet Windows 10 on your system.
Step 1: Navigate to WinGet GitHub
To download WinGet Windows, Click on this link to access the official WinGet release page. This page lists all available Winget releases, both stable and pre-release versions:
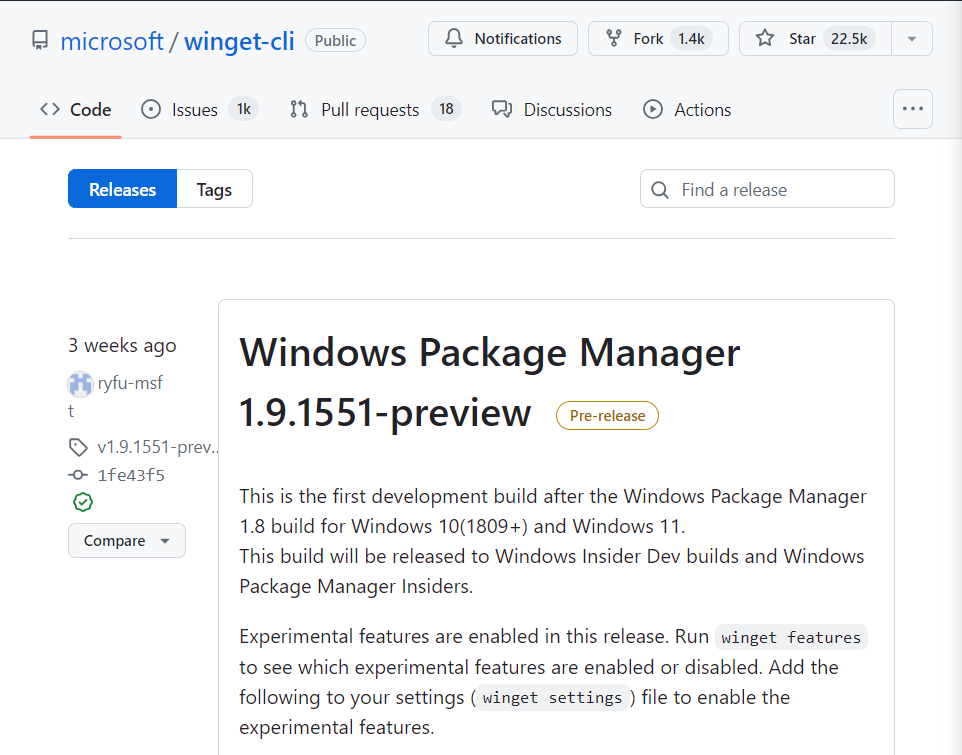
Each release comes with a set of downloadable files for different architectures.
Step 2: Download the WinGet MSIXBUNDLE
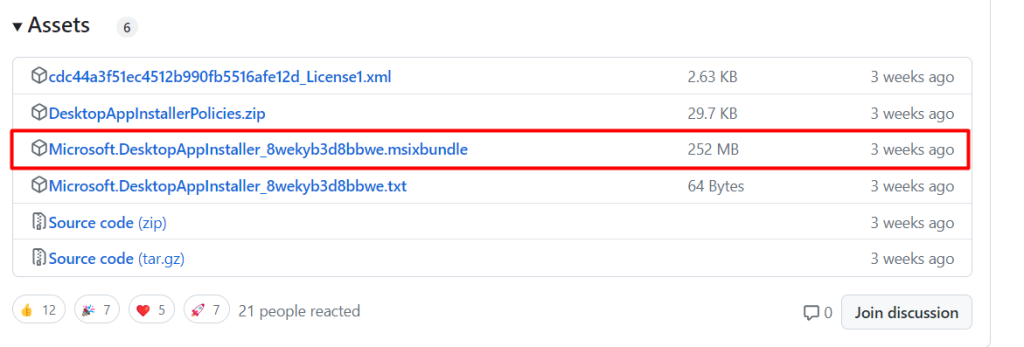
On the releases page, locate the latest stable release (unless you need a pre-release version). Under the “Assets” section, find the .msixbundle file that corresponds to your system’s architecture (most likely x64):
An MSIXBUNDLE (Microsoft Installer Package Bundle) is a file format used to package and distribute Windows applications. It’s a modern alternative to the traditional .msi or .exe installers and offers several advantages:
MSIXBUNDLE encapsulates all application files and dependencies within a single, self-contained package, ensuring a clean installation and minimizing potential conflicts with other software.
Installation, update, and removal operations are treated as single, atomic transactions. This means that if any part of the process fails, the system can be rolled back to its previous state, preventing partial installations.
The WinGet MSIXBUNDLE contains the necessary files to install or update the WinGet client on your system. By downloading and opening this file, you initiate the installation process managed by the App Installer, a built-in Windows component.
Explore the Blazing Fast Speed of Windows VPS!
With Ultahost, hosting a Windows VPS is now more straightforward and faster than ever. Enjoy ultra-fast SSD NVMe speeds without any interruptions or slowdowns.
Step 3: Updating App Installer
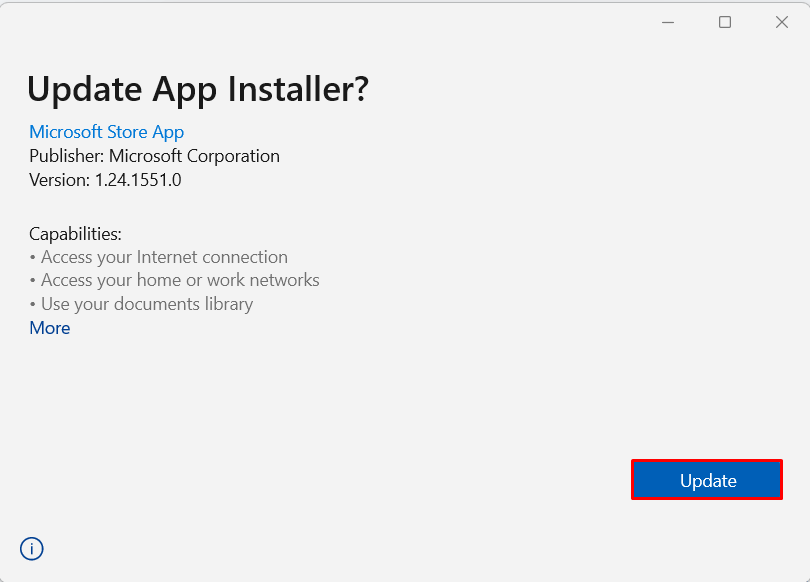
After downloading the msixbundle file, open it to initiate the installation process. You’ll be prompted to update the App Installer, which is a built-in Windows component responsible for managing app installations and updates. Click on the “Update” button to proceed.
By updating the App Installer, you’re ensuring that your system has the latest package management capabilities, which are required for Winget to function correctly. This step is crucial, as it lays the groundwork for Winget’s installation and future updates:
Step 4: Verifying Winget Installation
Once the App Installer update is complete, Winget will be installed or updated automatically. To verify that Winget has been installed successfully, open a new command prompt or PowerShell window and run the following command:
winget --version

If Winget has been installed correctly, you should see the version number displayed in the command output. This indicates that Winget is now available on your system, and you can start using it to manage your Windows applications.
Learn about How to Install Rust on Windows.
Method 2: Install winget via Microsoft Store
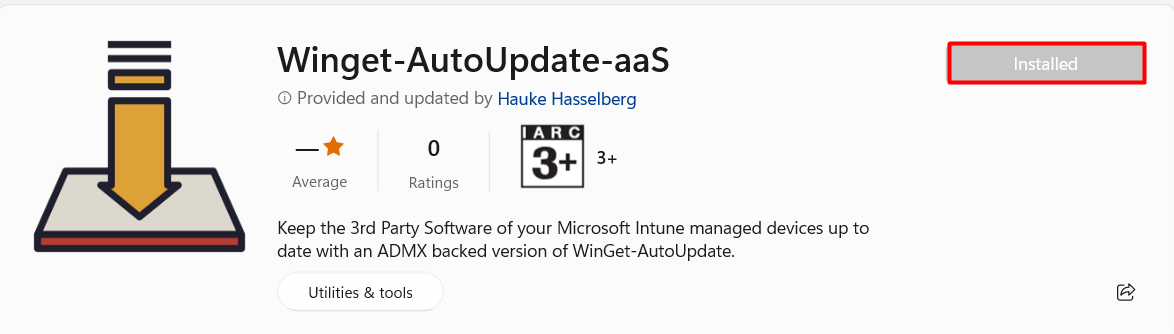
You can also install winget via accessing the Microsoft store. So first open the Microsoft store and then write winget on the search bar. There you will the app with the name Winget-AutoUpdate-aaS. After finding the application, you need to click on the Install button as shown below:
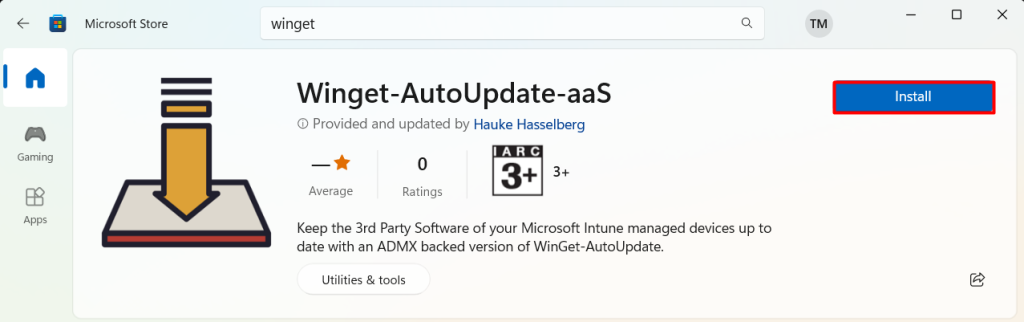
This will take some time to install and after that installed button will appear on the right side of the application to notify the successful completion:
To verify this you can run the below command on the command prompt:
winget
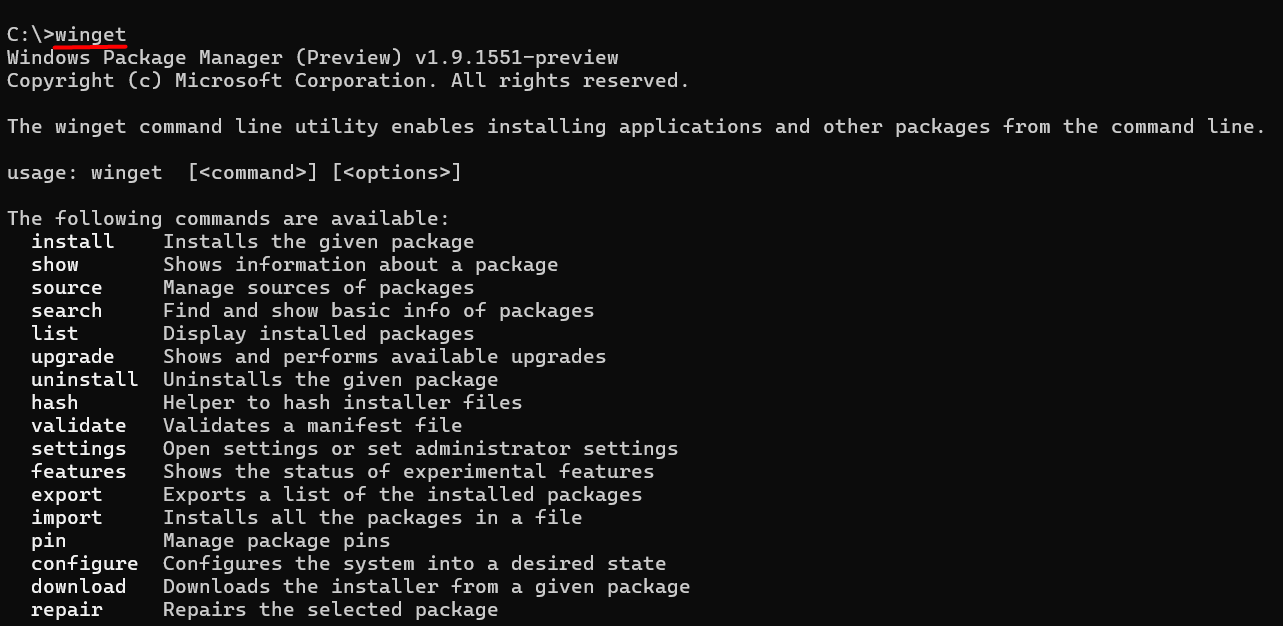
If you’re able to see a similar output, it means that winget package is working fine.
If you encounter any issues during the installation process, here are some troubleshooting tips:
Here are some common errors you may encounter during the installation process, along with their solutions:
Before diving into the installation process, let’s explore the advantages of using Winget:
Simplified Software Management
WinGet centralizes all your software management needs, allowing you to install, update, and uninstall applications with ease. No more navigating through multiple websites and dealing with individual installers.
Centralized Repository
WinGet draws from a vast repository of packages, ensuring access to a wide range of popular and niche applications. You can find and install almost any software you need directly from the command line.
Enhanced Security
WinGet uses a secure and trusted repository, ensuring that the software you install comes from verified sources is essential for security and reliability. This helps protect your system from malicious applications and vulnerabilities.
Automated Updates
WinGet automatically updates your installed applications, keeping your system up-to-date and patched against security threats. You can even schedule updates to occur at specific times, ensuring a smooth and efficient update process.
Powerful Command Line Interface
WinGet provides a powerful command-line interface, allowing you to manage your applications with precision and efficiency. You can perform complex tasks, such as bulk installations, updates, and removals, with just a few commands.
Streamlined Dependency Management
WinGet automatically handles dependencies, ensuring that all necessary components are installed correctly. This eliminates the need for manual dependency management, simplifying the installation process.
Improved User Experience
WinGet enhances the overall user experience by providing a consistent and user-friendly interface for managing software. This makes it easier for users of all skill levels to install and manage applications.
Enable WinGet Windows makes it easy to manage your Windows applications. You can search, install, and update software from a single platform, eliminating the need to search for individual installers or worry about compatibility issues. By following the simple installation steps outlined in this article, you can start using WinGet to keep your system up-to-date and organized.
With WinGet, you can easily manage your software, improve your system’s security, and enhance your overall user experience. It’s a powerful tool that can help you get the most out of your Windows system. So why wait? Install WinGet today and start enjoying more efficient and improved productivity in your skills.
Having completed these steps, you have successfully installed WinGet on your Windows system. You are now prepared to develop robust and powerful applications with WinGet. Remember, for optimal performance and seamless development, consider using Ultahost Windows hosting. You get reliable and high-speed hosting tailored to your needs.
WinGet, or Windows Package Manager, is a tool designed by Microsoft to streamline the process of installing, updating, and managing software on Windows operating systems. It works similarly to package managers on Linux and macOS, providing a command-line interface for software management.
To check if WinGet is installed:
WinGet is officially supported on Windows 10 (version 1809 and later) and Windows 11. It is not officially supported on older versions of Windows like Windows 7 or Windows 8/8.1.
Yes, administrative privileges are typically required to install WinGet because it is part of the App Installer package, which requires elevation to install system-wide.
WinGet updates are typically handled through the Microsoft Store:
Alternatively, you can download the latest release from the GitHub releases page and manually update it