
How to Install Kubernetes on Ubuntu 22.04
Kubernetes is an open-source container orchestration sy...


kubectl exec is one of the most important Kubernetes administration commands: it allows you to run one-off commands inside running containers. This is especially useful for validating config, logs, env vars, or running one-time tasks, without needing to tweak your container image. The kubectl exec offers direct, real-time access to a pod’s runtime environment, contributing to smoother operations and even quicker issue resolution.
If you are troubleshooting your applications, checking on your configuration, or performing maintenance tasks, this tutorial will explore how to use kubectl exec efficiently for your Kubernetes operations.
The kubectl exec executes a command on a running Kubernetes pod. It’s one of the best tools for working with your workloads in a real-time way. It provides admin/debug capabilities and could serve as an interface to the environment where such applications as curl or ping can be executed. It can also run the application’s command-line interface (like a database shell or a management command of a framework) or view and edit files directly in the container.
Master kubectl exec With Our NVMe VPS!
Use kubectl exec to manage your Kubernetes pods and power your workflow with UltaHost’s blazing-fast NVMe VPS for smooth, reliable execution.
To execute the kubectl exec command on Linux, first install kubectl, the Kubernetes command-line tool. Since kubectl exec is a built-in command, having kubectl installed makes it immediately available.
kubectl exec [OPTIONS] POD_NAME -- COMMAND [args...]
Here, each component of the kubectl exec command is explained:
kubectl exec is a kind of Docker exec command, but customized to Kubernetes setups. This tool gives you direct access to all your containerized applications and is therefore invaluable when it comes to troubleshooting and administration. Let’s explore below examples:
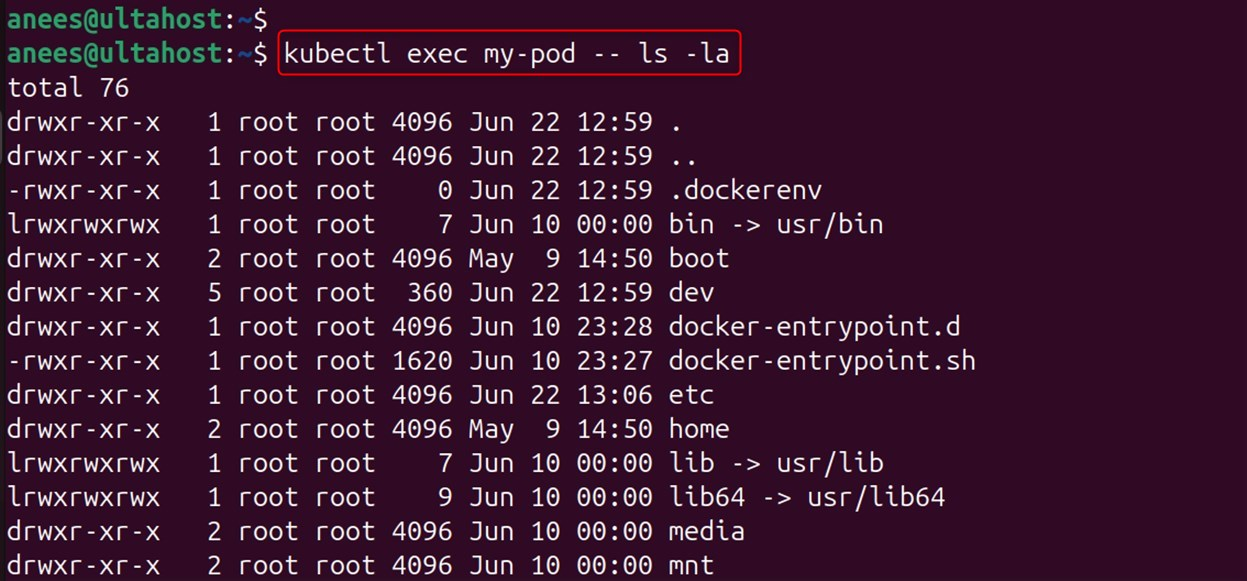
To show a list of all the files in the pod container’s current directory, as well as include some more detailed information, use the ls -la options. The information includes permissions, owner, sizes, and modification date.
Let’s run a simple command in a pod named my-pod:
kubectl exec my-pod -- ls -la
To verify the current directory, use the pwd utility:
kubectl exec my-pod -- pwd

Note: Double dash (–) is compulsory; it is used to separate arguments for kubectl and the command you want to run inside the container. Otherwise, kubectl may treat the command flags as its own flags.
Read also How to Deploy Kafka on Kubernetes
If you want to get an interactive shell to a pod, use the -it option by mentioning the /bin/bash:
kubectl exec -it my-pod -- /bin/bash

Here, -i flag keeps stdin open and -t allocates a pseudo-TTY allowing an interactive shell. With this combination, you can execute multiple commands, change directories, and work interactively within the container context.
A lot of minimal container images (such as Alpine Linux) don’t include bash to keep the image size down. Alpine containers use/bin/sh, primarily the ash shell, giving it most of the shell features. For Alpine Linux-based containers, use /bin/sh:
kubectl exec -it my-pod -- /bin/sh

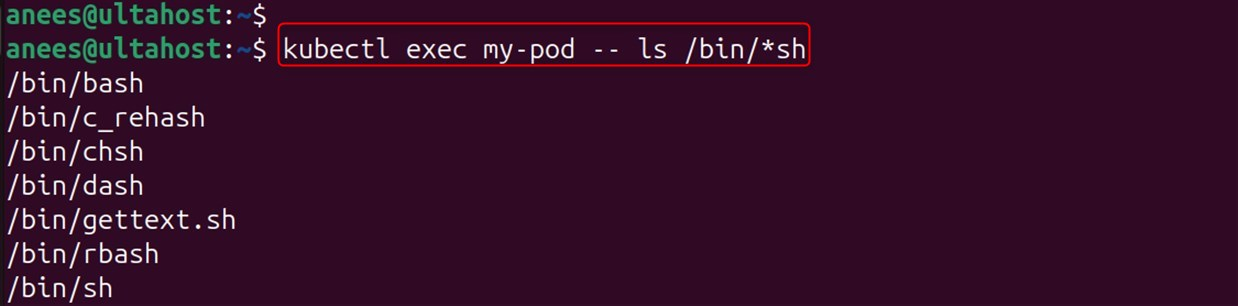
If you’re not sure which shell is installed, you can verify with:
kubectl exec my-pod -- ls -la /bin/*sh
Multi-container pods are common in microservices deployments, where you also might have a primary application container and sidecar containers (such as logging and proxy services, or monitoring utilities). If a pod has more than one container, you can specify which container you want to connect to.
Here, utilize the multi-container-pod as the container name:
kubectl exec -it my-pod -c container-name -- /bin/bash

Note: By default, kubectl references the first container in a pod if the container name is not specified, which may not be the container you want to debug.
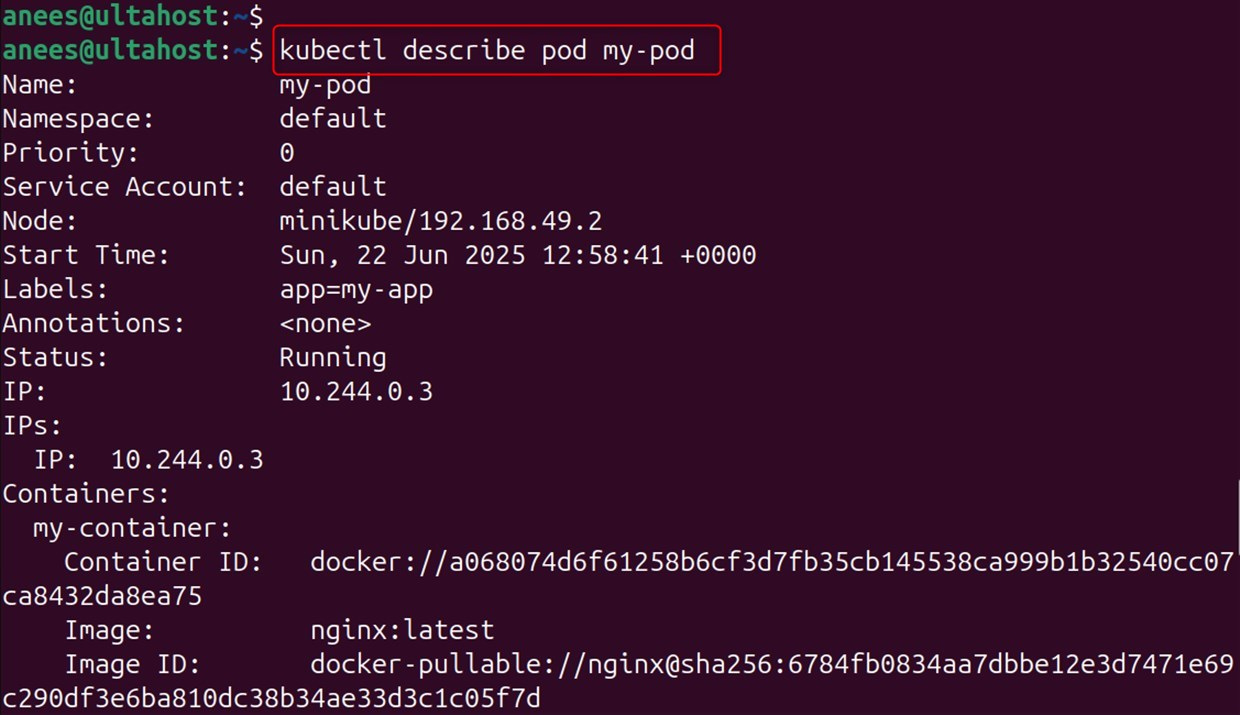
You can also list all containers in a pod first. Here, my-pod is the name of the pod where the target container is running:
kubectl describe pod my-pod
In the real world, resources are commonly grouped into distinct namespaces to isolate environments (dev, staging, prod) or teams. This division offers isolation and aids in resource management and access control.
Let’s target pods in various namespaces. Here, use the default namespaces in place of specific_namespaces:
kubectl exec -it my-pod -n specific_namespaces -- /bin/bash

Environment variables are one of the main ways we configure containers. They encompass everything from your database connection strings to feature flags and logging levels.
Let’s run commands with certain environment variables:
kubectl exec my-pod -- env
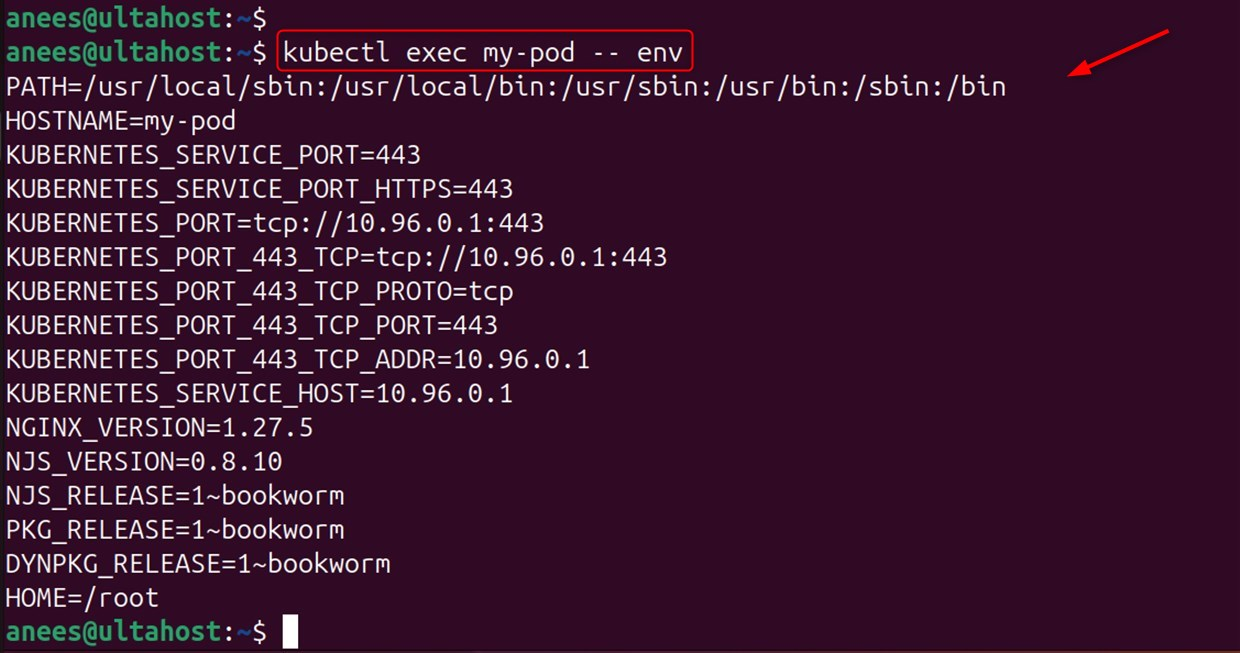
This shows all the environment variables in the container, and that is important for troubleshooting configuration problems.
IO operations are at the heart of debugging and maintenance purposes. They are useful for investigating a container’s file system, running processes, and config files, and for inspecting and diagnosing storage issues. You can copy as well as manipulate files inside containers:
Let’s view the contents of file /etc/hostname:
kubectl exec my-pod -- cat /etc/hostname

If users want to create a file, use the touch command by mentioning the filename:
kubectl exec my-pod -- touch /tmp/testfile

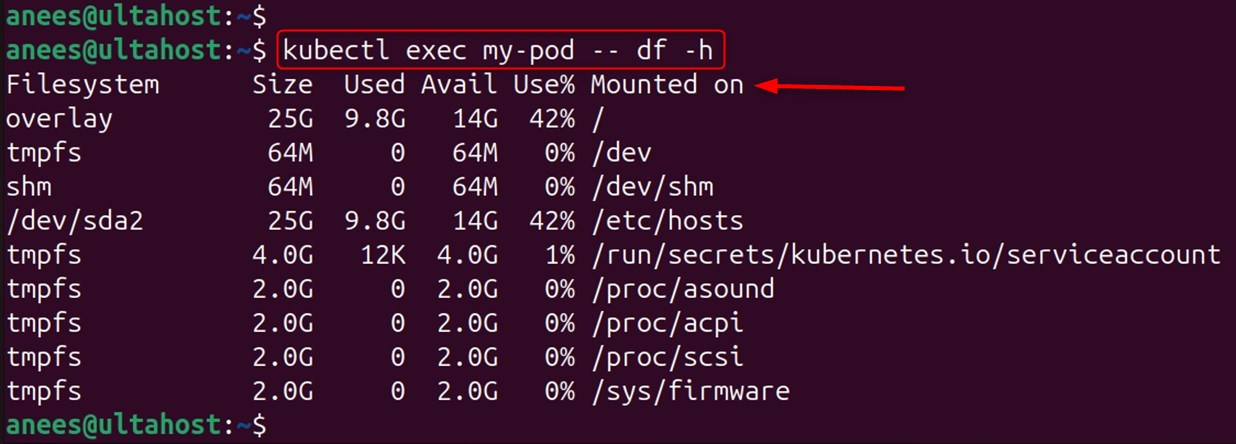
To check the usage of the disk, utilize the df -h utility:
kubectl exec my-pod -- df -h
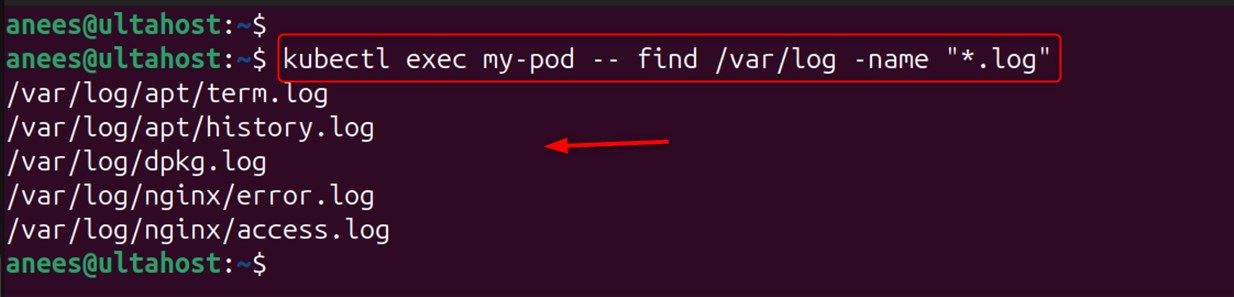
For finding specific files having a similar type, mention the name of the extension, such as .log, as below:
kubectl exec my-pod -- find /var/log -name "*.log"
Network headaches are one of the most typical problems for Kubernetes. The network policies could be blocking service traffic, or a service could be misconfigured. Now, we perform network troubleshooting inside containers:
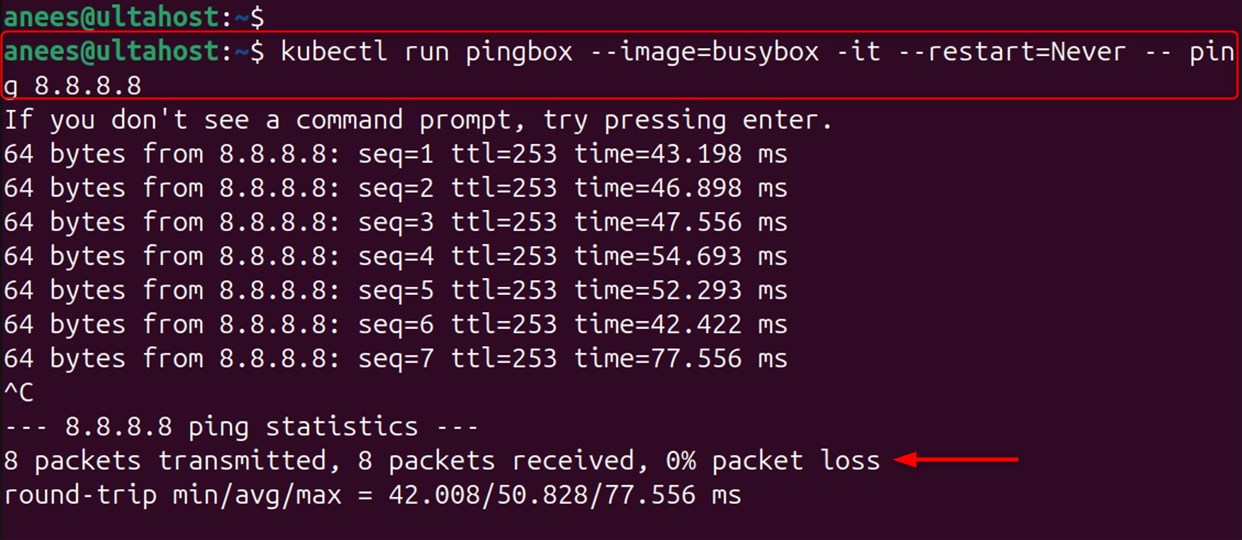
First, let’s check the network connectivity of the Google DNS server 8.8.8.8 using the ping utility:
kubectl run pingbox --image=busybox -it --restart=Never -- ping 8.8.8.8
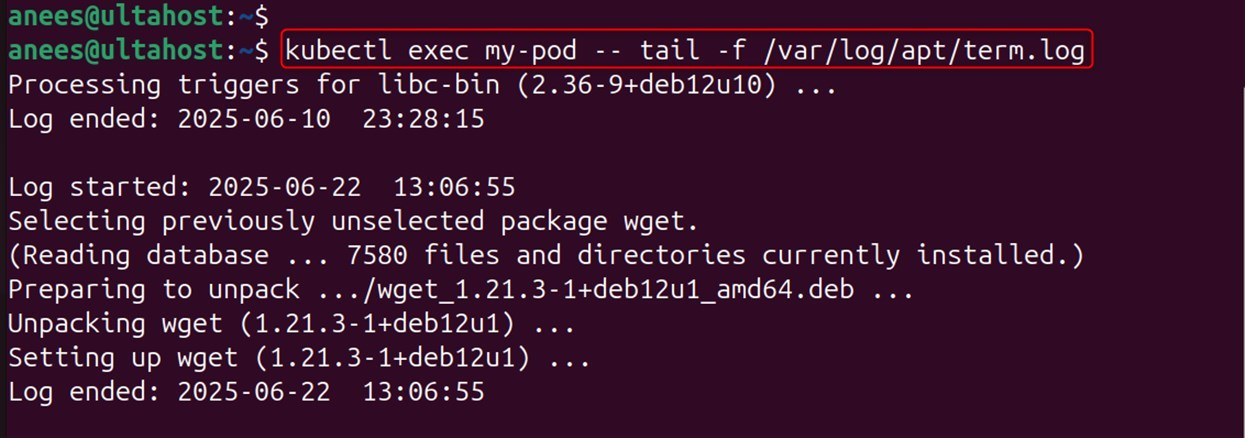
Checking logs is essential for studying the application work, searching for errors, or tracing system events. kubectl logs only shows container stdout/stderr, but often applications write to specific log files that you can only access via exec. Now, look at the logs and config files.
Let’s view application logs:
kubectl exec my-pod -- tail -f /var/log/apt/term.log
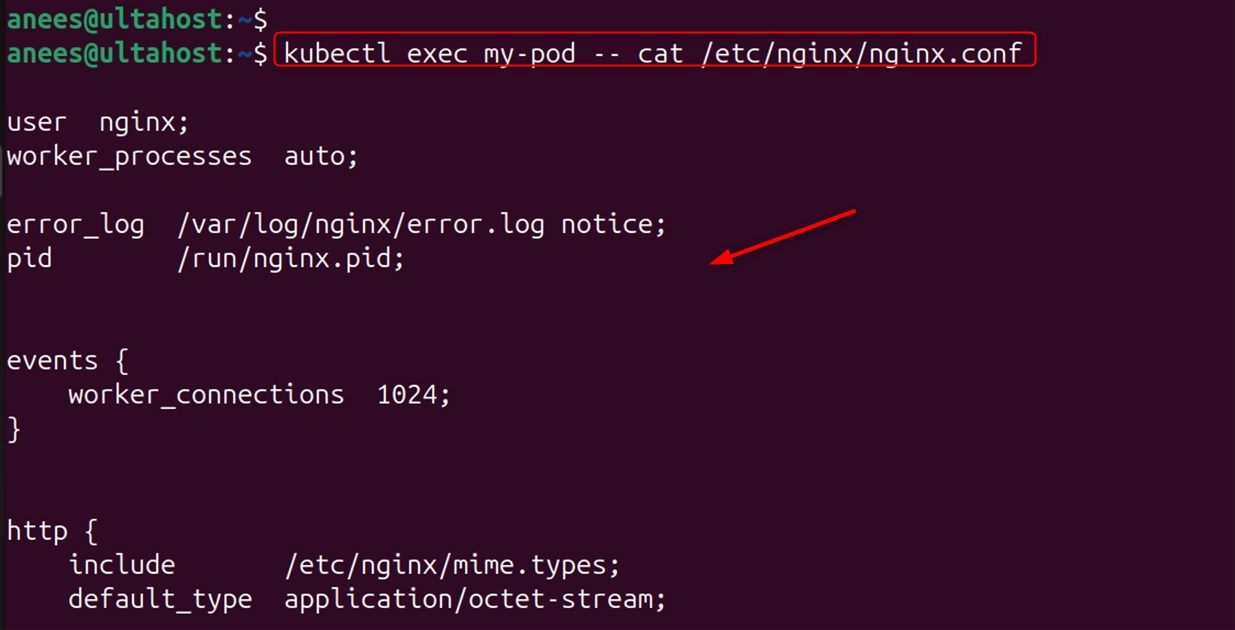
For instance, users can also check configuration files by specifying the .conf filename:
kubectl exec my-pod -- cat /etc/nginx/nginx.conf
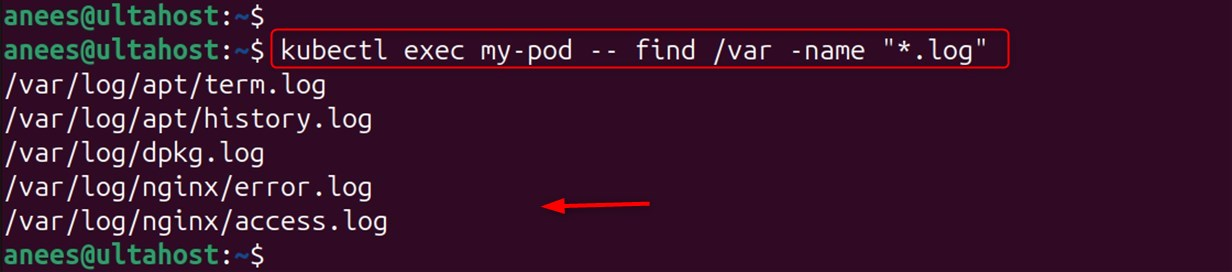
You can also search log patterns:
kubectl exec my-pod -- find /var -name "*.log"
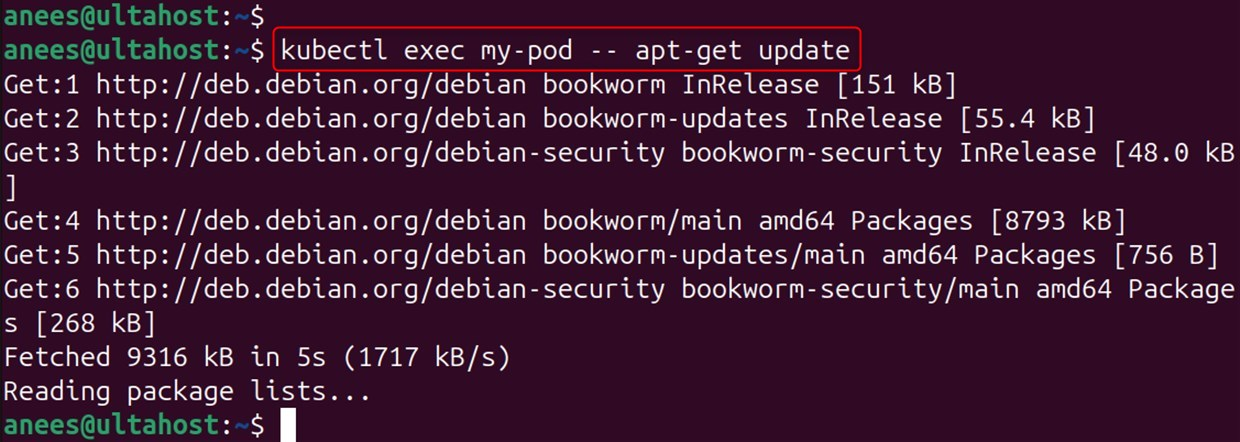
Images are normally stripped down in size and security, so that you often do not have important debugging tools. Yep, installing packages temporarily to diagnose a problem is OK, but it’s best to avoid it, and only on non-production systems if you can. Now, update and install packages for debugging purposes:
Let’s update package lists (Debian/Ubuntu):
kubectl exec my-pod -- apt-get update
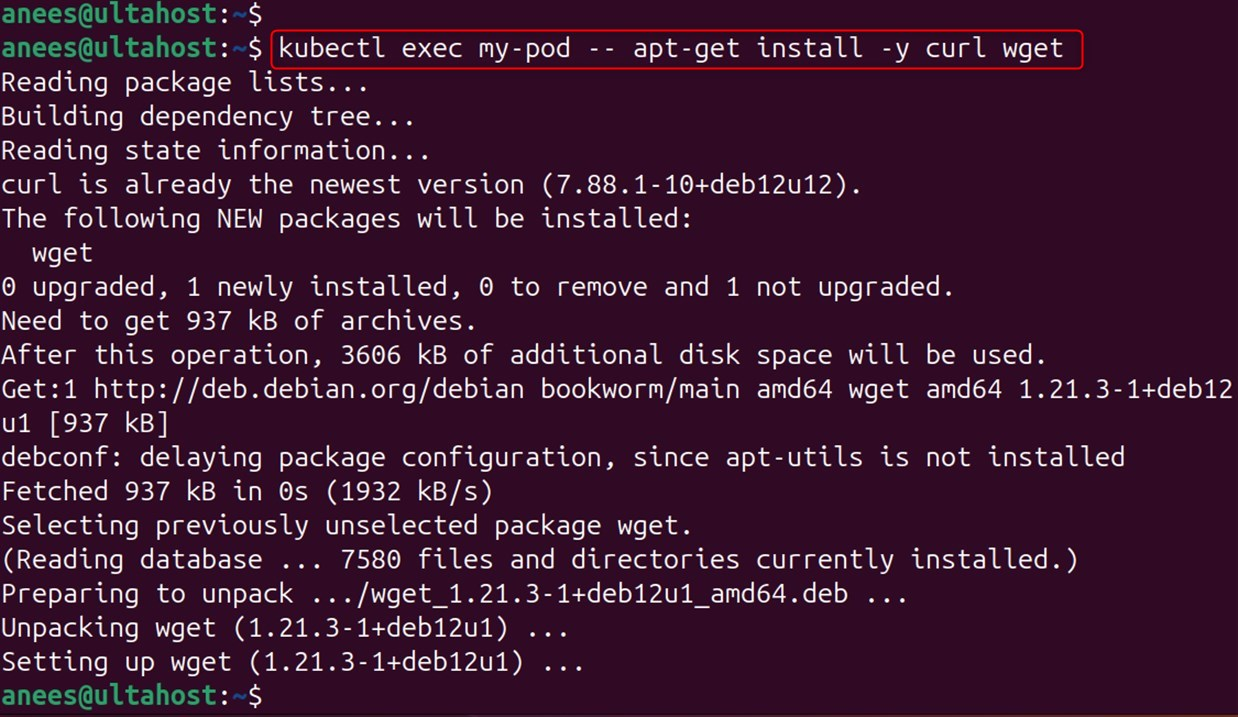
Users can also install packages for debugging tools:
kubectl exec my-pod -- apt-get install -y curl wget
Users can verify and update application configurations. Let’s reload configurations:
kubectl exec nginx-pod -- nginx -s reload

Let’s validate configuration syntax:
kubectl exec nginx-pod -- nginx -t

File/directory I/O is the core functionality for application debugging/maintenance/configuration. These operations help you to structure files, apply the right permissions, and find key resources inside containers. Now, we perform file system operations:
Let’s create directories by specifying a name such as /tmp/test:
kubectl exec my-pod -- mkdir -p /tmp/test

You can also change file permissions by mentioning the permission type and file name with the chmod utility:
kubectl exec my-pod -- chmod 755 /etc/nginx/nginx.conf

To search out the files, users can mention the file type, such as .log, as below:
kubectl exec my-pod -- find /app -name "*.log"
kubectl exec is an invaluable resource for any Kubernetes admin or developer. From the quick fix of any container issue, we need a master in the kubectl exec command. It will greatly improve your management of containerized applications. With the examples and methods discussed in this tutorial, you’re ready to use kubectl exec for effective management of your Kubernetes environment. Begin using these commands in a development environment, then work them into your Kubernetes workflow over time.
We hope this guide has helped you understand how to use the exec command in Kubernetes. Consider Ultahost’s Linux VPS hosting, which provides maximum flexibility and control. Ultahost handles all administrative tasks to ensure your servers operate smoothly, efficiently, and with reliable uptime. Buy a Linux VPS now and take your online presence to the next level!
kubectl exec is intended for use in a Kubernetes environment and operates on pods, whereas docker exec is for Docker containers. kubectl exec adds more capabilities such as namespace scoping, multi-container pods, and also works seamlessly with Kubernetes RBAC.
Yes, you can kubectl exec pods in any namespace you have access to. Let’s use the -n or –namespace flag to provide the namespace to deploy to. You have access based on your Kubernetes RBAC permission level.
Pass the -c or –container flag with the container name with “kubectl exec -it my-pod -c container-name — /bin/bash” command. You can view all containers inside one pod by using kubectl describe pod pod-name.
This failure generally means that the command or shell doesn’t exist in the container. Replace /bin/bash with /bin/sh or check the command otherwise by executing kubectl exec pod-name — which bash.
No, the kubectl exec is only accepted on a pod that is running. The pod has to be started and listening for connections. Verify that the pod status is ok with kubectl get pod pod-name before exec.
You can type files on the fly using kubectl exec with the command “kubectl exec my-pod – bash -c ‘cat > /tmp/file.txt << EOF” file content here EOF’. Or using tee: echo ”content” | kubectl exec -i my-pod — tee /tmp/file.txt
Yes, you can use the –timeout flag to set the maximum running time: kubectl exec my-pod –timeout=30s — long-running-command. This ensures that commands do not run forever and eat up resources.