After buying a domain name for a business or organization, one of the first things most people do next is set up a custom email address.
Sending emails from an address that includes your website’s domain name makes you look far more credible and professional when compared with emailing people from [email protected]. There are 2 main options to consider:
Enable Gmail to Work with Your Custom Domain Email
This option allows you to enjoy all the great features that come with a regular Gmail account while sending cold emails from your custom domain email address for free. Before you can do this, you’ll need to first have email hosting from a provider that allows email forwarding. Once you’ve done that, you’ll sign up with Gmail, forward the emails to that account, and enable Gmail to send as your custom domain email address.
You can then immediately start using your new, professional email address for your startup, blog, business website, or nonprofit. Without a doubt, this is your best option for setting up a custom domain email address for free. This process may sound complicated, but it’s really not, and I will walk you through it below, step-by-step.
What if you don’t have an email hosting plan? In this case, you can move on to option 2 below, which will cost you a few dollars each month for email hosting, or you can transfer your domain to a web hosting provider that offers free email hosting and lets you forward your emails. I recommend you strongly in our web hosting (UltaHost) since we’re inexpensive and make it really easy to transfer your domain to us from another provider. Once you’ve done this, you can move on to setting up your custom domain with Gmail as described below.
Sign Up for Google Workspace (Formerly G Suite)
In addition to a custom email address with Gmail that matches your website’s domain name, you’ll have tons of extra features that make it easier to collaborate, store documents, share files, and even add or remove user accounts for other people on your team that use your domain name in their email addresses, but sure the first option will save you some money.
One last note — if you’re a registered nonprofit, you can get Google Workspace at a discounted rate, or even for free through Google for Nonprofits. Regardless of whether you’re nonprofit or for-profit, it’s best to take the long-term view and sign up to get all of Google’s business productivity tools, especially given that can save a few extra dollars if when sign up with the promo codes. If you want to switch later, it will be a pain in the butt to transfer all your emails to Google Workspace. But if you still want a quick fix for the time being, here’s a quick workaround to use Gmail with your own, custom domain email for free.
Basically, you’ll just forward all the mail from [email protected] to a Gmail account, and change a setting so outgoing mail says [email protected] too. That’s it! So, let’s jump right in.
Create A Gmail Account
You probably already have a personal Gmail account, and you could use it for your custom email, but just like finances, it’s best to keep business and personal separate. It will make things a lot easier down the road if you upgrade to Google Workspace or Google for Nonprofits.
Here’s how to make the account:
- Create a Gmail account here and pick a new email address. [email protected] usually works well.
- Follow the rest of the steps to verify your phone number, create your account, and sign in.
Set up your Custom Email Address
Next, you’ll need to register your custom domain with a registrar that offers email forwarding.
If you haven’t registered your domain already, you can sign up with UlaHost to get a domain name, email hosting, and web hosting all for just a couple of bucks a month. You can even use this tool to see if your domain idea is available:
Why do we recommend UltaHost?
Well, if you’re looking for a professional email, you’ll probably want a website to go with it. UltaHost includes a free domain name if you sign up for web hosting, and they’re pretty much the gold standard when it comes to web hosts.
we have a money-back guarantee and pretty stellar support, so you can easily change your mind later.
Now you can finally get started with setting up your Gmail with a custom domain email address. First things first, you’ll need to set up your custom email address i.e [email protected].
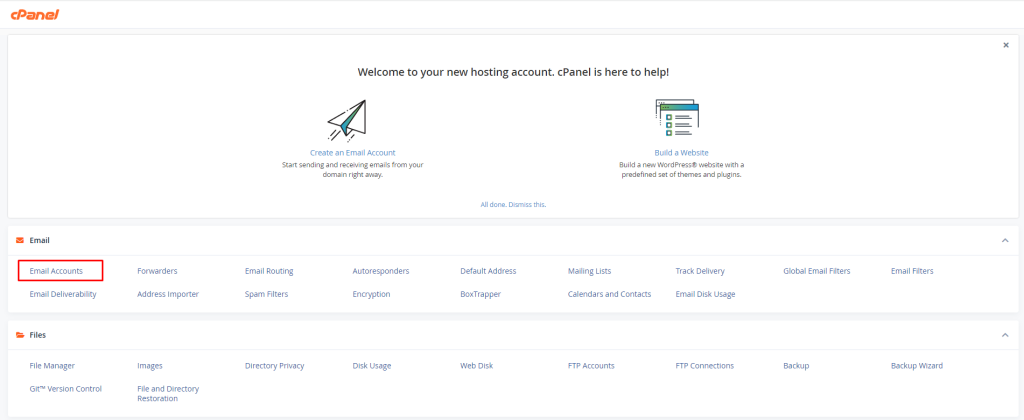
First of all, go to the cPanel of your website hosting to prepare your email account. Here, scroll down to the Email section and click on Email Accounts.
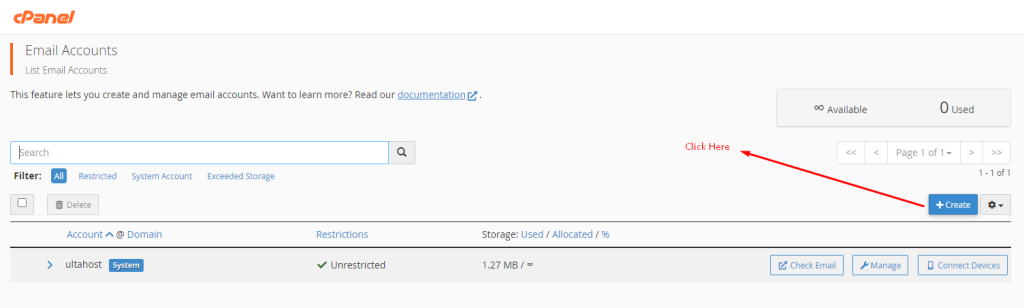
On this page, all the Email accounts currently in use are going to be listed. If you want to manage yours or add another email address in the future, you can do it from here. For now, just click on the ‘Create’ button.
Now you can just fill in the Username and Password fields with the one you want. Remember to safely store these credentials, because they’re going to be very important in the future.
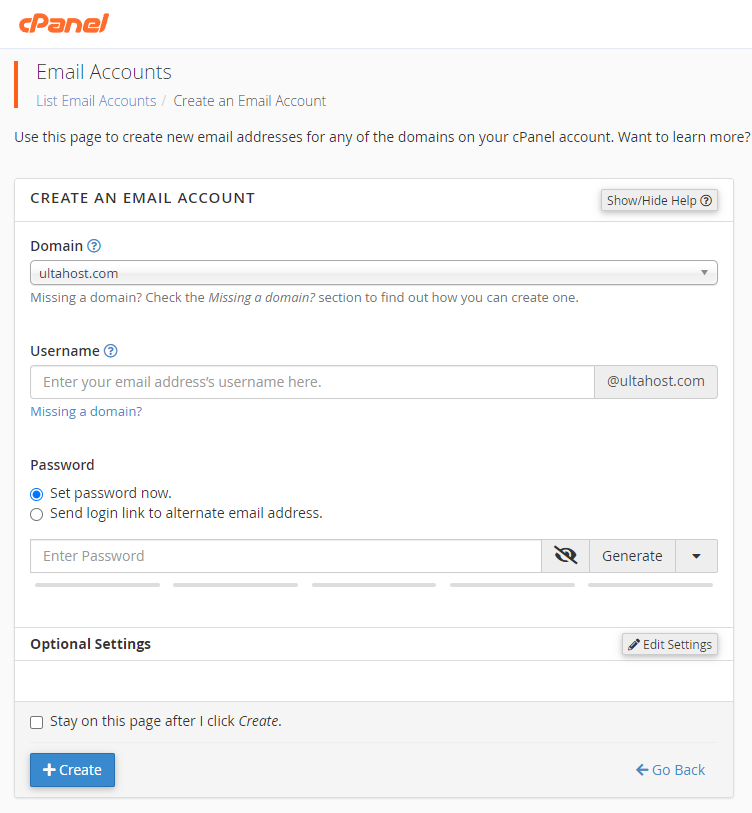
After that, scroll down and set the appropriate Storage Space for the email. You can also choose a few other settings according to your needs here. Once you’re done, just click on the ‘Create’ button and your domain name email is ready.
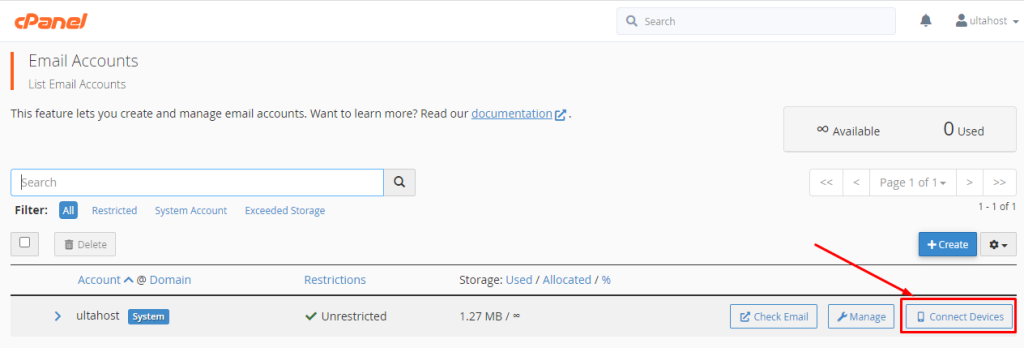
And there you go! Your custom email is ready to go. Before moving on to the next step, you’ll need to check specific information that’ll come in handy later. On your Email Accounts page, you should be able to see your new mail listed. Here, click on Connect Devices.
On this new page, scroll down to the ‘Mail Client Manual Settings’ section and note the information right below it.
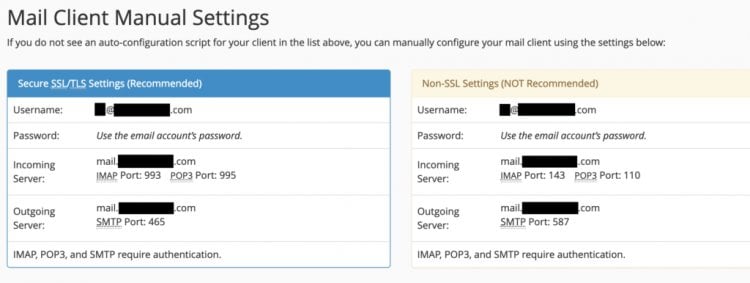
In fact, it’s best to keep this open because you’ll need to consult this info multiple times later.
Connect your Account to Gmail
Now you’re ready to go ahead and actually use Gmail with a custom domain. To do so, we’re basically going to configure Gmail to send and receive an email for your custom email from earlier.
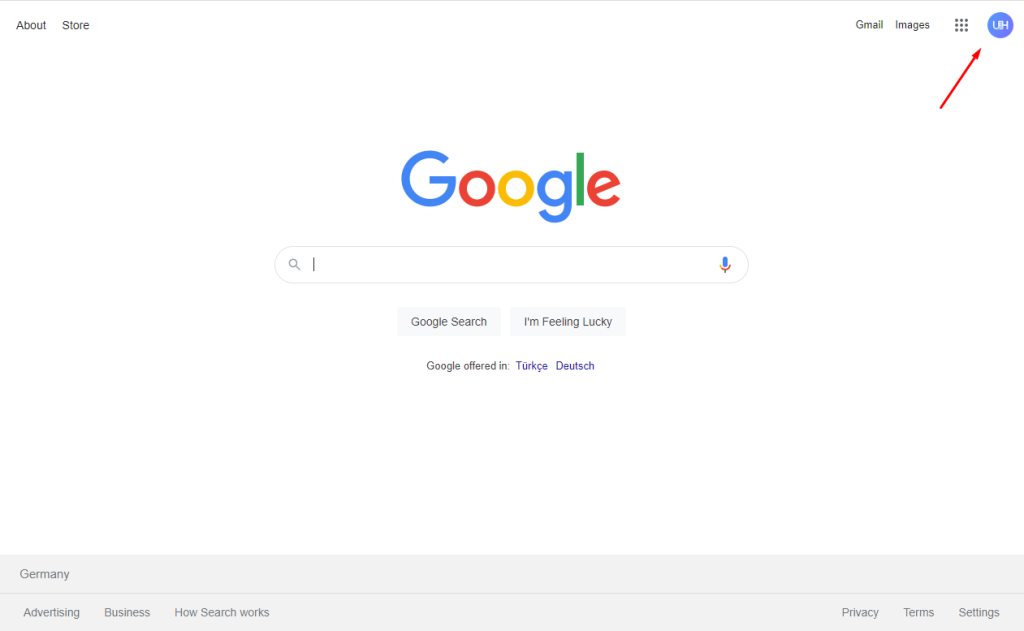
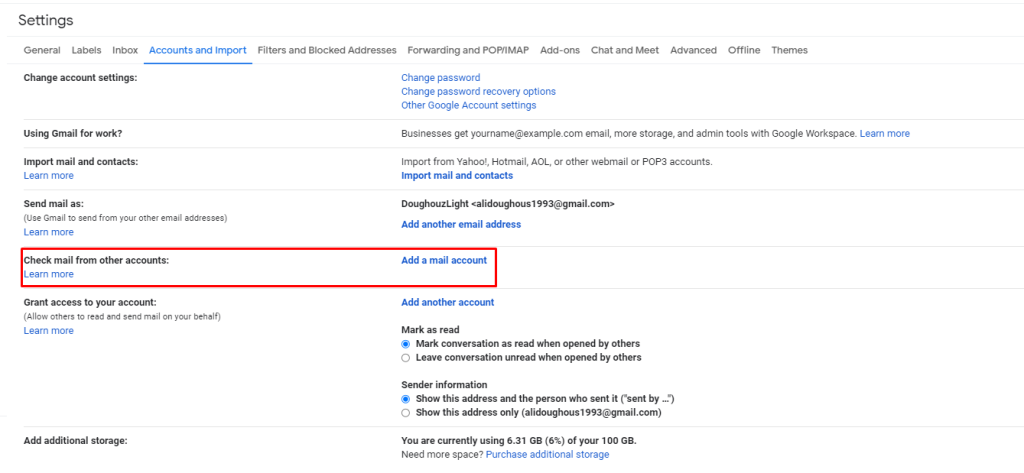
First, log in to the Google account that you have and click on the Cog icon in the top right and go to Settings. Now, just click on the ‘Accounts and Import ‘tab at the top.
After that is done, scroll down and look for the ‘Check mail from other accounts’ section. Here, click on ‘Add a mail account ‘. We’ll now enable forwarding from your custom mail address to your Gmail.
Doing so will make a new window pop up. Here, just enter the custom mail from earlier in the ‘Email address’ field and click on Next. Then click on Next once more on the new page that appears.

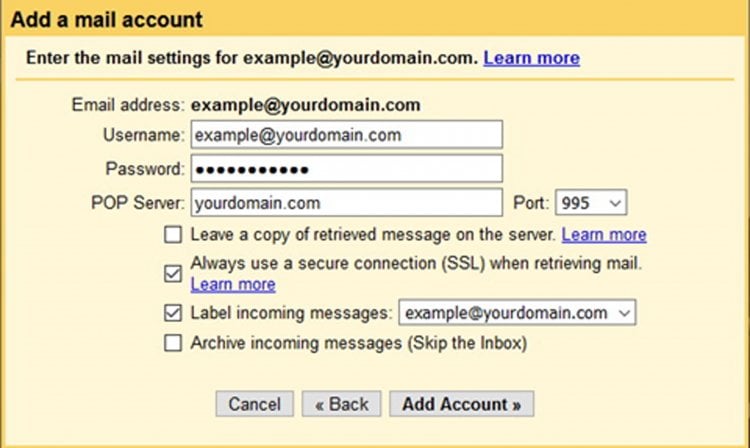
Now, this is where the earlier information from Mail Client Manual Settings will be used. In the Username field, just enter the username provided there. Just enter the Password of your mail below. Under POP Server, enter the data from the Incoming Server information field.
For the Port, you can just use the number under the POP3 Port field. Also, remember to check the ‘Always use a secure connection (SSL) when retrieving mail‘ option. Finally, click on Add Account.
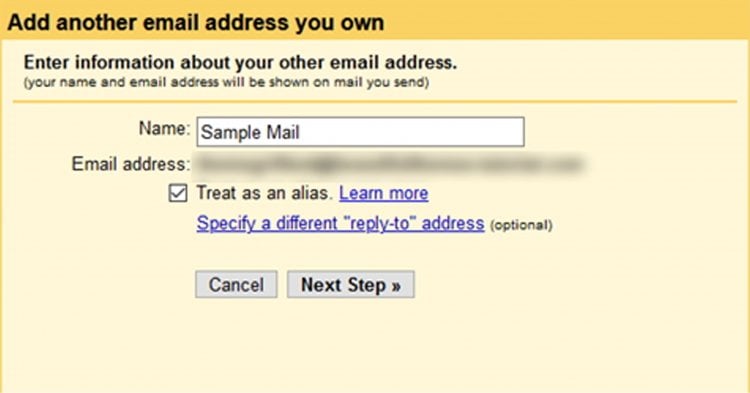
After that, just click on Next to keep going and fill in the Name field of the new page. Once you do that, click on Next Step.
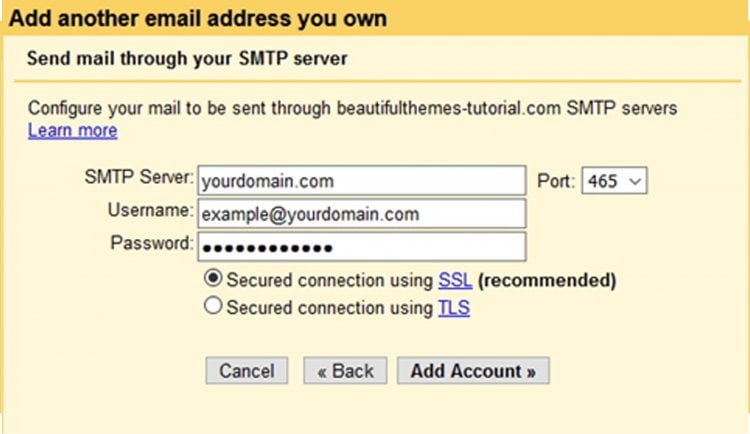
In the SMTP Server option, just enter the information under the Outgoing Server field that you got earlier. For the Port, enter the number beside the SMTP Port field. After that, fill in the Username and Password like before. Now, just click on Add Account.
This will send a confirmation email to your custom email address. You can close the window and move on to confirming your email now.
Confirm your Email
Go back to the settings>Accounts and Import page on your Gmail. Navigate to the ‘Check mail from other accounts section, where your custom domain should be listed. Here, click on Check mail now.
Now go back to your inbox where you can find a new email. To finish things up, open the email and open the confirmation link to open a new page. Finally, click on the Confirm button there.
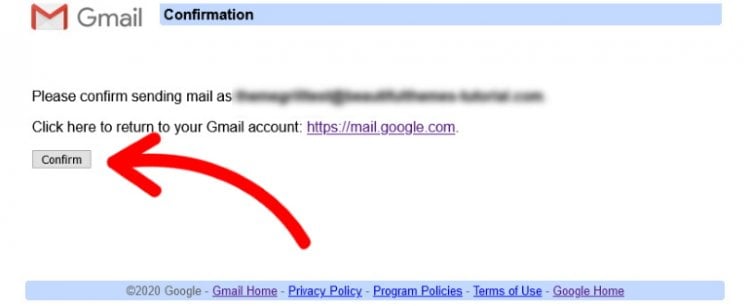
And that’s all there is to it. You can now use Gmail for sending and receiving emails from your custom domain! Of course, a premium alternative to this is to simply purchase a Google Suite account.
And that’s it! You now have Gmail with your own domain for free!
If you enjoyed this article, then you’ll love UltaHost hosting platform. Get 24/7 support from our support team. Our powered infrastructure focuses on auto-scaling, performance, and security. Let us show you the difference! Check out our plans!