How to Install Yarn on MacOS
Yarn, a package manager for JavaScript created by the e...
XCode is Apple’s integrated development environment (IDE) for macOS, iOS, watchOS, and tvOS app development. If you’re writing on a Mac, XCode is a must-have application that supports programming languages like Swift and Objective C.
XCode includes a source code editor, debugger, performance tools, and version control. In this post, we will go over the processes for installing XCode on your macOS system.
Before installing XCode, make sure your Mac system matches the following requirements:
Install XCode on Our Macintosh VPS Hosting!
UltaHost Mac VPS Hosting is one of the quickest, secure, and affordable Macintosh hosting. Connect to a MacOS VPS from any device. Start your Mac hosting today!
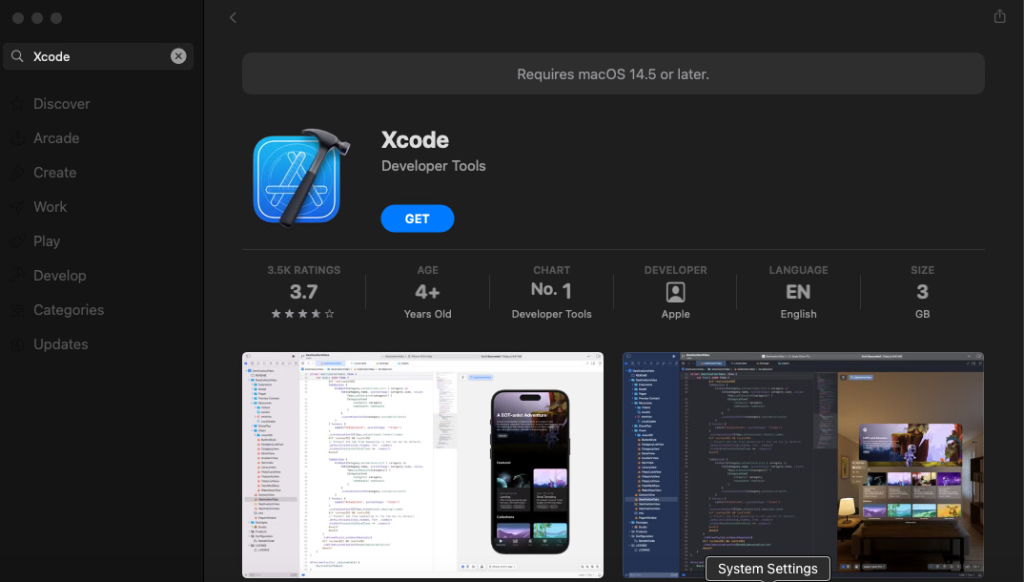
First, run your MacOS server on the Windows operating system. Here’s a step-by-step guide on how to download XCode through the App Store:
1. Launch the App Store application on your Mac. You can find it in your Applications folder or by searching for “App Store” in Spotlight.
2. In the search bar at the top-right corner, type “XCode”.
3. Click on the XCode application from the search results.

4. Click the “Get” button and then the “Install” button that appears. Enter your Apple ID credentials if prompted. The download and installation process may take some time depending on your internet speed.
Sometimes, you may need XCode Command Line Tools for tasks like homebrew installations or other development utilities. The following steps show how to install these tools:
1. Launch the Terminal application. You can find Terminal in the Utilities folder within your Applications folder or by searching for “Terminal” in Spotlight.
2. Type the following command and press Enter:
xcode-select --install
3. A pop-up window will appear, asking if you want to install the tools.
4. Click “Install” and follow the prompts to complete the installation.
After installing XCode, confirm everything is working correctly with these steps:
1. Open your Applications folder and double-click the XCode icon to launch it.
2. The first time you open XCode, you may need to agree to the terms and conditions and complete some initial setup steps.
3. To ensure XCode is correctly installed, you can check the version by opening Terminal and typing:
xcode-select -p
This command should return a path if XCode is correctly installed. You can also check the version number with:
xcodebuild -version
Apple frequently updates XCode with new features and bug fixes. Here’s how to keep it up to date:
1. Launch the App Store application and go to the “Updates” tab.
2. Look for XCode in the list of updates. If an update is available, click the “Update” button next to it.
3. Consider enabling automatic updates to ensure you always have the latest version. This can be done in the App Store Preferences.
With XCode installed, you are ready to start developing applications. Here are a few basic things you can do:
1. Open XCode and go to “File” then “New” then “Project” to set up a new project.
2. XCode includes Interface Builder, a GUI for designing your app’s user interface with drag-and-drop ease.
3. Start coding in Swift or Objective-C. XCode comes with code completion features to speed up your development process.
4. Use the built-in simulator to test how your app runs on different devices and iOS versions.
5. Utilize XCode’s powerful debugging tools to identify and fix bugs in your code.
Learn about How to Install Python on MacOS.
Here are a few common issues you might encounter while installing XCode and how to resolve them:
Installing XCode on macOS is a simple process that provides you with a powerful set of tools for developing applications across Apple’s ecosystem. By following the steps outlined above, you can start your journey in iOS development or enhance your existing skills.
While installing XCode on macOS is straightforward, managing dependencies and ensuring compatibility across different server environments can be technical. Upgrading to Ultahost’s cheap VDS server plan empowers you with a robust solution that helps you to install with the latest package managers and repositories, simplifying XCode installation and updates.
Xcode is Apple’s IDE for creating apps for iOS, macOS, watchOS, and tvOS.
You can download Xcode from the Mac App Store or Apple’s developer website.
Yes, Xcode is free to download and use for app development.
Xcode requires macOS and works best on the latest version of macOS.
Xcode requires about 40GB of free disk space for installation and operation.
No, Xcode can only be installed on macOS.
Yes, an Apple ID is required to download Xcode from the Mac App Store.