
How to Install PrestaShop on Windows
Installing PrestaShop Windows setup is a straightforwar...


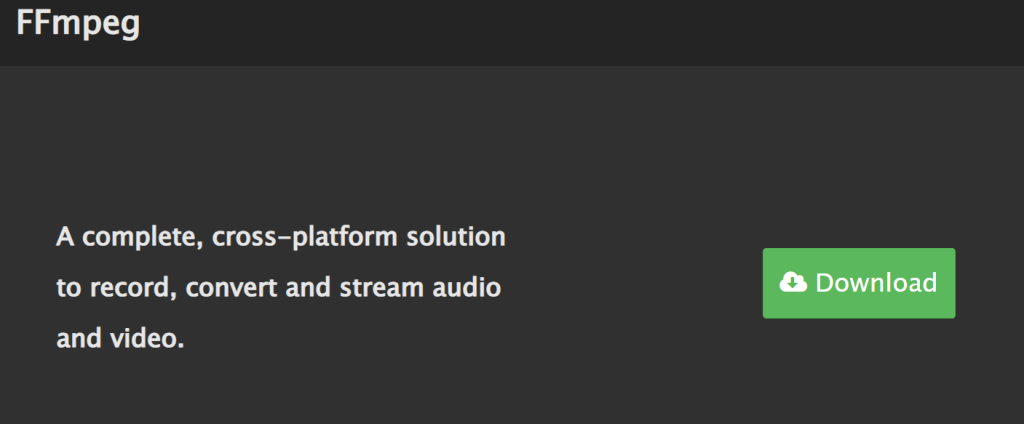
FFmpeg, a powerful open-source software, has revolutionized the world of video and audio processing by providing a versatile multimedia framework. This cross-platform compatible tool enables users to convert, stream, and record multimedia files with ease. With its extensive range of capabilities, FFmpeg allows users to perform various tasks such as video encoding, decoding, and transcoding, making it an essential tool for professionals and enthusiasts alike.
Install FFmpeg Windows 10 can unlock a world of possibilities, offering a seamless video and audio processing experience. By having FFmpeg on Windows 10, users can benefit from its flexibility and customization options, making it an ideal choice for a wide range of applications. However, a reliable installation is crucial to avoid errors and ensure a smooth workflow.
This step-by-step guide is designed to walk Windows 10 users through the FFmpeg installation process, providing a hassle-free experience and empowering them to harness the full potential of this powerful tool.
To get started with FFmpeg Windows 10 install, you need to download the latest version from the official website.
Step 1: Accessing the Official FFmpeg Website
Visit the official FFmpeg website to download the latest version:
Step 2: Identifying the Appropriate Download for Windows 10
On the FFmpeg website, navigate to the Download section and select the Windows platform.
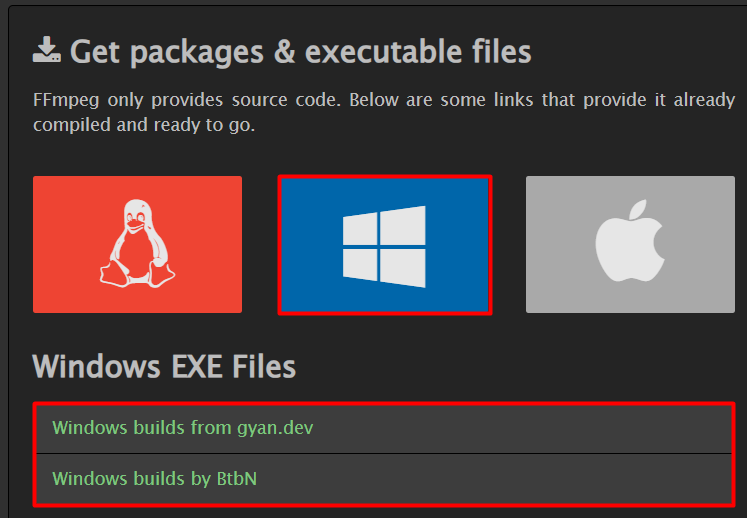
Both Gyan and BtbN are well-known contributors to the FFmpeg project, and their builds are considered official. You can trust that the downloads are authentic and safe to use and choose any from these two options.
For this guide, we’ll be using the gyan.dev.
Next, you’ll see multiple options to download FFmpeg on Windows 10 which are explained below:
For most users, we recommend selecting the Release Builds option. This will provide you with a stable, officially released version of FFmpeg that is well-tested and validated. It’s the safest and most reliable choice.
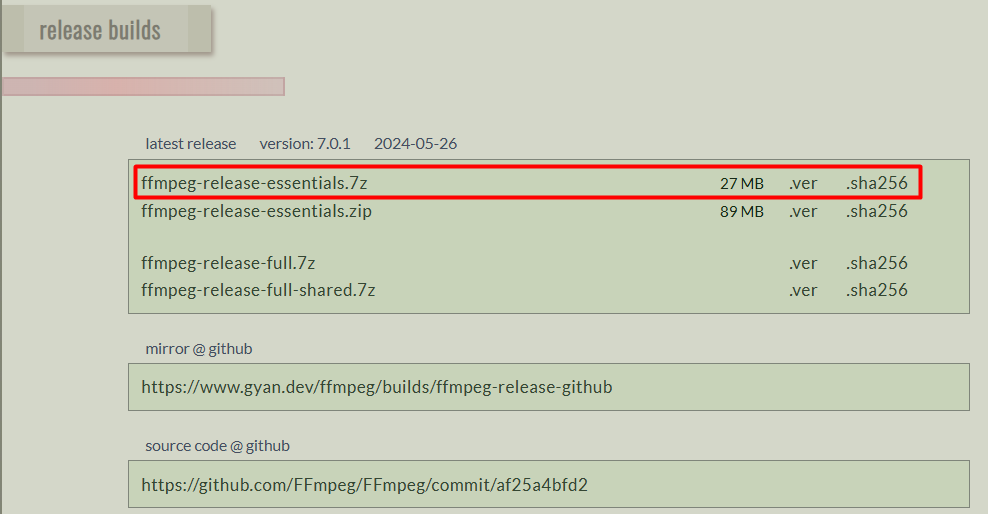
Step 3: Download FFmpeg Release Builds Version
Now when you navigate to the FFmpeg release builds version, you’ll see different versions. For most users, we recommend downloading ffmpeg-release-essentials.7z (27 MB). This package contains the essential FFmpeg binaries and is a good balance between size and functionality. It’s suitable for most use cases and is easy to extract and use:
This package includes the most commonly used FFmpeg tools, such as ffmpeg, ffplay, and ffprobe, which are sufficient for most video content creation and audio processing tasks. If you need additional features or tools, you can always download the full package later.
Now that you’ve downloaded the ffmpeg-release-essentials.7z archive, it’s time to FFmpeg install Windows 10 system. Follow these step-by-step instructions to get FFmpeg up and running.
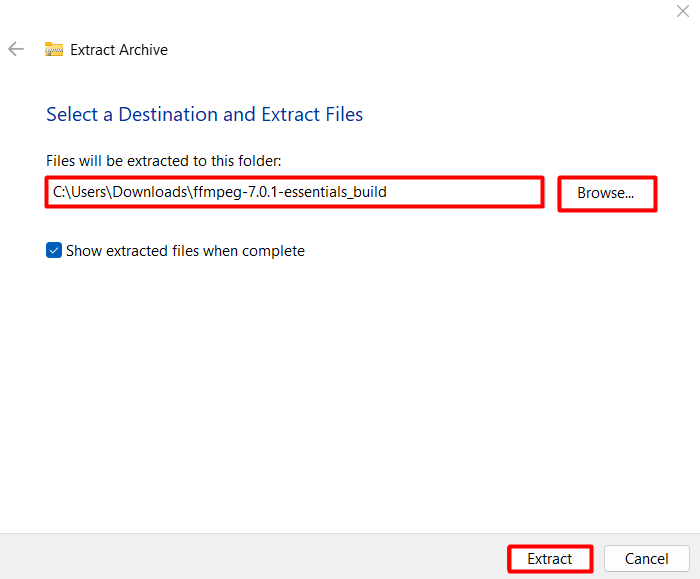
Step 1: Unpacking the Downloaded Archive
First, you need to find the ffmpeg-release-essentials.7z file you downloaded from Gyan.dev. Right-click on the downloaded archive and select “Extract All”, Choose a destination folder where you want to extract the FFmpeg files:
Step 2: Adding FFmpeg to the System Environment Path
FFmpeg is a portable, self-contained application that doesn’t require a traditional installation process. This means that you don’t need to run an installer or setup program to install FFmpeg on your system. Instead, the FFmpeg binaries are simply extracted from the downloaded archive to a folder on your system.
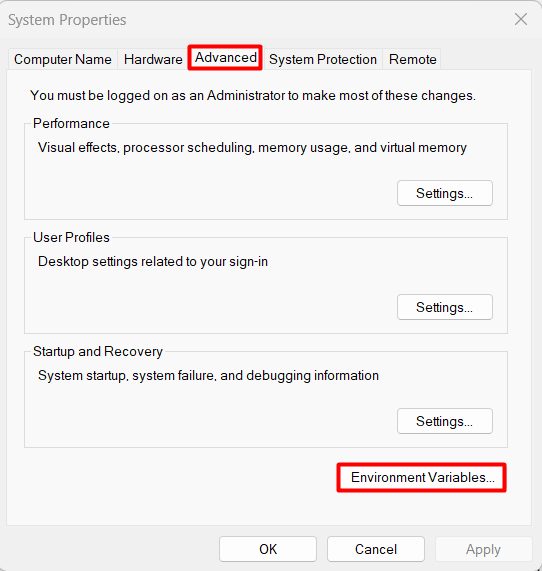
Even though FFmpeg doesn’t require installation, we still need to make it easily accessible from the Command Prompt or PowerShell. This is where the system environment path comes in. This allows you to run FFmpeg commands from anywhere on your computer, without having to navigate to the specific FFmpeg folder every time.
To do that, we can search for the edit environment variable settings from the start menu and then click on the Environment variables under the advanced settings:
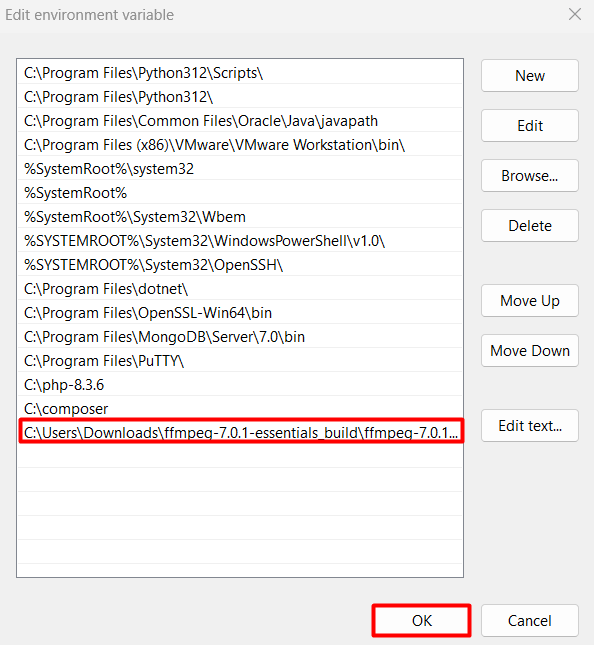
Next copy the complete path of the bin folder and then paste it into the path section:
Install FFmpeg on Our Windows 10 VPS!
With Ultahost, Hosting Windows VPS has never been easier or faster. Enjoy ultra-fast SSD NVME speeds with no dropouts and slowdowns.
After following the steps to unpack the FFmpeg archive and add it to your system’s environment path, it’s time to make sure everything is working correctly. Here’s how to verify your FFmpeg installation on Windows 10:
Step 1: Open Command Prompt
Search for the command prompt in the Windows search bar and open it:

Step 2: Type “ffmpeg”
In the command prompt window, type “ffmpeg” and press Enter:

If FFmpeg is installed correctly on Windows 10 and added to your environment path, you should see the FFmpeg command-line interface. This will display information about the software, including its version and build details.
Learn about How to Install FFmpeg on Ubuntu 22.04.
This guide has provided the detailed process of installing FFmpeg on Windows 10. By downloading the latest release build from the official website, users can choose the appropriate package for their needs, including the essential binaries or the full package. After unpacking the archive, the key step is to add the FFmpeg bin folder to the system environment path, allowing users to access FFmpeg commands from any location.
This ensures that FFmpeg is readily available for use in the Command Prompt or PowerShell. To verify a successful installation, users can open the Command Prompt, type “ffmpeg,” and press Enter. If the FFmpeg command-line interface appears, it confirms that the installation was successful and that users can now leverage the powerful features of FFmpeg for video and audio processing tasks.
While installing FFmpeg on Windows allows for some audio manipulation it may not be ideal for running a reliable internet radio stream. Ultahost’s internet radio hosting plans offer a more robust and user-friendly solution that helps to install and configure FFmpeg entirely with all the necessary software optimized for internet radio streaming.
FFmpeg is a free and open-source software project that produces libraries and programs for handling multimedia data. It includes libavcodec, an audio/video codec library used by several other projects, libavformat (mux and demux libraries), and other multimedia-related components.
FFmpeg is used for various multimedia tasks, including video and audio conversion, streaming, recording, and processing. It supports a wide variety of formats and codecs.