How to Install and Deploy Kubernetes on AlmaL...
Kubernetes, often abbreviated as K8s, is an open-source...
Apache Kafka is a distributed streaming platform that enables you to build real-time data pipelines and streaming applications. When combined with Kubernetes, Kafka can benefit from Kubernetes orchestration capabilities enabling seamless deployment scaling and management of Kafka clusters.
In this guide, we will cover the comprehensive process of deploying Kafka on Kubernetes including core concepts of Kafka and Kubernetes.
Before starting the deployment process let’s briefly understand the core concepts of Kafka and Kubernetes:
Make sure you have the following prerequisites:
Following are the steps described below to deploy Kafka on Kubernetes:
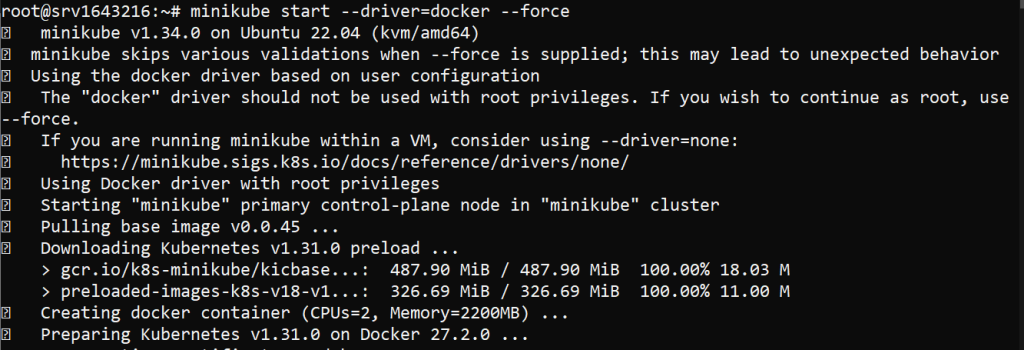
If you don’t have a Kubernetes cluster you can create one by installing Minikube on Ubuntu for local development or a managed Kubernetes service for production environments. Here’s a quick start with Minikube:
minikube start --driver=<driver-name>

Replace <driver-name> with a pre-installed driver for example I am using Docker. For this, you need to install Docker on Ubuntu system. It is important to note that while you start Minikube with root privileges use --force argument.
After setting up your Kubernetes cluster, verify it’s running:
kubectl cluster-info && kubectl get nodes

Helm simplifies the deployment process by using charts with pre-configured Kubernetes resources. Install Helm on your machine if it’s not already installed:
curl https://raw.githubusercontent.com/helm/helm/master/scripts/get-helm-3 | bash

Verify the installation with the following:
helm version

Add the Bitnami Helm repository which provides maintained Kafka Helm charts:
helm repo add bitnami https://charts.bitnami.com/bitnami
helm repo update

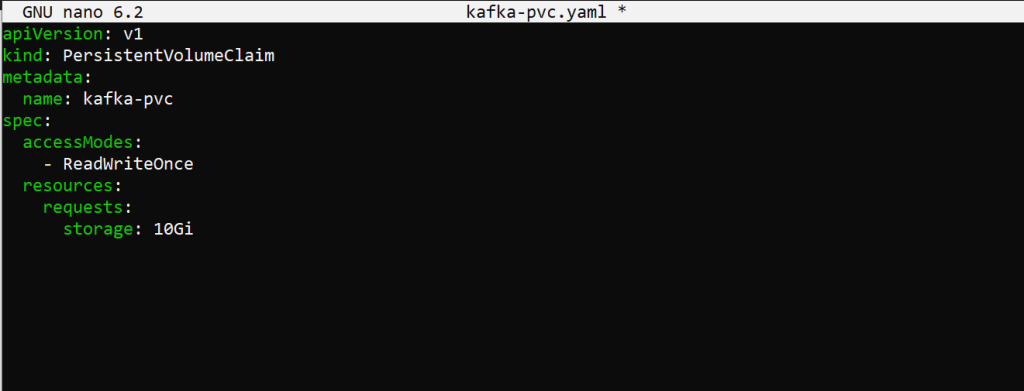
Kafka requires persistent storage for its logs. Configure persistent volume claims (PVCs) in your Kubernetes cluster to ensure Kafka’s data persists across pod restarts. Create the one using the nano command. Here’s an example of PVC configuration:
apiVersion: v1
kind: PersistentVolumeClaim
metadata:
  name: kafka-pvc
spec:
  accessModes:
    - ReadWriteOnce
  resources:
    requests:
      storage: 10Gi

Apply the PVC configuration:
kubectl apply -f kafka-pvc.yaml
With Helm and PVCs configured, you can deploy Kafka:
helm install my-kafka bitnami/kafka

This command installs Kafka using the default values. You can customize the values by creating a values.yaml file and specifying configurations. An example of values.yaml file looks like this:
persistence:
  enabled: true
  size: 10Gi
  storageClass: standard
replicaCount: 3
zookeeper:
  enabled: true
Deploy Kafka with the custom configuration:
helm install -f values.yaml my-kafka bitnami/kafka
Ensure Kafka is running correctly by checking the pods and services:
kubectl get pods && kubectl get services

You should see Kafka and ZooKeeper pods running. You can also check the logs for any issues:
kubectl logs -f <kafka-pod-name>
Install Kubernetes on Our Linux VPS!
Get the reliability of the world’s most popular Linux distros and the flexibility of a virtual server. Enjoy blazing-fast speeds and low latency.
Kafka brokers typically communicate within the cluster. To access Kafka externally, use port forwarding or create a LoadBalancer service. For port forwarding:
kubectl port-forward svc/my-kafka 9092:9092
Now, you can connect to Kafka using a client on your local machine:
kafka-console-producer.sh --broker-list localhost:9092 --topic test
kafka-console-consumer.sh --bootstrap-server localhost:9092 --topic test --from-beginning
Kubernetes makes scaling Kafka brokers straightforward. Update the replicaCount in your values.yaml and upgrade the Helm release:
replicaCount: 5
helm upgrade my-kafka -f values.yaml bitnami/kafka
Check the new pods to ensure they are running:
kubectl get pods
Monitoring Kafka is important for maintaining the health of your deployment. Tools like Prometheus and Grafana can be used for monitoring. Bitnami charts provide built-in support for Prometheus metrics. Enable Prometheus metrics in values.yaml:
metrics:
  kafka:
    enabled: true
    port: 9308
Deploy Prometheus and Grafana in your cluster then configure them to scrape metrics from Kafka.
Security is paramount in a production environment. Secure Kafka using TLS encryption and authentication mechanisms.
Enabling TLS
Configure TLS settings in your values.yaml:
tls:
  enabled: true
  existingSecret: kafka-tls-secret
Create Kubernetes secrets for TLS certificates:
kubectl create secret generic kafka-tls-secret --from-file=ca.crt --from-file=cert.crt --from-file=cert.key
Learn about How to Deploy WordPress Instance on Kubernetes.
Enabling Authentication
Set up SASL authentication in values.yaml:
auth:
  clientProtocol: sasl
  jaas:
    enabled: true
    clientUsers:
      - user
    clientPasswords:
      - password
Enabling Network Policies
Restrict access to Kafka using Kubernetes Network Policies. Create a Network Policy to allow traffic only from specific namespaces or IP ranges. Create the policy file with the nano command. Here’s an example of a policy file:
apiVersion: networking.k8s.io/v1
kind: NetworkPolicy
metadata:
  name: kafka-policy
spec:
  podSelector:
    matchLabels:
      app: kafka
  ingress:
    - from:
        - podSelector:
            matchLabels:
              role: my-app
      ports:
        - protocol: TCP
          port: 9092
Apply the Network Policy:
kubectl apply -f kafka-policy.yaml
Deploying Kafka on Kubernetes offers numerous advantages, including easy scaling efficient resource management, and improved reliability. This guide provides a comprehensive overview of the process from setting up the Kubernetes cluster and installing Helm to configuring Kafka and securing the deployment. With these steps, you can deploy and manage a robust Kafka cluster in a Kubernetes environment, ensuring high availability and scalability for your streaming applications.
Discover a seamless KVM VPS server that helps to install Kubernetes where reliability converges with security. Ultahost ensures efficient server management and dedicates resources to guarantee optimal speed and stability. Elevate your online presence with us.
Apache Kafka is a platform for managing real-time data streams across systems.
Deploying Kafka on Kubernetes makes it scalable, resilient, and easier to manage.
You need Kubernetes, Helm, and the Kafka Helm chart to set it up.
Yes, but using Helm simplifies the setup and configuration.
You can scale Kafka by adjusting replicas and resources in Kubernetes.
Yes, but it’s essential to configure it for high availability and data reliability.
Common issues include network configuration, resource limits, and storage setup.