
How to fix “530 Login Authentication Fa...
FTP or File Transfer Protocol is a standard network pro...


Connecting your Windows PC to a host computer remotely requires the use of Microsoft’s proprietary network communication protocol known as Remote Desktop Protocol (RDP). The default RDP number assigned to all Microsoft PCs is 3389.
When you initiate a remote desktop session, the client (your computer) sends a signal to the host computer via listening port 3389, requesting authorization to connect.
After you log in, the listening port transmits your keyboard and mouse movements to the host computer and collects and shows data from the host on your computer, just as if you were working on the host computer directly. All of this is possible because of the back-and-forth communications through the listening port.
However, a host allows only one remote connection at a time. As such, if you try to use the host computer or connect to it from another device, the remote connection is lost. This shows why listening ports are an essential part of remote desktop connections.
Hackers sometimes try to hack listening ports through brute force attacks to gain access to the remote desktop. Changing the default RDP port number from 3389 to any other free port makes it more difficult for hackers to guess which RDP port you use, further showing the importance of knowing how to change your RDP number.
Step 1: Open the Run dialog box by pressing Windows key + R.
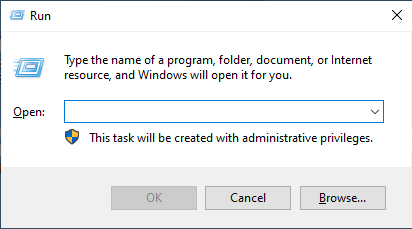
Step 2: Type regedit into the Run box and press Enter. This will bring up the Registry Editor box.
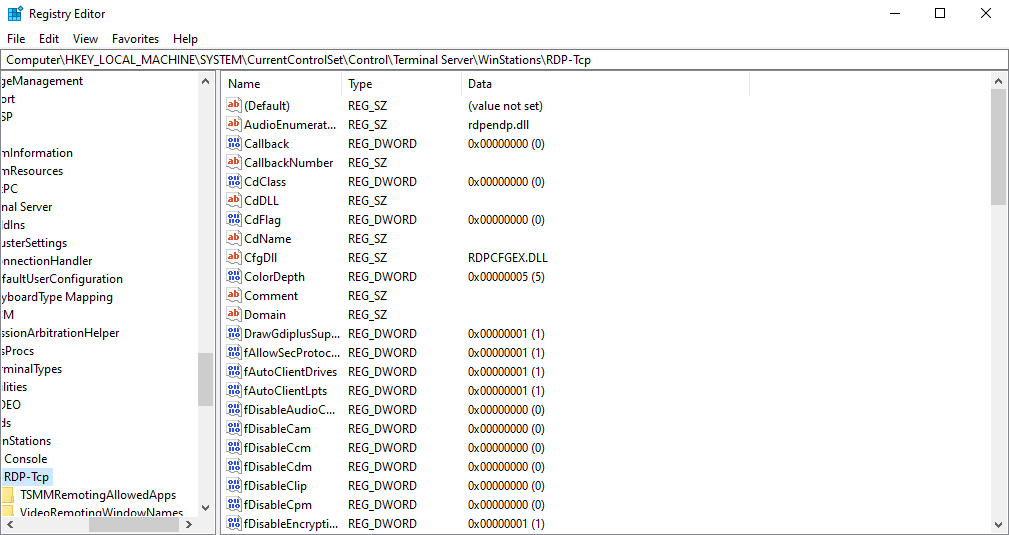
Step 3: Navigate to the search bar and input the following command:
HKEY_LOCAL_MACHINE\System\CurrentControlSet\Control\Terminal Server\WinStations\RDP-Tcp
Press Enter to reach the RDP-TCP settings.
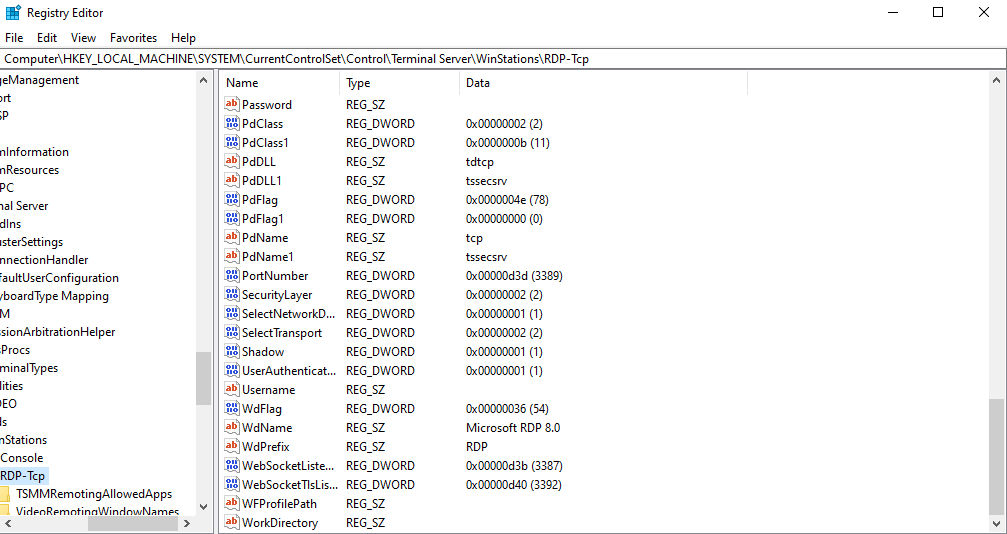
Step 4: Scroll down in the right sidebar until you reach PortNumber. Double-click on it to edit.
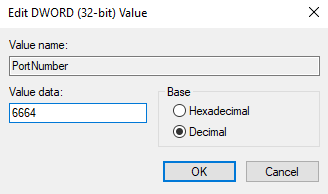
Step 5: Select the Decimal option in the edit window, and enter your desired port number in the Value data field (The recommended range for the RDP ports is 1024-65535). Click OK to save your changes.
Step 6: Restart your computer or the RDP service to apply your changes.
Once you have changed your PC’s default RDP port number, you must create specific Windows firewall rules for the custom RDP port number.
If you do not do this, your Windows firewall defender may prohibit you from using the custom RDP port for remote desktop services.
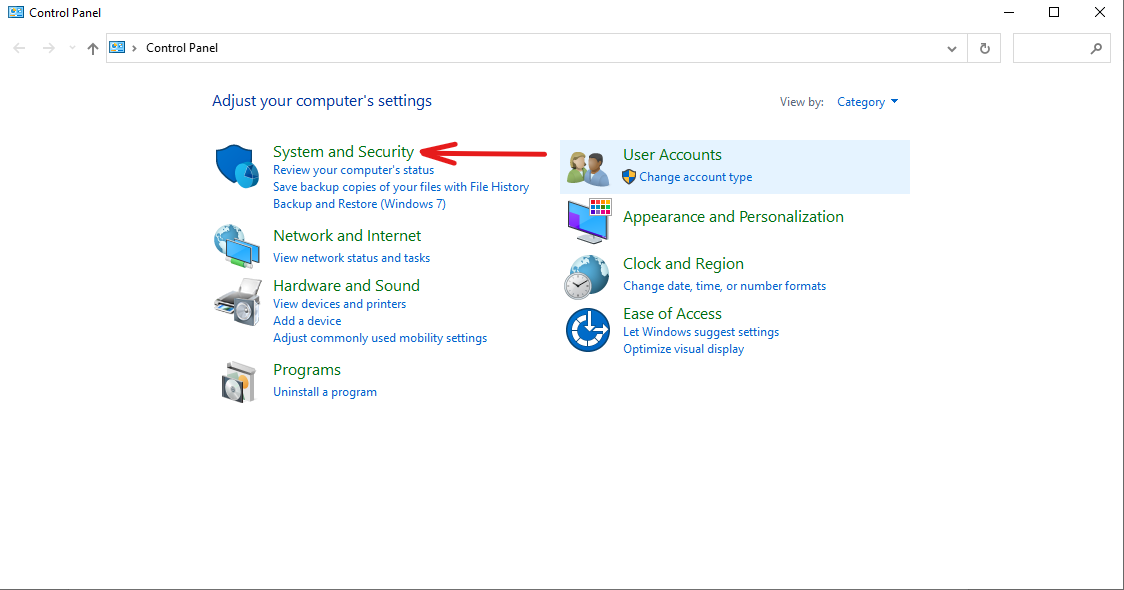
Step 1: Open Control Panel and go to System and Security.
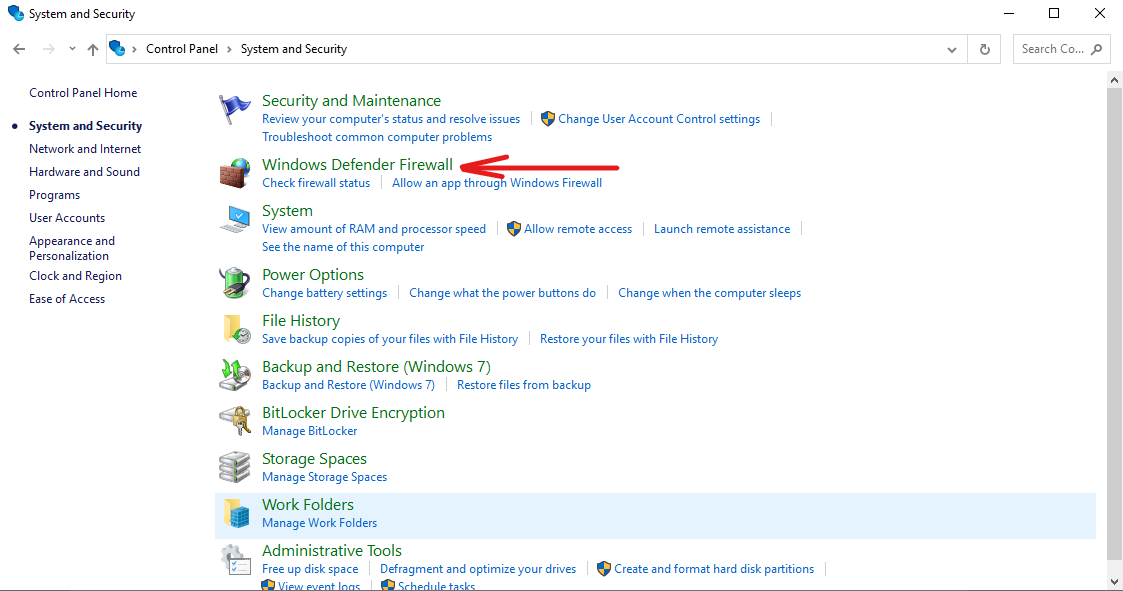
Step 2: Click on Windows Defender Firewall.
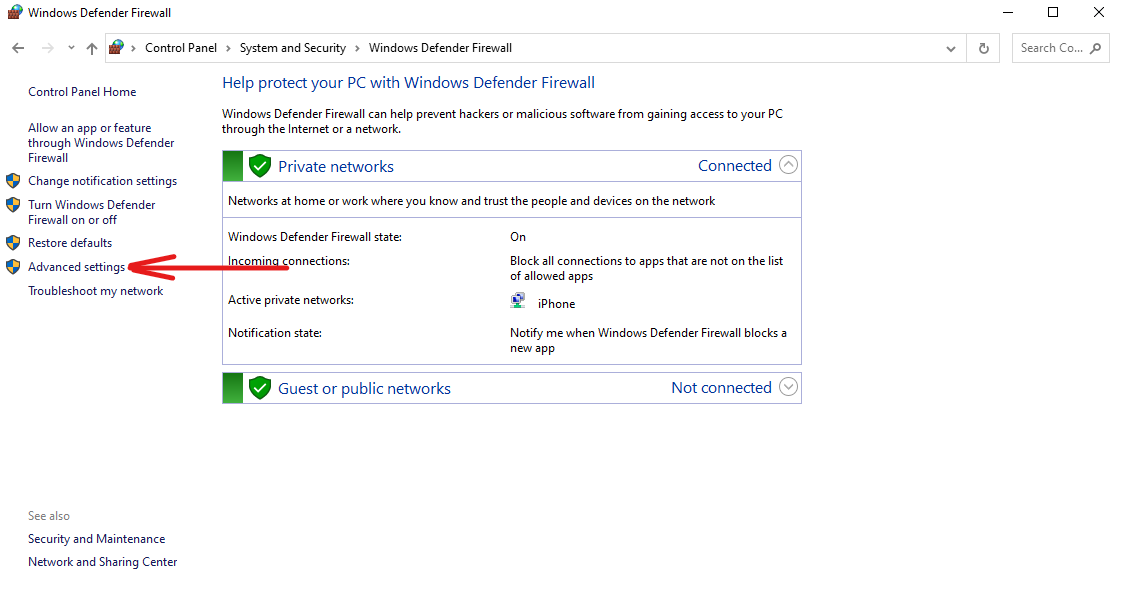
Step 3: Select Advanced Settings.
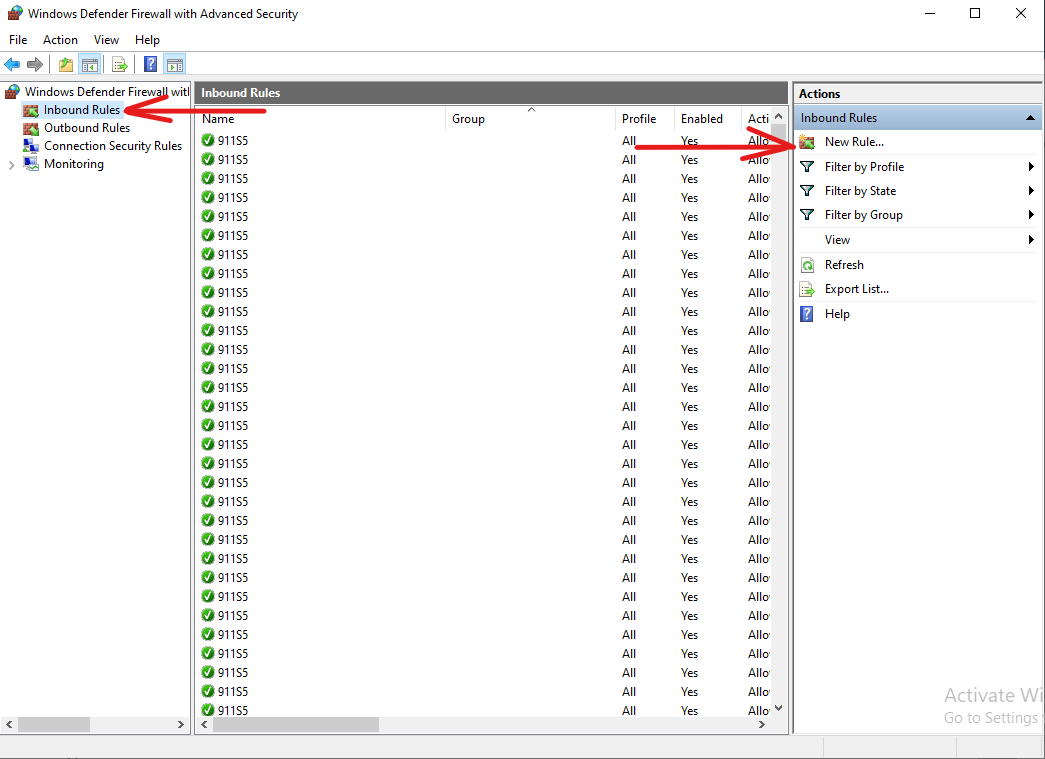
Step 4: Select Inbound Rules. Select New Rule from the Actions panel
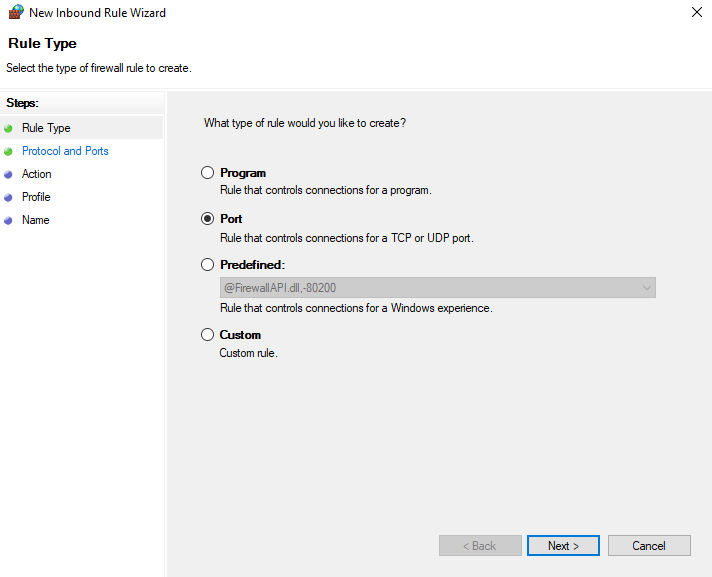
Step 5: Make sure Port is selected for Rule Type. Click on Next.
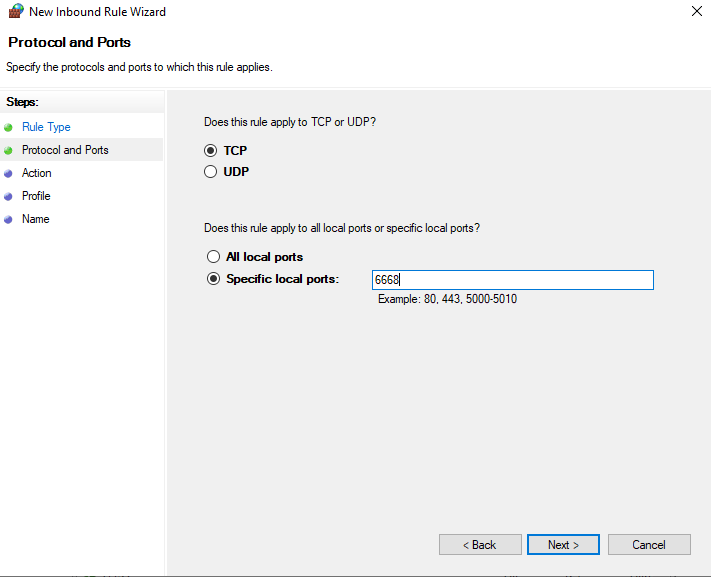
Step 6: Ensure the TCP button is selected and enter the correct port number in the Specific local ports input field. Click Next.
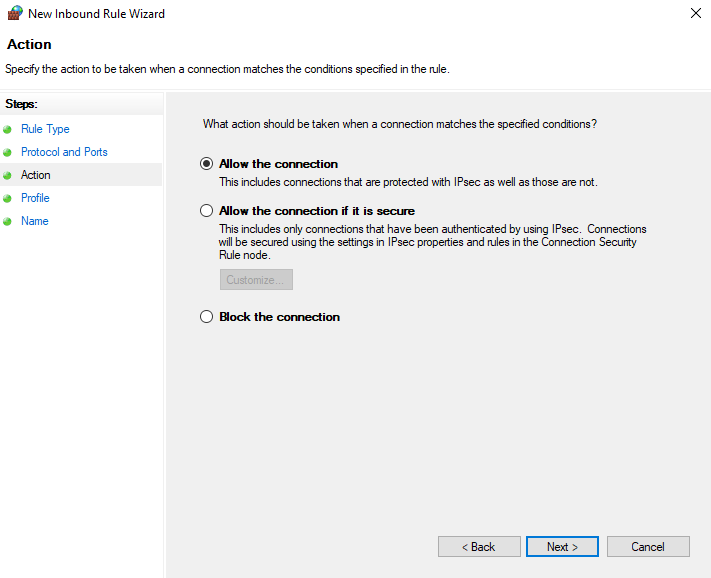
Step 7: Select the Allow Connection option and click Next.
Step 8: Select the Profile option on the right, and ensure the Domain and Private checkboxes are ticked. Click Next to save your changes and continue.
Leave the Public checkbox unchecked to prevent establishing the Remote Desktop Connection on a public network.

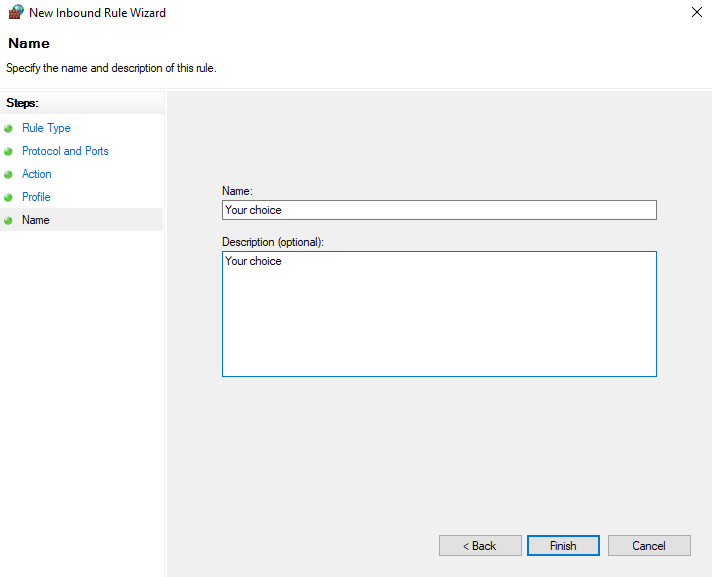
Step 9: Enter a name for your rule In the Name bar. A description is useful should anyone else need to make changes at a later stage, but this is optional.
Click Finish to complete the port change.
The Remote Desktop Protocol allows you to initiate a remote desktop session and operate a host computer as if it were directly in front of you. The default RDP number assigned to all Microsoft PCs is 3389. Due to security reasons, however, it is advisable to change it to a custom number of your choice. This article provides a step-by-step guide on changing the default RDP number to any number you choose.