
How to Check the Email Service Included in Yo...
Email is one of the most important communication tools ...


Python, like any other programming language, allows third-party libraries and frameworks. You can use these to avoid reinventing the wheel with each new project. If you want to use these Python libraries, you can locate them in a central repository known as the Python Package Index (PyPI).
Manually downloading, installing, and managing these packages can be frustrating and time-consuming. Instead, most programmers use PIP to automate and simplify the process.
In this article, you will learn how to install PIP for Python on Windows and Linux Operating systems.
PIP is an acronym for “PIP Installs Packages” or “Preferred Installer Program.” PIP is a popular package-management system used to install and manage libraries not included in the standard Python distribution.
By default, PIP obtains such libraries from the Python Package Index (PyPI), a central online repository containing many frameworks, tools, and libraries for various applications. PIP can also connect to another local or online repository if it complies with PEP 503.
Step 1: Check if Python is available
Before installing PIP on Windows, we need to ensure that Python is already installed.
To verify if Python is already installed on your PC, open Command Prompt and type “Python.”
If Python is properly installed, you will receive a reply like this:
Python 3.10.10 (tags/v3.10.10:aad5f6a, Feb 7 2023, 17:20:36) [MSC v.1929 64 bit (AMD64)] on win32
Type “help”, “copyright”, “credits” or “license” for more information.
If you do not have Python, you will receive a reply like this:
‘python’ is not recognized as an internal or external command, operable program or batch file.
This indicates that Python is either not installed on your PC or installed incorrectly and requires certain system variables to be set.
Step 2: Check if PIP is already installed
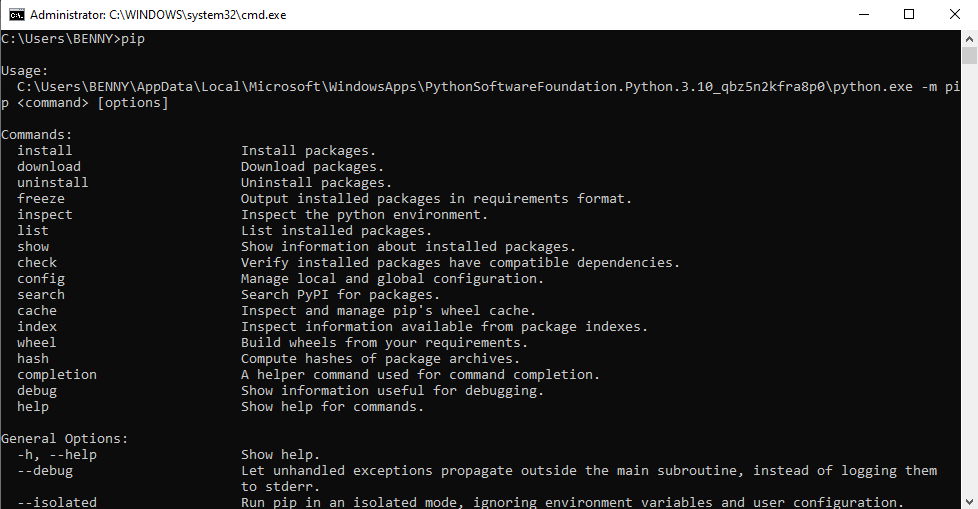
To check if PIP is installed on Windows, we should open the command line again, type “pip”, and press Enter.
If PIP is installed, we will receive an extensive notification explaining the program usage, all the available commands, and options similar to this:
If PIP is not installed, the reply will be:
‘pip’ is not recognized as an internal or external command, operable program or batch file.
In this case, you will have to install PIP on Windows manually.
Step 1: Download PIP
Before installing PIP, we have to download the get-pip.py file.
Go to https://bootstrap.pypa.io/get-pip.py and save this file as get-pip.py in the same folder where Python is located.
The Python installation is stored in the folder “AppData” by default. The entire path could look like the following:
C:\Users\User\AppData\Local\Programs\Python\Python310
Step 2: Install PIP
Now that we downloaded the get-pip.py file, open command prompt and launch the installer by running the following command:
python get-pip.py
After a quick installation process, a message appears with all the installation details and confirmation that you have successfully installed PIP.
Step 3: Verify the PIP Installation Process and Check the PIP Version
To verify if PIP has been appropriately installed and check its version, run the command:
pip -V
If PIP is installed correctly, you will receive a reply indicating the version of PIP and its location on the local system:
pip 22.3.1 from C:\Program Files\WindowsApps\PythonSoftwareFoundation.Python.3.10_3.10.2800.0_x64__qbz5n2kfra8p0\lib\site-packages\pip (python 3.10)
If an error reply is shown, it is necessary to repeat the installation process.
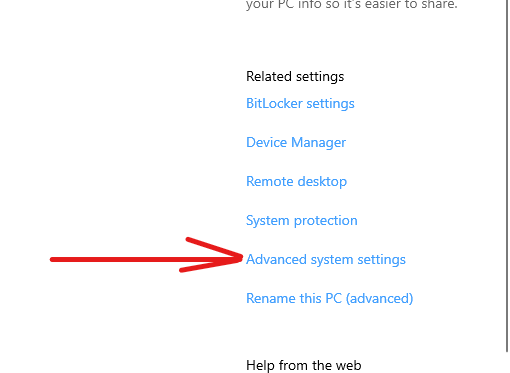
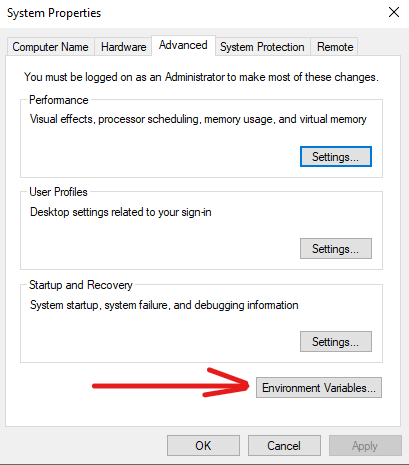
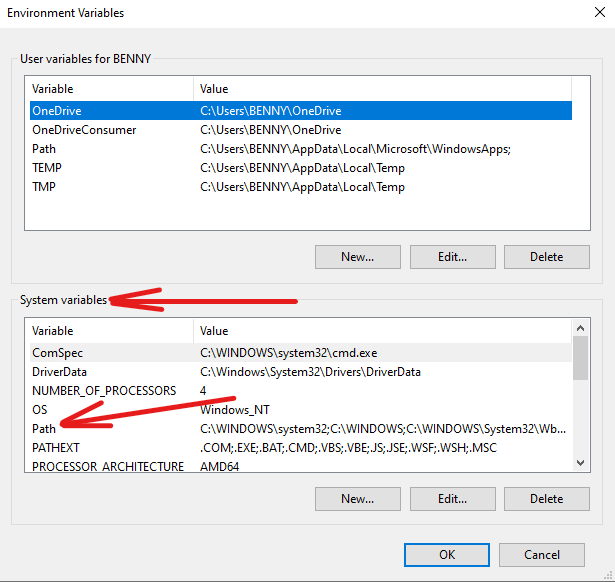
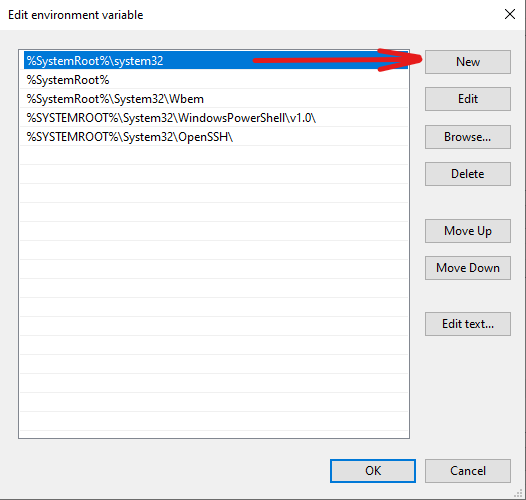
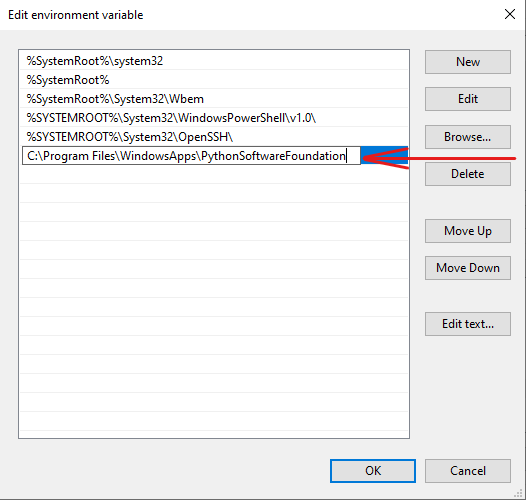
Step 4: Configure to Windows Environment Variables
To execute PIP from any folder in the command line without issues, you must add the path to the folder containing the get-pip.py file to Windows environment variables.
Many Linux versions include Python, but the Python version may not be the latest. To verify the version running on your operating system, input the command:
python3 –version
If you installed Python, inputting this command for the Ubuntu or Debian-based distributions should respond with a version number. Whereas, if you want to install the Python distribution on Linux, the built-in package manager is preferably the best method.
sudo apt install python3-pip
Once you’ve got a Python setup up and running, don’t start installing packages into it with PIP. This is because every project on your system will store and retrieve packages from a centralized site-packages directory.
Once your PIP workflow is set, you can start installing packages from PyPI.
To install packages input:
# Mac
python3 -m pip install “SomeProject”
# Windows
py -m pip install “SomeProject”
To list installed packages on your system input:
# Mac
python3 -m pip list
# Windows
py -m pip list
Through this article, we have discussed and learned how to install PIP on Windows and Linux operating systems. You can now utilize Python PIP to manage your packages efficiently.