
How to Install FFmpeg on Windows 10
FFmpeg, a powerful open-source software, has revolution...


Concrete CMS, formerly known as concrete5, is a powerful and user-friendly content management system designed to simplify website creation and management. This open-source platform offers a robust set of features, including in-context editing, customizable themes, and a flexible permissions system, making it an ideal choice for businesses, organizations, and individuals seeking to build and maintain dynamic websites. For Windows users, Concrete CMS presents an exciting opportunity to harness its capabilities and create stunning, functional websites without the need for extensive technical knowledge.
In this article, we’ll provide a comprehensive, step-by-step guide on how to install Concrete CMS on Windows. We’ll walk you through the entire process, from setting up the necessary prerequisites to configuring your new Concrete CMS installation. By following this guide, you’ll be able to leverage the power of Concrete CMS on your Windows machine and start building impressive websites in no time.
Before diving into the installation process, it’s essential to ensure that your Windows system meets the necessary requirements and has the required software installed. Here’s what you’ll need:
For the sake of this article, we’ll be installing xampp which is already equipped with PHP, MySQL and other necessary features required.
Explore the Blazing Fast Speed of Windows VPS!
Hosting a Windows VPS with Ultahost is easier and faster than ever. Enjoy ultra-fast SSD NVMe speeds with no interruptions or slowdowns.
To install Concrete CMS, we will use XAMPP, a free and open-source software package that includes Apache, MySQL, PHP, and Perl. Here’s how to download and install XAMPP:
You can take detailed instructions on install Xampp on Windows from our guide.
After installing XAMPP, we need to configure Apache and MySQL to work with Concrete CMS:
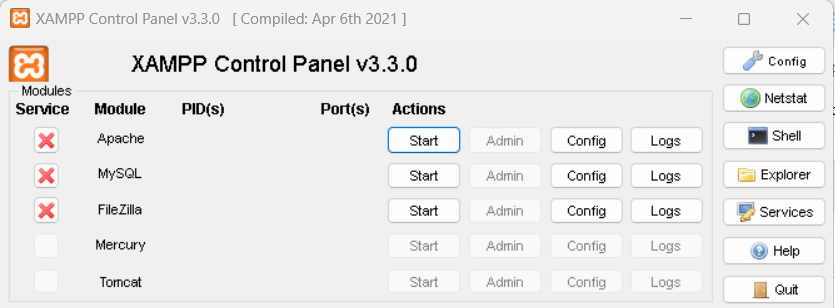
Open the XAMPP Control Panel (usually found in the Start menu or C:\xampp\control.exe):
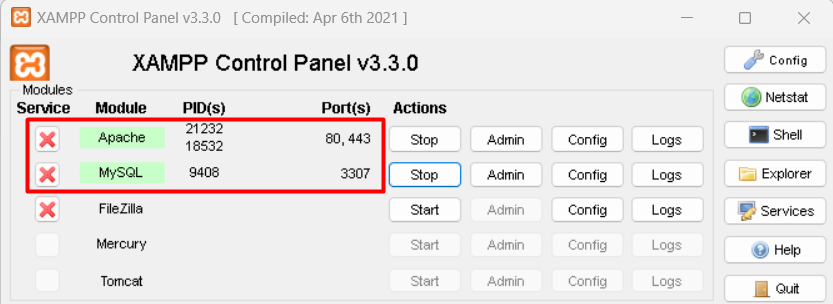
Start the Apache and MySQL server by clicking their corresponding “Start” button:
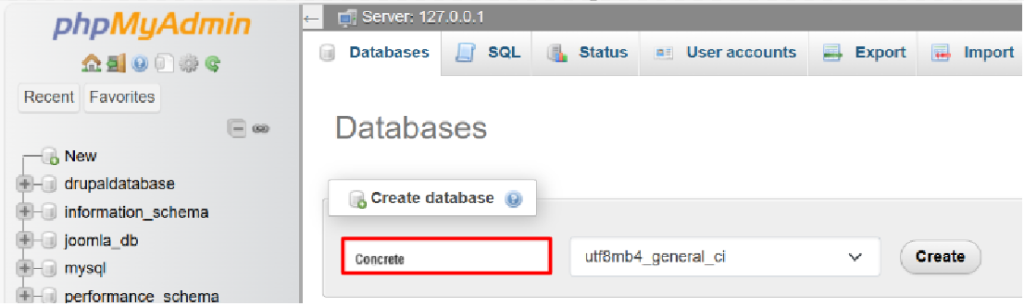
Open a web browser and navigate to http://localhost/phpmyadmin to access the MySQL database management interface. Create a new database for Concrete CMS by clicking the “Databases” tab and entering a database name (e.g., “concrete”):
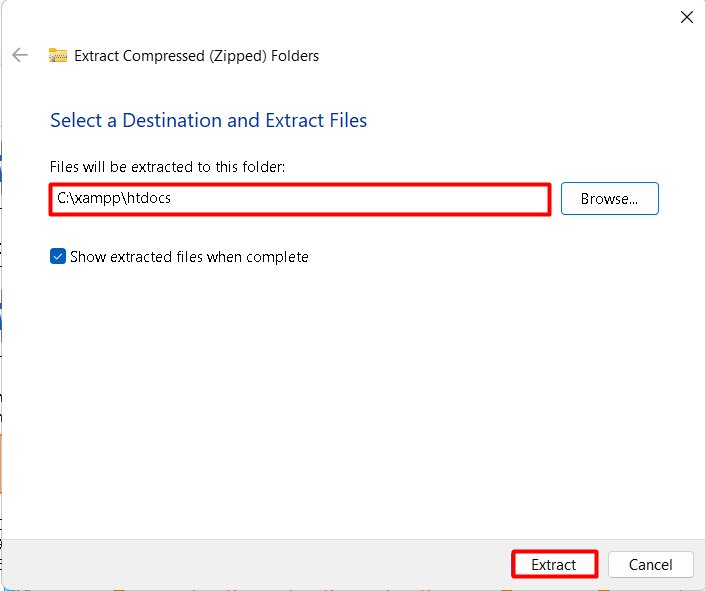
You also need to make sure to extract the download concrete cms Windows file inside the htdocs directory:
Read also How to Install Concrete on Ubuntu.
With your database set up and ready to go, you’re now ready to proceed with the Concrete CMS installation. To initiate the process, open your preferred web browser and navigate to the following URL: http://localhost/concrete (this assumes that you earlier extracted the Concrete CMS files to the htdocs folder).
Upon accessing this URL, you will be presented with the Concrete CMS Setup Wizard, a user-friendly and intuitive interface designed to walk you through the installation process, step by step:
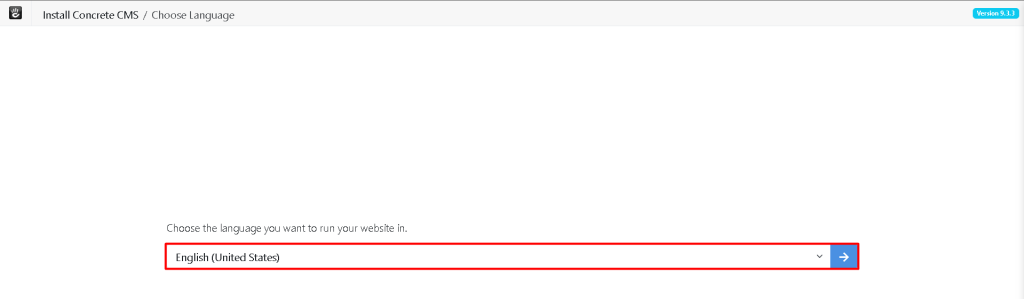
On the initial setup page, you will encounter a language selection interface, which presents you with a list of available languages to choose from. Select the language that you wish to use as the default for your website’s interface, including the dashboard, menus, and system notifications.
Once you’ve made your selection, you will be directed to the Concrete CMS configuration page, where you will finalize the setup process. This page will display a series of checks to confirm that your server environment meets the necessary requirements to run Concrete CMS smoothly. These checks verify that your environment has the following essential components installed and configured correctly:

On this page, you will need to establish the administrator credentials for your Concrete CMS installation. To do this, you will be prompted to enter a password and confirm it to ensure its accuracy.
Next, you will have the opportunity to select a starting template for your website from a range of available options. This will serve as the foundation for your site’s design and layout.
Additionally, you will need to provide the necessary database connection details, including:
Enter these details accurately to ensure a successful connection to your database:

Once the installation process is complete, you will see a confirmation message indicating that Concrete CMS has been successfully installed on your system. This message will be displayed on your screen, confirming that the installation has finished and that your Concrete CMS instance is now ready for use:

You’ve now completed the installation of Concrete CMS on your Windows machine. This process has set you up with a powerful tool for creating and managing your website. By following the steps outlined in this guide, you’ve successfully installed XAMPP, configured Apache and MySQL, and set up Concrete CMS. You’ve also created a database for your website and established the administrator credentials.
With Concrete CMS now up and running, you can start building your website. You can choose from a range of templates to get started, and then customize your site to suit your needs. You can add content, images, and other features to create a dynamic and engaging online presence. Remember to explore the features and capabilities of Concrete CMS to get the most out of your website. With its user-friendly interface and flexible design, you’ll be able to create a website that meets your needs and helps you achieve your goals.
After completing these steps, you’ve successfully installed Concrete on your Windows system and are ready to build robust websites. For optimal performance and smooth development, always follow best practices and keep your software up to date. consider using Ultahost Windows hosting. You get reliable and high-speed hosting tailored to your needs.
Concrete CMS requires Windows 7, 8, 10, or Windows Server 2012 R2 and later versions, along with Apache or IIS, PHP 7.3 or higher, and MySQL 5.7+ or MariaDB 10.2+. A modern web browser like Chrome, Firefox, or Edge is also required.
Download the latest version of XAMPP from the official website and run the installer to install it on your Windows machine, selecting the default installation location and components.
Configure Apache and MySQL by starting the servers through the XAMPP Control Panel and creating a new database for Concrete CMS through the phpMyAdmin interface.
The steps to install Concrete CMS on Windows include downloading and installing XAMPP, configuring Apache and MySQL, extracting the Concrete CMS files, and initiating the installation process through a web browser.
After installation, you can start building your website by choosing a template, customizing your site, and adding content, and explore the features and capabilities of Concrete CMS to get the most out of your website.