
How to Install Scala on Windows 10
Scala, a high-level programming language that combines ...


Eclipse is a robust Java IDE that is strong enough for Java developers to create applications with minimum hassle. It has built-in coding, debugging, and testing tools that hasten the development process and hence has become very popular with Java enthusiasts. It can be used to program in many other languages apart from Java because Eclipse is very flexible and can be highly customized.
This guide simplifies the steps for installing Eclipse on Windows. The process is described step by step with clear screenshots to make sure you install it correctly. It will lead you through setting up Eclipse easily and quickly, so that soon you will be ready to work on your projects—and you might just discover that there’s more to it than you thought.
In short, Eclipse installation on Windows is an indispensable prerequisite for harnessing your potential in development; that is to say, it opens up vast opportunities for the installation of Eclipse’s many plugins and other resources. With Eclipse at hand, tackling intricate projects will be made easier, team collaboration with fellow developers will be made possible, and you can remain a cut above the rest in this continuously changing software development world.
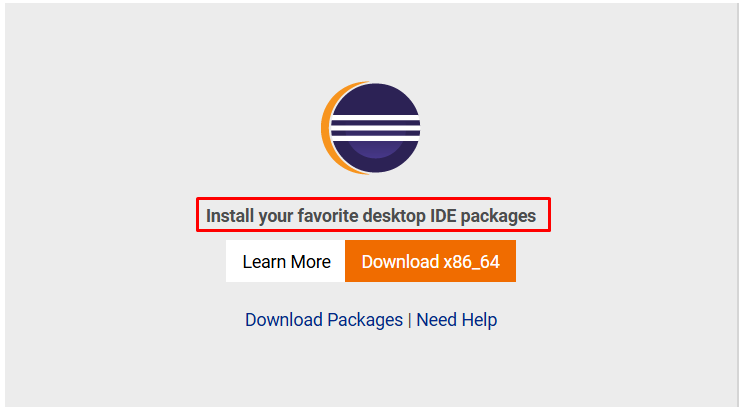
Eclipse offers various packages, each catering to specific needs. Here’s an Eclipse download for Windows brief overview:
For Windows users, we recommend downloading the Eclipse IDE for Java Developers package from the Desktop IDE packages section. This package provides a comprehensive IDE for developing Java applications and includes essential tools like the Java Development Tools (JDT) and the Eclipse Java Compiler.
Now that you’ve downloaded the Eclipse installer, it’s time to install Eclipse on your Windows.
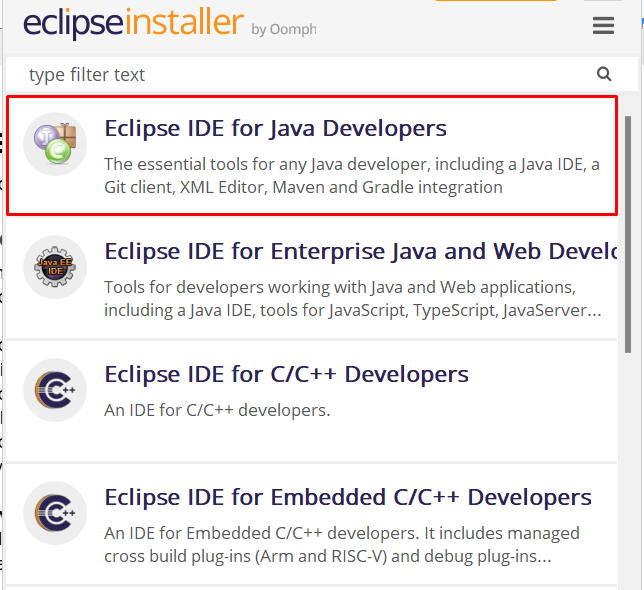
Step 1: Choosing the Right Eclipse Package
When you launch the installer, you’ll see multiple options:
For this tutorial, We will perform Eclipse IDE Windows installation for Java Developers. This package provides a comprehensive development environment for Java programming and is suitable for most users, including beginners:
Explore the Blazing Fast Speed of Windows VPS!
With Ultahost, hosting a Windows VPS has never been simpler or faster. Enjoy ultra-fast SSD NVMe speeds with no dropouts or slowdowns.
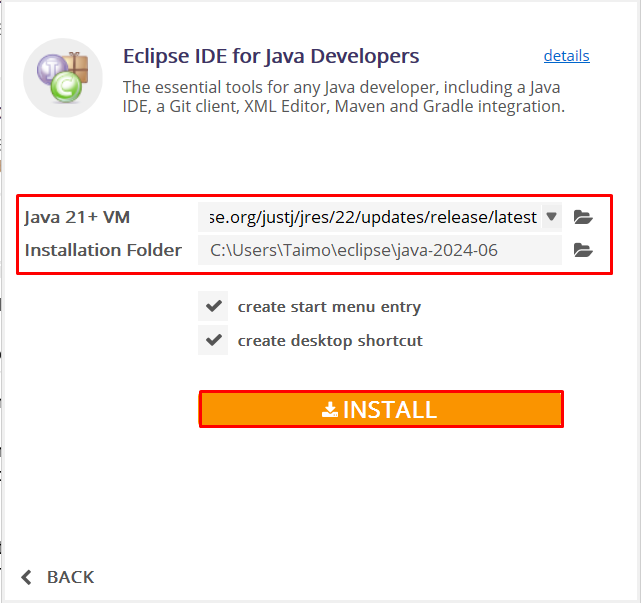
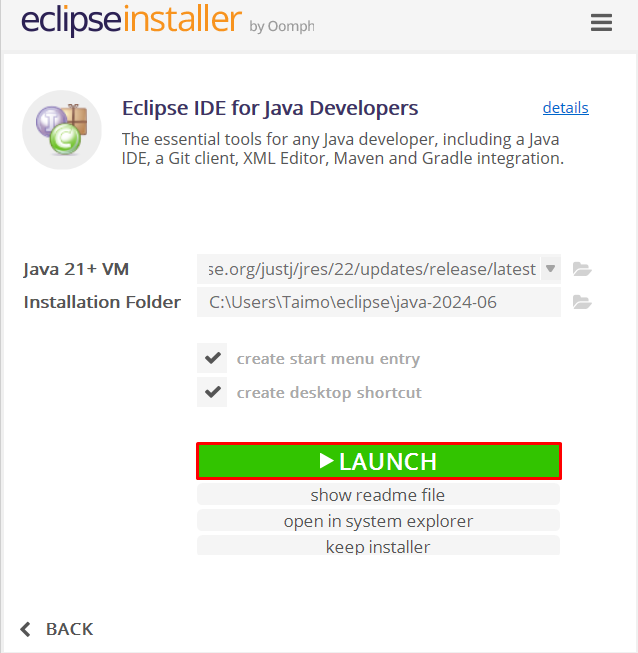
Step 2: Configure Installation Settings
In this step, you’ll configure the installation settings for Eclipse.
You’ll see an option to select the Java VM and JRE versions. The current option is Java 21 + VM with JRE 22.0.1. This setting determines the Java version used by Eclipse. The JRE (Java Runtime Environment) is required to run Eclipse.
You’ll also see an option to choose the installation folder for Eclipse. This is where Eclipse will be installed on your Windows PC. You can either download Eclipse for Java and install Eclipse for Java in the default location or specify a custom location.
Leave the default settings for the Java VM and JRE version. For the installation folder, you can choose a location that’s easy to remember. Make sure to choose a location with sufficient disk space.
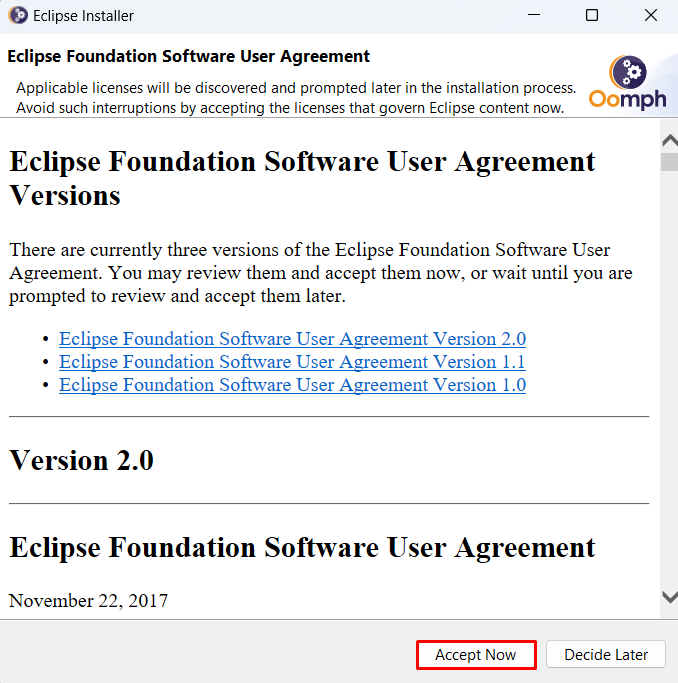
Step 3: Review and Accept the Software User Agreement
When you’ve clicked the Install button, you’ll see the Software User Agreement screen. The Software User Agreement, also known as the End-User License Agreement (EULA), outlines the terms and conditions for using Eclipse. This agreement explains how you can use Eclipse, what rights you have as a user, and what responsibilities you assume by using the software.
Learn about How To Install Python on Windows 10.
Click on the Accept Now button to proceed further:
Step 4: Complete Installation and Launch Eclipse
The installation process has been completed, and you need to click on the launch button to start the Eclipse for the first time. This will start the Eclipse IDE, and you’ll be able to begin using it.
There are some additional options also appear at the bottom:
Click the Launch button to start Eclipse for the first time. This will complete the installation process, and you’ll be able to begin using Eclipse. Further, you can also separately install Java on the Windows operating system.
If you want to view the Readme file or open the installation folder, you can select those options. If you don’t need the installer executable anymore, you can uncheck the Keep Installer option:
Step 5: Select a Workspace
A new window has popped up, asking you to Select a directory as a workspace. In Eclipse, a workspace is a directory where you’ll store all your projects, files, and settings. Think of it as a container for all your work in Eclipse.
Eclipse needs a workspace to store its configuration files, project metadata, and other data. By selecting a workspace, you’re telling Eclipse where to store these files.
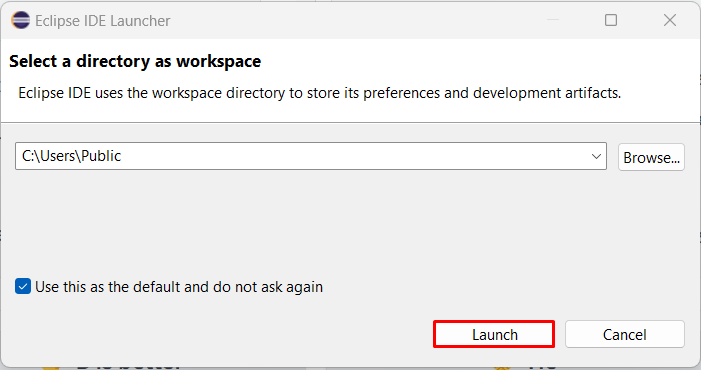
Choose a directory on your system where you want to store your Eclipse workspace. This can be a new directory or an existing one. Make sure to choose a location that’s easy to remember and has sufficient disk space.
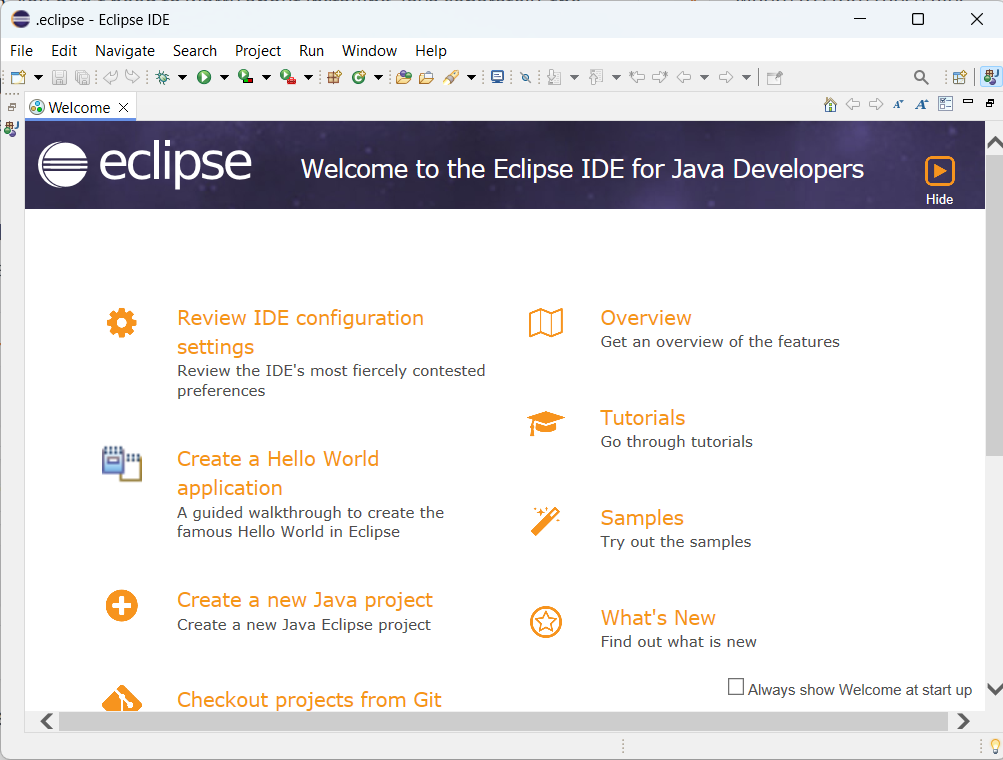
After providing the workspace path, the eclipse IDE will be launched as shown below:
This article has provided a step-by-step guide on how to install Eclipse on Windows 10. We began by choosing the right Eclipse package, specifically the Eclipse IDE for Java Developers. We then configured the installation settings, including the Java VM and JRE version, and selected the installation folder. Next, we reviewed and accepted the Software User Agreement and completed the installation process. After launching Eclipse, we selected a workspace directory and explored the Eclipse IDE, including its various components such as the menu bar, toolbar, navigation pane, editor pane, and console pane.
Throughout this process, we covered essential topics such as understanding the different Eclipse packages, configuring installation settings, and selecting a workspace. By following these steps, users can successfully install Eclipse Windows. With its comprehensive IDE, Eclipse provides a robust platform for developers to write, compile, and debug their code.
If you’re developing or running resource-intensive Java programs, consider Ultahost’s Java hosting plan. Our hosting provides the flexibility and control of a dedicated server, allowing you to install the specific Java version your application needs and configure server settings to optimize performance for your Java workloads.
Eclipse is an integrated development environment (IDE) used primarily for Java development but also supports other programming languages via plugins.
In today's digital landscape, security is paramount, es...
ReactJS is a JavaScript library for building dynamic us...

Time To Live (TTL) is a numeric descriptor for how long...

MySQL is an open-source relational database system that...
RubyMine is an integrated development environment (IDE)...