
How to Install Nucleus CMS in Windows
Nucleus CMS is an open-source content management system...


Joomla is a powerful and versatile content management system (CMS) that enables users to build dynamic and responsive websites and online applications. With its user-friendly interface and extensive customization options, Joomla has become a popular choice for individuals and businesses seeking to establish a strong online presence. What sets Joomla apart is its scalability and flexibility, allowing users to create anything from simple blogs to complex corporate websites.
Installing Joomla on Windows unlocks a range of benefits. It provides users with the ability to create and manage content efficiently, offering a seamless and intuitive content creation and management experience. Additionally, Joomla’s extensive ecosystem of extensions and templates empowers users to enhance their websites with added functionality and design options.
This article will guide you process of how to install Joomla Windows, helping you unlock the full potential of this versatile CMS. You will learn how to get started with Joomla and discover the benefits it can bring to your online projects.
To install Joomla on Windows, we need to set up a local development environment that can run PHP and MySQL. This is where XAMPP comes in. XAMPP is a free, open-source software package that consists of Apache HTTP Server, MariaDB (a MySQL variant), PHP, and Perl. It’s a one-stop solution that provides everything needed to run Joomla locally on our Windows machine.
XAMPP is necessary to install Joomla because Joomla requires a web server, database, and PHP to function. XAMPP provides all these components, making it an ideal choice for setting up a local development environment. With XAMPP, we can run Joomla on our local machine, test and develop our website, and then deploy it to a live server when we’re ready.
You can download Xampp by referring to our guide on how to install XAMPP on Windows system.
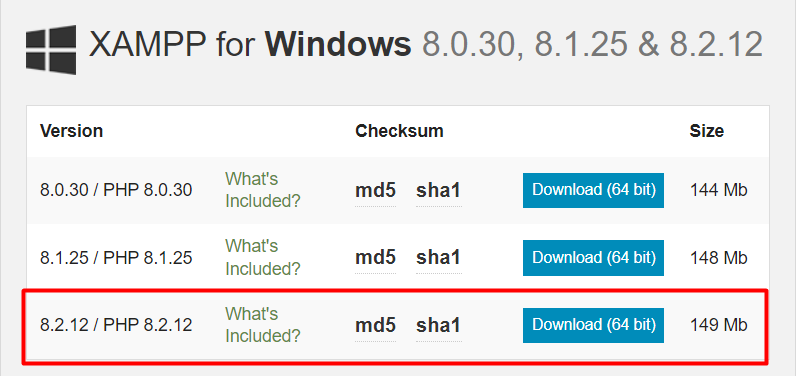
After downloading the XAMPP installer, run the executable file and proceed with the installation. During the installation process, you’ll be prompted to select the components you want to install. For Joomla installation, we’ll need to select the following components:
MySQL: MySQL is a relational database management system that Joomla uses to store its data. Joomla requires a database to store its content, user information, and other settings. MySQL is a popular and widely used database management system that integrates well with Joomla. By selecting MySQL, we’re ensuring that Joomla has a database to store its data and function properly.
FileZilla FTP Server: FileZilla FTP Server is not strictly necessary for Joomla installation, but it’s a useful tool to have. FileZilla is an FTP (File Transfer Protocol) server that allows us to transfer files between our local machine and a remote server. This can be useful when we need to upload our Joomla website to a live server or manage files on our server. Although Joomla can be installed without FileZilla, having it installed can make file management easier.
phpMyAdmin: phpMyAdmin is a web-based tool that provides a graphical interface to manage MySQL databases. With phpMyAdmin, we can create, modify, and manage our MySQL databases from a web-based interface. Joomla requires a database to function, and phpMyAdmin makes it easy to manage that database. By selecting phpMyAdmin, we can easily create a new database for Joomla and manage it later if needed.

By selecting these components, we’re ensuring that we have the necessary tools to install and run Joomla on our local machine. Once we’ve selected the components, proceed with the installation to complete the setup.
After selecting the components, you’ll be prompted to choose the installation directory for XAMPP. This is where XAMPP will be installed on your Windows machine.
By default, XAMPP suggests installing to the C:\xampp directory. You can choose to install XAMPP to a different directory by clicking the “Browse” button and selecting a new location.
Make sure to choose a directory that is easy to remember and has sufficient disk space. The default C:\xampp directory is a good choice, but you can choose a different location if needed.
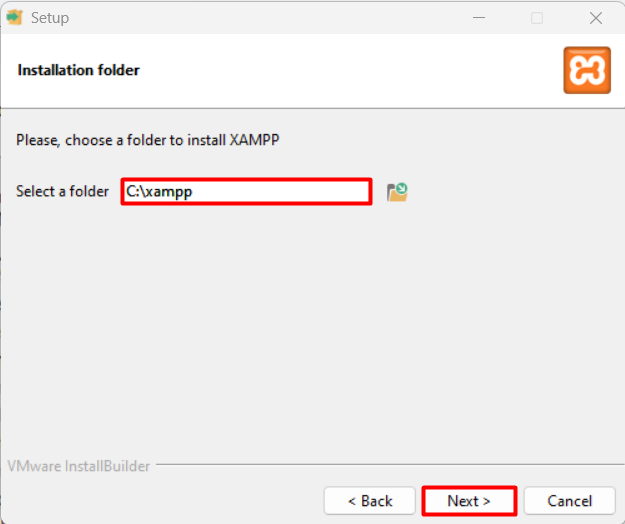
Once you’ve chosen the installation directory, click the “Next” button to proceed with the installation. XAMPP will then install the selected components to the chosen directory.
Install Joomla on Our Windows 10 VPS!
With Ultahost, Hosting Windows VPS has never been easier or faster. Enjoy ultra-fast SSD NVME speeds with no dropouts and slowdowns.
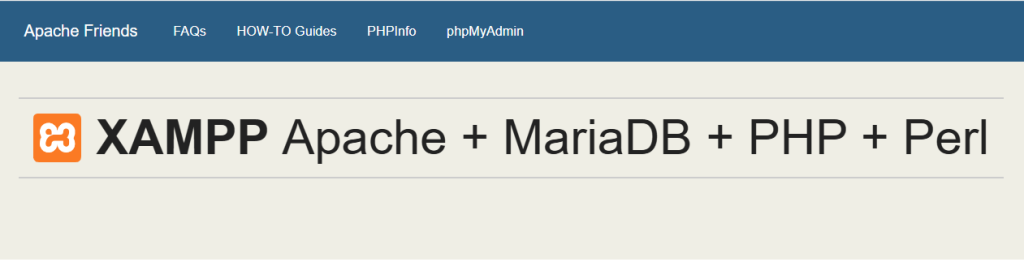
To verify that XAMPP has been installed successfully, launch a web browser and navigate to http://localhost. This should display the XAMPP welcome page, indicating that the installation was successful:
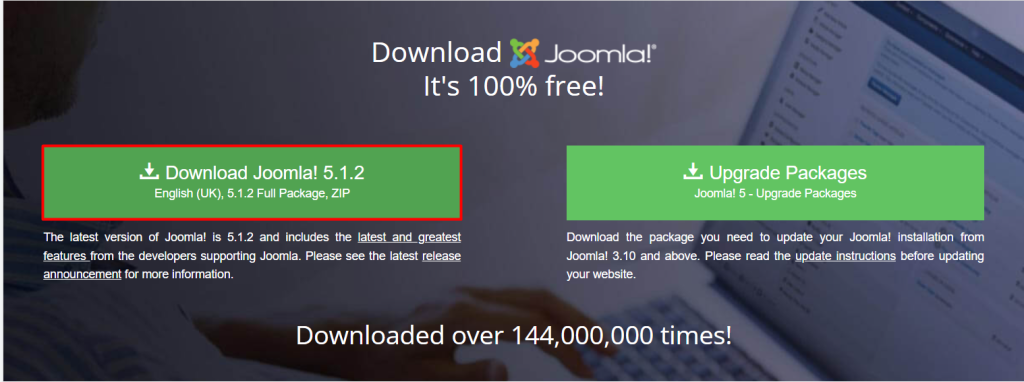
Now that XAMPP is installed and running, we need to download the Joomla installation package by visiting the official Joomla website:
Once the download is complete, you’ll have a ZIP file containing the Joomla installation package. To extract the contents of the ZIP file, you’ll need to use a file archiver tool such as WinRAR, 7-Zip, or the built-in Windows ZIP extractor.
Right-click the Joomla ZIP file and select “Extract All” or “Extract Here” to extract the contents of the ZIP file to a folder. You can also use a file archiver tool to extract the ZIP file.
Choose a location to extract the Joomla files, such as a new folder on your desktop or in a designated directory. Make sure to note the extraction location, as we’ll need it later. Once the extraction is complete, you should have a folder containing the Joomla installation files. We’ll use these files to install Joomla on our local machine.
Now that we’ve extracted the Joomla installation package, we need to copy the entire contents of the extracted folder and move it to the XAMPP’s htdocs directory:
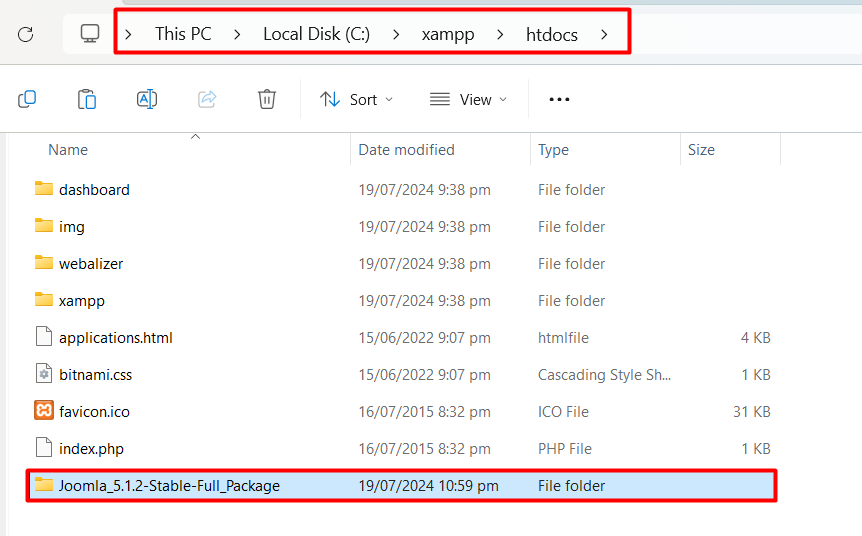
The htdocs directory is a crucial part of the XAMPP installation. It’s the root directory where Apache serves files from. In other words, when you access http://localhost in your web browser, Apache looks for files and folders inside the htdocs directory to serve.
We need to place the Joomla files in the htdocs directory because Apache needs to be able to serve the Joomla files to our web browser. By placing the Joomla files in the htdocs directory, we’re telling Apache to make the Joomla files available at http://localhost.
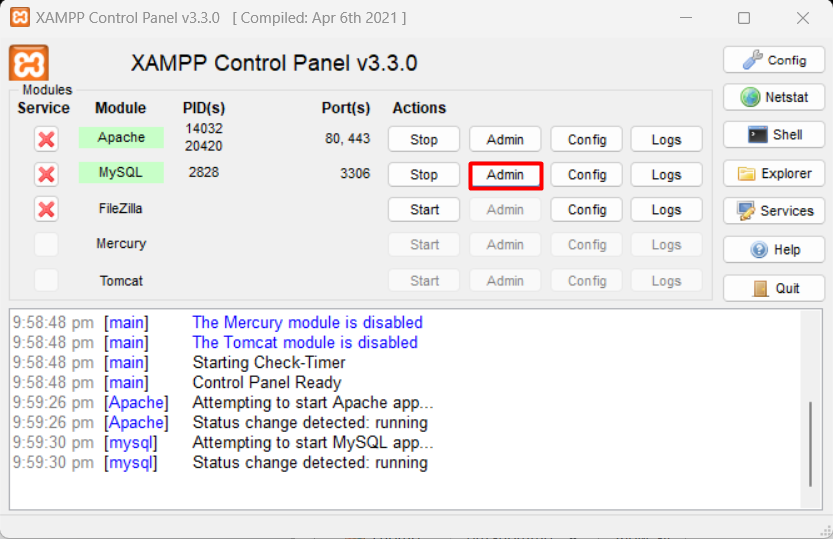
Now that we’ve moved the Joomla files to the htdocs directory, we need to create a new MySQL database for our Joomla installation. To do this, we’ll use the XAMPP Control Panel and phpMyAdmin.
In the XAMPP Control Panel, click on the “Admin” button next to the “MySQL” module. This will open a new window in your web browser, where you can access phpMyAdmin:
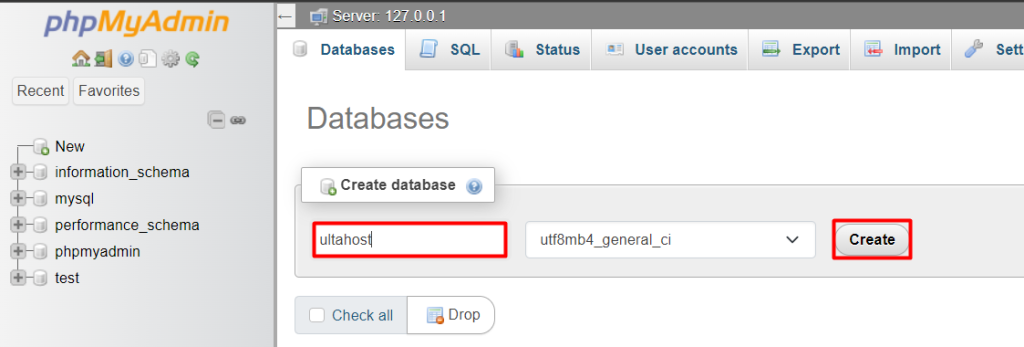
In phpMyAdmin, click on the “Databases” tab and then click on the “Create database” button. In the “Create database” form, enter a name for your database (e.g., “ultahost”) and select a collation (e.g., “utf8_general_ci”).
Click on the “Create” button to create the new database. You’ll see a success message indicating that the database has been created.
Now that we’ve created a new MySQL database, we’re ready to proceed with the Joomla installation process.
Open a web browser and navigate to http://localhost/myjoomlasite (replace “myjoomlasite” with the name of the folder you created in the htdocs directory). This will launch the Joomla installation wizard.
The first step in the Joomla installation wizard is to select the language for the installation process. Choose your preferred language from the dropdown list and click the “Next” button.
In the next step, you’ll be asked to set up your site name and login data. Enter a site name (e.g., “ultahost”) in the “Site Name” field. This will be the name of your Joomla website:
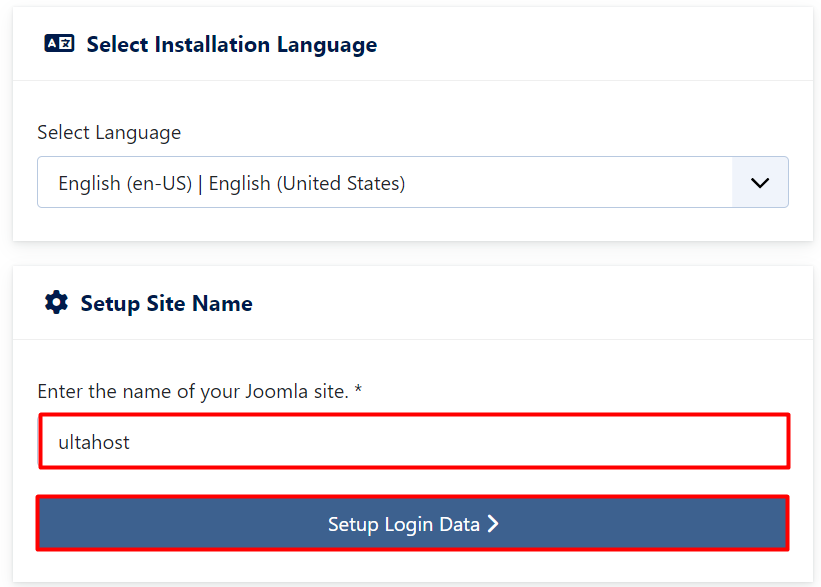
Below the site name field, you’ll see a “Setup login data” button. Clicking this button will allow you to set up the login credentials for your Joomla administrator account.
In this step, you’ll be asked to provide the login data for your Joomla administrator account. After providing the login data, click on the “Setup Database Connection” button at the bottom of the page. This will allow Joomla to connect to the MySQL database we created earlier.

Clicking this button will take you to the next step in the Joomla installation wizard.
In this step, you’ll be asked to configure the database settings for your Joomla installation. The database configuration page will display various settings, most of which will be pre-filled with information. Provide the necessary information, such as the database name, username, and password, to complete the configuration.
Once you’ve provided the necessary information, click on the “Install Joomla” button to begin the installation process.
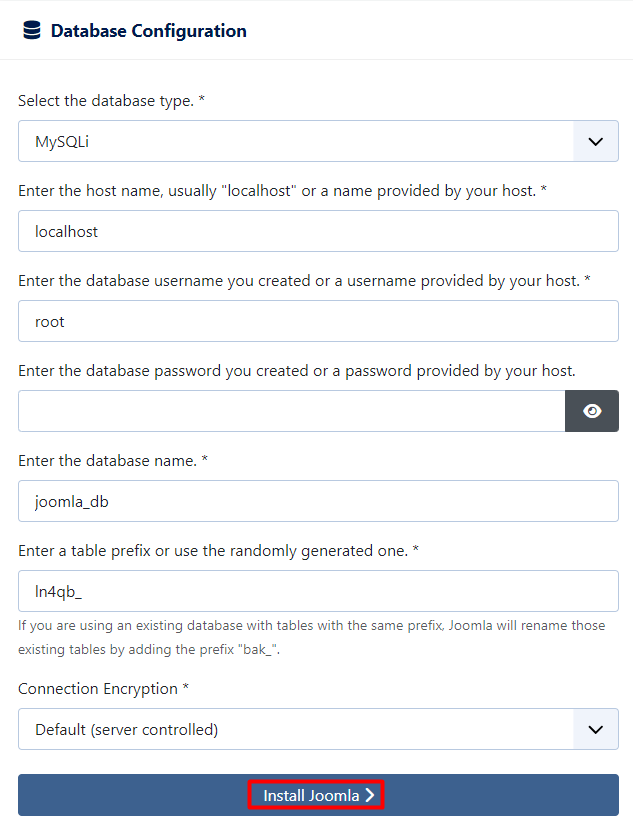
Clicking this button will start the Joomla Windows server installation process, which may take a few minutes to complete.
After clicking the “Install Joomla” button, Joomla will be installed on your local machine. Once the installation is complete, you’ll see a success message:
“Congratulations! Joomla is now installed.”
At the bottom of the screen, you’ll see two buttons: “Open Site” and “Open Administrator”.
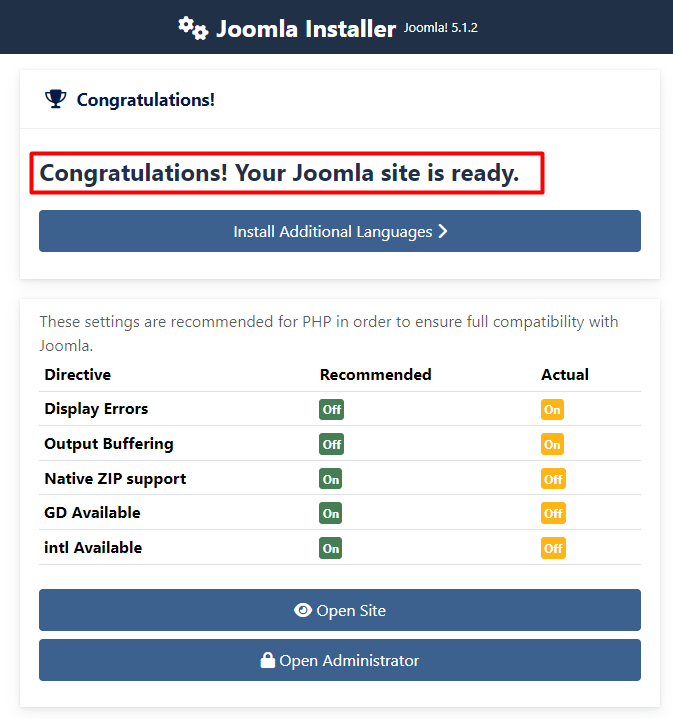
Clicking the “Open Site” button will take you to the frontend of your Joomla website, where you can view your site as it would appear to visitors.
Clicking the “Open Administrator” button will take you to the Joomla administrator dashboard, where you can manage your site’s settings, content, and plugins.
That’s it! You’ve successfully installed Joomla on your local machine.
In this article, we walked through the step-by-step process of installing Joomla on a Windows machine. We started by downloading and installing XAMPP, a free and open-source software package that includes Apache, MySQL, and PHP. We then downloaded the Joomla installation package, extracted its contents, and moved them to the XAMPP’s htdocs directory. This set the stage for the Joomla installation process.
Next, we created a new MySQL database using phpMyAdmin and provided the necessary login data for the Joomla administrator account. Finally, we configured the database settings and clicked the “Install Joomla” button to complete the installation. With these easy-to-follow steps, you can now install Joomla Windows 10 on your local machine and start building your dream website. By following this guide, you’ll be up and running with Joomla in no time, ready to take advantage of its powerful features and flexibility.
Installing Joomla on Windows can be an intensive process. Upgrading to an Ultahost quick VPS server provides a more powerful and affordable environment for installing Joomla. These VPS plans offer processing power, RAM, and storage, ensuring smooth performance.
You’ll need a web server software like XAMPP or WampServer that includes Apache, MySQL, and PHP. These tools create a local development environment on your Windows 10 machine.
XAMPP and WampServer are popular choices. XAMPP is known for its simplicity, while WampServer offers a Windows-friendly interface.
Visit the Apache Friends website and download the XAMPP installer for Windows. Run the installer and follow the installation instructions. Make sure to start the Apache and MySQL services after installation.
Go to the WampServer website and download the installer for your Windows version (32-bit or 64-bit). Run the installer and follow the on-screen instructions. Start the WampServer after installation; it will automatically start Apache and MySQL.
Yes, you need to configure Apache and MySQL to ensure they are running correctly. This typically involves adjusting port settings if there are conflicts and setting up MySQL databases.