
How to Install Nucleus CMS in Windows
Nucleus CMS is an open-source content management system...


SQL Server is a relational database management system (RDBMS) developed by Microsoft. It is designed to compete with other popular SQL-based databases such as MySQL. Its primary functions include storing, retrieving, and securing data for users and applications. It utilizes the traditional Structured Query Language (SQL) to manage and manipulate data. Applications and utilities communicate with an SQL Server instance or database via Transact-SQL.
In this article, we will demonstrate the step-by-step process of installing Microsoft SQL Server on a Windows operating system.
Many SQL-based databases, including MySQL database, PostgreSQL, SQLite, and SQL Server, are designed for efficient data storage, retrieval, management, and querying. Each database has its own specific hardware and software requirements for installation. More specifically, the hardware and software requirements for installing SQL Server on Windows are listed below:
Let’s proceed toward the installation process of Windows SQL Server.
Different editions and versions are available for Microsoft SQL Server installation, such as the Developer Edition, Express Edition, Evaluation Edition, and Basic or Custom versions. In this section, we will install the Basic version of Microsoft SQL from the Developer Edition. However, all other editions are also freely available and you can install them in a similar way.
Discover the Fast Performance of Windows Server!
Consider Ultahost’s reliable Windows hosting for optimal performance, which offers a high-speed and stable environment.
To install the SQL server on Windows, follow the below demonstrations:
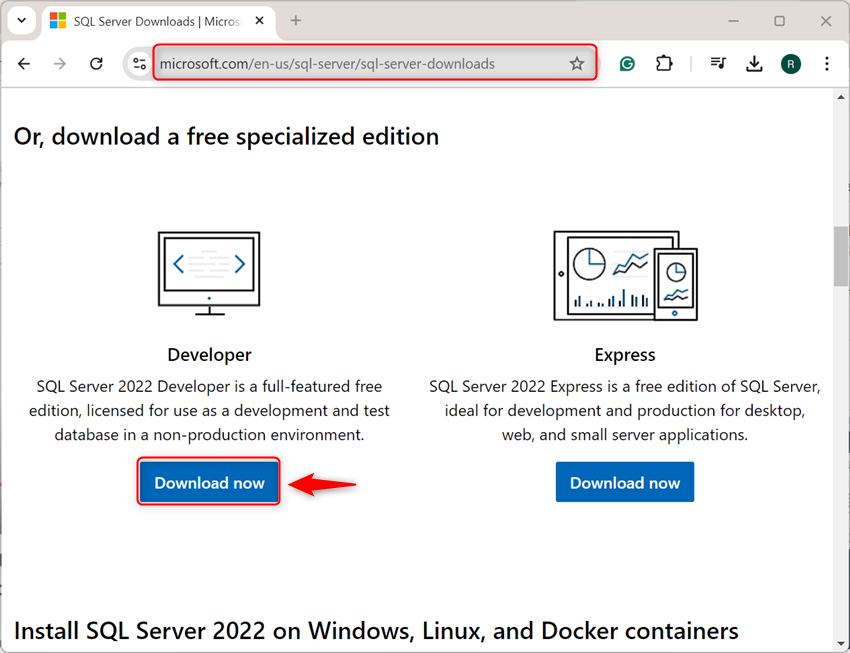
Navigate to the official Microsoft website and choose the edition of Microsoft SQL server. After that, press the “Download now” button:
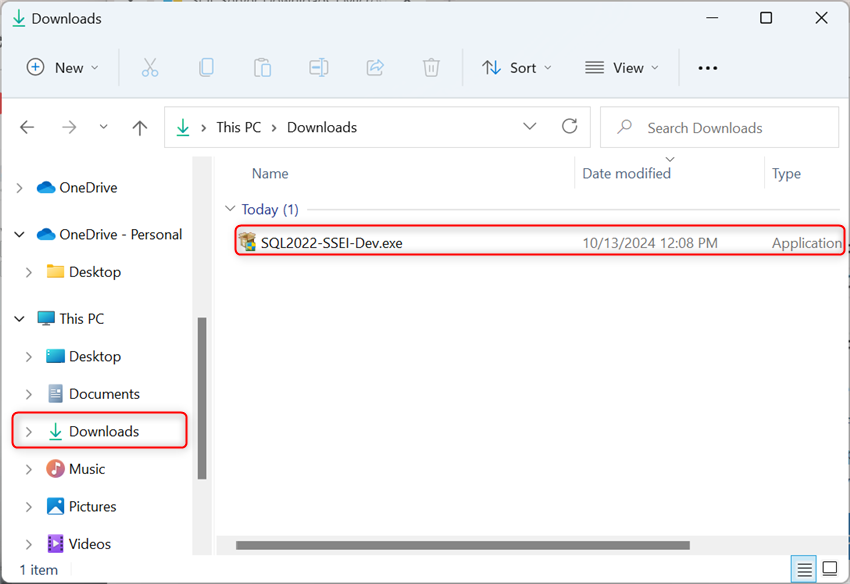
By default, the installer will be stored in the Downloads folder of Windows. Now, navigate to the Downloads directory, and execute the Micro SQL server installer:
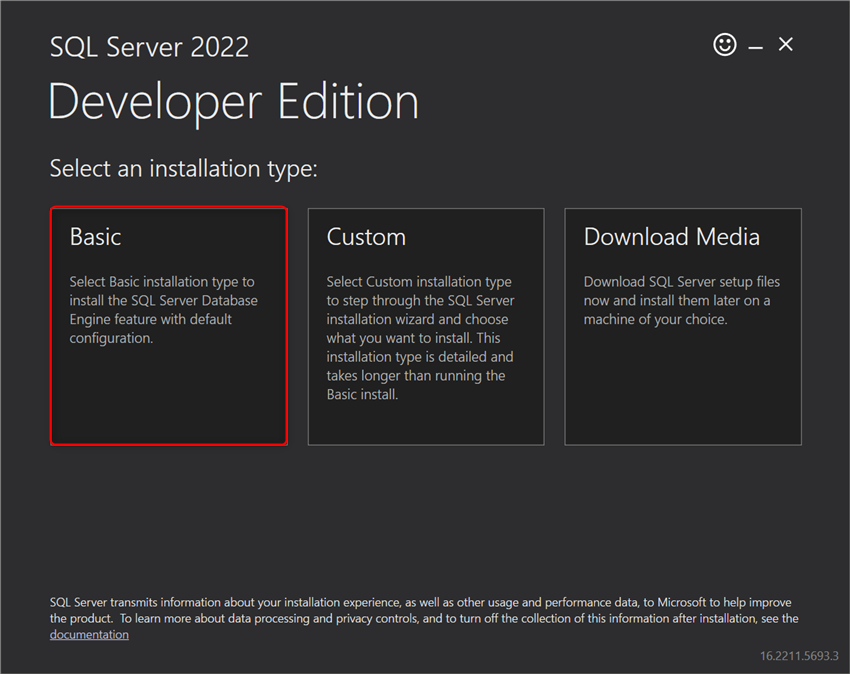
Now, select the SQL server installation type according to your preferences. For example, the “Basic” edition will install basic features and configuration:
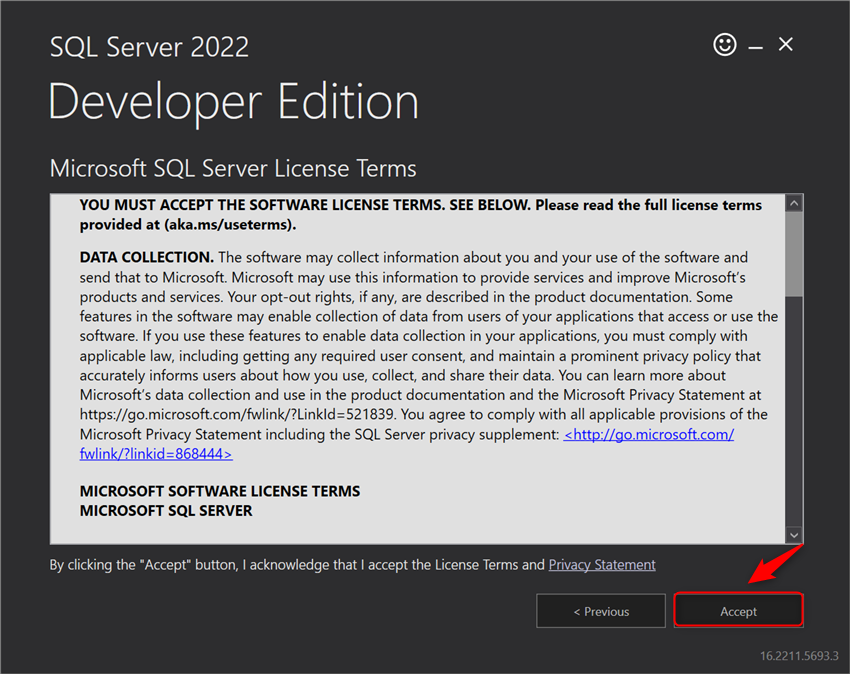
Agree with Microsoft SQL server License terms and privacy conditions by hitting the “Accept” button:
Browse the location where you want to install the SQL server and then press the “Install” button:

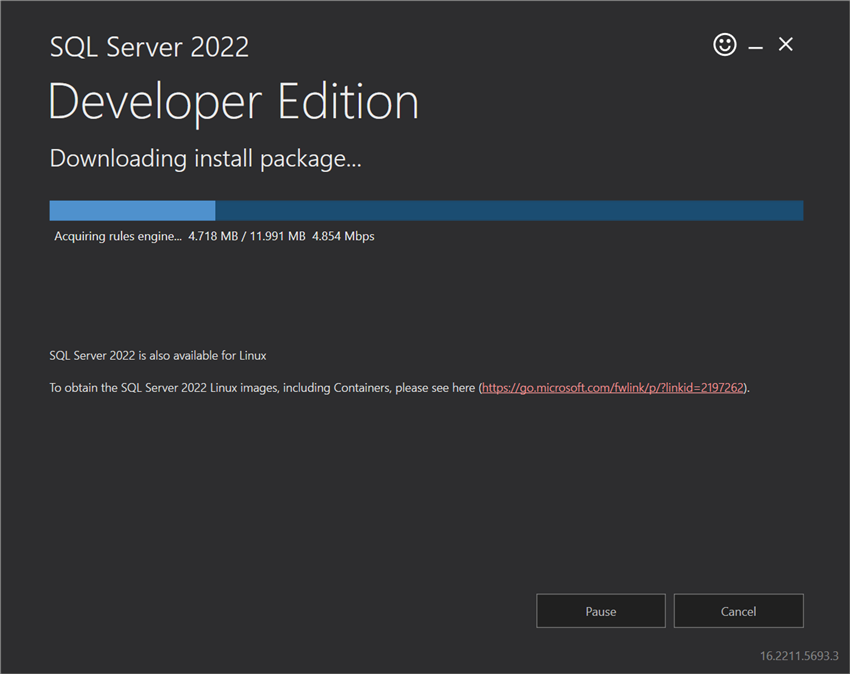
Upon doing so, the installation process will start:
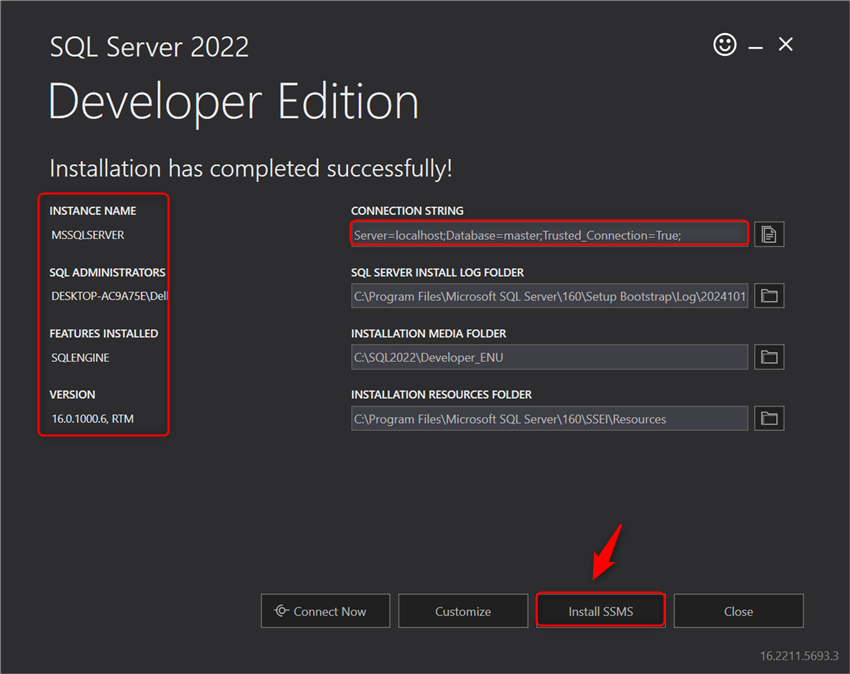
After the installation, the SQL Server main wizard will appear, showing basic information about SQL Server, such as the instance name, system administrator name, connection string, location of SQL logs, and so on. It is also recommended that we install the SSMS (SQL Server Management Studio) tool, which allows us to manage and use SQL Server through a user-friendly interface.
Read also How to Install SQLite on Windows
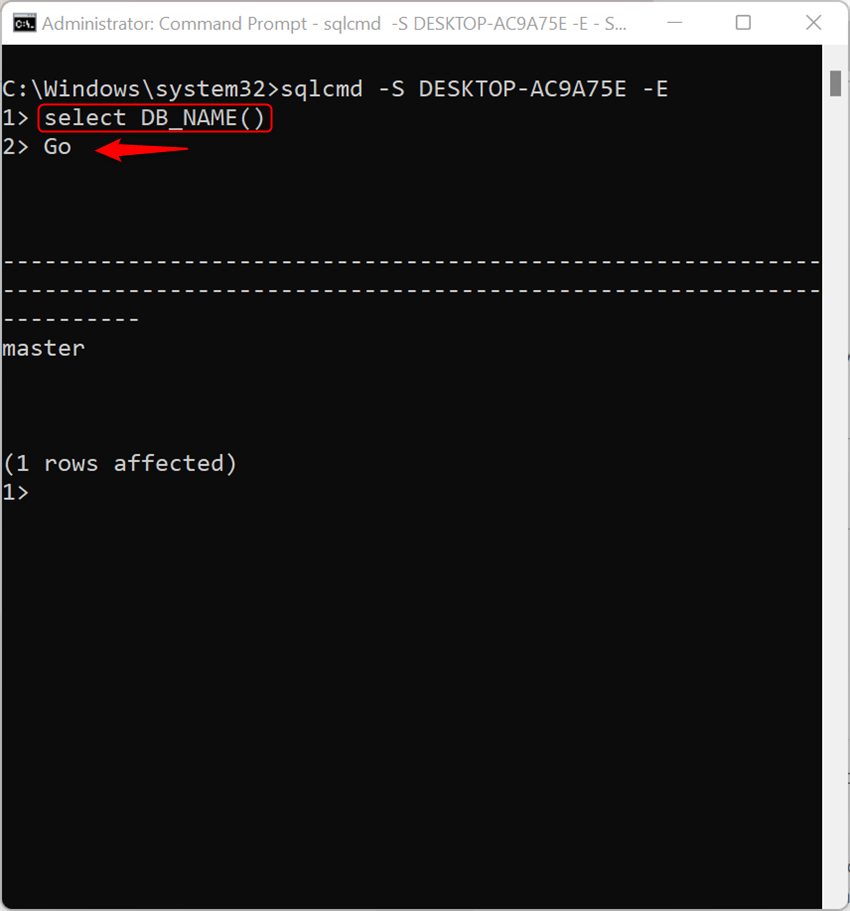
Launch the Command Prompt as an administrator via the Windows Start menu and connect to the SQL server by utilizing the following command:
sqlcmd -S DESKTOP-AC9A75E -E

View the existing database information using the below command:
select DB_NAME()
GO
To create a new database in the SQL server, use the “Create database <Database name>” query:
Create database Demodatabase

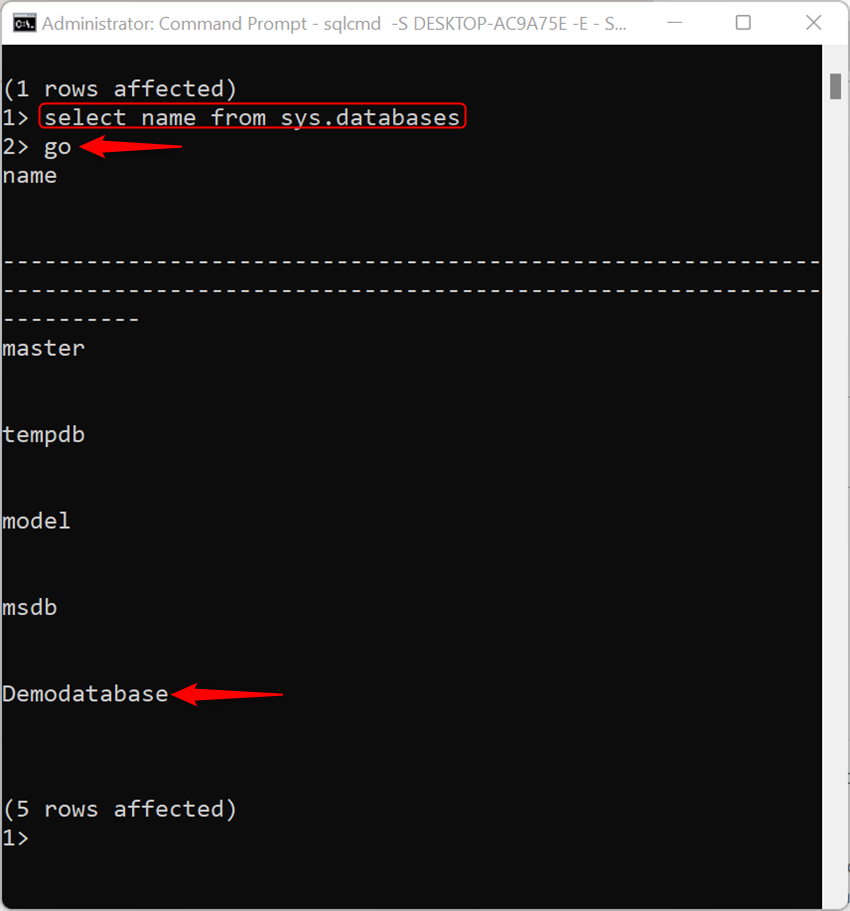
For validation, check the system databases through the following queries:
select name from sys.databases
go
Here, the output indicates that the new “Demodatabase” is created effectively in the SQL server. To exit the SQL server prompt interface, type “Exit” query:
This is all about Microsoft SQL server installation.
Microsoft SQL Server for Windows is a relational database that manages, manipulates, and retrieves data securely in an RDBMS. All editions and versions are available on Microsoft’s official website and you can easily install them free of cost. After downloading the installer, simply run it and start the installation of Microsoft SQL Server.
Enhance your SQL Server environment on Windows with Ultahost’s affordable Windows VPS hosting. Enjoy improved processing power, increased memory, and extensive storage, making it easier to install and run Microsoft SQL Server. Ultahost provides the performance you need to manage databases and execute queries efficiently.
Microsoft introduced Microsoft SQL Server as a relational database management system (RDBMS). It competes with other SQL databases like MySQL by offering similar features, but it is deeply integrated with Microsoft tools and technologies that enhance its features.
Hardware: Minimum 6GB hard disk space, 1GB memory, and a 1.4 GHz x64 processor.
Software: Windows 10 or later, or Windows Server 2016 or later, and .NET Framework.
You can install Microsoft SQL Server on Windows 10, or the latest versions of Windows, and Windows Server 2016 or greater. However, SQL Server is also available for Linux distributions and helps run Linux containers.
Editions include Developer Edition, Express Edition, Evaluation Edition, and Basic or Custom versions.
Open Command Prompt as administrator and use the command sqlcmd -S <System name/Instance name> -E to connect.
Use the command “select DB_NAME()” followed by “GO” in the SQL Server prompt to view the database.
SSMS is a tool that provides a user-friendly interface for managing, administering, and configuring all SQL Server components. It is recommended for easier database management.