
How to Install Kubernetes on Ubuntu 22.04
Kubernetes is an open-source container orchestration sy...


Tmux is a powerful terminal multiplexer that allows users to manage multiple terminal sessions, windows, and panes from a single terminal window or remote connection. It is particularly useful for developers and system administrators who need to handle multiple tasks or projects simultaneously in a terminal environment. With Tmux, you can detach and re-attach sessions, which means you can leave processes running in the background and reconnect to them later, making it ideal for long-running tasks or managing remote servers.
In this step-by-step guide, we’ll walk you through the process of installing and setting up Tmux on an Ubuntu system, as well as explore some of its key features and use cases to help you get the most out of this versatile tool.
Before diving into the installation process, let’s briefly discuss why Tmux is beneficial:
Installing Tmux on Ubuntu is a straightforward process that can be completed in a few steps.
Method 1: Install Tmux using the Ubuntu Repository
Ubuntu, as a Debian-based distribution, often sparks the debate of Ubuntu vs Debian among users, highlighting both the similarities and distinct features each brings to the table, uses the apt package management system. This system provides a simple and efficient way to install, remove, and update software packages on your system. The apt package management tools include apt, apt-get, and aptitude, which can be used to interact with the package system and manage your software installations.
For installing Tmux, we will primarily use the apt command, which is an improved front-end for apt-get with a better progress display and other user-friendly features.
Unleash the power of Ubuntu VPS
Experience the reliability of the world’s top Linux distribution paired with the flexibility of a virtual server. Enjoy lightning-fast speeds and minimal latency.
Step 1: Updating the Package List
Before installing any new packages, it’s important to update the local package list to ensure that your system has the latest package information and version numbers from the Ubuntu repositories.
sudo apt update
This command will contact the Ubuntu package repositories and update the local package list, providing information about available packages and their versions. It’s good practice to update the package list regularly, especially before installing or upgrading any software, to ensure you’re installing the most recent versions.
Step 2: Installing Tmux
Now that your package list is up to date, you can proceed to install Tmux Ubuntu 22.04. The Tmux package is available in the default Ubuntu repositories, so you can install it directly using the apt command.
sudo apt install tmux
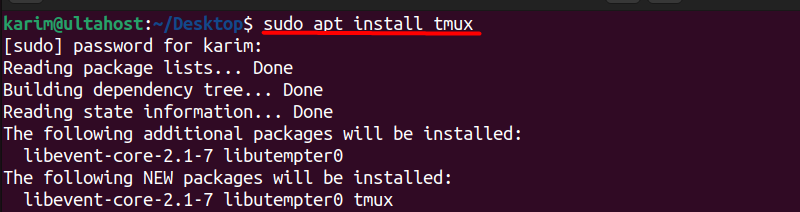
This command will download and install the Tmux package, along with any necessary dependencies, on your Ubuntu system. You will be prompted to confirm the installation, and you can simply press Y and then Enter to proceed.
During the installation process, the package manager will provide information about the packages being installed, the amount of disk space they will occupy, and any configuration tasks that need to be performed. Simply wait for the process to complete.
Learn about How to Install Rust on Ubuntu
Step 3: Verify Tmux Installation
Once the installation is finished, you can verify that Tmux was installed successfully by checking its version:
tmux -V

Running this command should display the version number of Tmux that was installed, indicating that Tmux is now ready to use.
Now that you have Tmux installed, let’s take a moment to understand some basic concepts and terminology before we dive into using it:
With these concepts in mind, you can think of Tmux as a way to create and manage multiple terminal sessions, windows, and panes, all from a single interface. This is especially useful when you need to monitor multiple processes, switch between different projects, or simply want to organize your work efficiently in the terminal.
Now that you have Tmux installed, let’s explore some basic commands to get you started.
Starting a Tmux Session
To start a new Tmux session, simply type:
tmux

This will create a new session and open a Tmux terminal.
Detaching and Reattaching Sessions
One of Tmux’s powerful features is the ability to detach and reattach sessions. To detach from a session, press Ctrl+b followed by d:

This will return you to the regular terminal, leaving your Tmux session running in the background.
To reattach to a detached session, use
tmux attach

If you have multiple sessions, you can specify which session to attach to by providing the session ID:
tmux attach -t <session-id>
Managing Tmux Sessions
To list all active Tmux sessions, use:
tmux ls

To kill a specific Tmux session, use:
tmux kill-session -t <session-id>
To kill all Tmux sessions, you can use:
tmux kill-server
Tmux is a must-have tool for developers and system administrators. It helps you manage multiple terminal sessions, windows, and panes from one place, making your work easier and more efficient. With Tmux, you can start tasks, leave them running, and come back to them later, which is great for long tasks or remote server management.
Installing Tmux on Ubuntu is easy, by following our guide you can understand how to use Tmux on Ubuntu effectively. You just need to update your package list and use the apt command to install it. Once installed, you can check its version to make sure everything went well. Understanding the basics, like sessions, windows, and panes, will help you get the most out of Tmux. Basic commands like starting a session, detaching and reattaching sessions, and managing sessions are simple and make your workflow smoother. This guide has covered these steps to help you start using Tmux to handle your terminal tasks more effectively.
Whether you’re a seasoned developer or new to Linux, having a setup that meets your needs is crucial. Ultahost offers a robust and reliable platform with Linux VPS hosting providing dedicated resources to ensure the speed and stability necessary for efficient task handling.
Tmux (short for Terminal Multiplexer) is a terminal application that allows you to multiplex several virtual consoles. It enables users to access multiple separate terminal sessions inside a single terminal window or remote terminal session
You can install Tmux on Ubuntu using the apt package manager. Open a terminal and run the following command:
After installing Tmux, simply type tmux in your terminal and press Enter. This will start a new Tmux session.
To detach from a Tmux session without closing it, press Ctrl+b, then release both keys and press d (stands for detach). You’ll return to your regular terminal shell.
If you have a detached Tmux session, you can list all sessions with: