
How to Install Filmora Video Editor on Window...
Filmora Video Editor is a versatile video editing softw...


WinSCP is a popular free and open-source software for Windows that allows users to securely transfer files between a local and a remote computer. It uses the Secure File Transfer Protocol (SFTP) and Secure Copy Protocol (SCP) to ensure safe and efficient file management. With its simple user interface, WinSCP has become a favorite among web administrators and anyone needing to transfer files securely. This step-by-step guide will teach you how to install WinSCP Windows 10 on your system and begin using it for your file transfer needs.
WinSCP (Windows Secure Copy) is a widely used open-source file transfer tool designed specifically for Windows. It supports various protocols such as SFTP, FTP, WebDAV, Amazon S3, and SCP, making it versatile for both personal and professional use. This guide will take you through the step-by-step process of downloading and installing WinSCP on your Windows system, ensuring you can securely transfer files between your local computer and remote servers.
Downloading WinSCP Installer
To begin, you need to download the WinSCP installer from the official website:
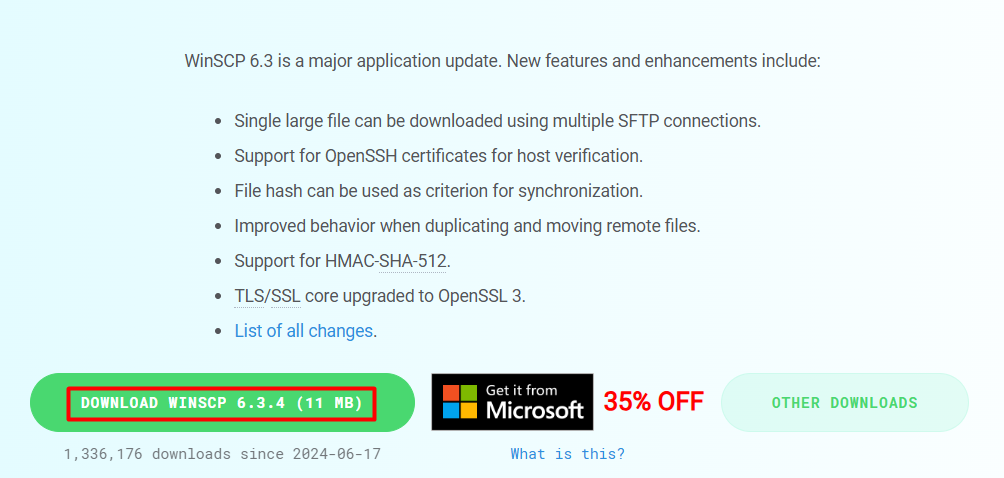
On the download page, you will see different versions available from which you can download WinSCP Windows executable files. Click on the ‘Download’ button for your chosen version. The website will redirect you to the SourceForge page, which hosts the WinSCP files. After taking around 5 seconds the download will start automatically which is around 11 MB in size.
To install WinSCP on your Windows system, follow these straightforward steps:
Step 1: Launch the Installer
After downloading the executable file, you need to double-click on the installer file to launch it. Depending on your Windows settings, you may see a User Account Control (UAC) prompt asking if you want to allow the app to make changes to your device. Click ‘Yes’ to proceed.
Explore the Blazing Fast Speed of Windows VPS!
With Ultahost, hosting a Windows VPS is now easier and faster than ever. Experience ultra-fast SSD NVMe speeds with no interruptions or slowdowns.
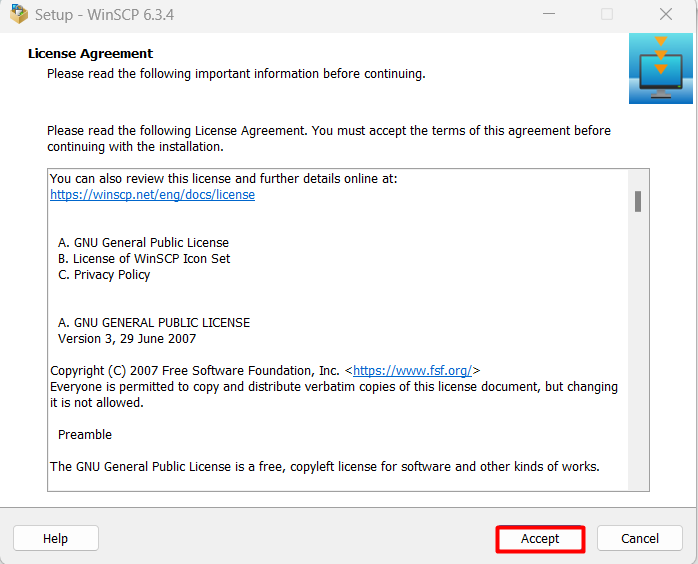
Step 2: WinSCP Setup Wizard
The WinSCP Setup Wizard will guide you through the installation process. Click ‘Next’ on the welcome screen. Review the license agreement. If you agree to the terms, select the ‘I accept the agreement’ option and click ‘Next’:
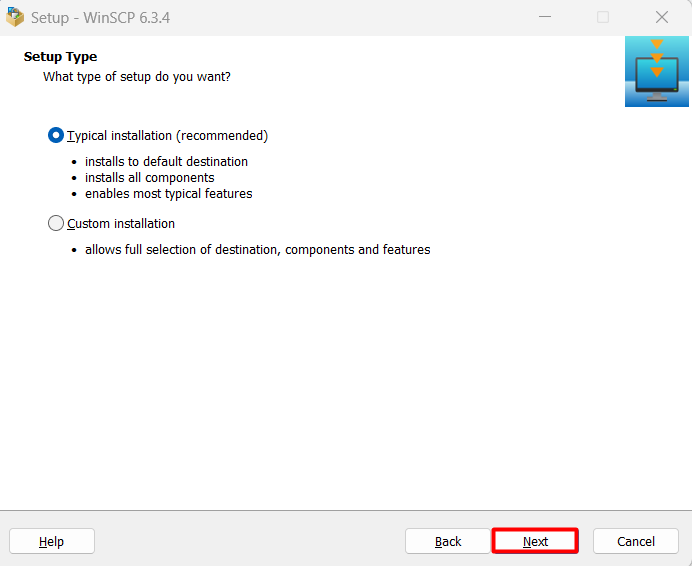
Step 3: Choose Installation Type
The next step offers a choice between the ‘Installable’ and ‘Portable’ versions of WinSCP. Select the ‘Installable’ option, which will then present you with two installation methods: ‘Typical installation’ or ‘Custom.’
Make your choice and click ‘Next’ to proceed:
Step 4: Interface Selection
After selecting the ‘Typical’ installation method, WinSCP allows you to choose your preferred interface: ‘Commander’ or ‘Explorer.’
Select the interface that best suits your needs and click ‘Next.’ Don’t worry if you change your mind later, as you can easily switch between these interfaces in WinSCP’s settings:
Learn about How to Install WinGet in Windows.

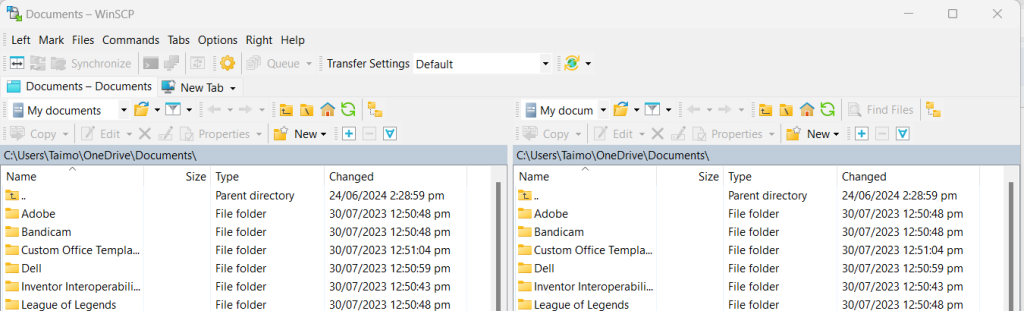
The choice depends on user preference, with the ‘Commander’ view suited for multi-file transfers and the ‘Explorer’ view offering a familiar browsing experience. You can switch between these interfaces at any time in WinSCP’s settings.
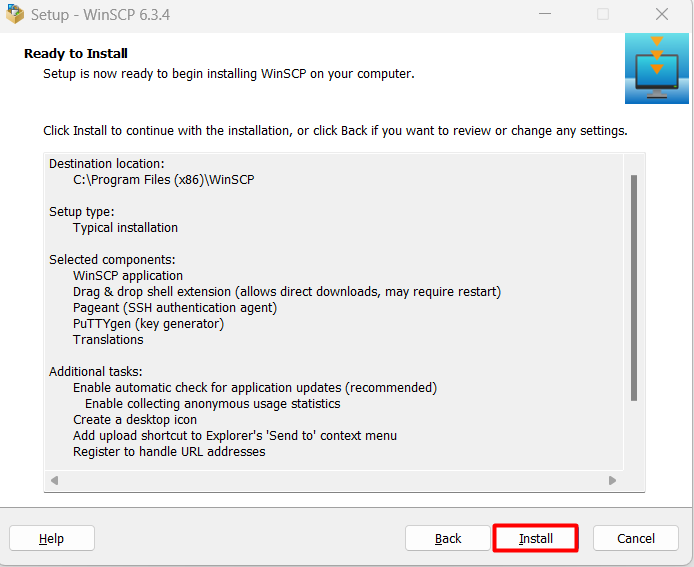
Step 5: Finalize Installation
Review your installation choices on the summary screen. If you’re satisfied, click the ‘Install’ button to begin the installation process. Sit back and let WinSCP do its magic!
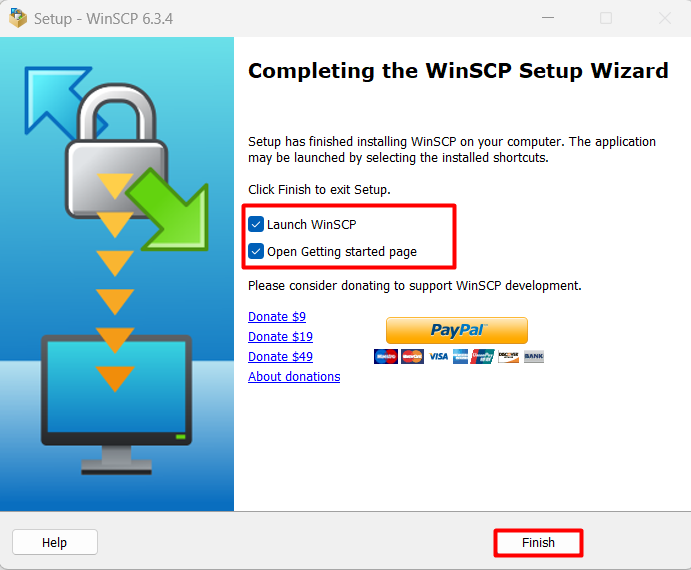
Step 6: Launch WinSCP
Once the installation is complete, you’ll have the option to launch WinSCP immediately by leaving the ‘Run WinSCP’ box checked. Click ‘Finish’ to exit the Setup Wizard and open WinSCP, ready to start using it.
That’s it! You’ve successfully installed WinSCP on your Windows system and are now ready to start transferring files securely.
Now that WinSCP is installed and configured, you can start transferring files securely:
WinSCP offers a range of customization options to tailor the program to your needs. Through the ‘Options’ menu, you can modify various settings, including:
You can also create and manage sessions through the ‘Sessions’ menu. A session stores the connection details for a particular server, allowing you to quickly connect without entering credentials each time.
The ‘Commands’ menu allows you to customize the set of commands available in the right-click menu, giving quick access to your most-used actions.
WinSCP also supports custom scripts, which can be written in various scripting languages, to automate complex tasks and further customize the program to your needs.
WinSCP also supports command-line operations, allowing you to automate file transfers through scripting.
WinSCP is an invaluable tool for anyone needing to transfer files securely, and the installation process is straightforward and user-friendly. By following the simple steps outlined in this guide, you can quickly install WinSCP on your Windows system and begin leveraging its powerful file transfer capabilities.
With its support for various protocols and a simple user interface, WinSCP makes secure file management accessible to all. The software’s versatility and ease of use have made it a favorite among web administrators and professionals alike. Whether you’re transferring files between a local and remote computer or utilizing advanced features like synchronization, WinSCP offers a reliable and efficient solution. So, if you’re seeking a secure and reliable way to manage your files, look no further than WinSCP.
After completing these steps, you have successfully installed WinSCP on your Windows system. You are now ready to develop robust and powerful applications with WinSCP. Remember, for optimal performance and seamless development, consider using Ultahost Windows hosting. You get reliable and high-speed hosting tailored to your needs.
WinSCP (Windows Secure Copy) is a popular open-source SFTP, SCP, and FTP client for Windows.
You can download WinSCP from its official website: winscp.net.
Yes, WinSCP is completely free and open-source under the GNU General Public License (GPL).
WinSCP runs on all recent versions of Windows, including Windows 11, 10, 8, 7, Vista, and their corresponding server versions.
Here are the steps to install WinSCP: