How to Install XCode on MacOS
XCode is Apple's integrated development environment (ID...


Yarn, a package manager for JavaScript created by the efforts of Facebook, Google, and others It’s built to be fast, reliable and secure. Yarn is a next-generation JavaScript package manager that stands for Yet Another Resource Negotiator and a lot of problems that developers are facing with npm (Node Package Manager), such as Inconsistent package installations and a lot more.
In this article, we will learn how to install Yarn on macOS and some commands to help you start adapting it.
Before setting up Yarn Mac, kindly ensure you have the following prerequisites:
1. macOS version 11 that you are able run most.
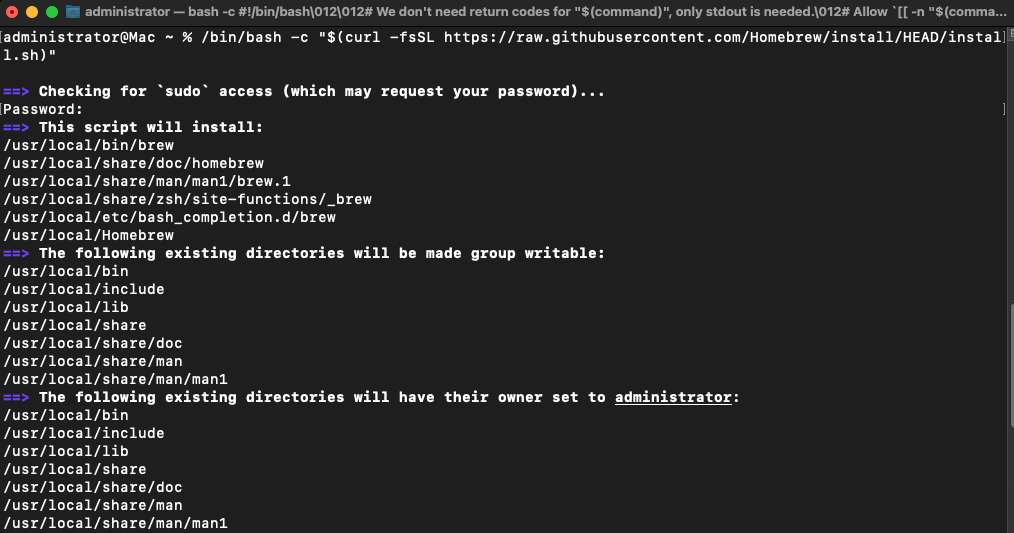
2. Command line utility based on the Homebrew package manager for macOS. If you have not homebrew in your machine, run the below command in your terminal to install it.
/bin/bash -c "$(curl -fsSL https://raw.githubusercontent.com/Homebrew/install/HEAD/install.sh)"
3. Mac install Yarn requires Node.js to be installed on your system. Refer to our guide on how to install Node.js on macOS.
Let’s proceed with the installation of Yarn on your macOS system:
First, ensure that your Homebrew installation is up to date. Open your terminal and run the following command:
brew update

This command updates Homebrew to the latest version, ensuring you have access to the most recent packages.
With Homebrew updated, you can now Yarn install Mac. Run the following command in your terminal:
brew install yarn
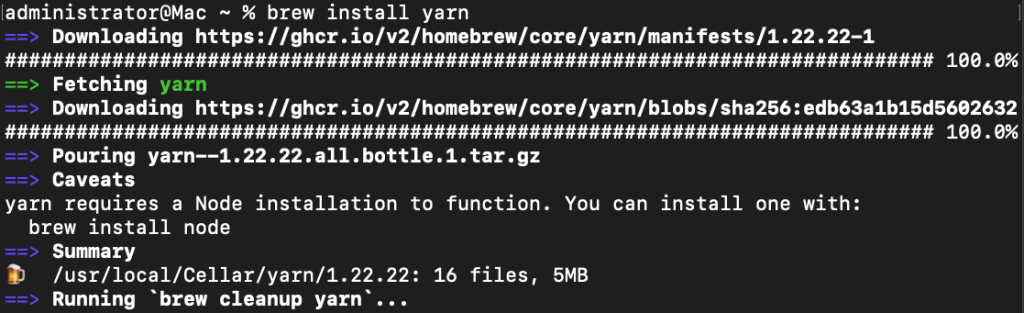
This command will download and install Yarn, along with all its dependencies. The installation process might take a few minutes, depending on your internet connection.
Install Yarn on Our Macintosh VPS Hosting!
UltaHost Mac VPS Hosting is one of the quickest, secure, and affordable Macintosh hosting. Connect to a MacOS VPS from any device. Start your Mac hosting today!
After the installation is complete, you should verify that Yarn is installed correctly. Run the following command to check the version of Yarn installed on your system:
yarn --version

If Yarn is installed correctly, you should see the version number displayed in your terminal. This confirms that the Yarn is ready for use.
Now that you have Yarn installed, let’s go over some basic commands to help you get started.
To create a new project using Yarn, navigate to your desired directory and run the following command:
yarn init
This command will prompt you to answer a series of questions about your project, such as its name, version, and entry point. You can either fill out these details or press Enter to accept the default values.
With your project initialized, you can start adding dependencies. To add a package to your project, use the following command:
yarn add [package-name]
Replace [package-name] with the name of the package you want to install. Yarn will download the package and add it to your project’s node_modules directory.
If you need to remove a package from your project, use the following command:
yarn remove [package-name]
Replace [package-name] with the name of the package you want to remove. Yarn will delete the package from your project’s node_modules directory and update your package.json file accordingly.
To update all the dependencies in your project to their latest versions, use the following command:
yarn upgrade
This command will check for updates to your project’s dependencies and install the latest versions available.
Yarn allows you to define and run scripts from your package.json file. To run a script, use the following command:
yarn run [script-name]
Replace [script-name] with the name of the script you want to execute. For example, if you have a script named start defined in your package.json file, you can run it using:
yarn run start
Learn about How to Install Yarn on Ubuntu.
The following are some best practices after installing Yarn on macOS:
Yarn is a versatile and efficient package manager that offers numerous benefits over npm. By following this guide, you should have successfully installed Yarn on your macOS system and learned some essential commands to get you started. Yarn’s speed, reliability, and security make it a valuable tool for managing JavaScript projects, and its seamless integration with the JavaScript ecosystem ensures that you can easily manage dependencies and automate tasks.
While installing Yarn on macOS is straightforward managing dependencies and ensuring compatibility across different server environments can be technical. Upgrading to Ultahost’s best VDS server plan empowers you with a robust solution that helps you to install with the latest package managers and repositories, simplifying Yarn installation and updates.
Yarn is a package manager for JavaScript that helps you install, manage, and share project dependencies.
You can install Yarn using Homebrew or npm with simple terminal commands.
Run brew install yarn in your terminal to install Yarn via Homebrew.
Yes, Yarn requires Node.js. You can install Node.js using Homebrew or directly from its website.
Type yarn –version in your terminal. If Yarn is installed, it will display the version number.
Yes, you can install Yarn via Homebrew, which doesn’t require npm.
Yes, Yarn is completely free and open-source.