How to Install Unity on Ubuntu
Unity is a popular, widely-used game engine that enable...


The MERN stack, an acronym for MongoDB, Express.js, React.js, and Node.js, is a powerful set of technologies. It enables developers to build scalable and feature-rich web applications. It handles everything from managing the database to running the server and creating interactive user interfaces. Overall, the MERN stack on Ubuntu 24.04 offers a robust platform for developers to create scalable, maintainable, and high-performance web applications.
In this guide, we will explain the process of installing the MERN stack on Ubuntu 24.04.
The MERN stack consists of four open-source tools: MongoDB, Express.js, React, and Node.js. It is used for building modern web applications. Installing the MERN stack on Ubuntu 24.04 sets up an environment to build and deploy full-stack JavaScript applications. This is beneficial for those looking to develop JavaScript-based applications that require a NoSQL database, a backend framework, and a frontend library, all operating within a Node.js runtime environment.
To install MERN on Ubuntu 24.04, use the below steps:
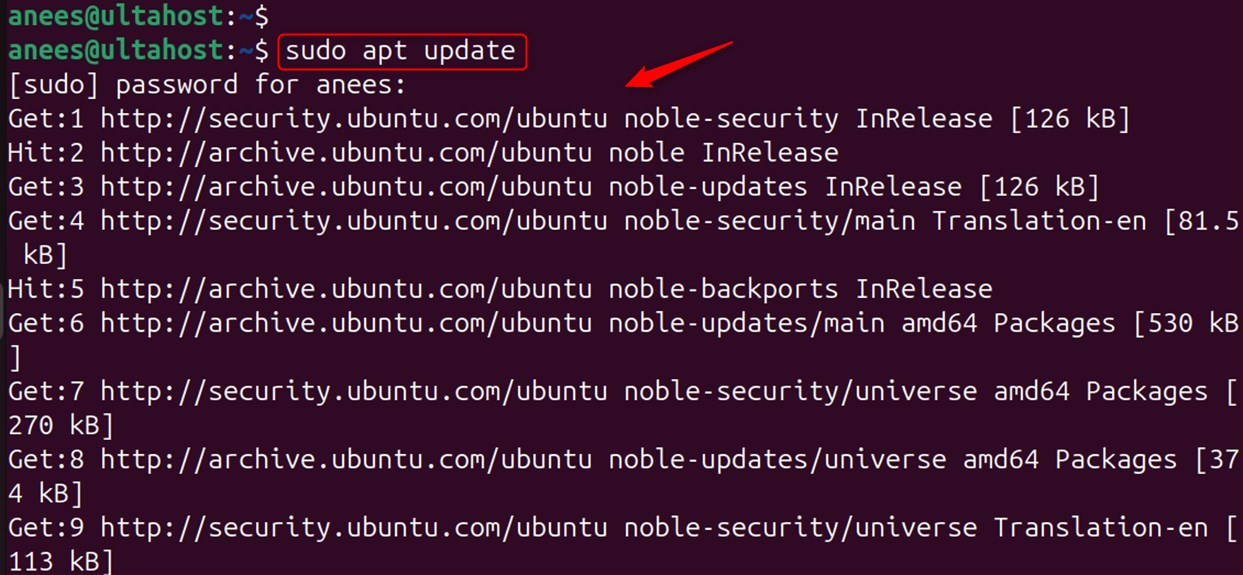
First, update the package repository information and install any available updates for your system:
sudo apt update
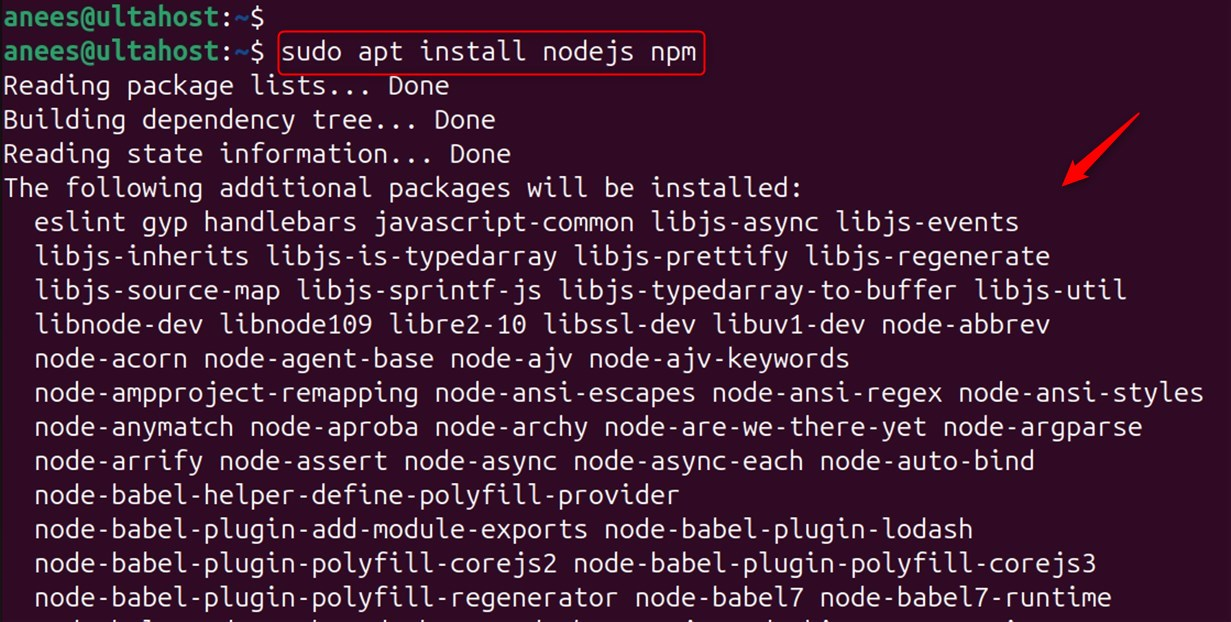
Node.js is the core of the MERN stack, offering you to run JavaScript on the server side. To install Node.js on Ubuntu, run the below command. It also installs npm, the Node Package Manager, used to manage dependencies:
sudo apt install nodejs npm
After installation, verify the version of Node.js with:
node --version

Since Ubuntu 24.04 does not have the latest version of MongoDB in its default repository, you will need to add the MongoDB repository to your system.
Install MERN Stack on our Cheap Ubuntu VPS!
Install the MERN Stack on our Ubuntu VPS to build scalable and dynamic web applications with MongoDB, Express, React, and Node.js
First, add the MongoDB GPG key through the curl command:
curl -fsSL https://www.mongodb.org/static/pgp/server-7.0.asc | sudo gpg -o /usr/share/keyrings/mongodb-server-7.0.gpg --dearmor

Note: If you find any error regarding dependencies, install the necessary dependencies via the “sudo apt install curl gnupg2 git” command.
After that, add the repository to the sources list via the below command:
echo "deb [arch=amd64,arm64 signed-by=/usr/share/keyrings/mongodb-server-7.0.gpg] https://repo.mongodb.org/apt/ubuntu jammy/mongodb-org/7.0 multiverse" | sudo tee /etc/apt/sources.list.d/mongodb-org-7.0.list

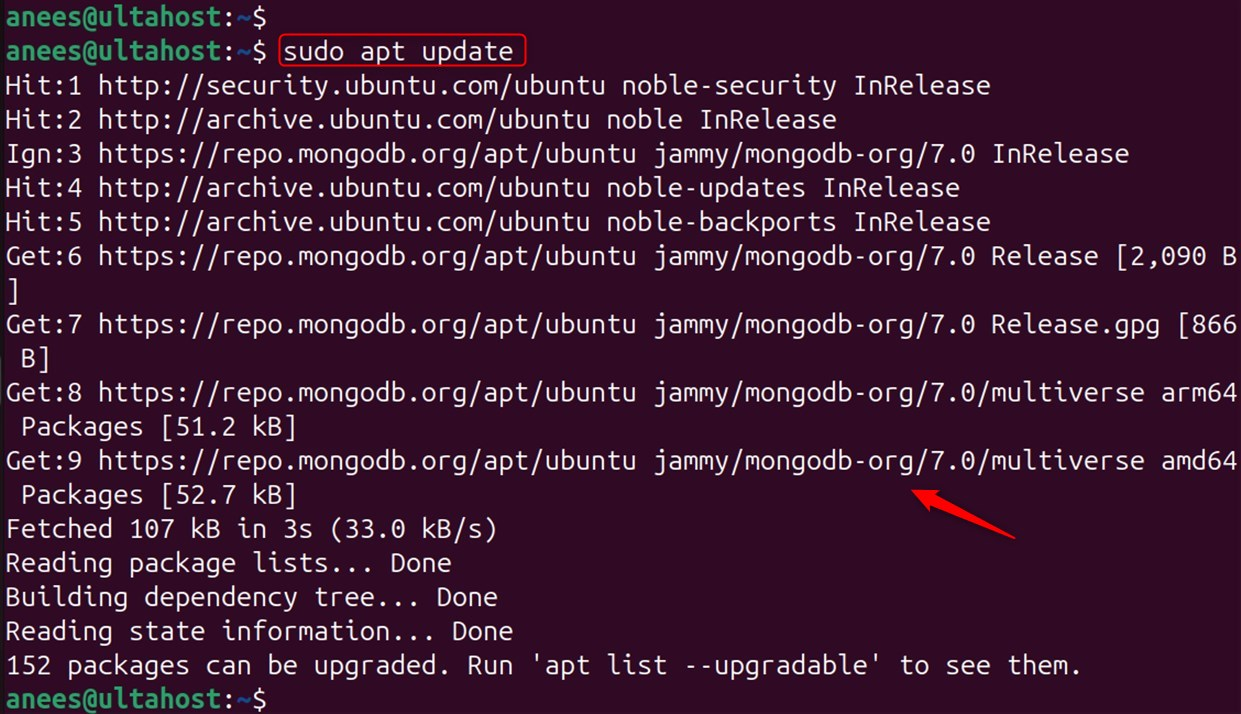
Now, reload the package index and make sure that you install the most recent version of the package:
sudo apt update
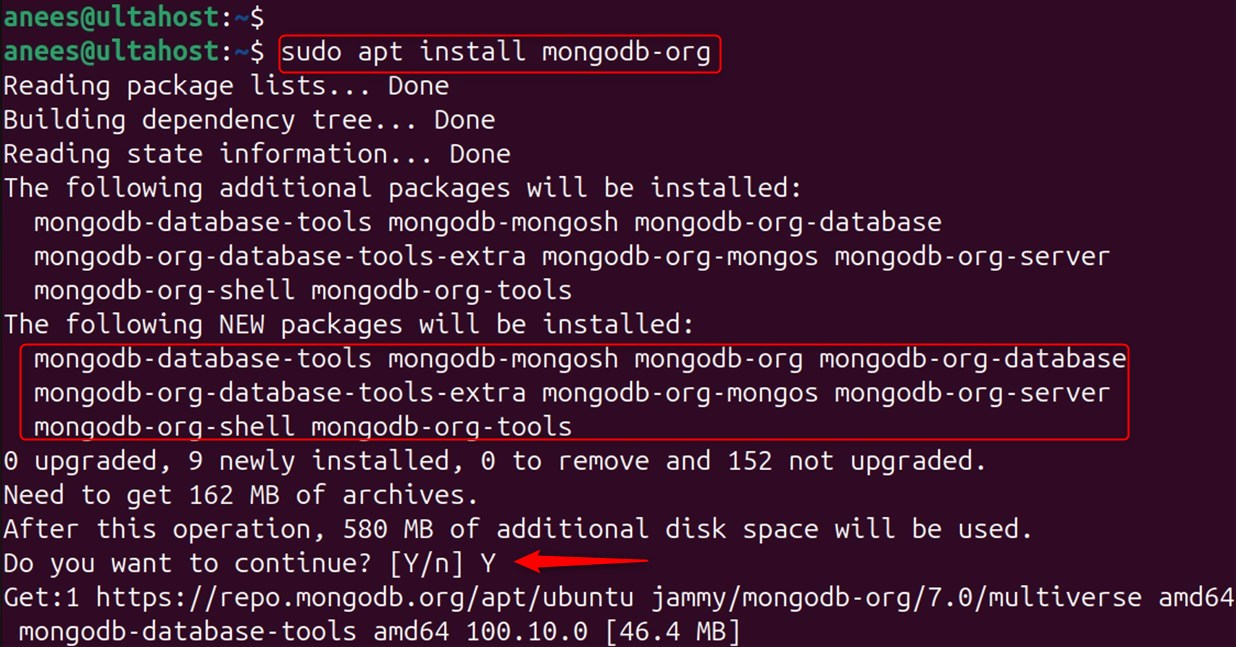
Now, install the MongoDB database server, which is essential for storing data in your MERN applications:
sudo apt install mongodb-org
Once the installation is completed, initialize the MongoDB service through the systemctl command:
sudo systemctl start mongod
Now run the systemctl command one more time to enable the MongoDB service:
sudo systemctl enable mongod

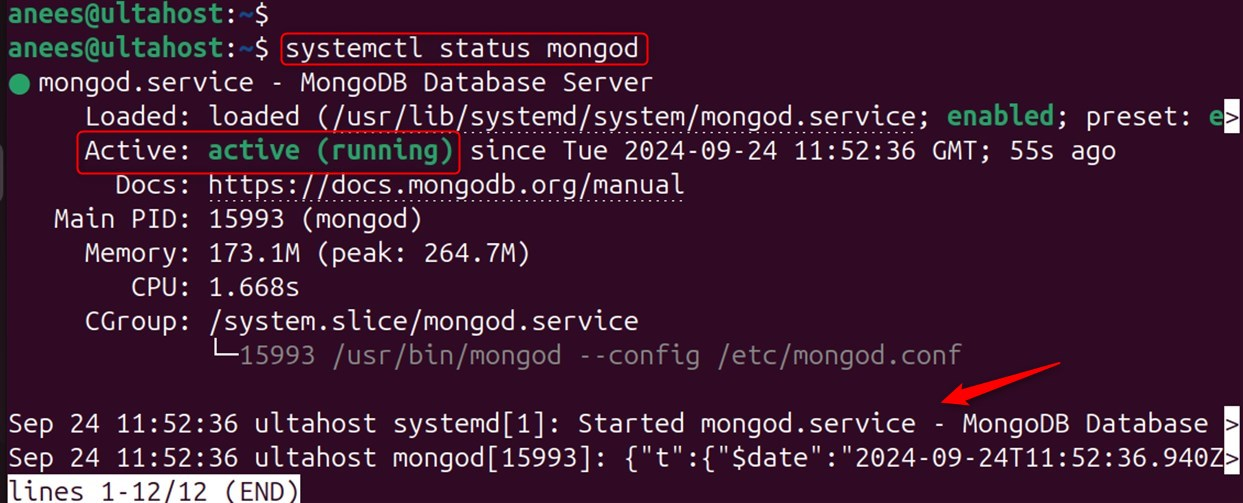
You can also check the status of the MongoDB service via the below command:
systemctl status mongod
Read also How to Install the MEAN on Ubuntu 24.04
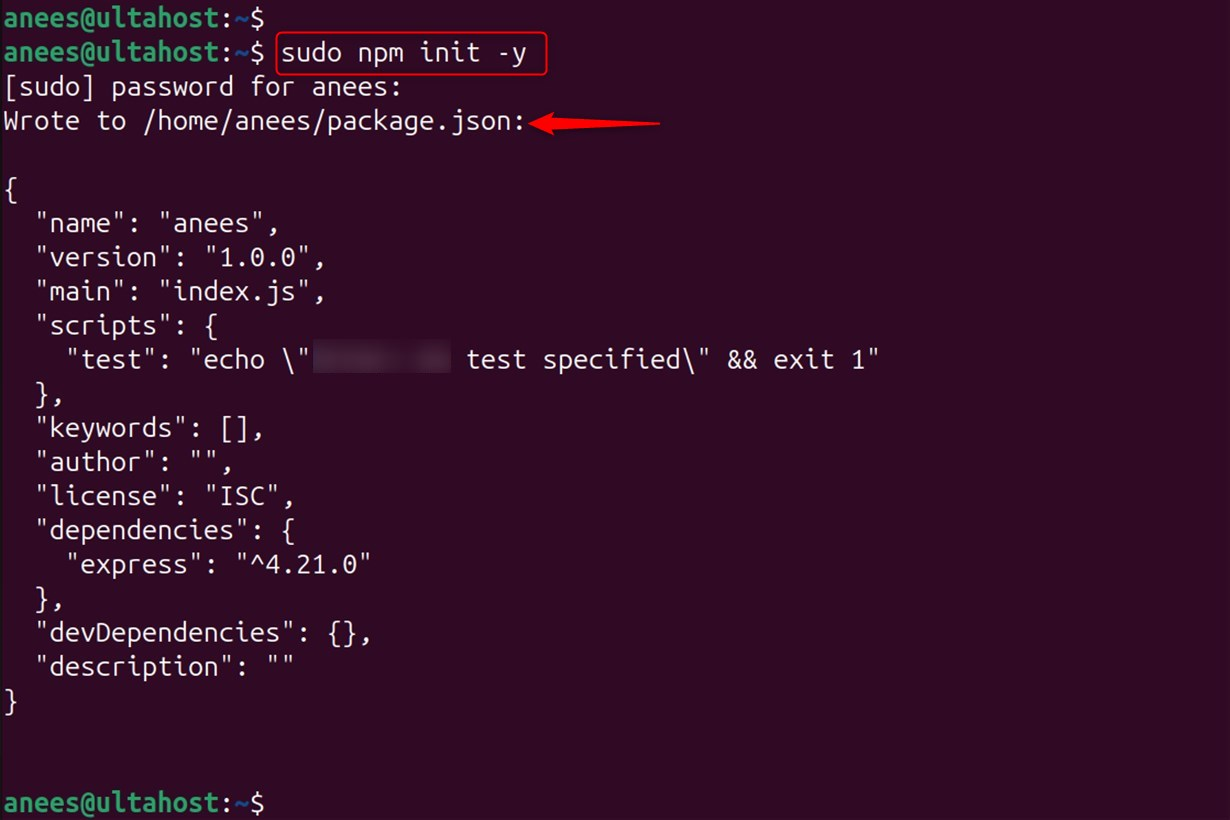
Before the installation of Express.js, you need to configure the environment. To set up, use the npm with the init utility. This creates a package.json file in the working directory:
sudo npm init -y
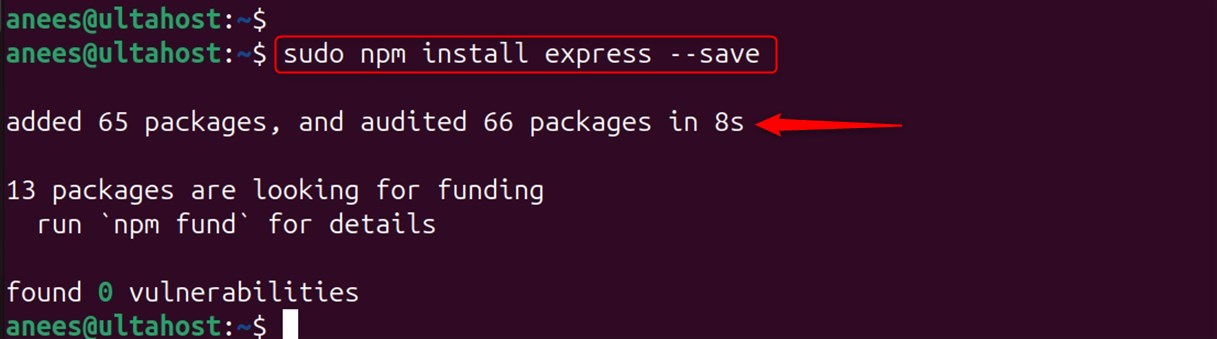
Now, install Express.js which offers a robust framework for building Node.js web applications:
sudo npm install express --save
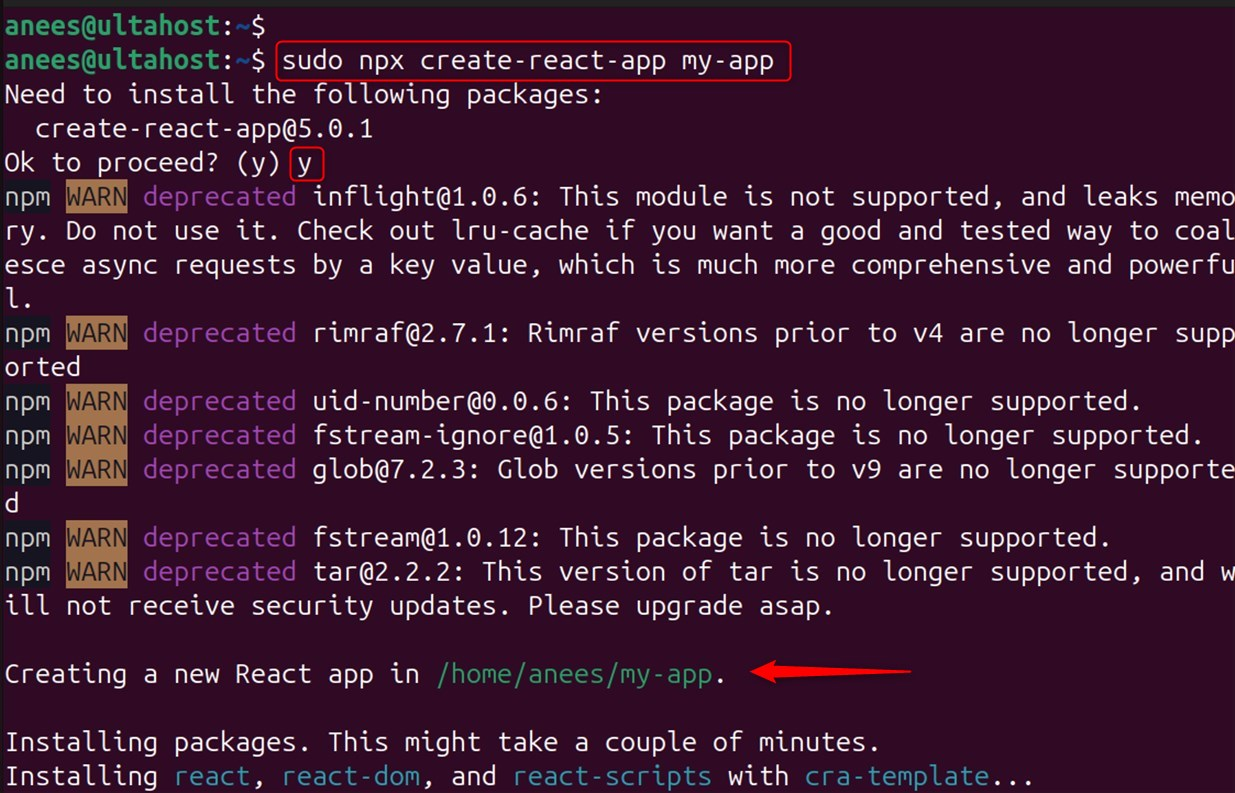
React.js is one of the renowned front-end libraries for building UI. Let’s install it through the create-react-app command by specifying the application name such as my-app:
sudo npx create-react-app my-app
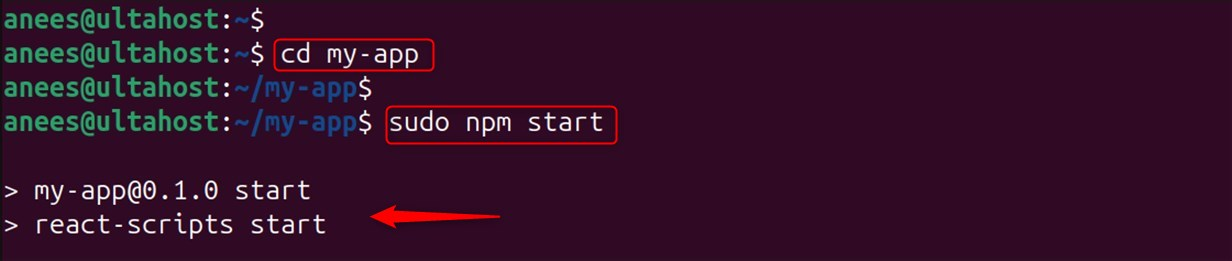
To start React App, navigate to the my-app directory using the cd command:
cd my-app
Now start the application with the npm command:
sudo npm start
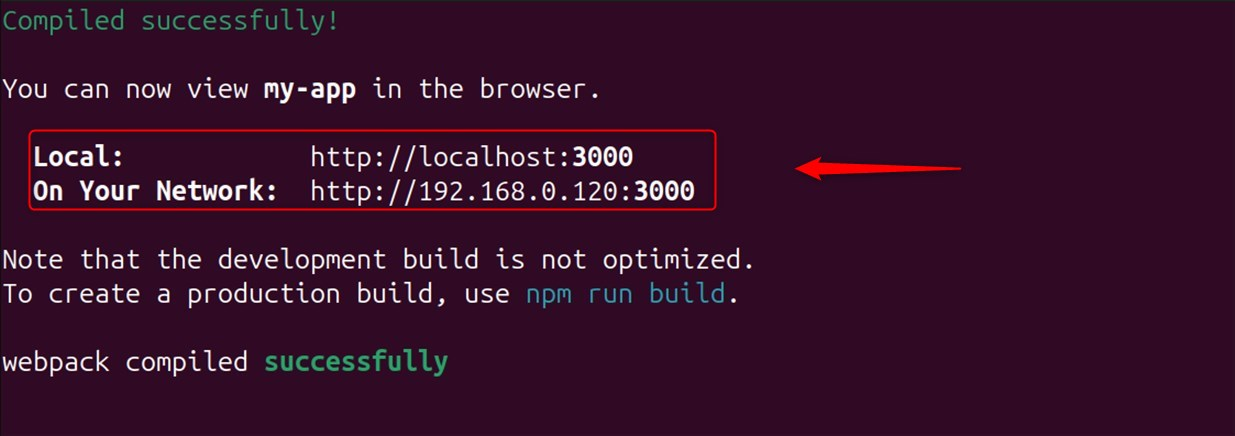
It creates the new React application in the my-app folder and initializes the development server:
It takes some time to compile the script and finally get the URL to access the application as below:
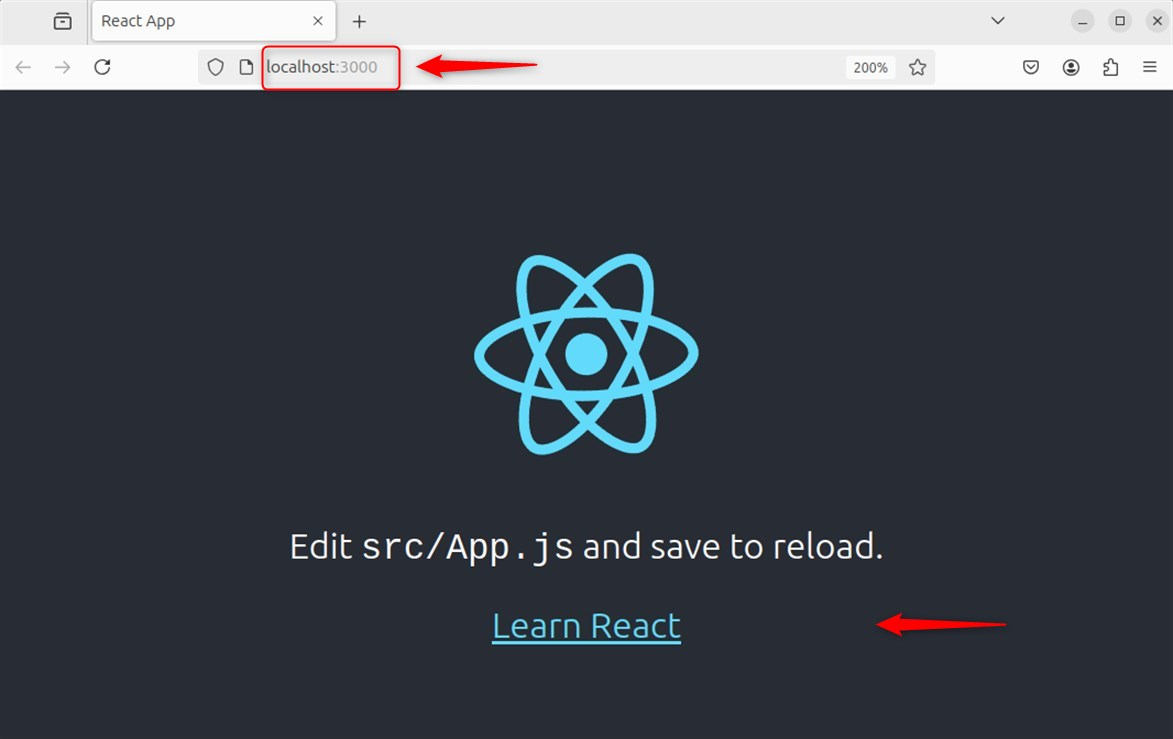
To confirm the successful installation of MERN Stack, you can access the browser with the URL http://localhost:3000 and display the default page:
Note: You can replace my-app with your desired project name. It generates a new React project directory with the necessary files and dependencies.
By following these steps, you have successfully installed the MERN stack on your Ubuntu 24.04 system, and are ready to build your web applications.
To install the MERN stack on Ubuntu 24.04, you need to follow a series of steps to set up MongoDB, Express.js, React.js, and Node.js. First, ensure your system is up-to-date. Then, install Node.js from the official NodeSource repository and npm, which comes bundled with it. After that, install MongoDB from its official repository after adding its GPG key and creating the necessary list file in sources.list.d. For Express.js, you can install it using npm with sudo npm install express. Lastly, set up React by creating a new React app using the npx create-react-app my-app command.
We hope this guide has helped you install the MERN stack on Ubuntu 24.04. Setting up the MERN stack on a Linux system is simple with the right hosting platform. Ultahost’s Linux VPS hosting offers excellent performance and scalability for your web development projects as they grow.
The MERN stack comprises four modern technologies: MongoDB, Express.js, React.js, and Node.js. It allows developers to build dynamic and scalable web applications using JavaScript both on the front end and back end.
Installing MERN stack on Ubuntu offers several advantages including: Developers familiar with JavaScript can write code for both front-end and back-end.
You can use the command node –version to see the installed Node.js version.
You can use the commands sudo systemctl start mongod and sudo systemctl enable mongod to start and enable the service, respectively.
create-react-app is a tool that sets up the basic structure and dependencies for a new React application, simplifying the initial setup process.
You can run your React app and visit http://localhost:3000 in your browser to see the default page. If the default React page loads, it confirms that Node.js and React are properly installed and running on your system.
After setting up your React application, you can access it by opening your web browser and navigating to http://localhost:3000.
PrestaShop is a popular, free, and open-source e-commer...
SQLite is a lightweight, self-contained, and serverless...
Screenshots are a convenient way to explain complex ide...