
How to Install Mozilla Firefox on Windows
Mozilla Firefox is a popular web browser known for its ...


Jupyter Notebook is one of the most widely-used tools among data scientists and Python learners. Its interactivity allows users to write and test code in the same page. It provides a user a more dynamic way to learn, comprehend concepts, visualize data and play with machine learning models. What’s even better, it provides immediate output unlike traditional code editors which can be slower when learning and debugging code.
At a high level, Jupyter Notebook is a basic, browser-based, light-weight Python IDE (Integrated Development Environment) for both novice and advanced users. Every aspect of Jupyter allows users to combine text, code, and visualizations while seamlessly working in a single document format. This could be great for tutorials, academic research, and a project that would result in data analysis. The best part is you run Python code in a web browser, users save their work as notebooks and results can be easily shared with others.
In this guide, you will see how to install Jupyter Notebook on your Windows 10 or 11 computer. You can install it in one of two ways, using Anaconda or pip. This guide will show how to install Jupyter Notebook using either way step by step.
Before installing Jupyter Notebook, make sure your system meets the following requirements. You need a computer running Windows 10 or 11, an active internet connection, and either Python or Anaconda installed. These tools form the base of the Python environment required to run Jupyter properly.
If you haven’t installed Python yet, make sure to download and set up Python 3.7 or a newer version. You can follow our step-by-step guide here: How to install Python on Windows. This ensures compatibility with Jupyter and avoids common setup issues.
To verify your setup, open the Command Prompt and run python –version. This quick Python installation check confirms whether your system is ready. Once this is done, you’re prepared to move forward.
Run Jupyter Notebook on Our Windows VPS!
Launch Python projects in minutes on Ultahost’s lightning-fast Windows VPS. Enjoy hassle-free setup, smooth performance, and 24/7 expert support!
Anaconda is a free Python distribution designed for data science, machine learning, and large-scale data processing. It includes Jupyter Notebook preinstalled, along with other useful tools like JupyterLab and Spyder. This makes it ideal for beginners who want a ready-to-use Python environment without manual setup. Anaconda manages packages and dependencies automatically, reducing the risk of version conflicts.
Visit the official Anaconda website and download the latest 64-bit version for Windows:

Run the installer and follow the prompts. During installation, you will be asked whether to add Anaconda to the PATH environment variable. This step is optional:
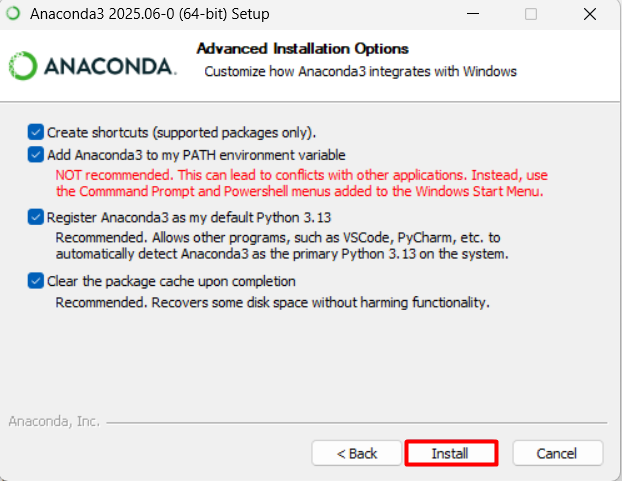
Enabling it allows you to use Anaconda tools from any Command Prompt window, but it may interfere with other Python setups. Choose the “Just Me” option unless you’re installing it for all users.
Once the installation is complete, open either Anaconda Navigator (graphical interface) or Anaconda Prompt (command-line interface) to confirm it’s working.
Read also How to Install Pandas in Python
To launch Jupyter Notebook, open Anaconda Prompt and type the below command:
jupyter notebook
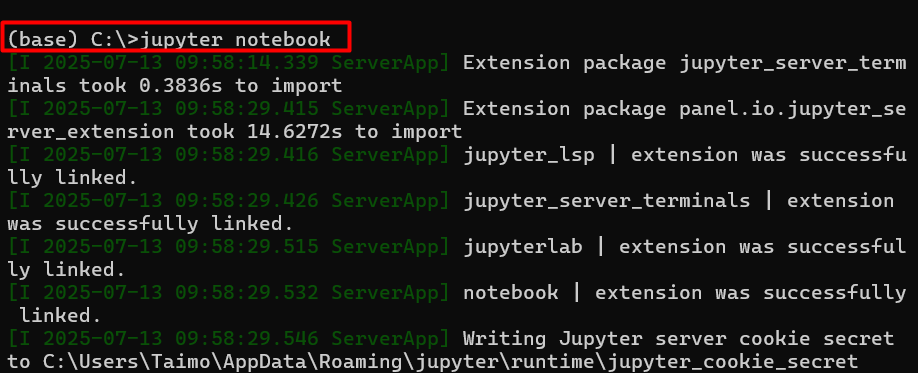
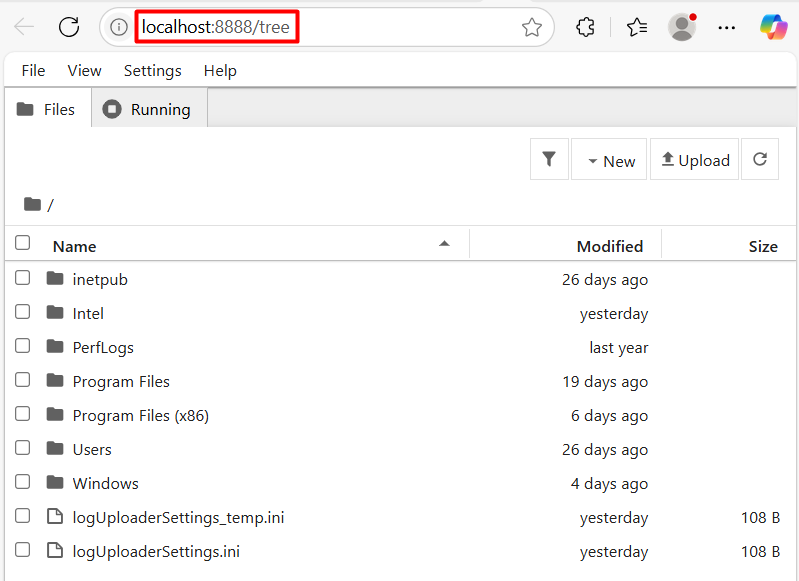
Your default web browser will open automatically at http://localhost:8888, displaying the Jupyter Notebook dashboard.
Here, you can navigate folders, create new notebooks, and run Python code in a browser. You can also launch Jupyter Notebook from Anaconda Navigator with just a few clicks:
This method is the easiest way to install Jupyter with Anaconda on Windows 10 or 11 and ensures a stable, beginner-friendly setup.
Start by downloading the latest version of Python from the website. During installation, make sure to check the option “Add Python to PATH”—this allows you to run Python commands directly from the Command Prompt. Once installed, open cmd and run:
python --version

This confirms that Python is properly set up and ready to create a working Python environment.
Now, use pip (Python’s package manager) to install Jupyter Notebook. Open the Command Prompt and enter:
pip install notebook
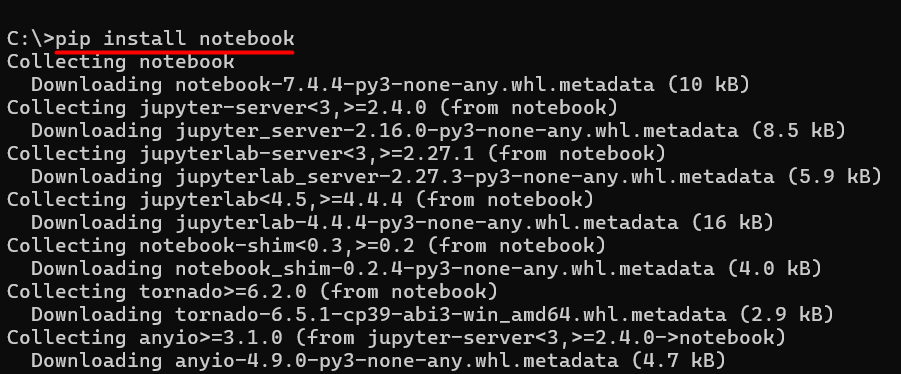
The installer will download all required files and set up Jupyter in your current Python environment. After it finishes, verify the installation with:
jupyter --version
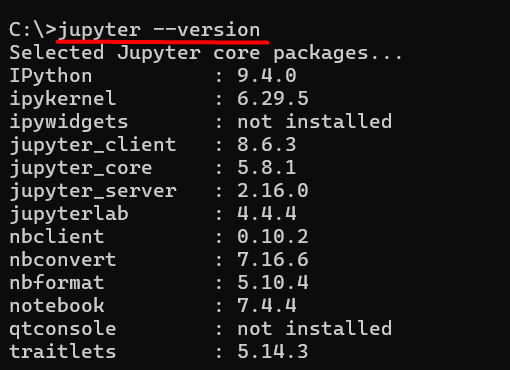
This step ensures that everything is installed correctly and ready to use.
In this article, we discussed how to install Jupyter Notebook on Windows using two different methods. The first method focused on installing it through Anaconda, which provides a complete Python environment with Jupyter Notebook and other useful tools already included. This option is recommended for beginners who want a preconfigured setup with minimal manual steps.
The second method explained how to install Jupyter Notebook using pip, Python’s package manager. This approach is lightweight and suited for users who prefer more control over their Python environment. We also covered the necessary prerequisites, such as Python version requirements and environment setup, and provided commands to verify successful installation. With both methods explained clearly, you can now choose the one that best fits your system and workflow.
Deploy Jupyter Notebook on UltaHost’s DDoS-Protected VPS Hosting for Ultimate Performance and Security.Run data science projects effortlessly with full admin access, high-speed NVMe SSDs, and up to 3500+ Gbps DDoS protection. Experience seamless coding on robust VPS servers built for developers, students, and businesses. Accelerate your workflow with enterprise-grade security, 24/7 support, and unmatched affordability!
Jupyter Notebook is used for writing and running Python code interactively. It’s popular in data science, machine learning, and education for its ability to combine code, text, and visuals in one place.
No, you can install Jupyter Notebook using pip if you have Python installed. Anaconda just makes the setup easier by bundling everything together.
Yes, once installed, Jupyter Notebook runs locally on your system. You don’t need an internet connection to use it.
Yes, Jupyter Notebook is completely free and open-source. You can download, install, and use it without any cost.
Jupyter Notebook works with Python 3.7 and newer. Using the latest stable version is recommended for compatibility.
Open Command Prompt and type jupyter notebook. It will launch in your default web browser at http://localhost:8888.
Yes, you can install libraries like pandas, numpy, or matplotlib using pip. They can be used directly within your notebooks.
UltaAI – Smart AI Assistant for Ultahost Clients
UltaAI is your advisor for anything related to domain or hosting. Experience personalised suggestions.