Resetting Email Mailbox Password in cPanel
Managing email accounts is an important part of web hos...


Email is an essential aspect of personal as well as professional connections. However, the development of various cyber threats has made it necessary to protect your domain from email spoofing, phishing, and other harmful actions. DMARC stands for Domain-based Message Authentication, Reporting, and Conformance and is a powerful technology that can assist in protecting your domain’s reputation and ensure that your emails are sent to their intended recipients.
In this post, we will cover the process of setup DMARC cPanel account. We will explore the basics of DMARC and it is benefits and instructions to implement it effectively.
DMARC stands for Domain-based Message Authentication, Reporting, and Conformance is an email authentication protocol designed to protect your domain from email spoofing and phishing attacks. It works by verifying the authenticity of emails sent using your domain name. If an email fails DMARC checks the receiving server can take actions like rejecting or quarantining the message.
The following are the benefits of DMARC record cPanel for email security purposes:
Here is a step-by-step breakdown to configure DMARC on cPanel:
Access your cPanel with the provided credentials.
Navigate to the “Zone Editor” under the “Domain” section.
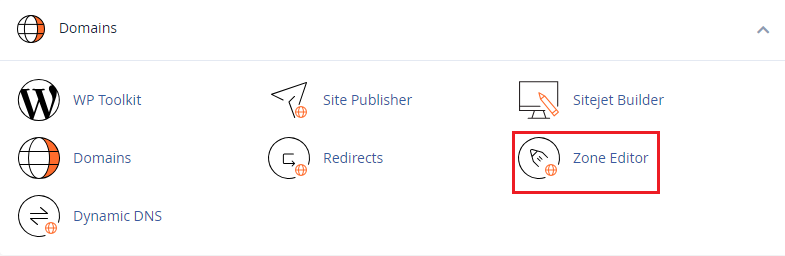
Click the “Add Record” button and select “TXT” from the “Type” dropdown.
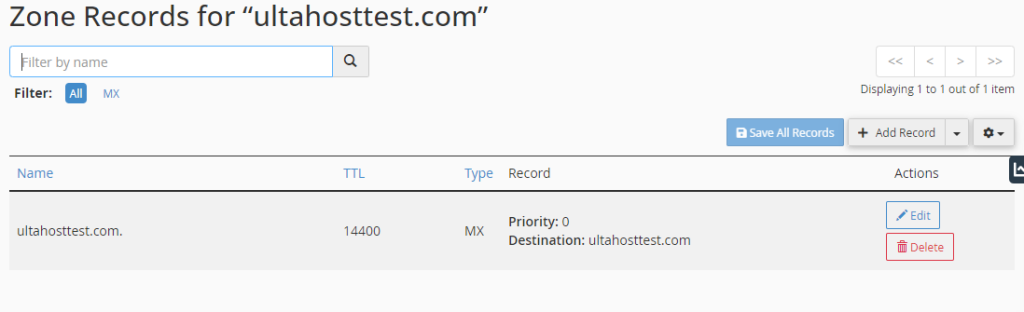
In the “Name” field, enter “_dmarc”. In the “Value” field, paste the following DMARC record, replacing it with your actual domain name:
v=DMARC1; p=none; rua=mailto:[email protected]; ruf=mailto:[email protected]
The explanation of record components is given below:
Setting Up DMARC with Our cPanel Hosting!
Easily set up DMARC on our cPanel account to protect your brand enhance email deliverability and safeguard your customers from fraudulent emails.
Once you have created the DMARC record, you can adjust the policy settings to your desired level of protection.
Regularly check the DMARC reports sent to the specified email addresses. These reports provide valuable insights into the email traffic associated with your domain. The aggregate reports provide a summary of DMARC checks performed on your domain, including the number of emails that passed, failed, and were quarantined or rejected. Similarly, the forensic reports: provide detailed information about individual email messages that failed DMARC checks including the sender’s IP address, email headers, and reasons for failure.
Also, Read How to Change your cPanel Password.
The following are some important considerations while setting up DMARC on cPanel:
Setting up DMARC policy on your cPanel account you can significantly improve the security of your domain and protect your brand from email based attacks. By following the steps outlined in this guide you can effectively implement DMARC and reap the benefits of enhanced email authentication.
Ensure your email security by getting Ultahost professional email hosting for your domain. Host your business email on a secure privacy-guaranteed and promote your site with every message you send with an email address that matches your website.
DMARC is an email security policy that helps prevent email spoofing and phishing.
DMARC improves your email security making it harder for attackers to misuse your domain.
You begin by creating a DMARC record in your cPanel DNS settings.
Your DMARC record should include the policy (none, quarantine, reject), and optional reporting email.
You can use online DMARC check tools to verify if your setup is correct.
Without DMARC your domain is more vulnerable to phishing and spoofing attacks.
Yes, you can update your DMARC record in cPanel anytime to change the policy.
Managing email accounts is an important part of web hos...
WordPress is a free, open-source content management sys...
Transferring a domain can sometimes be a complex proces...
Website owners encounter situations where they need to ...
Security is the most important element in the digital w...