
How to Fix the PR_END_OF_FILE_ERROR
Have you encountered the PR_END_OF_FILE_ERROR? especia...


The DNS_PROBE_FINISHED_NXDOMAIN error is a DNS error that occurs when your browser cannot find the IP address for the website you are trying to access. The NXDOMAIN part of the error stands for a non-existent domain, which means that the browser thinks that the website domain name does not exist. Sometimes the distributed nature of the internet can cause problems in the browser or device that you are using.
In this post, we will discuss what is DNS_PROBE_FINISHED_NXDOMAIN and how can you fix it, and look for perfect solutions that work on different operating systems such as Windows, Linux, and Mac.
When we type the correct domain in the browser the DNS translates into an IP address, and the server searches for the appropriate IP address somehow when DNS fails to explore it results in an error. There are a number of possible causes for the DNS_PROBE_FINISHED_NXDOMAIN error, which are described below:
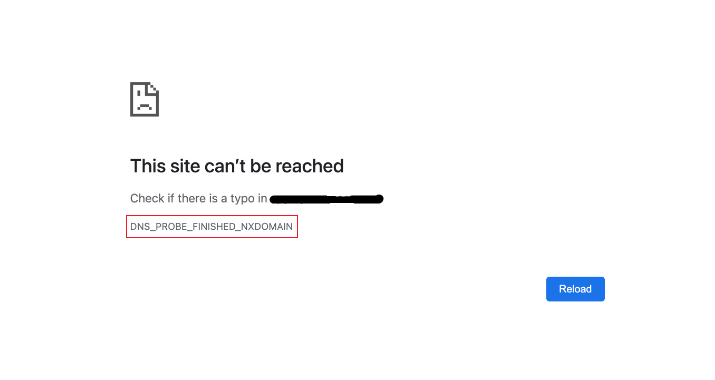
The screenshot shows the DNS_PROBE_FINISHED_NXDOMAIN error in Google Chrome
Depending on different browsers it shows different kinds of messages.
There are a number of things you can try to fix the DNS_PROBE_FINISHED_NXDOMAIN error, We discuss some possible solutions that can resolve the issue:
ipconfig /flushdns
To flush the DNS cache on Mac, open a Terminal window and type the following command:
sudo dscacheutil -flushcache
For different Linux distributions, the default DNS resolver on most distributions, you can use the following command:
systemd-resolve --flush-caches
The DNS cache stores recently accessed DNS records in order to improve performance. However, sometimes the DNS records in the cache can become outdated or incorrect.
ipconfig /release && ipconfig /renew
To release and renew your IP address on Mac, open a Terminal window and type the following commands:
sudo ifconfig en0 release && sudo ifconfig en0 renew
To release and renew your IP address on Linux, open a Terminal and type the following commands:
sudo dhclient -r eth0 && sudo dhclient eth0
You may need to restart your network service after releasing or renewing an IP address.
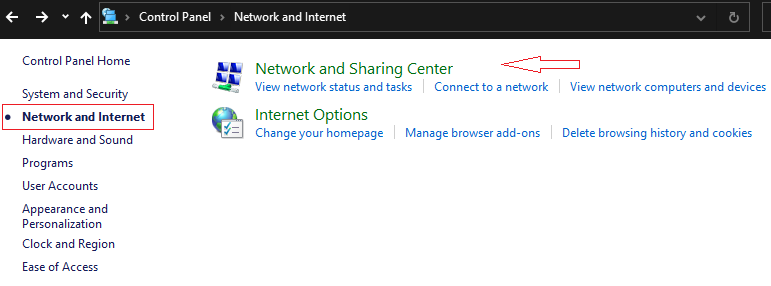
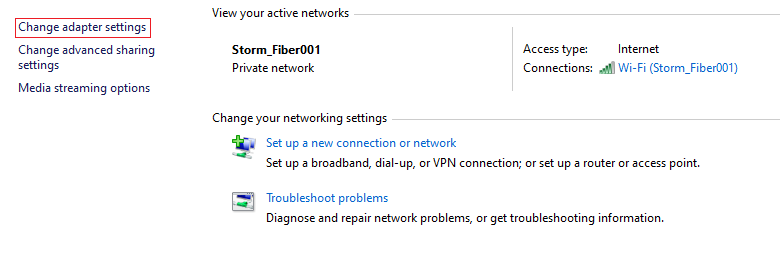
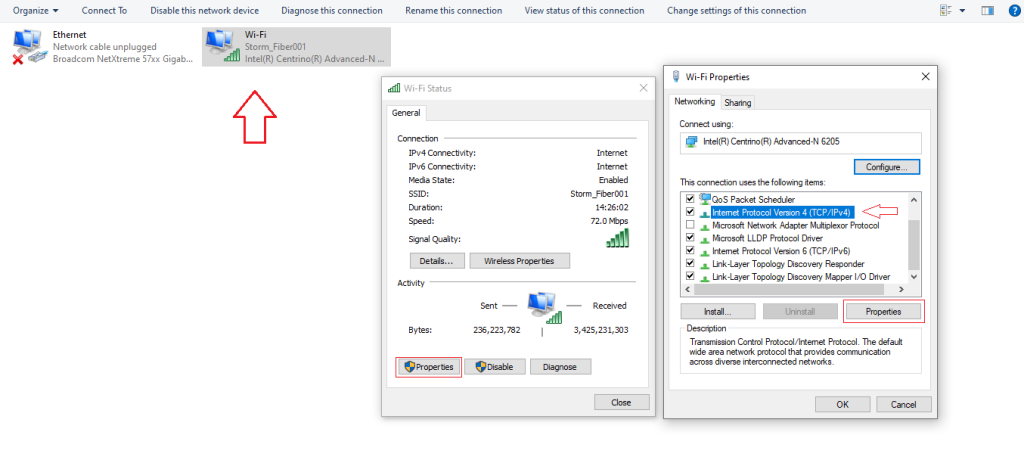
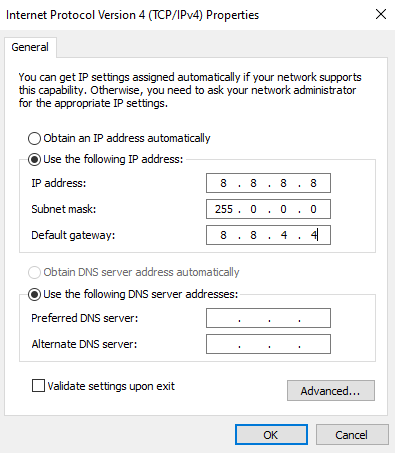
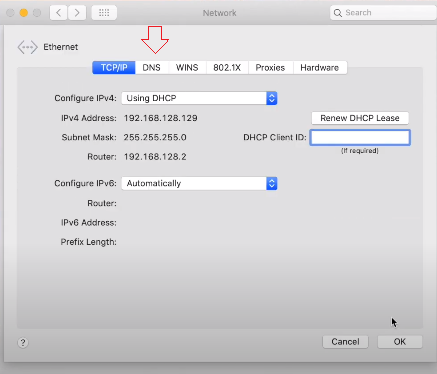
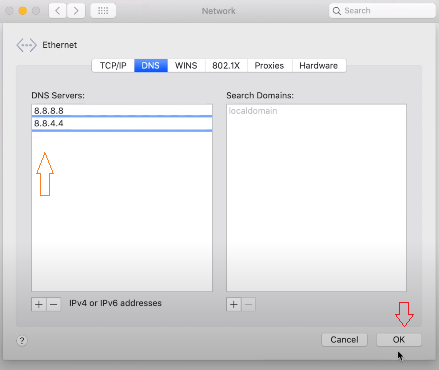
For Windows

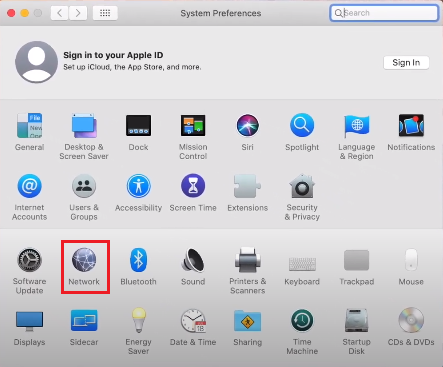
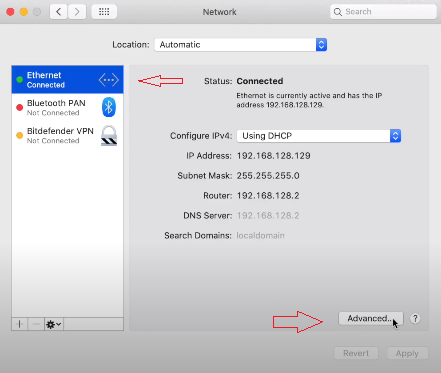
For MacOS
The DNS_PROBE_FINISHED_NXDOMAIN error is a common DNS error that can be caused by a number of factors. There are a number of things you can try to fix the error, but if you are still having problems, you may need to contact your internet service provider for further assistance.
Experiencing the DNS_PROBE_FINISHED_NXDOMAIN error on a regular basis may be a sign that your website’s DNS settings are not configured correctly. With Ultahost’s free website migration service, we will take care of all the technical details of moving your website to our servers. We will also configure your DNS settings correctly to ensure that your website is always up and running.
Have you encountered the PR_END_OF_FILE_ERROR? especia...
Have you ever methodically created a blog post and sche...
WordPress is renowned for building blogs and websites a...
The HTTP 304 Not Modified status code is found among th...
Encountering white text and missing buttons in the Word...
When you're using the internet, you might sometimes see...