


If you create your website in a foreign language and use a WordPress theme, you may have problems translating some elements into the target language. I will explain how to translate a blog or a WordPress website to dump annoying English words.
The theme is not translated completely
“Keep reading”, “Read more”, “Continue”, “Search”… – whoever has not seen such messages on a foreign-language blog should raise their hand first. After finishing work on the blog design, the creator wants to start writing and forgets about these linguistic details.
No wonder.
A blogger dreams of starting writing as soon as possible. He ignores small linguistic details. The fields for entering translations are not visible anywhere in the back-end of WordPress, it is also in vain to look for them in the theme settings. When, after another series of searches, it is still unclear where to insert a foreign word, many people will lay down their arms and do other things.
However, in my opinion, these translations are worth considering. A website in Spanish, French, German, or Polish with the addition of “keep reading” does not look professional. And the matter is not as complicated as it may seem.
In the article, I will describe two methods in which you will find the answer to the question: How to translate a blog or website on WordPress?
The first one is to use the Loco Translate plugin. The second one, a bit more complicated, requires installing the appropriate application and logging into the server.
Let’s get to work.
Set the correct language in WordPress
The first thing you should check is the language of WordPress. Sometimes it happens (especially if you have installed your WordPress using an application hosted on the server) that you mistake website language during installation. If you have your target language set correctly – everything is fine. If different, change it. You can do it in the Tab: Settings -> General -> Site language.
You can also tell what is the language of WordPress by looking at the names of individual tabs in the menu. See what the WordPress dashboard looks like in different languages.
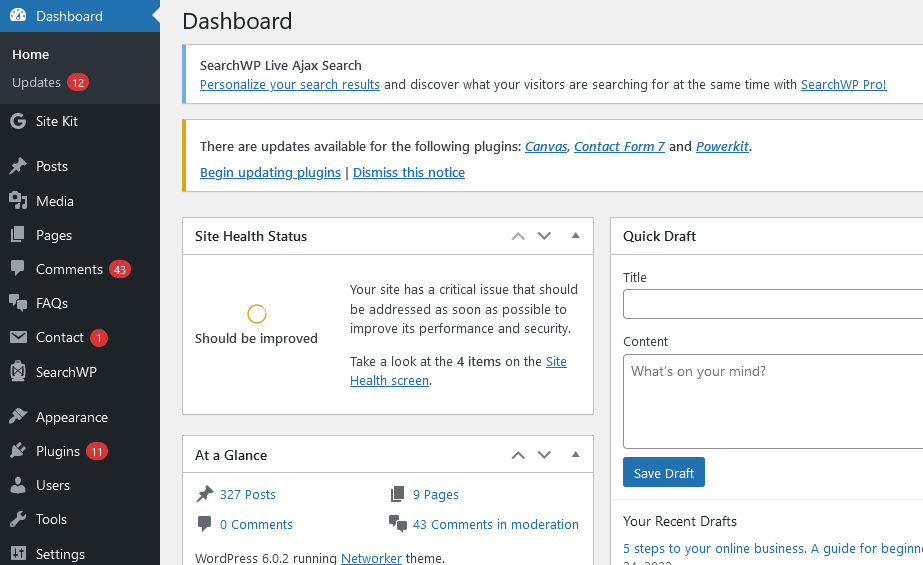

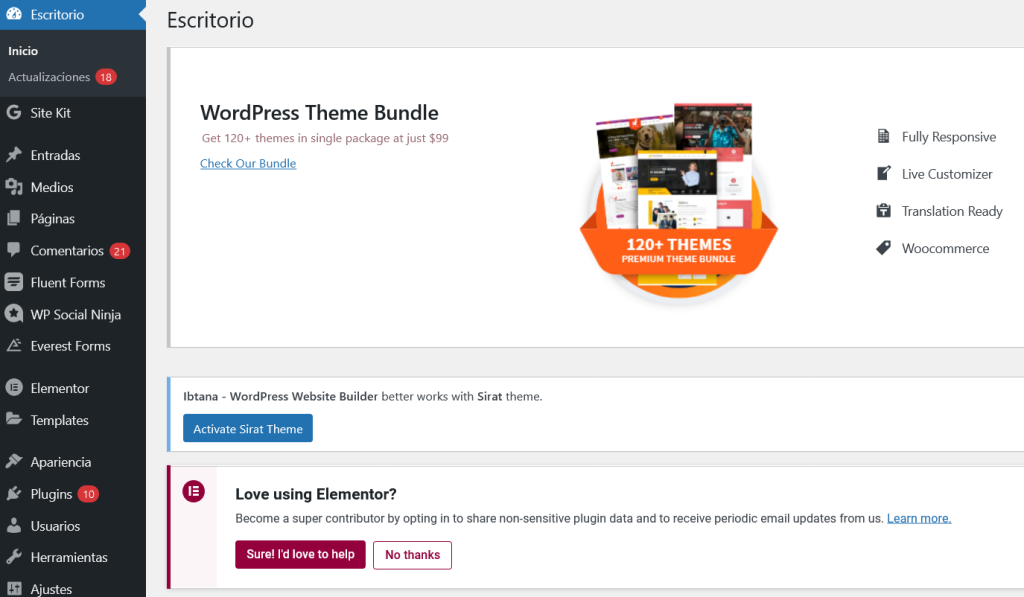
The dashboard is called “Escritorio” in Spanish and “Kokpit” in Polish.
How to translate a blog or website on WordPress with the Loco Translate plugin
Step 1
Go to the Plugins tab and search for Loco Translate. Install and activate the plugin.
Step 2
After activation, you will see the new Loco Translate tab on the Dashboard. In the tab you will find:
- Home – from where you can go directly to the translation of the theme and active plugins;
- Themes – all installed themes that you have ever used;
- Plugins – as above, but this tab will display all plugins (both active and disabled);
- WordPress – here you will find WordPress files, which in the case of your language are 100% translated
- Languages - where you can find information about the available languages
- Settings – where you can change plug-in settings
To translate the theme, go to Themes. Depending on how your theme is prepared, you will see different options.
If your WordPress theme does not have a translation template, clicking on the name will display: “New language” and “Create template”, go to Step 3. If your WordPress theme has a translation template, you will see: “New language” and “Edit template”, go to Step 4.
Step 3
After clicking “Create template” you will see a summary including information about how many files Loco Translate will search and the location where will save the translation on the server.
You can get information about too large files. If you want to search them, go to the Settings tab and raise the value of the field: “Skip PHP files larger than”, then save the changes by clicking “Save settings”.
Go back to Themes -> Your theme -> Create template.
Step 4
Choose “New language”. In the next window, you will see the language selection and the path that tells you where you will save the translation.
Select the foreign language and the preferred save folder. The safest option is to save the file in the Custom directory. It ensures that your translation will not be deleted when you update the theme to the new version.
After selecting the appropriate directory and language, click “Start translating” and the system will automatically take you to the next screen, where you can enter the translation.
Step 5
Enter the translations. You’ll see a list of phrases at the top of the screen. In the field “Source text” there is the original text, and below it, you enter the translation. Translated but not yet written phrases are marked with an asterisk. Remember to save changes.
You can use the Sync button to synchronize the phrases. When a theme’s authors release a new version, sometimes translation updates also appear among the changes made. With the Sync button, you can import these changes into the plugin and use them when you install a new version of the theme you are using.
Interestingly, the plugin also supports plural translations, which can be particularly important in many languages.
As you can see, translating a theme with Loco Translate is not challenging. However, if you do not want to install additional plugins on your website, use the second method.
How to translate a blog or website on WordPress using Poedit
Step 1
Download and install the POEDIT application. The program is available in a free version.
Step 2
Download the theme files. Where can you find them? You can download the .rar archive from the page where you bought the theme. After downloading the .rar archive, unpack it and find the translation files (i.e. those with the .po, .mo and .pot ending).
If you have already installed the theme, you will also find the archive on your server. Look in the languages or similar folders. If you cannot find them, please use the documentation that comes with each theme.
Step 3
Open the POEDIT application and click “Edit translation”, then find the file you are interested in. Or you can double-click the .po file to open the translation immediately.
Your system may not associate files with the application yet. In that case, find POEDIT and link the files permanently to the application.
Step 4
If your theme does not have translation files, open the .pot file – the system will ask you if you want to create a new translation. Choose the foreign language you need and go to phrase translation.
You enter the phrases at the bottom of the application. After completion of translation, save the file d in the de_DE.po format (example for German, where “de” is the language code).
The application will also automatically generate a .mo file which is read by WordPress. The .po file is the translation source for the .mo file.
Step 5
Upload the .po and .mo files to the server. Where to paste the files? Choose one of the two options:
- FOLDER with WORDPRESS * / wp-content / languages / themes
- FOLDER with WORDPRESS * / wp-content / themes / THEMEXXX / lang IS INSTALLED
* As often as not it is the public_html folder in a folder with the same name as your domain name.
I suggest the first location, because – as you already know – in location number two, files may be deleted after updating the theme.
I can’t find the phrase to translate in the theme files – what should I do?
Unfortunately, not every theme is perfectly polished. On the contrary, many themes have flaws and errors that can give the ambitious user a headache. If you translate your theme into a foreign language and cannot find a phrase, maybe it is not in the theme files, but in the plugin files.
Plugins also have their language files that can be translated. It’s worth checking if your phrase is out there somewhere.
If the search does not bring any results, it will mean that the text is in the theme files, and the creators did not foresee the possibility of its translation. In this case, you need to find the correct theme file, search for the phrase and translate it manually.
My theme has no files to translate
These situations occur if you are using free themes without support. You can try to use the pro version of the POEDIT application, which can generate a translation file even in that case.
You can also change all phrases manually by editing the theme files. It is quite a tedious task if you don’t know where to look for phrases. What’s more, different themes may have texts in various files, which means that there is no one pattern that would apply to every situation.
Summary
It happens that bloggers overlook translation issues. Hence, on many, even great blogs, there are English inserts. If you want your website to be professional, you have to remember the details. Especially since introducing a translation is usually not a challenge. Even a layman can handle it.
If you enjoyed this article, then you’ll love UltaHost hosting platform and our WordPress Hosting. Get 24/7 support from our support team. We will even help you to translate your website. Our powered infrastructure focuses on auto-scaling, performance, and security. Let us show you the difference! Check out our plans!


