
How to Install MATLAB on Ubuntu
MATLAB, short for Matrix Laboratory, is a powerful soft...


Minikube is a lightweight, portable, and easy-to-use way to run Kubernetes on your laptop. As a developer, you can use Minikube to test, develop, and deploy Kubernetes applications locally, without the need for a full-fledged Kubernetes cluster. This approach enables you to accelerate your development cycle, reduce costs, and increase productivity.
Minikube provides a rapid development cycle, enabling you to iterate quickly, experiment with new ideas, and validate your code. It supports various Kubernetes features, including Deployments, Services, and Persistent Volumes. With Minikube, you can create a Kubernetes cluster in minutes, deploy your application, and start testing it immediately. This streamlined approach ensures that you can focus on writing code rather than managing infrastructure.
To set up a local Kubernetes development environment, you need to install Minikube on your Ubuntu machine. This guide will walk you through the installation process, covering the prerequisites, installation steps, and troubleshooting tips. By the end of this guide, you will have a fully functional Minikube installation on your Ubuntu machine, ready to power your Kubernetes development.
To Minikube install Ubuntu, you’ll need to download the Minikube package and then install it using the dpkg package manager.
Step 1: Downloading the Minikube Package
First, you need to download the Minikube package from the official Minikube repository. You can do this using the following command:
curl -LO https://storage.googleapis.com/minikube/releases/latest/minikube_latest_amd64.deb

Here’s what this command does:
When you run this command, curl will download the Minikube installation package to your current working directory.
Unleash the power of Ubuntu VPS
Experience the dependability of the world’s leading Linux distribution combined with the flexibility of a virtual server. Enjoy ultra-fast speeds and minimal latency.
Step 2: Installing the Minikube Package
Once the package is downloaded, you can install it using the following command:
sudo dpkg -i minikube_latest_amd64.deb
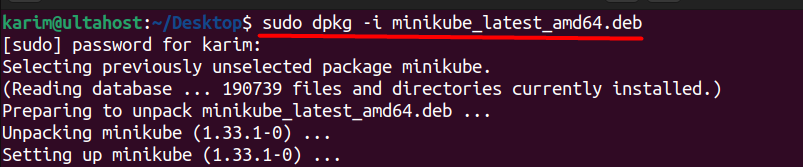
Here’s what this command does:
When you run this command, dpkg will install the Minikube package, which will make Minikube available on your system.
Step 3: Verifying Minikube Installation
After installing Minikube, you can verify that it’s working correctly by running the following command:
minikube version

When you run the command, it displays the version of Minikube installed on your system, along with the commit information.
The commit hash is a unique identifier that corresponds to a specific commit in the Minikube Git repository. It’s a way to identify the exact code changes that are included in the Minikube version.
Here’s why the commit hash is important:
This guide walks you through installing Minikube using the Snap package manager, a popular way to distribute software on Linux systems.
Step 1: Installing Snap
First, you need to make sure that snap is already installed which you can do by executing the below command:
sudo apt update && sudo apt install snapd
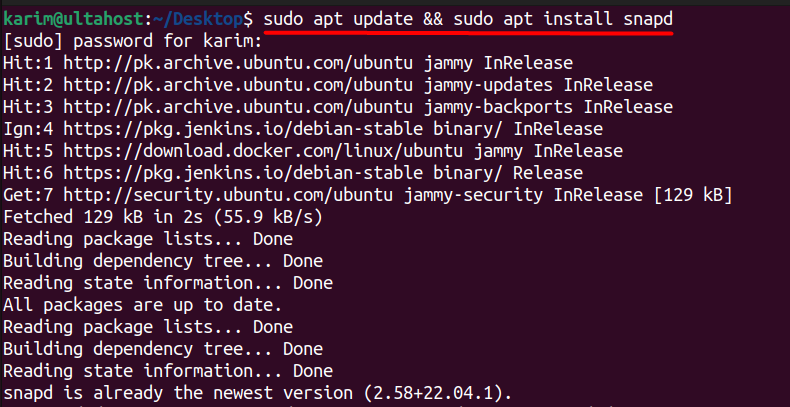
This command updates system packages and installs the snap package manager if it isn’t already installed.
Learn about How to Install TensorFlow on Ubuntu
Step 2: Installing Minikube
Next, execute the below command to download and install Minikube Ubuntu:
sudo snap install minikube

Step 3: Verifying Minikube Installation
Lastly, you can verify if Minikube has been installed correctly by displaying its version using the below command:
snap run minikube version

The first method is more reliable as its installing the latest version compared to the second method.
Minikube is a single-node Kubernetes cluster that runs on your laptop or workstation. It provides a self-contained environment for developing, testing, and deploying Kubernetes applications. Minikube supports various Kubernetes features, including:
Minikube offers several benefits for local Kubernetes development:
Minikube is useful in various scenarios:
Development: Use Minikube to develop and test Kubernetes applications locally before deploying them to a production cluster.
Minikube is a powerful tool for local Kubernetes development, providing a self-contained environment for developing, testing, and deploying Kubernetes applications. Installing and setup Minikube on Ubuntu, a popular Linux distribution. developers can accelerate their development cycle, reduce costs, and increase productivity. This article has provided a step-by-step guide on how to install and run Minikube on Ubuntu, covering the prerequisites, installation steps, and troubleshooting tips.
By following this guide, developers can quickly get started with Minikube and begin developing, testing, and deploying Kubernetes applications locally. With its ease of use, flexibility, and scalability, Minikube is an ideal solution for local Kubernetes development. Whether you’re a seasoned developer or just starting out with Kubernetes, Minikube is a valuable tool that can help you streamline your development process and achieve your goals faster.
Whether you’re an experienced developer or new to Linux, it’s crucial to have a setup that meets your needs. Ultahost provides a robust and reliable platform with cheap Linux hosting, offering dedicated resources to ensure the speed and stability required for efficient task handling.
Minikube is a tool that allows you to run a single-node Kubernetes cluster on your local machine for development and testing purposes. It supports multiple virtualization technologies.
You need a system with at least 2GB of RAM, 20GB of free disk space, a processor with VT-x or AMD-v virtualization support, and a compatible virtualization technology like VirtualBox, KVM, or Docker.
You can specify the driver using the –driver flag. For example, to use VirtualBox:
minikube start –driver=virtualbox
The process of server security can begin with a single ...

Time To Live (TTL) is a numeric descriptor for how long...
Chromium is an open-source web browser project that ser...
As a Ubuntu user, managing video and audio files can be...
IPv6, also known as Internet Protocol version 6, offers...