How to Install Oracle Database on Windows 10
Oracle Database is a highly efficient relational databa...
Apache Tomcat a widely used web server and Java container is essential for deploying and running Java web applications. Its reliability and robust features have made it a preferred choice among developers and organizations worldwide.
In this post, we will cover the process of installing Apache Tomcat on Windows machine ensuring a smooth and efficient setup for your Java web development projects.
Tomcat acts as a bridge between Java web applications and the underlying operating system. It provides the necessary environment for executing Java servlets, JSPs stands for JavaServer Pages, and other Java-based web components. Tomcat’s architecture is modular allowing for customization and scalability to meet the demands of various web applications.
Following are some key features of Apache Tomcat server described below:
Before proceeding with the installation ensure you have the following prerequisites in place:
Tomcat comes in various versions each with its own features and compatibility. Consider the following factors when selecting the appropriate version:
To Apache Tomcat download, open your favorite browser and visit the official Tomcat website. Choose the appropriate Tomcat version based on your project requirements and preferences. In my case, I am using Tomcat 11 for a smooth process.
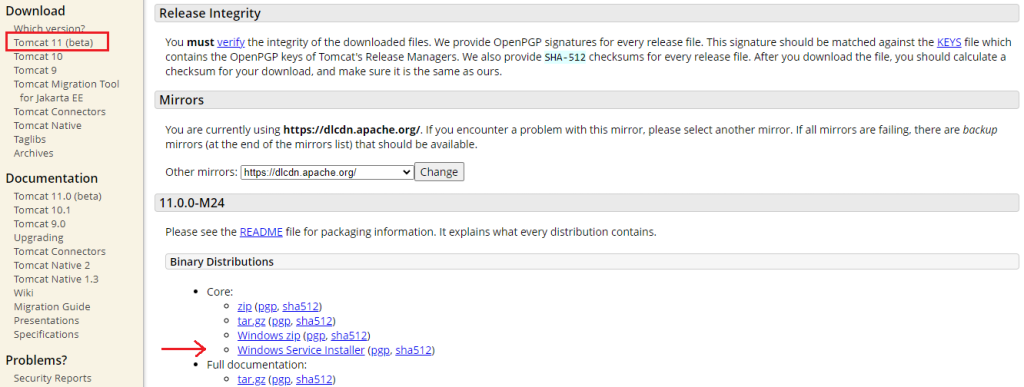
Download the Windows Service Installer, this installer will configure Tomcat as a Windows service for easier management.
Double-click the downloaded installer file under your “Downloads” folder.

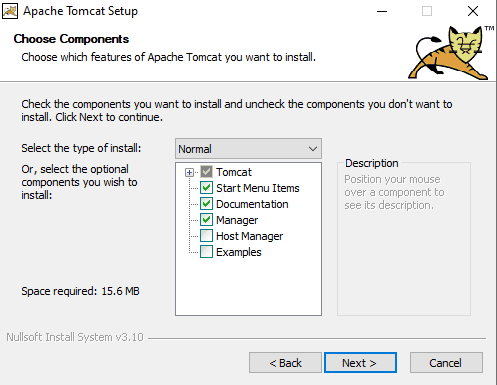
Select the type of installation or select the components like Start Menu Items or Manager then click “Next”.
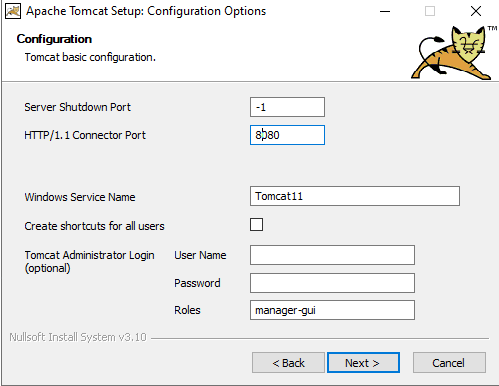
Set the Tomcat basic configuration by specifying the port number and Windows Service Name.
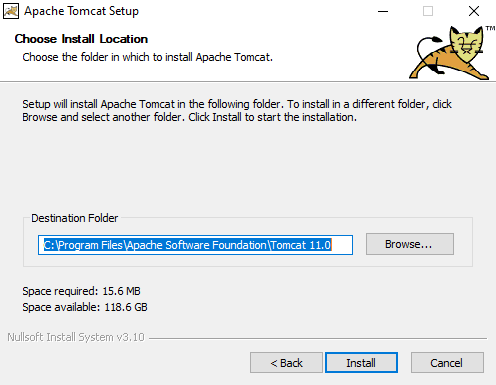
Select the desired location where Tomcat will be installed. The default is usually C:\Program Files\Apache Software Foundation\TomcatX and click “Install”.
Select the path to your JDK installation for the Apache Tomcat setup.
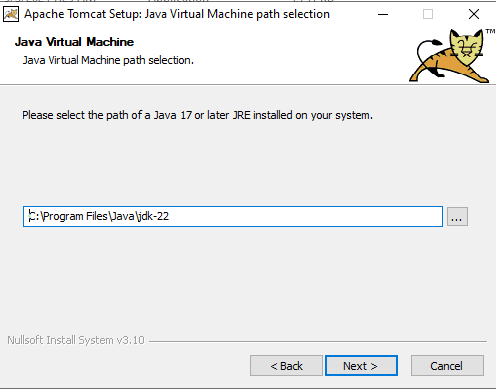
Click “Next” to continue and finish the installation.
Install Apache Tomcat on Our Windows Server!
Hosting a Windows Server with Ultahost is now simpler and faster than ever. Experience ultra-fast SSD NVMe speeds with no interruptions or slowdowns.
Open the command prompt by searching for “Command Prompt” in the Start menu.
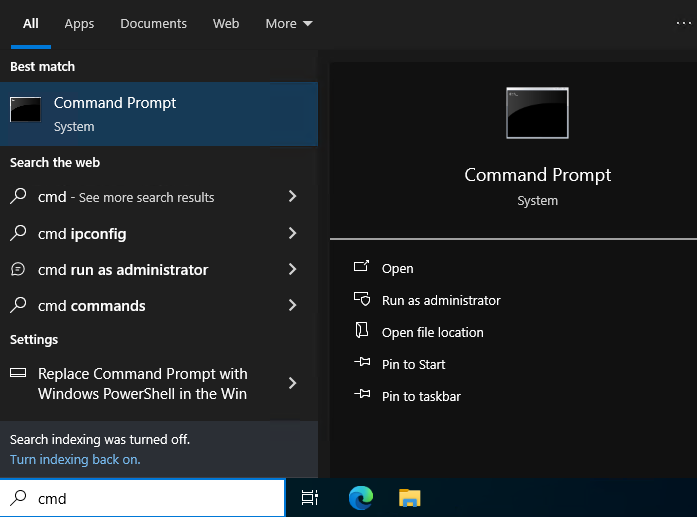
Use the cd command to change to the bin directory of your Tomcat installation. For example:
cd C:\Program Files\Apache Software Foundation\Tomcat 11.0\bin
Execute the startup.bat command. You should see a message indicating that Tomcat has started successfully.
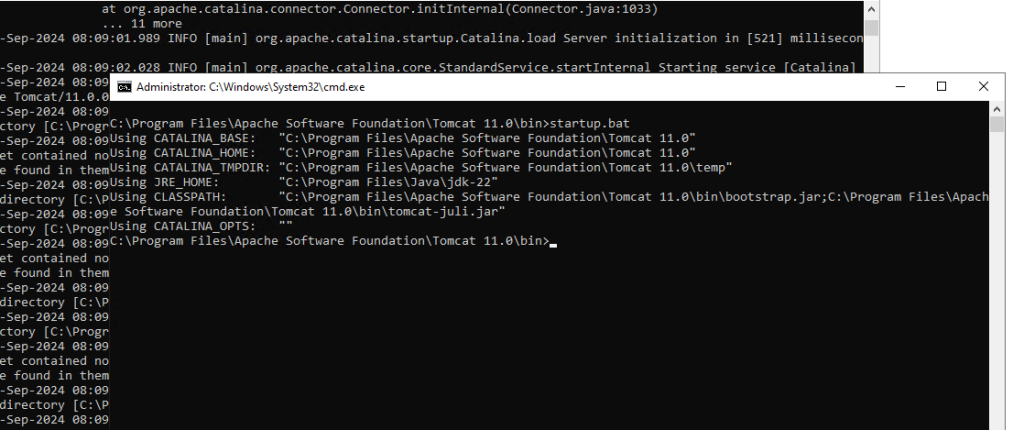
Open a web browser type http://localhost:8080 in the address bar and press Enter.
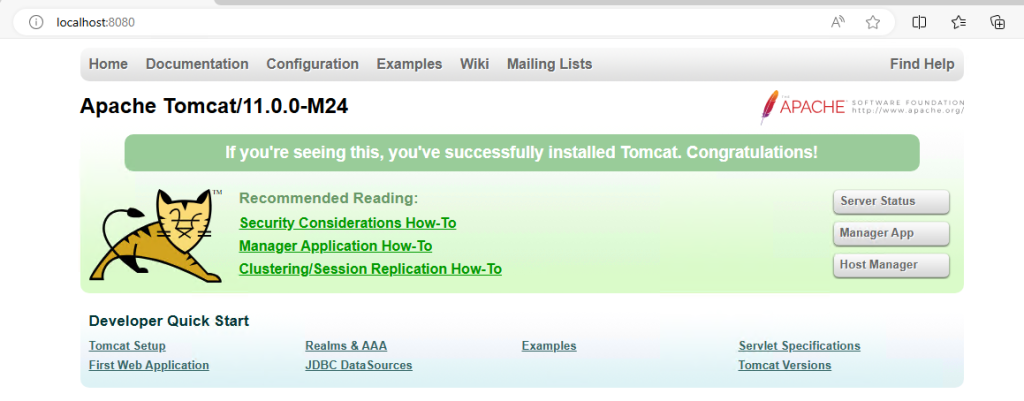
If the installation was successful you should see the Tomcat default web page which usually displays a message like “Congratulations”.
Tomcat can be configured using XML files located in the conf directory of your installation. Some common configurations include:

Open the server.xml file in a text editor. If you have install Notepad++ on Windows you can use this as a text editor.
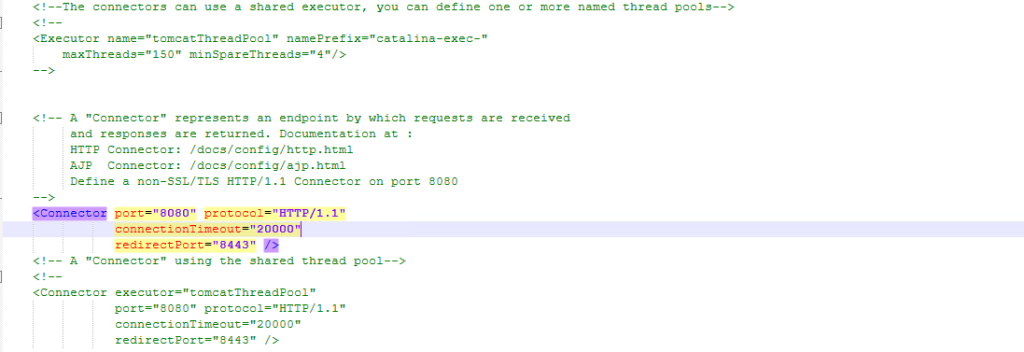
Locate the <Connector> element and modify the port attribute to the desired value for example port="8081" save the changes and restart Tomcat.
To deploy a web application, place the application’s WAR stands for Web Application Archive file in the webapps directory of your Tomcat installation. Tomcat will automatically deploy the application and make it accessible through the appropriate URL.
Search for “Services” in the Start menu and find the service named “ApacheTomcat11” or the name you specified during installation. Right-click the service and choose the appropriate action.
Following are some important notes during install Tomcat Apache Windows system:
By following these steps and understanding the concepts involved you can successfully install and configure Apache Tomcat on your Windows machine to deploy and manage Java web applications.
Ultahost presents specialized dedicated storage servers tailored for both large enterprises and small businesses delivering versatile deployment choices and personalized configurations. The Bare Metal servers from Ultahost stand out in quality, ensuring robust support for your business operations.
Yes, you must have Java Development Kit (JDK) or Java Runtime Environment (JRE) installed before running Tomcat.
You can download it from the official Apache Tomcat website
Run the Windows Service Installer .exe file and follow the instructions to complete the installation.
Use the Tomcat Service Manager or execute the startup.bat and shutdown.bat files located in the ‘bin’ directory.
Open a web browser and go to http://localhost:8080 if Tomcat is running you will see the welcome page.
Edit the server.xml file in the ‘conf’ directory to change the default port number to an unused port.
Yes, but you need to configure each instance to use different ports to avoid conflicts.