How to Run Speed Test in The VPS (Terminal) And Choose Your Location
Or copy link
In today’s digital era, Virtual Private Servers (VPS) have gained immense popularity as a hosting solution for websites, applications, and various online services. Unlike shared hosting, a VPS offers dedicated resources and greater control over your hosting environment.
However, ensuring optimal speed and performance for your VPS is crucial in this fast-paced digital landscape. This is where conducting speed tests on your VPS becomes essential. Speed tests enable you to measure important factors such as upload and download speeds, latency, and other performance indicators associated with your VPS connection.
The purpose of this blog post is to provide you with a step-by-step guide on how to perform speed tests on a VPS using the terminal. Additionally, we will emphasize the significance of selecting the right testing location to obtain accurate results. By following the outlined steps and implementing the suggested tips in this article, you will be able to effectively monitor and optimize the speed and overall performance of your VPS.
How Speed Tests Work
To understand the process of conducting speed tests in a VPS (Virtual Private Server), it is important to grasp the general principles behind how speed tests work. These tests evaluate the rate of data transfer between your device and a server by uploading and downloading a predetermined amount of data and measuring the time it takes to complete these actions.
Speed tests generate several performance metrics, including:
Download speed: This refers to the speed at which data is transferred from the server to your device.
Upload speed: This indicates the speed at which data is transferred from your device to the server.
Latency: This measures the time it takes for a data packet to travel between your device and the server.
Jitter: Jitter reflects the variation in latency or delay between data packets.
Differences When Conducting Speed Tests in a VPS Compared to Regular Internet Connections
Executing speed tests in a VPS differs from conducting them on regular internet connections due to a few key factors:
Network infrastructure: VPS providers typically have distinct network setups compared to typical consumer internet connections. This disparity can affect routing, latency, and overall performance within your VPS.
Virtualization technology: VPS environments employ virtualization technology to divide physical servers into multiple virtual instances. This virtualization layer can introduce additional overhead and impact the results of speed tests.
Shared resources: In shared VPS environments, multiple virtual instances share physical resources. This sharing arrangement can influence the available bandwidth and consequently affect the outcomes of speed tests, particularly during periods of high usage.
The Importance of Selecting The Appropriate Location for Accurate Results
When conducting speed tests in a VPS, choosing the right location for the test server is crucial to obtain accurate and meaningful results. Here’s why:
Proximity to your audience: If your website or application caters to a specific geographic audience, selecting a test server location close to your target audience provides a more realistic depiction of their user experience.
Network performance variations: Internet infrastructure and network performance can significantly vary across different regions. By choosing a test server in a location similar to your target audience, you can assess the actual network conditions they may encounter.
Network routing: The path data takes between your VPS and the test server can impact latency and overall performance. Opting for a test server located in an area with favorable routing can provide a more accurate representation of the network conditions within your VPS.
In the upcoming sections, we will delve into a step-by-step process for running speed tests in a VPS using the terminal. Additionally, we will provide tips for optimizing the test results and discuss factors to consider when selecting the ideal location to ensure accurate speed test measurements.
Running Speed Tests in VPS: Step-by-Step Guide
Step 1: Accessing the VPS terminal
To begin running speed tests in your VPS, you’ll need to access the VPS terminal. Follow these steps:
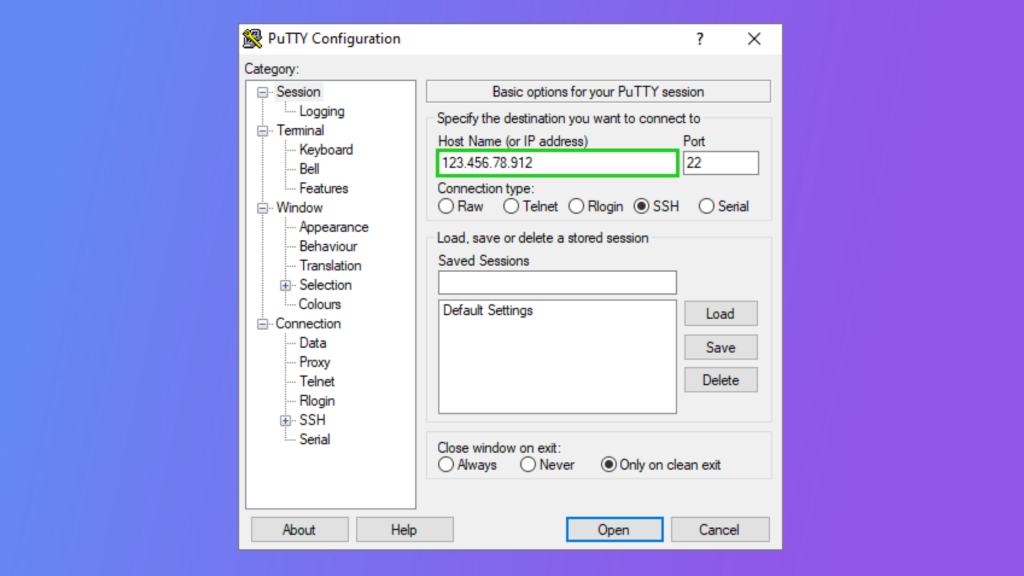
Open a terminal application on your local machine.
Use SSH (Secure Shell) to connect to your VPS. The command usually follows this format: ssh username@your_vps_ip_address.
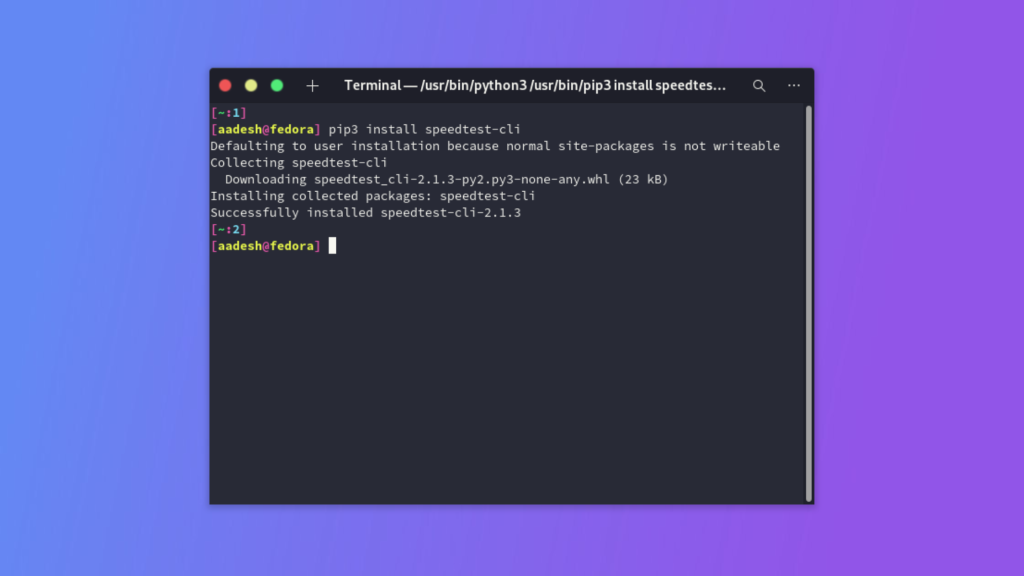
Next, you’ll need to install speed testing tools in your VPS. One popular tool is speedtest-cli. Here’s how to install it:
Update the package list on your VPS by running the command sudo apt update.
Install Python’s package manager (pip) if it’s not already installed. Run the command sudo apt install python3-pip.
Install speedtest-cli by running sudo pip3 install speedtest-cli.
Step 3: Running The Speed Test Command
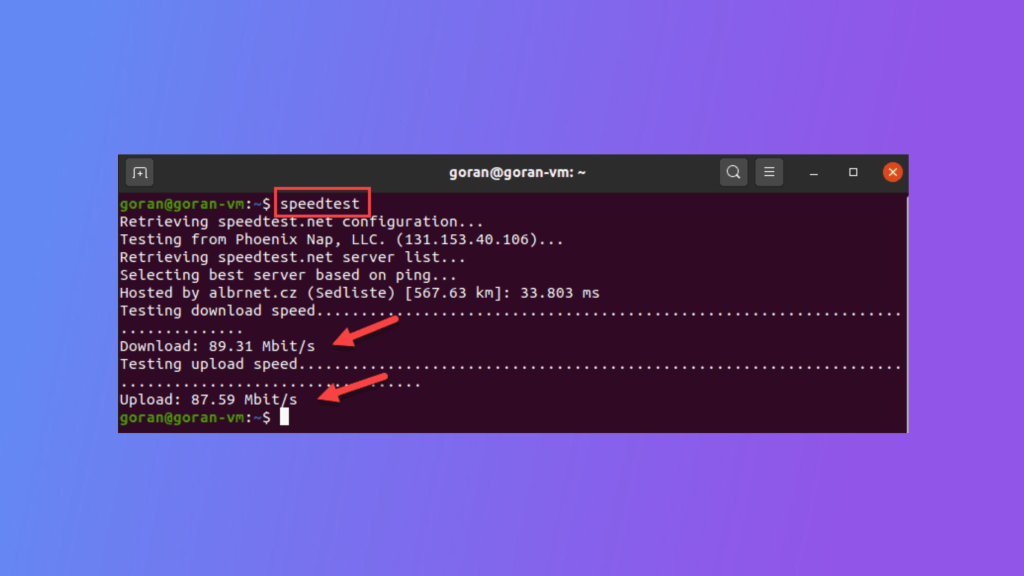
Once you have speedtest-cli installed, you can run speed tests in your VPS. Follow these steps:
In the VPS terminal, type speedtest-cli and press Enter.
The speedtest-cli tool will connect to the nearest speed test server and initiate the test. Wait for the test to complete.
Step 4: Interpreting The Results
After the speed test completes, you’ll see the results displayed in the terminal. The results typically include metrics such as download speed, upload speed, ping (latency), and server location. Here’s how to interpret the results:
Download speed: Represents the rate at which data is transferred from the server to your VPS, measured in megabits per second (Mbps).
Upload speed: Indicates the rate at which data is transferred from your VPS to the server, also measured in Mbps.
Ping (latency): Refers to the time it takes for a data packet to travel between your VPS and the test server, measured in milliseconds (ms).
Server location: Indicates the location of the speed test server.
Choosing Location for Speed Tests
The location of the speed test server can significantly influence the test results and provide a more accurate representation of the network performance for your VPS. Here’s how server location impacts speed test results:
Network distance: The physical distance between your VPS and the test server affects latency. Data travels faster over shorter distances, resulting in lower latency and improved performance.
Network infrastructure: Different regions may have varying levels of network infrastructure development, which can impact the quality and speed of the network connection.
Routing and congestion: The network route that data takes between your VPS and the test server can vary based on the server location. Routing inefficiencies or network congestion can lead to increased latency and reduced performance.
Factors to Consider When Selecting a Location
When choosing a location for your speed tests, consider the following factors:
Target audience: If your website or application caters to a specific geographic region, selecting a test server in or near that region provides a more accurate reflection of the network conditions experienced by your users.
Data center proximity: If your VPS is hosted in a specific data center, selecting a test server within the same data center can give you insights into the local network performance.
Network providers: Different regions may have various network service providers, each with its own infrastructure and performance characteristics. Consider the dominant network providers in your target audience region.
Testing diversity: To obtain a comprehensive understanding of your VPS performance, consider running speed tests from multiple locations to gather data on various network routes and performance conditions.
By considering these factors and following best practices, you can choose an appropriate server location for your speed tests. Gaining valuable insights into the performance of your VPS.
Conclusion
Regularly monitoring and optimizing the speed and performance of your VPS is crucial for maintaining a smooth VPS host user experience. And ensuring the efficiency of your online services. By utilizing speed tests and making informed decisions based on the results. You can improve the overall performance of your VPS and deliver an optimal experience to your users. It is important to dedicate time to running speed tests in your VPS, selecting the appropriate test server location, and consistently assessing and optimizing its performance. You can unleash the full potential of your VPS and offer a seamless and dependable online experience for your audience.