
How to Manage Databases with SSH Command Line
SSH stands for Secure Shell is a powerful network proto...


In 2026, remote server access will be more difficult to protect, especially due to increasing brute-force attacks on Linux VPSs. Because of this, password-based SSH logins are not considered secure for production servers. Therefore, to ensure secure SSH access, system administrators and DevOps engineers must use SSH key-based authentication instead. With public and private key encryption, passwords are no longer needed. Therefore, it is necessary to minimize the risk of unauthorized access, credential leaks, and bot attacks.
This guide will help you secure SSH access with key-based authentication, safely disable password logins, and make your Linux server more secure against today’s cyber threats.
There has been a notable surge of cyber threat activity pertaining to Linux VPS and cloud servers in 2026. Cyber attackers use bots to scan for open SSH ports and launch brute-force attacks with leaked passwords or any combination of credentials. If you still rely on password-based login, attackers will target your server. Using cryptographic key pairs that attackers cannot guess or crack, SSH access with key-based authentication eliminates the risks associated with weak or guessable passwords.
Upgrade to a Faster SSH VPS Today!
Access your server securely with SSH at Ultahost, get full root control, and scale resources instantly as your traffic grows without downtime.
Modern security standards and compliance requirements demand that you implement a more robust authentication method to access the remote server. If you are using a production web server, an AI automation platform, or a business application, the use of SSH key authentication minimizes possible attacks and secures your data. For all intents and purposes, the use of SSH key authentication is a non-negotiable practice in order to create a positive and secure Linux server environment.
SSH Key-based Authentication requires access to the private key of the machine requesting access, and as such, the chances of an unauthorized individual being able to access the server are almost impossible. For this reason, SSH key-based authentication is a good practice for anyone managing a cloud VPS, dedicated server, or any other type of server, as it improves the remote access management and server hardening.
This method reduces security risks by ensuring that only devices possessing the correct private key are able to access the server.
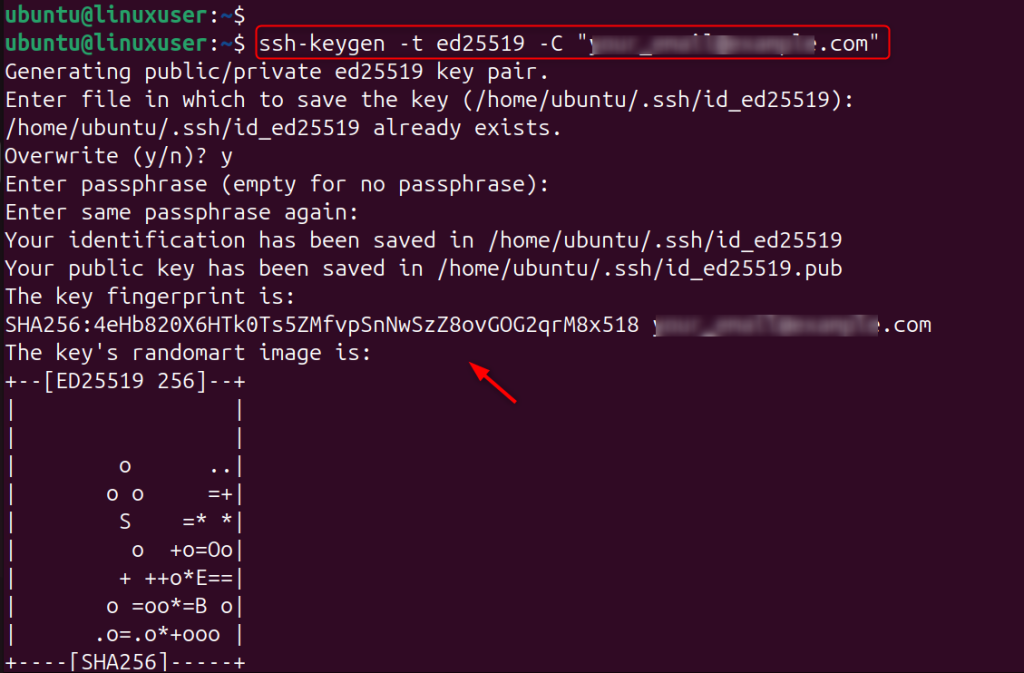
SSH keys use cryptographic pairs to authenticate users. They are much more secure than traditional passwords, and they eliminate the need for them. On your computer, you create a pair of public and private keys. You upload the public key to the server, while you keep the private key with yourself.
ssh-keygen -t ed25519 -C "[email protected]"
This will create strong encryption keys that attackers can’t brute force.
This step will install your public key on the server. Your local machine can then authenticate by using your private key.
ssh-copy-id user@your_server_ip
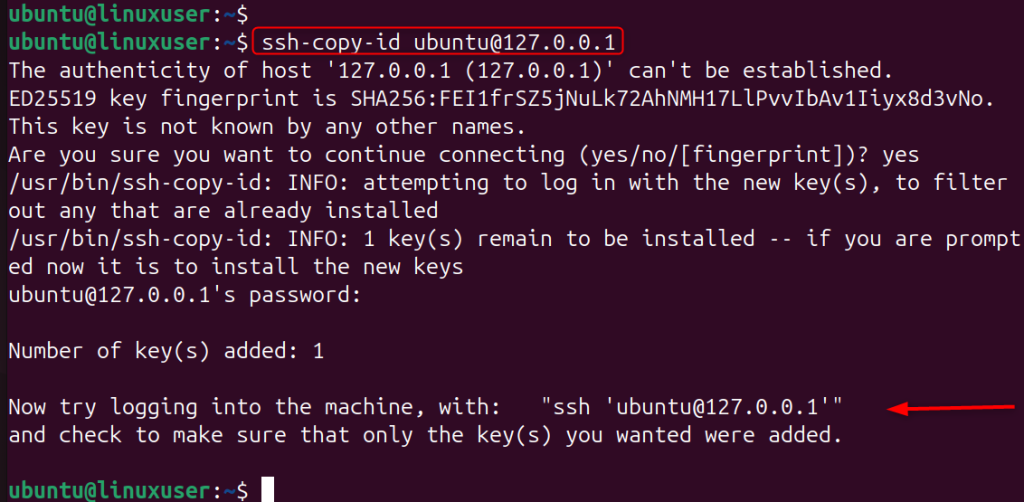
Upload the key manually if this command is not available.
cat ~/.ssh/id_ed25519.pub | ssh user@your_server_ip "mkdir -p ~/.ssh && cat >> ~/.ssh/authorized_keys"
Once you have done this, the server will accept authentication attempts made by your computer.
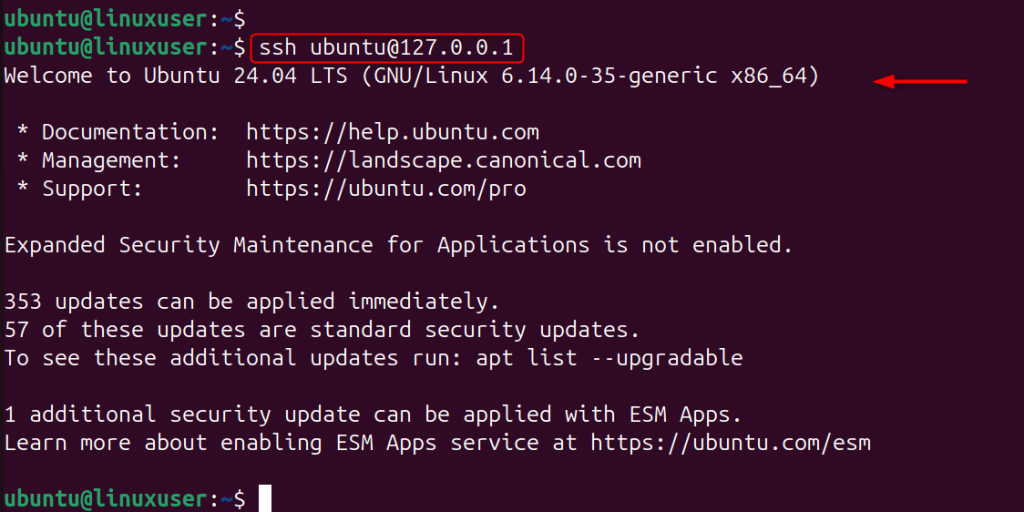
Implementing SSH key-based authentication is a great way to improve remote access security and strengthen your server hardening strategy, whether you manage a cloud VPS or dedicated server. Test the login before you disable passwords.
ssh user@your_server_ip
If you can log in without entering a password, then key authentication is functioning correctly.
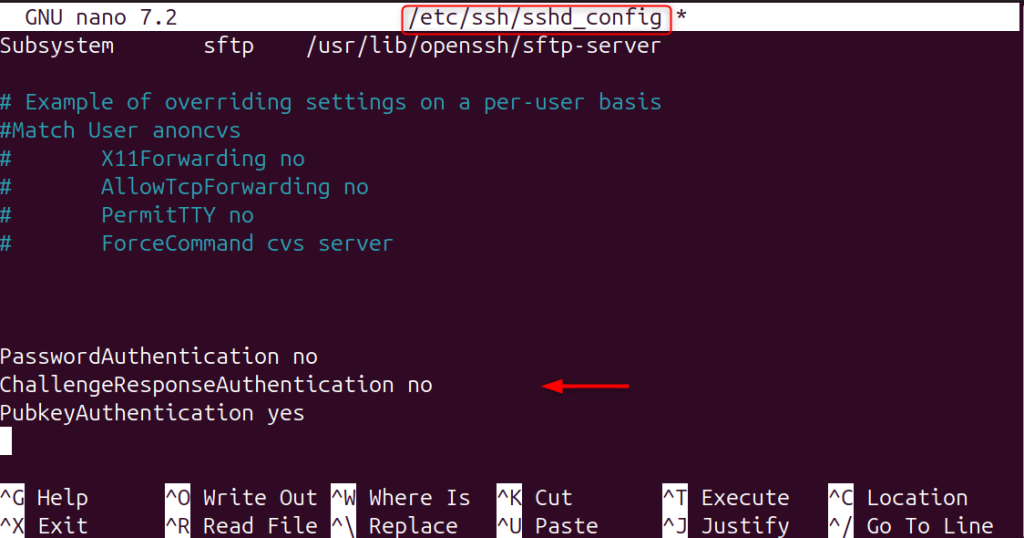
Disabling password authentication prevents attackers from launching brute-force attacks. To do this, open the SSH config file:
sudo nano /etc/ssh/sshd_config
Now specify the following settings in the “sshd_config” file:
PasswordAuthentication noChallengeResponseAuthentication noPubkeyAuthentication yes
Restart SSH to apply the changes.
sudo systemctl restart sshd

Only trusted SSH keys will be able to log in. Automated bots pose a high risk to password-protected SSH access on Linux servers. You can easily prevent these attacks by using SSH key-based authentication instead of traditional passwords. Passwords remain vulnerable to credential phishing and other malicious attacks.
2FA generates a TOTP (time-based one-time password) that changes every 30 seconds. You must enter this code to log in, even if someone steals your SSH key.
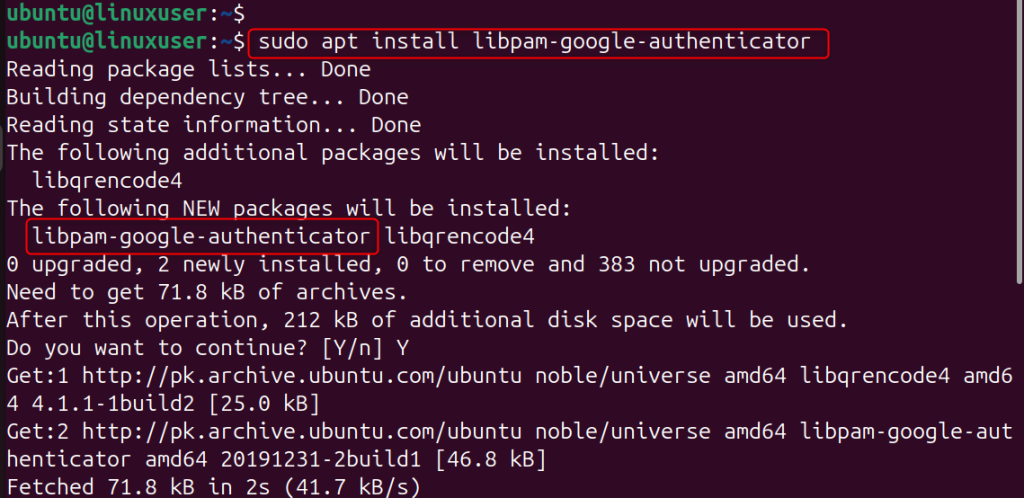
This package allows SSH to request a code of verification from Google Authenticator.
sudo apt install libpam-google-authenticator
This module adds 2FA to the authentication framework of the system.
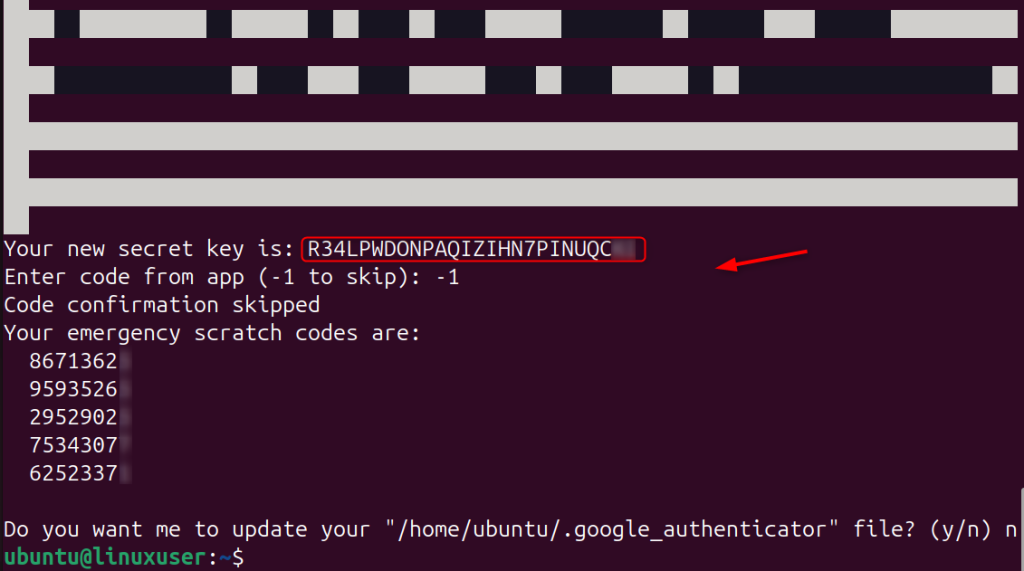
This command will generate your secret one-time password key and QR code.
google-authenticator
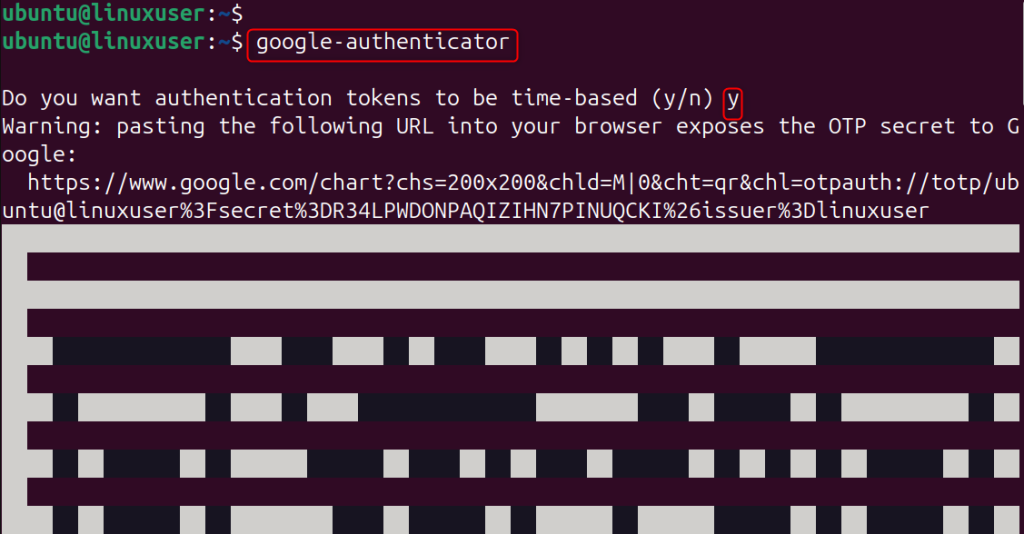
Use your mobile app to scan the QR code. It will also ask you for security questions and backup codes.
This tells SSH that it will check the Google Authenticator code when you log in.
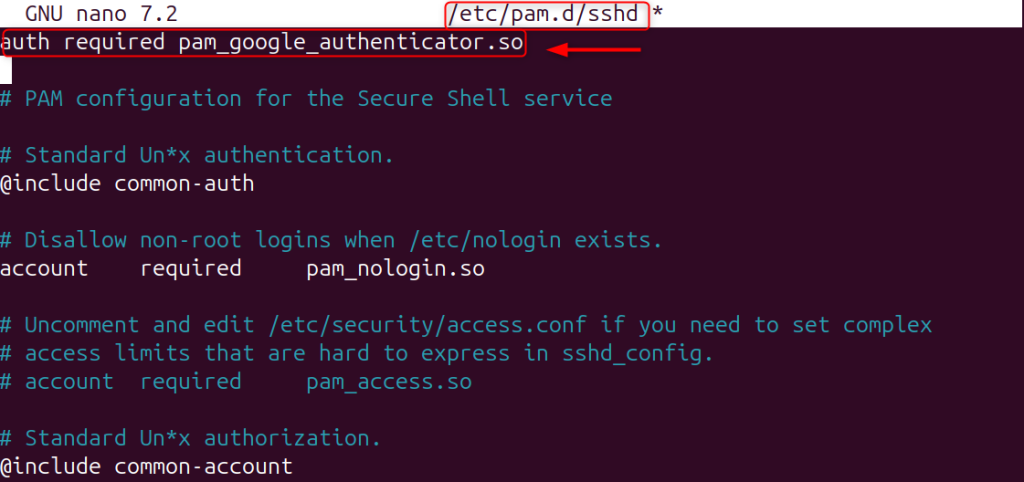
sudo nano /etc/pam.d/sshd
Add the following line to the top of the “/etc/pam.d/sshd” file:
auth required pam_google_authenticator.so
The system enables 2FA authentication for every SSH login.
This will activate challenge-response Authentication, which allows SSH to request the TOTP code.
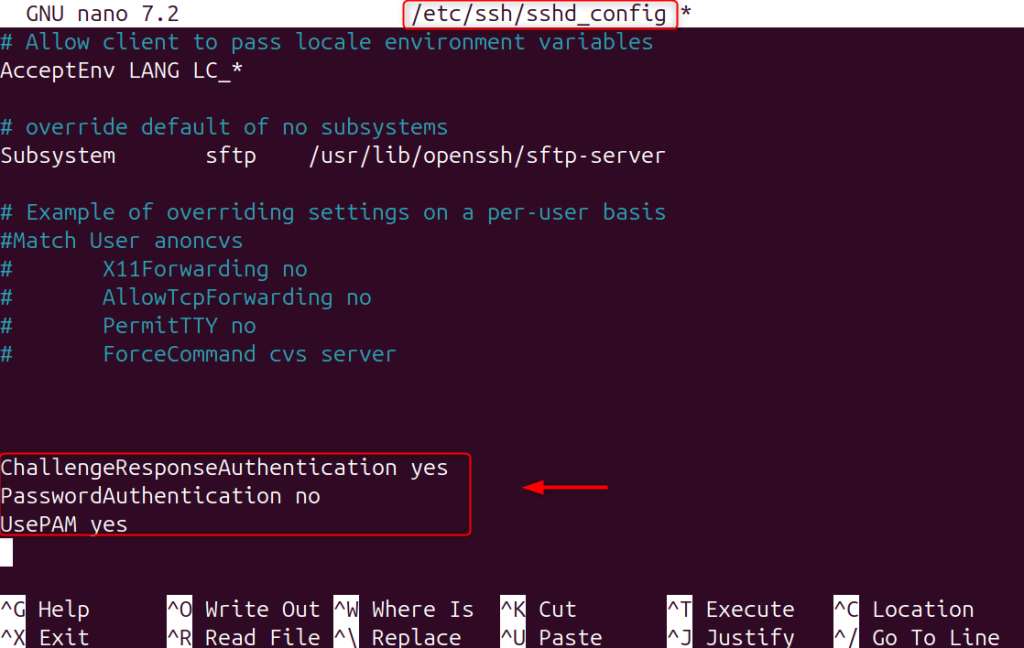
sudo nano /etc/ssh/sshd_config
Make sure these settings are active:
ChallengeResponseAuthentication yesPasswordAuthentication noUsePAM yes
Restart SSH in order to apply the changes.
sudo systemctl restart sshd
The system will require your SSH key and your time-based verification code.

Reconnect the two authentication layers to ensure they are working properly.
ssh user@your_server_ip
It will ask you to provide your SSH private key and enter a 2FA verification code.
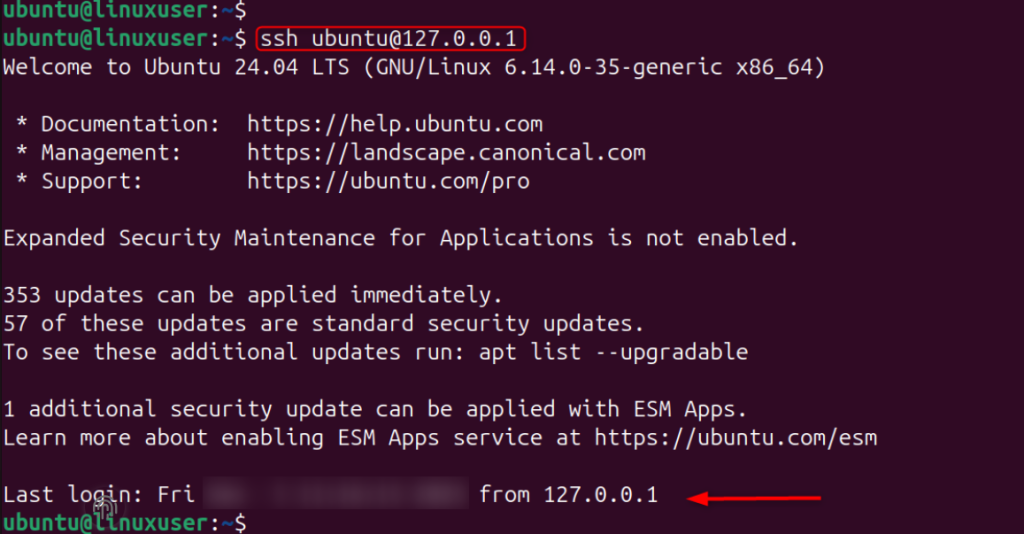
This confirmation shows that your server is now fully protected.
Beyond configuring SSH key-based authentication, you should apply additional security hardening measures to protect your Linux VPS from modern cyber threats. Always enable a firewall like UFW to restrict unnecessary ports, install Fail2Ban to block brute-force attempts, and keep your system updated using regular apt update && apt upgrade commands to patch vulnerabilities. Disable unused services, enforce strong file permissions, and consider changing the default SSH port to reduce automated attack noise.
For production environments, implement intrusion detection tools, enable automatic security updates, and regularly monitor system logs to ensure your VPS remains secure, stable, and resilient against unauthorized access.
Attackers frequently scan port 22. You can change it to reduce unwanted traffic.
sudo nano /etc/ssh/sshd_config
Let’s change the port 22 to 2222:
Port 2222

Restart SSH by executing the following command:
sudo systemctl restart sshd

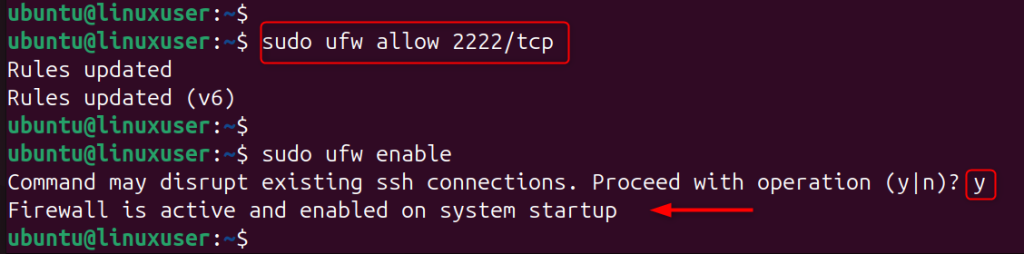
Only allow your selected SSH port to pass through the firewall. For example, the following command enables firewall rules:
sudo ufw allow 2222/tcpsudo ufw enable
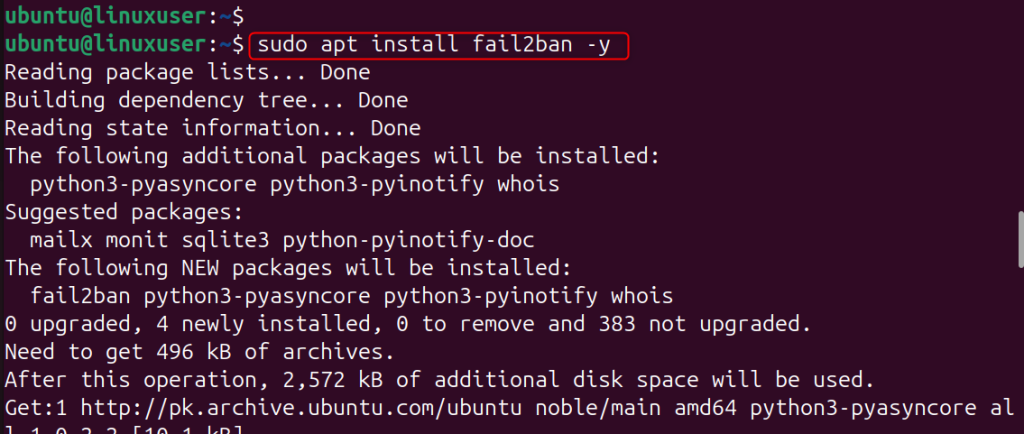
Fail2Ban automatically blocks failed SSH login attempts.
sudo apt install fail2ban -y
Let’s enable the services of Fail2Ban:
sudo systemctl enable --now fail2ban

This is the complete guide to Secure SSH access on your Linux VPS using keys and two-factor authentication.
Securing SSH using key-based authentication is not optional in 2026. It’s an essential step to protect any Linux VPS or cloud server. By replacing passwords and root password login with a cryptographic SSH key and enforcing access controls, you can dramatically reduce the attack surface and improve server security. SSH key authentication is a great way to ensure that your infrastructure remains secure, whether you manage a single Ubuntu Server or multiple production environments.
SSH key-based authentication uses two cryptographic keys, a public key and a private key, instead of a username and a password to log into a server. The server stores the public key while you keep the private key on your local machine. This method applies asymmetric cryptography to verify your identity without sending sensitive credentials over the network.
SSH keys provide stronger security than passwords. Attackers cannot easily brute force or guess a cryptographic key, even with automated tools. SSH key login protects Linux VPS and cloud servers by blocking common attacks such as brute force attempts.
You should disable password authentication on production servers after confirming that your SSH key works correctly. Update the SSH configuration and turn off password login to prevent unauthorized access attempts. This step reduces the risk of brute force attacks and credential stuffing.
If you lose your private SSH key and do not have a backup, you may lose access to your server. Always store secure backups of your private key. You can also add an extra authorized key for emergency access. Keep encrypted backups in a password manager to avoid accidental lockouts.
Cloud VPS providers strongly recommend SSH key authentication. Many hosting platforms encourage or require SSH key login during server setup to improve security. In 2026, system administrators consider SSH key authentication a best practice for securing remote server access.
In high security environments, rotate SSH keys at least every six months. If someone compromises a private key, regular rotation limits long-term exposure. Follow proper key management policies to strengthen overall server security.
Try Ultahost’s UltaAI for Smarter Website Management!
Experience AI-driven hosting that boosts your website speed, strengthens security, and helps you make smarter management choices.