How to Deploy and Run Redis in Docker
Deployment of Redis in Docker simplifies managing depen...
Setting up a private Docker registry can significantly enhance your control over Docker images, provide better security, and enable more efficient management of your containerized applications. To streamline the distribution and management of Docker images within your organization a private Docker registry is essential.
In this article, we will cover the process of setting up and using a private Docker registry empowering you to securely store, manage, and distribute your custom Docker images.
A Docker registry is a storage and distribution system for Docker images. Docker images are collections of layers that allow you to build and share containerized applications. While Docker Hub is the default public registry provided by Docker, it is often beneficial to host your own private registry to maintain control over your images, ensure compliance with internal policies, and improve network efficiency.
The following are benefits of a private docker registry described below:
Before create private Docker registry, make sure you have the following:
Following are the steps described below on how to set a private docker registry:
If Docker is not already installed on your machine, you need to install it first. You can follow the Docker installation guide for your operating system:
If you are using Linux, Type the following command in the terminal:
apt install docker.io

For Windows users, refer to our guide on how to install Docker on Windows system.
Docker provides an official image for the registry. You can run a registry container using the following command:
docker run -d -p 5000:5000 --restart=always --name registry registry:2

Now that your registry is running, you can push images to it.
1. Tag the image with the hostname and port of your registry:
docker tag your-image localhost:5000/your-image
2. Push the image to your private registry:
docker push localhost:5000/your-image
To pull an image from your private registry, use the following command:
docker pull localhost:5000/your-image
While setting up a registry is simple securing it is important to protect your images. Here are a few points to enhance security:
Use SSL/TLS:
SSL/TLS encrypts the communication between your Docker client and the registry preventing eavesdropping and tampering.
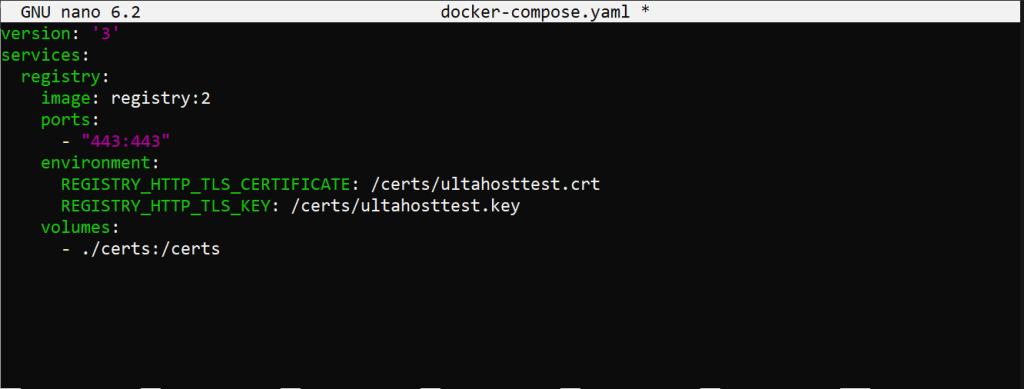
First, obtain a domain name and set up DNS records pointing to your registry server. Generate SSL certificates. You can use a trusted Certificate Authority (CA) or create self-signed certificates using tools like OpenSSL. Finally configure the Docker registry to use SSL/TLS by creating a file named docker-compose.yml.
version: '3'
services:
  registry:
    image: registry:2
    ports:
      - "443:443"
    environment:
      REGISTRY_HTTP_TLS_CERTIFICATE: /certs/domain.crt
      REGISTRY_HTTP_TLS_KEY: /certs/domain.key
    volumes:
      - ./certs:/certs

Start the registry with Docker Compose:
docker-compose up -d
Install Docker on Our Secure Ubuntu Server!
Enjoy the reliability of Ubuntu with Ultahost’s virtual server, offering fast performance and low latency for managing Docker private registry.
Enable Authentication
Implementing basic authentication adds another layer of security by requiring users to authenticate before pushing or pulling images.
1. Create a password file using the htpasswd tool:
mkdir auth && docker run --entrypoint htpasswd registry:2 -Bbn your-username your-password > auth/htpasswd
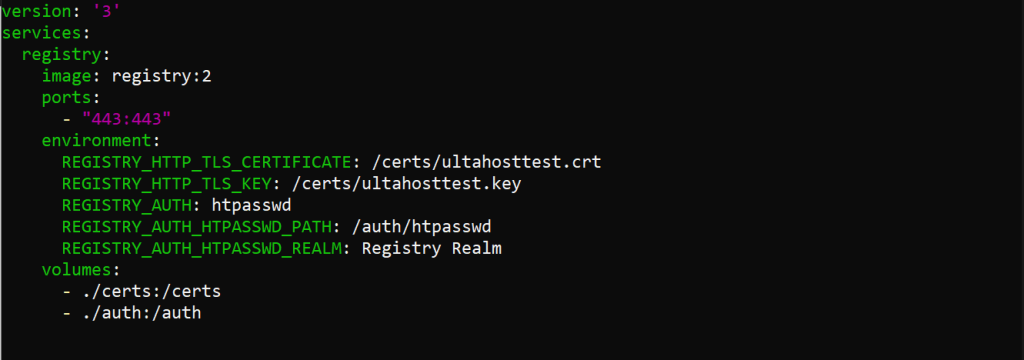
2. Update your docker-compose.yml file to include the authentication configuration:
version: '3'
services:
  registry:
    image: registry:2
    ports:
      - "443:443"
    environment:
      REGISTRY_HTTP_TLS_CERTIFICATE: /certs/domain.crt
      REGISTRY_HTTP_TLS_KEY: /certs/domain.key
      REGISTRY_AUTH: htpasswd
      REGISTRY_AUTH_HTPASSWD_PATH: /auth/htpasswd
      REGISTRY_AUTH_HTPASSWD_REALM: Registry Realm
    volumes:
      - ./certs:/certs
      - ./auth:/auth

Restart your registry with the following commands:
docker-compose down && docker-compose up -d
If you are using self-signed certificates you need to configure Docker to trust your registry. Create or update the Docker daemon configuration file /etc/docker/daemon.json:
{
  "insecure-registries" : ["your-registry-domain:5000"]
}
Restart Docker to apply the changes:
sudo systemctl restart docker
Integrating your free private Docker registry with Continuous Integration/Continuous Deployment (CI/CD) pipelines automates the process of building, pushing, and deploying images. Popular CI/CD tools like Jenkins, GitLab CI, and GitHub Actions can be configured to interact with your private registry.
Example: Using GitHub Actions
Create a .github/workflows/docker-publish.yml file in your repository:
name: Docker Publish
on:
  push:
    branches:
      - main
jobs:
  build:
    runs-on: ubuntu-latest
    steps:
    - uses: actions/checkout@v2
    - name: Set up Docker Buildx
      uses: docker/setup-buildx-action@v1
    - name: Login to DockerHub
      uses: docker/login-action@v1
      with:
        username: ${{ secrets.DOCKER_USERNAME }}
        password: ${{ secrets.DOCKER_PASSWORD }}
    - name: Build and push
      uses: docker/build-push-action@v2
      with:
        push: true
        tags: your-registry-domain:5000/your-image:latest
Add your Docker registry credentials to the repository secrets.
Regular monitoring and maintenance of your private Docker registry ensure its optimal performance and security. Tools like Prometheus and Grafana can be used to monitor metrics and visualize performance data.
Create a docker-compose.yml file to set up Prometheus and Grafana:
version: '3'
services:
  prometheus:
    image: prom/prometheus
    volumes:
      - ./prometheus.yml:/etc/prometheus/prometheus.yml
    ports:
      - "9090:9090"
  grafana:
    image: grafana/grafana
    ports:
      - "3000:3000"
Configure Prometheus to scrape metrics from your Docker registry.
Setup private Docker registry is a powerful way to manage and secure your containerized applications. By following these steps, you can create a robust system for storing and distributing Docker images. Remember to regularly update and monitor your registry to maintain its security and performance. With a private Docker registry, you have full control over your container images ensuring a more efficient and secure development workflow.
Above the following steps, you can effectively manage your private registry on Docker. Integrate Docker Compose with Ultahost’s best Linux VPS server for seamless management. Experience ultra-fast SSD NVMe speeds without dropouts or slowdowns, ensuring smooth performance while managing Docker instances.
A private Docker registry is a storage space where you keep your Docker images securely.
It lets you store and manage Docker images securely, without sharing them publicly.
You can set it up by running a Docker registry container on your server.
No, you just need Docker installed to run and access your private registry.
Yes, you can secure it with authentication, SSL, and other access controls.
Yes, you can set it up for free on your own server, though storage costs may apply.
Use Docker commands like docker push to upload images to your registry.