How to Install Maldet on Linux Server
Linux Malware Detect shorts for Maldet is a powerful ma...
BitrixVM is a powerful and flexible virtual machine designed for running Bitrix based applications. Whether you are setting up an online store a corporate portal or any other web application using Bitrix setting up BitrixVM on CentOS can help you get the performance, stability, and security you need.
In this post, we will discuss the step-by-step process of installing and configuring Centos BitrixVM environment making sure you cover all the important aspects to get your environment up and running smoothly.
Before you start the BitrixVM environment CentOS installation process make sure you have the following prerequisites in place:
Install BitrixVM on Our CentOS Server!
Ultahost offers VPS hosting with NVMe SSD storage. Use our VPS to practice the command and streamline your processes.
Following are the steps described below to install BitrixVM on CentOS:
Before installing any new software it is important to update your system packages to their latest versions. Open your terminal and run the following commands:
sudo yum update -y

This command will update all the packages on your system to their latest versions. Once the update process is complete, reboot your system to ensure all updates are applied correctly.
BitrixVM requires several dependencies to function correctly. These include web server software, database management systems, and PHP. Install these dependencies by running the following command:
sudo yum install -y epel-release

sudo yum install -y httpd mariadb-server php php-mysqlnd php-xml php-mbstring php-opcache

Start and enable the Apache and MariaDB services to ensure they run on boot:
sudo systemctl start httpd && sudo systemctl enable httpd
sudo systemctl start mariadb && sudo systemctl enable mariadb
MariaDB needs to be secured by setting a root password and removing insecure default settings. Run the following command to start the security script:
sudo mysql_secure_installation

You will be prompted to enter a root password and make several security-related decisions. It is recommended to answer “-y” to all options to enhance the security of your MariaDB installation.
Learn about How to Install Rancher on CentOS 7.
Navigate to the BitrixVM official download page and download the latest version of BitrixVM:
wget http://www.bitrixsoft.com/download/scripts/bitrix-env.sh

Once the download is complete, make the script executable and run it:
chmod +x bitrix-env.sh && sudo ./bitrix-env.sh

The installation script will prompt you for several configurations. Follow the instructions to complete the installation process.
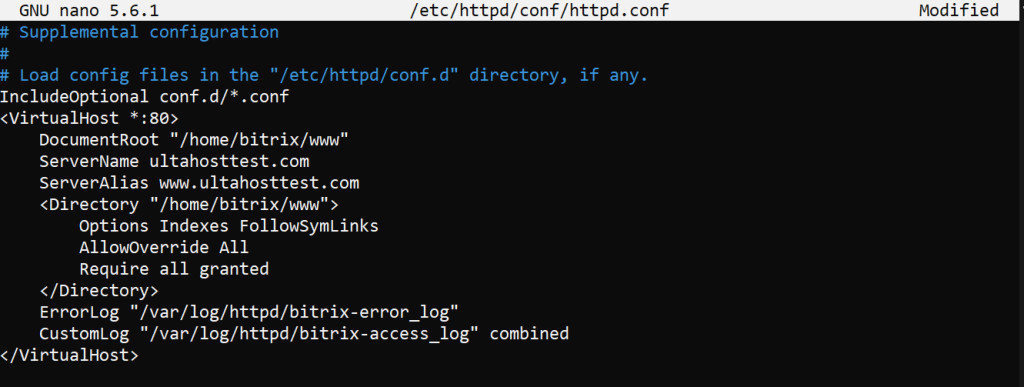
BitrixVM requires specific configurations for Apache and PHP to function optimally. Start by editing the Apache configuration file:
sudo nano /etc/httpd/conf/httpd.conf
Add the following lines to the configuration file to set up the virtual host for your BitrixVM:
<VirtualHost *:80>
    DocumentRoot "/home/bitrix/www"
    ServerName your_domain.com
    ServerAlias www.your_domain.com
    <Directory "/home/bitrix/www">
        Options Indexes FollowSymLinks
        AllowOverride All
        Require all granted
    </Directory>
    ErrorLog "/var/log/httpd/bitrix-error_log"
    CustomLog "/var/log/httpd/bitrix-access_log" combined
</VirtualHost>

Save and close the file, then restart the Apache service to apply the changes:
sudo systemctl restart httpd
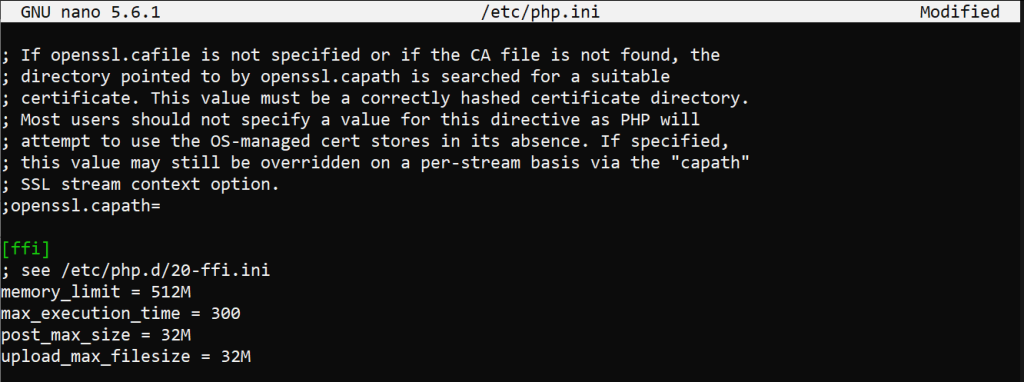
Next, edit the PHP configuration file to match the recommended settings for BitrixVM:
sudo nano /etc/php.ini
Make the following changes:
memory_limit = 512M
max_execution_time = 300
post_max_size = 32M
upload_max_filesize = 32M

Save the changes and restart Apache again.
Now that the basic setup is complete, you need to configure BitrixVM itself. Open your web browser and navigate to http://your_domain.com. You should see the BitrixVM installation page.
Follow the instructions to complete the Bitrix installation. You will need to provide database details, including the MariaDB root password you set earlier.
After completing the web-based installation, you might want to perform some additional configurations to optimize your BitrixVM environment. Here are a few recommended steps:
1. Ensure that your firewall settings allow web traffic on ports 80 and 443. You can use the following commands to open these ports:
sudo firewall-cmd --permanent --add-service=http
sudo firewall-cmd --permanent --add-service=https
sudo firewall-cmd --reload
2. Bitrix requires a cron job to run periodic tasks. Add the following line to the crontab:
sudo crontab -u bitrix -e
Add the following line to the crontab file:
* * * * * /home/bitrix/www/bitrix/modules/main/tools/cron_events.php
3. Tweak the MariaDB configuration to optimize database performance for Bitrix. Edit the MariaDB configuration file:
sudo nano /etc/my.cnf.d/server.cnf
Add or modify the following settings:
[mysqld]
innodb_buffer_pool_size = 1G
innodb_log_file_size = 256M
Save the changes and restart the MariaDB command.
4. For a more secure environment, it is recommended to enable HTTPS. You can do this by obtaining an SSL certificate from a trusted certificate authority (CA) and configuring Apache to use it.
Setting up BitrixVM on CentOS involves several steps, by following this guide you can have a robust and secure environment ready to run your Bitrix-based applications. From updating your CentOS system and installing necessary dependencies to configuring Apache, PHP, and MariaDB, this comprehensive guide covers all the essential aspects of the setup process. With your BitrixVM environment up and running, you can now focus on developing and deploying your applications easily.
At Ultahost, we are committed to providing our customers with the best possible service and support, and we are always working to improve our offerings. Our dedicated hosting is designed to be scalable and flexible so you can always choose the right amount of resources for your needs.
BitrixVM is a virtual machine environment for hosting Bitrix based applications efficiently.
CentOS is stable and compatible with BitrixVM, ensuring reliable performance for web applications.
You can download the BitrixVM script using the wget command on CentOS.
At least 2GB RAM, 2 CPU cores, and sufficient disk space are recommended for optimal performance.
Access the web interface of BitrixVM and follow the guided setup to configure databases and services.
Yes, BitrixVM is compatible with both CentOS 7 and CentOS Stream 8-9.
Yes, BitrixVM supports hosting multiple websites by managing them through its control panel.