
How to Use chown Command Recursively
In Linux, ownership strictly governs what can read, cha...


A proxy server acts as an intermediary between a client and the internet, providing various benefits such as improved security, privacy, and control. Squid is a popular open-source proxy server that can be used to provide proxy services for a range of protocols, including HTTP, HTTPS, and FTP. In this guide, we will cover how to install Squid Ubuntu and configure Squid on an Ubuntu server. We will also cover some basic configuration options to secure and customize your Squid Ubuntu server.
Proxy servers play a crucial role in enhancing network security, improving performance, and reducing bandwidth consumption. Squid, a popular open-source caching and forwarding HTTP web proxy, is widely used in Linux-based systems, including Ubuntu. In this comprehensive guide, we will walk you through the process of installing and configuring Squid Proxy setup on Ubuntu, ensuring a seamless and secure browsing experience.
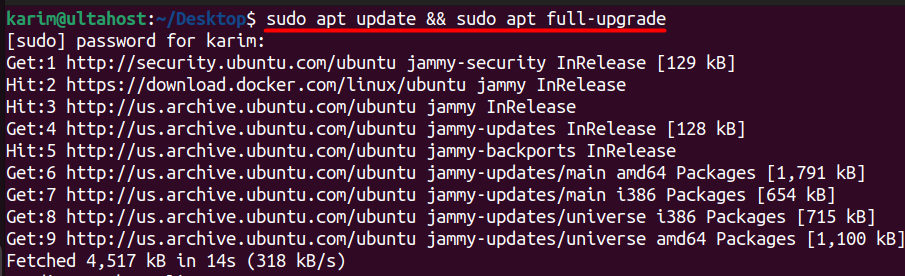
Before we dive into the installation process, ensure that your Ubuntu system is up-to-date by running the following command:
sudo apt update && sudo apt full-upgrade
Install Squid
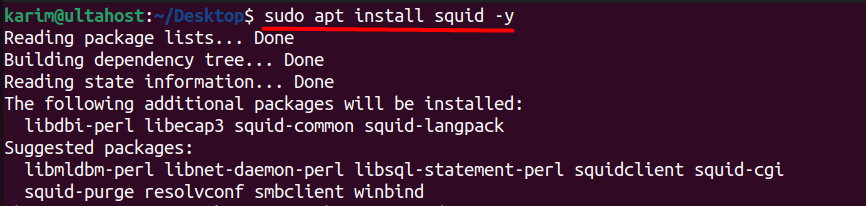
After updating and upgrading Run the following command to install Squid Proxy:
sudo apt install squid -y
Verify Squid Installation
Once the installation is complete, verify that Squid is running by executing:
sudo systemctl status squid
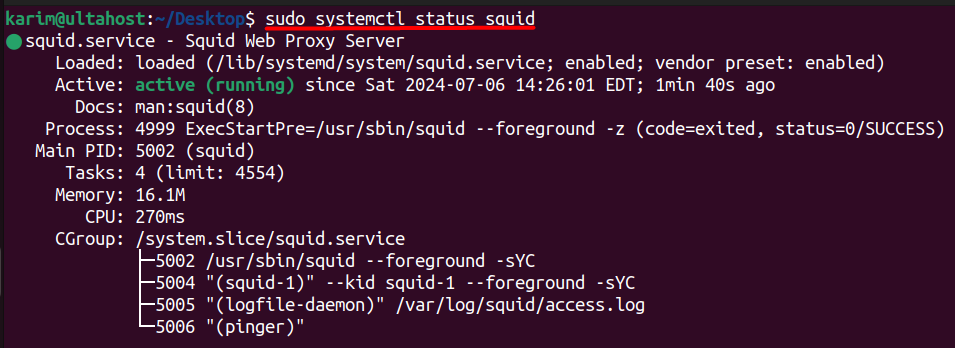
You should see a message indicating that Squid is active and running.
Unleash the power of Ubuntu VPS
Experience the reliability of the world’s leading Linux distribution combined with the flexibility of a virtual server. Enjoy lightning-fast speeds and minimal latency.
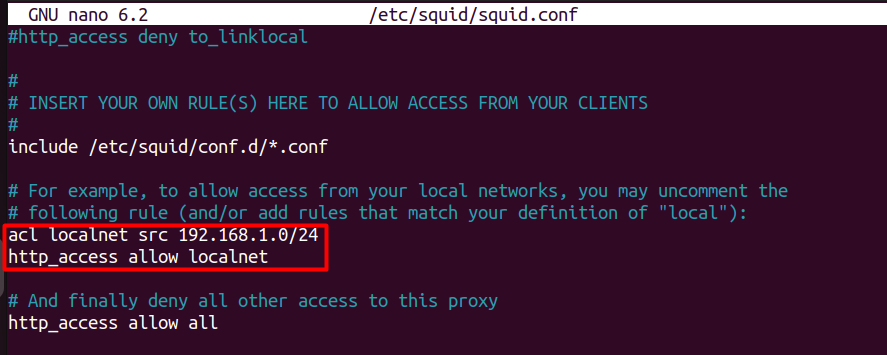
By default, Squid is configured to allow access from localhost (127.0.0.1) only. To configure Squid proxy Ubuntu to allow access from other devices on your network, you need to edit the configuration file.
Open the Squid configuration file with a text editor:
sudo nano /etc/squid/squid.conf
You can also first create a backup of the original configuration file which can be useful if the newly made changes may corrupt or not work properly:
sudo cp /etc/squid/squid.conf /etc/squid/squid.conf.backup
Here are some of the key directives that you may want to configure:
Allow Access from Your Network:
By default, Squid only allows access from the local host. To allow access from other machines on your network, find the http_access section and add your network. For example, to allow access from the 192.168.1.0/24 network, add:
acl localnet src 192.168.1.0/24
http_access allow localnet
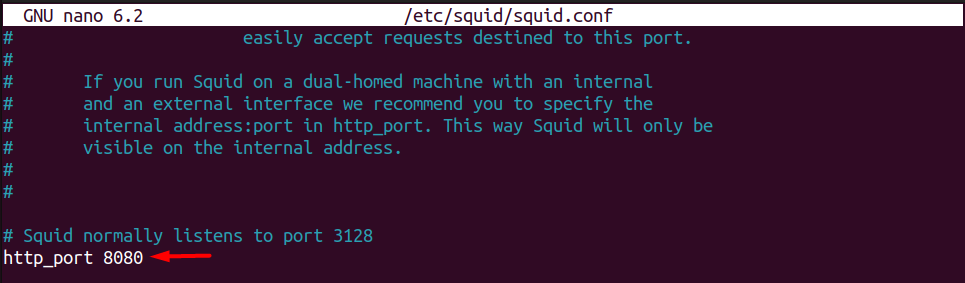
Change the Default Port:
This directive sets the port on which Squid listens for incoming HTTP requests. By default, it is set to port 3128. You can change it to any available port number such as 8080:
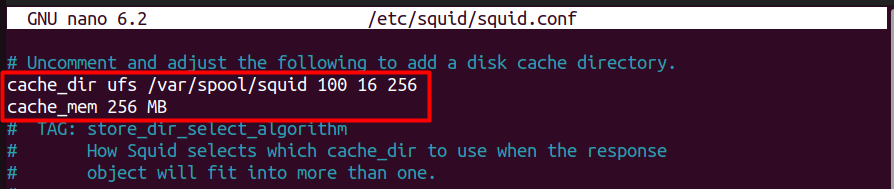
Enable Caching:
Squid can cache web content to improve performance. To enable caching, ensure the following directives are set:
cache_dir ufs /var/spool/squid 10000 16 256
cache_mem 256 MB
After making changes to the configuration file, restart Squid to apply the new settings:
sudo systemctl restart squid

Squid logs can help you monitor and troubleshoot your Squid proxy server Ubuntu. The main log files are located in /var/log/squid/. The access log (access.log) records all client requests, and the cache log (cache.log) records cache-related messages. To view these logs, use:
sudo tail -f /var/log/squid/access.log
sudo tail -f /var/log/squid/cache.log
Learn about How to Install Rust on Ubuntu.
Before delving into the specifics of Squid, it is essential to understand the fundamental role of a proxy server. A proxy server acts as an intermediary between your devices (such as computers or smartphones) and the internet. When you make a request to access a website or online service, the request goes through the proxy server first. The proxy then communicates with the internet on your behalf, forwarding your request and returning the response back to you.
Here are some key advantages of using a proxy server:
Enhanced Security
A proxy server acts as a buffer between your internal network and the outside world, adding an extra layer of security. It can protect your network from direct exposure to potential threats and provide a level of anonymity by hiding your IP address.
Improved Privacy
Proxies can mask your identity by changing your IP address, making it more difficult for websites and advertisers to track your online activities, thus enhancing your privacy.
Control and Filtering
Proxy servers allow you to control and filter web content, blocking access to certain websites or services. This is especially useful in organizational settings or when creating a safe online environment.
Bandwidth Savings and Performance Enhancement
Proxies can cache frequently accessed web pages and files, reducing the need for repeated external requests and saving bandwidth. This leads to improved network performance and faster loading times.
Squid is a high-performance caching and forwarding proxy server specifically designed for web traffic. It supports various protocols, including HTTP, HTTPS, and FTP, making it a versatile tool for managing web access. One of its key strengths lies in its caching capabilities, which can significantly improve productivity network performance.
Improved Performance
Squid’s caching mechanism is one of its standout features. By storing frequently accessed web pages and resources on users’ machines, Squid reduces the need for repeated external requests, resulting in faster page loading times, lower latency, and a smoother browsing experience.
Bandwidth Optimization
With Squid’s caching, you can significantly reduce your network’s bandwidth consumption. By storing popular resources locally, Squid minimizes the need for frequent downloads, saving on internet costs and optimizing your network’s performance, especially in bandwidth-constrained environments.
Enhanced Security
Squid offers robust security features, including access control and authentication. With Squid, you can ensure that only authorized users can access specific resources, adding an extra layer of protection to your network.
Content Filtering
Squid provides powerful content filtering capabilities, allowing administrators to block access to unwanted or inappropriate websites. This feature is invaluable for creating a safer and more productive browsing environment, especially in educational or organizational settings.
Open-Source and Customizable
Being open-source, Squid offers a high level of transparency and customizability. System administrators can delve into the code to understand its inner workings and make modifications to suit their specific needs.
Wide Range of Protocol Support
Squid supports a vast array of internet protocols, ensuring that it can handle various types of web traffic. This includes HTTP, HTTPS, and FTP, making it versatile for different use cases.
Installing and configuring Squid Proxy on Ubuntu is a straightforward process that offers significant benefits in terms of security, performance, and control over web traffic. By following the steps outlined in this guide, you can set up Squid to act as a robust intermediary between your network and the internet, allowing for efficient caching, content filtering, and access control.
The initial setup involves updating your system, installing Squid, and making necessary configurations in the squid.conf file to suit your network’s needs. Once configured, Squid’s caching capabilities and security features can greatly enhance your network’s efficiency and safety.
Whether you’re an experienced developer or new to Linux, having a setup that meets your needs is essential. Ultahost provides a robust solution.and reliable platform with Linux VPS hosting providing dedicated resources to ensure the speed and stability necessary for efficient task handling.
Squid is a widely-used caching and forwarding HTTP web proxy server. It can also function as a reverse proxy for HTTP and other protocols.
The main configuration file for Squid Proxy on Ubuntu is located at /etc/squid/squid.conf.
After installing Squid, you can configure it by editing the /etc/squid/squid.conf file. Common configurations include setting up access controls, defining cache settings, specifying allowed clients, and configuring ACLs (Access Control Lists)
You can check the status of Squid Proxy using the command: sudo systemctl status squid.
Yes, Squid Proxy can handle HTTPS traffic using SSL/TLS interception. You need to configure SSL/TLS settings in the squid.conf file and set up SSL certificates if you want to intercept HTTPS traffic.

In Linux, ownership strictly governs what can read, cha...
HashiCorp’s creation Terraform is an open-source tool...

Powerlevel10k is a Zsh theme that improves the speed an...
Atom is a free text editor created by Github that is hi...
Migrating your WordPress site from a local development ...