How to configure PHP parameters on Linux Serv...
PHP a widely used server-side scripting language plays ...
In the developing world of IT, remote access to servers is an indispensable tool for systems and IT engineers. xRDP (Remote Desktop Protocol for Linux) is an effective and easy-to-use solution allowing remote desktop access to Linux servers. Read through this blog post to learn how to install and connect to a Linux server with xRDP to streamline the steps that empower you to implement maximum remote access to your Linux infrastructure. From experienced sysadmins to someone new to managing Linux servers, xRDP can improve your efficiency, flexibility, and control over the server environment.
Before diving into the details of xRDP installation and configuration, let’s understand why remote access to Linux servers is vital and how xRDP stands out as a compelling solution. Whether troubleshooting, deploying updates, or managing your Linux server from a distance, this guide offers insights for a seamless and secure remote desktop experience.
Remote Desktop Protocol (RDP) has traditionally been linked with Windows, providing a convenient way for remote system access. However, in the Linux world, achieving smooth remote desktop connectivity has been challenging. Enter xRDP, a game-changing solution designed to bridge this gap, offering Linux users a reliable and efficient means of remote access.
xRDP, or X Remote Desktop Protocol, is an open-source implementation of the Remote Desktop Protocol, enabling remote desktop functionality on Linux systems. Serving as a server, xRDP allows users to connect to a Linux machine’s desktop from a remote location. Notably, xRDP integrates seamlessly with popular Linux desktop environments like XFCE and MATE, ensuring a consistent and familiar user experience.
xRDP seamlessly works across different Linux distributions, offering versatility to users, regardless of their preferred Linux flavor.
The xRDP supports integration with popular Linux desktop environments, providing users the flexibility to choose an environment that aligns with their preferences.
xRDP is lightweight, ensuring it doesn’t consume excessive system resources. This makes it suitable for both resource-constrained environments and robust server setups.
As an open-source project, xRDP encourages community involvement and allows users to customize it to meet their specific requirements.
xRDP is compatible with various Linux distributions, offering administrators a consistent and reliable method for remote desktop connections, whether on Ubuntu, CentOS, Debian, or other distributions.
Seamless Connectivity with RDP Server
Experience seamless and secure remote access with our state-of-the-art RDP server – your gateway to unparalleled connectivity.
Before installing xRDP, ensure that your system’s package repository is up-to-date.
For Debian/Ubuntu
sudo apt update
For CentOS/RHEL
sudo yum update
xRDP works well with various desktop environments, but for this guide, we’ll use XFCE as an example. Install xRDP along with XFCE using the package manager.
For Debian/Ubuntu
sudo apt install xrdp xfce4 -y
For CentOS/RHEL
sudo yum install xrdp epel-release -y
sudo yum install xfce4 -y
After installation, start the xRDP service and enable it to start on boot.
For Debian/Ubuntu
sudo systemctl start xrdp
sudo systemctl enable xrdp
For CentOS/RHEL
sudo systemctl start xrdp
sudo systemctl enable xrdp
Adjust your firewall settings to allow incoming connections on the default xRDP port (3389).
For Debian/Ubuntu
sudo ufw allow 3389/tcp
For CentOS/RHEL
sudo firewall-cmd --add-port=3389/tcp --permanent
sudo firewall-cmd --reload
Confirm that xRDP is running on your server.
For Debian/Ubuntu
sudo systemctl status xrdp
For CentOS/RHEL
sudo systemctl status xrdp
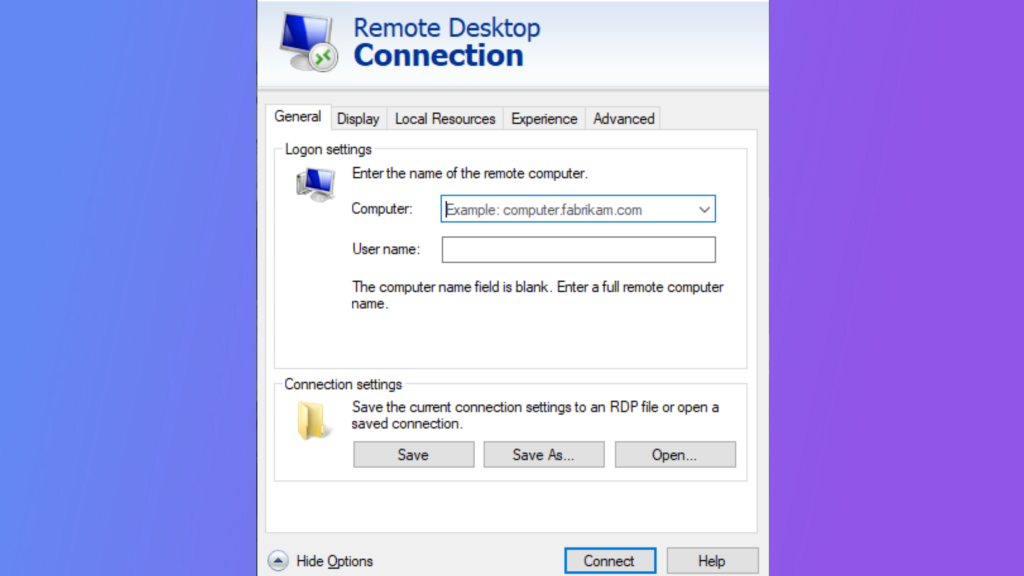
Once xRDP is running smoothly, you can connect to your Linux server using a remote desktop client.
Follow these steps to connect to xRDP:

In summary, xRDP is a versatile solution for remote desktop access to Linux servers. It combines the flexibility of various distributions with popular desktop environments. Following this guide, users can install, configure, and connect to their Linux servers using xRDP. With its compatibility, open-source nature, and user-friendly features, xRDP makes server management more accessible and productive for administrators, developers, and IT professionals. As technology advances, tools like xRDP showcase the adaptability and innovation in the evolving field of remote server administration. Learn how to connect to a Linux server remotely with ease using our step-by-step guide and ensure seamless access to your server from any location.
We hope this guide helps you manage your unmanaged Linux VPS via remote desktop efficiently. For more assistance or to explore additional features, our Ultahost support team is ready to help. Happy hosting, and may your Linux server endeavors be rewarding!