
How to Install Laravel on Windows
Laravel is one of the most prominent examples of an Ope...


Jenkins is an open-source automation server widely used for building, testing, and deploying software projects. It acts as the backbone of Continuous Integration/Continuous Delivery (CI/CD) pipelines, automating repetitive tasks and streamlining the software development process. This enables developers to quickly identify and fix bugs, release software faster, and improve overall software quality.
Install Jenkins Windows offers several advantages, including native integration with Windows systems, seamless access to Windows-specific tools and libraries, and ease of use for developers familiar with the Windows environment. This article will guide you through the step-by-step process of installing Jenkins on Windows, covering prerequisites, installation methods, configuration, and setting up your first Jenkins job.
Before Jenkins installation on Windows, ensure your system meets the necessary requirements for smooth operation and optimal performance.
System Requirements
Software Dependencies
Java Development Kit (JDK): Jenkins requires a 64-bit JDK installation. You can download the latest version of JDK from the official Oracle website.
Note: Jenkins is compatible with Java 8, 11, and 17. Ensure you download the correct version of JDK/JRE that matches your system architecture (64-bit). Further, you can check our guide on how to install Java on a Windows system.
Verify that your system meets these prerequisites before proceeding with the Jenkins installation.
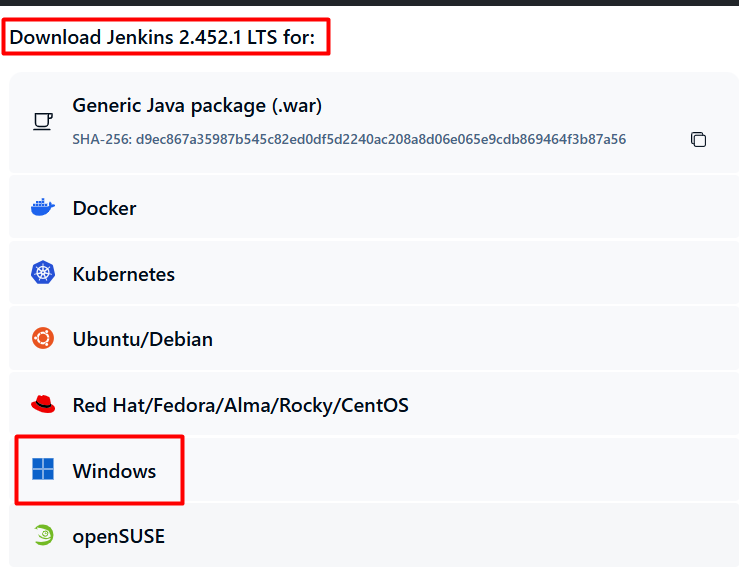
Now that you have the prerequisites in place, it’s time to get your hands on the Jenkins install Windows. Head over to the official Jenkins download page:
On the download page, you’ll find two primary release options:
LTS (Long-Term Support)
These releases are more stable and receive security updates and bug fixes for a longer duration. They are ideal for production environments where stability is paramount.
Weekly Releases
These versions are updated more frequently and include the latest features and bug fixes. They are suitable for testing and experimentation but may lack the stability of LTS releases.
For most users, especially those starting with Jenkins, it’s recommended to download the LTS version for a stable and reliable experience. Select the Windows installer from the available options and download Jenkins for Windows:
Now you have the Jenkins installer ready to start the installation process.
With the Jenkins installer downloaded you’re ready to install it on your Windows system by following the below steps:
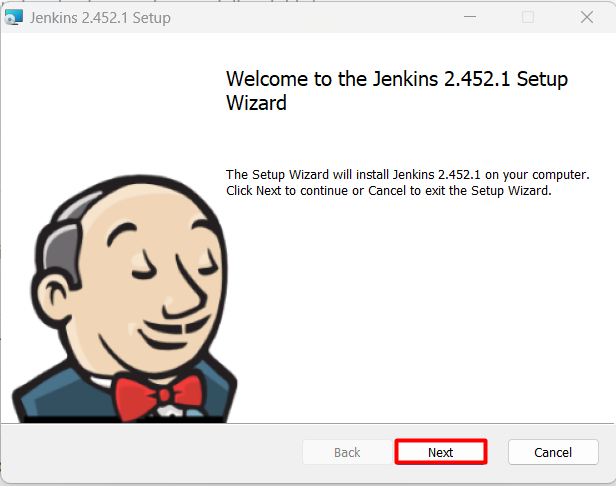
Step 1: Run the Installer
Double-click the downloaded Jenkins installer file. This will launch the Jenkins installation wizard where you will see the welcome screen:
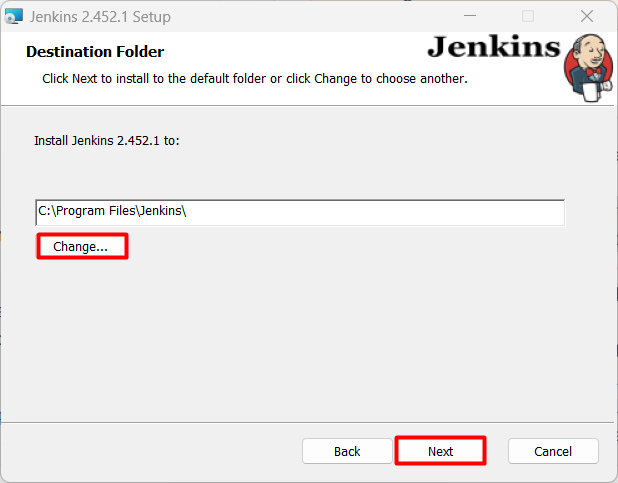
Step 2: Select Installation Location
Choose the desired installation directory for Jenkins. The default location is recommended unless you have specific preferences.
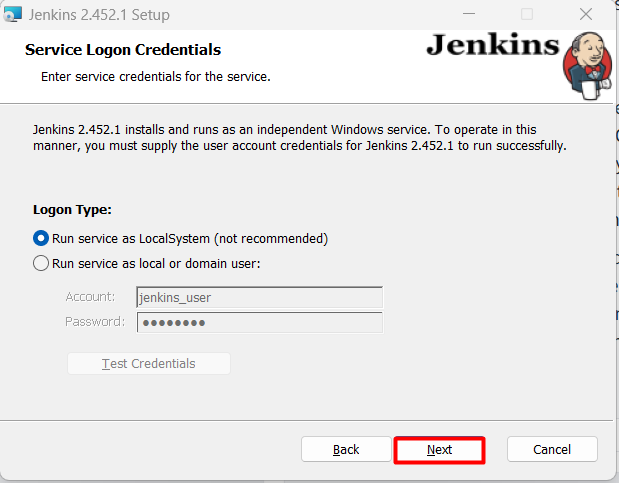
Step 3: Provide Service Logon Credentials
After selecting the installation location, you’ll encounter the Service Logon Credentials screen. This screen determines how Jenkins will run as a service that offers two logon types:
Moreover, The “Test Credentials” button at the end allows you to verify that the provided username and password are valid and that the account has the necessary permissions:
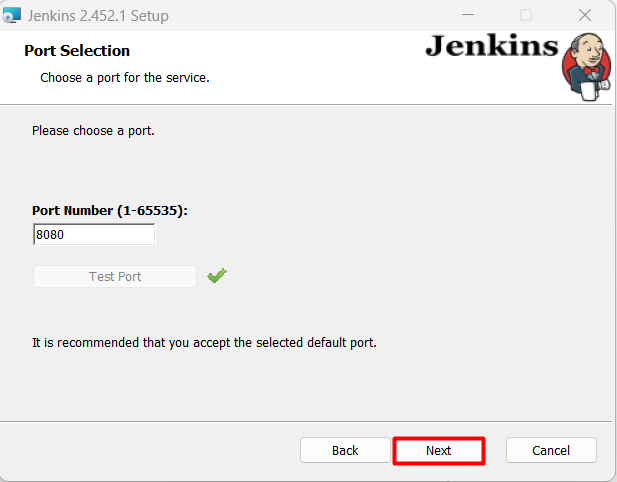
Step 4: Enter Port Number
After configuring the service logon credentials, the installer will ask for a port number. This port is used by Jenkins to communicate with the outside world, allowing you to access the Jenkins web interface through your browser.
The default port number for Jenkins is 8080 but you can choose to use a different port number if 8080 is already in use by another application on your system.
Explore the Blazing Fast Speed with Cheap Windows VPS!
With Ultahost, Hosting Windows VPS has never been easier or faster. Enjoy ultra-fast SSD NVME speeds with no dropouts and slowdowns.
Step 5: Provide JDK Path
The next screen in the Jenkins installer requires you to specify the path to your Java Development Kit (JDK) installation. This is crucial because Jenkins relies on the JDK to run:
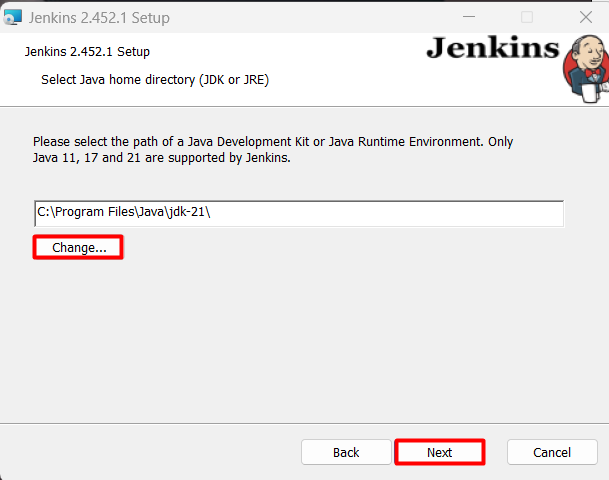
While writing this article, we used the JDK 21 version as most of the other versions are not compatible.
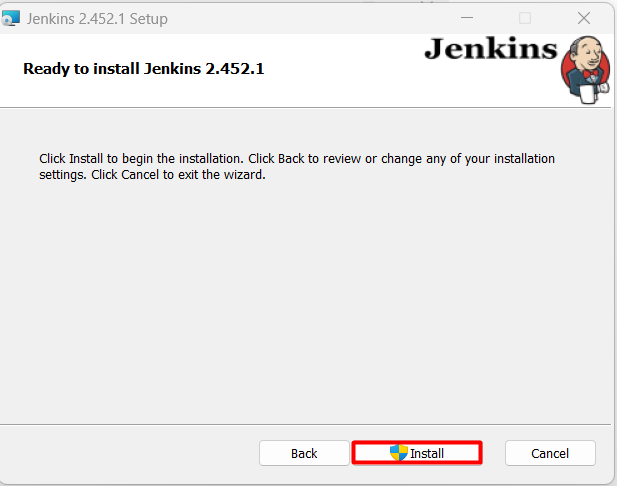
Step 6: Click on the Install Button
After that you can start the installation by clicking on the install button:
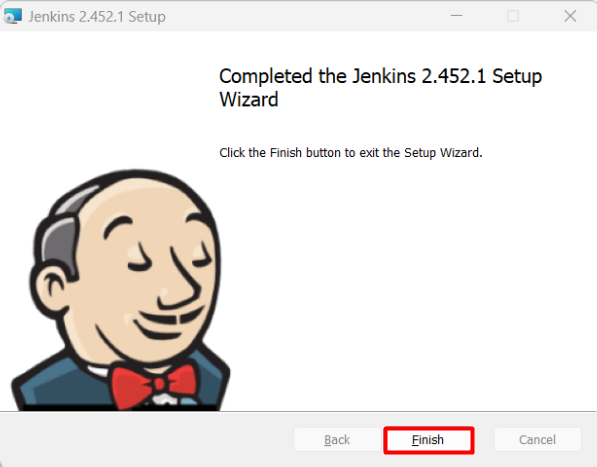
After some time the installation will be completed and you can close the application by clicking on the finish button:
Learn about How to Install PuTTY in Windows.
Step 7: Launching Jenkins
Launching Jenkins: After the installation is complete, the wizard should automatically open the Jenkins web interface in your browser. If not, manually open a web browser and navigate to http://localhost:8080 (or the port you specified):
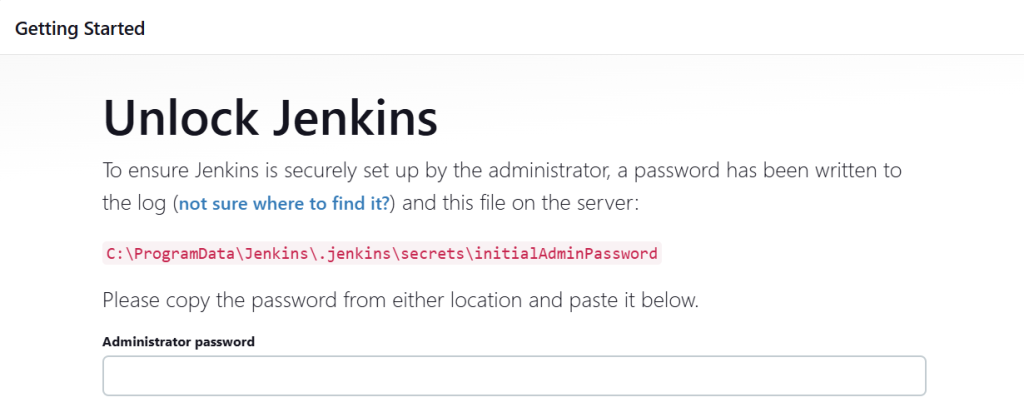
Provide the password by accessing the path mentioned in the image to customize Jenkins.
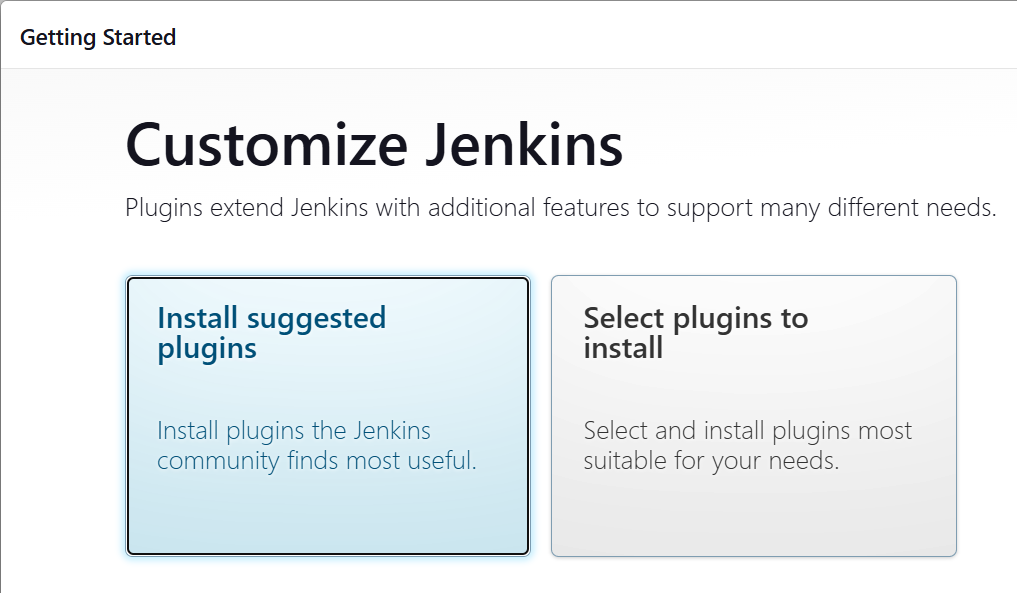
Step 8: Installing Plugins
Jenkins offers a wide range of plugins to extend its functionality. The initial setup will guide you through installing recommended plugins.
You can choose to install all recommended plugins or select specific ones based on your needs:
This article explains how to install Jenkins on Windows, a powerful open-source automation server for building, testing, and deploying software. It guides users through the installation process, starting with system requirements and download options, and then walks through each step of the installer, including selecting the installation location, configuring service logon credentials, and specifying the JDK path. The article also emphasizes the importance of launching Jenkins and installing plugins to further enhance its capabilities.
By following these steps, developers can seamlessly set up Jenkins on Windows and leverage its automation power to streamline their software development process. This includes automating repetitive tasks, enabling faster identification and resolution of bugs, and ultimately delivering higher quality software more efficiently.
Installing Jenkins on Windows can be powerful especially when handling complex build pipelines. Rent a VPS from Ultahost that offers a more powerful and user-friendly solution that provides the resources that give processing power storage needed for running Jenkins efficiently. Focus on building and automating your software delivery with ease.
Jenkins requires Java to run. Ensure you have the JDK installed. Jenkins typically requires JDK 8 or later. You also need administrative privileges to install Jenkins as a Windows service.
Visit the Jenkins download page and select the Windows package.
Double-click the downloaded .msi file to run the Jenkins installer. Accept the license agreement, choose the installation directory, and complete the setup steps.
Jenkins typically starts automatically after installation. If not, you can start it manually by navigating to the Jenkins installation directory (default is C:\Program Files\Jenkins) and running jenkins.exe or using the Windows Services manager.
Open a web browser and navigate to http://localhost:8080. The Jenkins web interface should be accessible if the service is running.