
Understanding TTL values and How to Choose th...
Time To Live (TTL) is a numeric descriptor for how long...


PostgreSQL, also known as Postgres is a powerful open-source object-relational database system with a strong reputation for reliability, feature robustness, and performance. Installing PostgreSQL on a Windows system is straightforward.
If you are looking to setup PostgreSQL on Windows machine this guide will walk you through the installation process.
Before proceeding with the installation of PostgreSQL on Windows, ensure the following prerequisites:
Following are steps described below to install PostgreSQL Windows operating system:
Step 1: Download PostgreSQL
To download PostgreSQL for Windows, start by visiting the PostgreSQL download Windows page. Click on the “Download the installer” link, which will redirect you to the EnterpriseDB website where the Windows installers provided by EnterpriseDB can be downloaded.

Select the desired version for your Windows architecture 32-bit or 64-bit and download the installer executable file. You can also install the latest PostgreSQL on Windows.
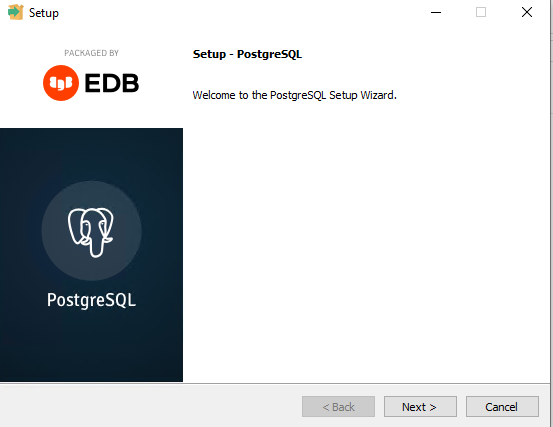
Step 2: Run the Installer
Navigate to the location where the installer was downloaded. Double-click on the executable file to start the installation process. If prompted by User Account Control, click ‘Yes’ to allow the installer to make changes to your system. Click “Next” on the welcome screen.
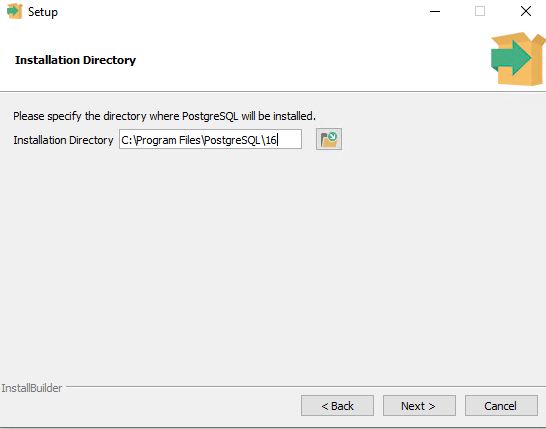
Set up the installation directory where PostgreSQL can be installed you can set it to by default or write a custom location.
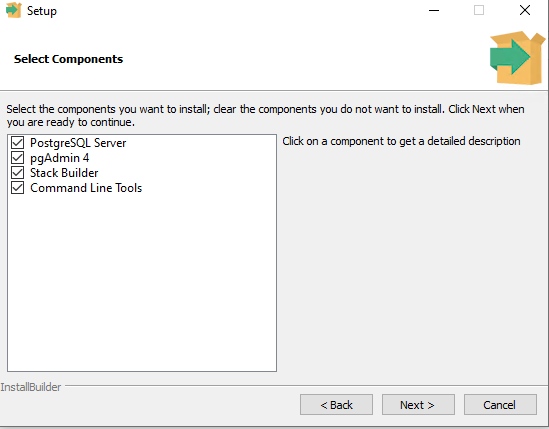
Step 3: Installation Process
Follow these steps in the installation wizard:
Step 4: Data Directory
The data directory stores your database files. The default location is usually within the PostgreSQL installation directory. You can keep this or choose a custom location. Click “Next”.

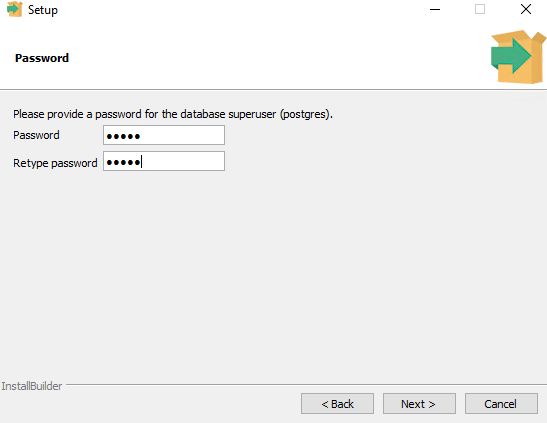
Step 5: Set a password
Create a strong password for the PostgreSQL superuser account. This account has full administrative privileges. Remember this password for future use.
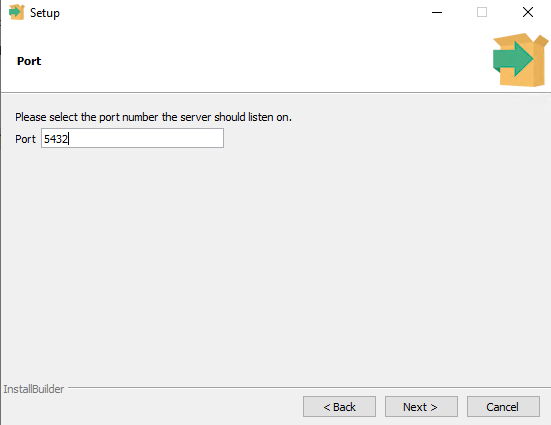
Step 6: Port configuration
The default port for PostgreSQL is 5432. You can leave this unchanged unless you have a specific reason to use a different port. Click “Next”.
Install PostgreSQL on Our cheap Windows VPS!
With Ultahost, Hosting Windows VPS has never been easier or faster. Enjoy ultra-fast SSD NVME speeds with no dropouts and slowdowns at a low cost.
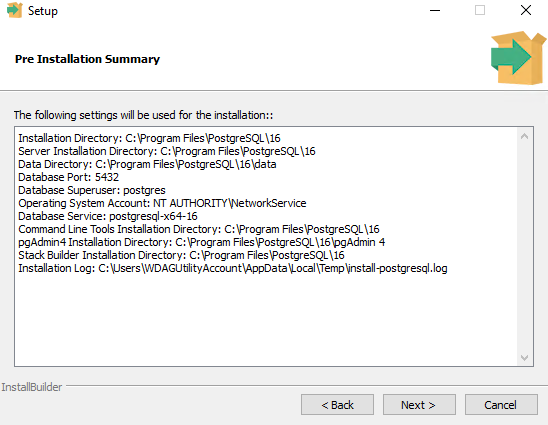
Step 7: Review settings
This screen provides a summary of your chosen installation options. Review everything carefully and make any necessary adjustments. Click “Next” to confirm.
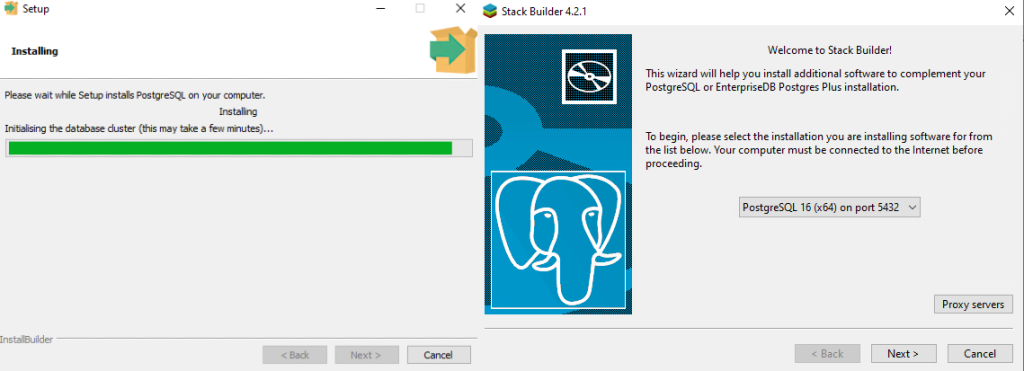
Step 8: Start the installation
The installer will begin copying files and setting up PostgreSQL. This might take a few minutes depending on your system speed. If you selected StackBuilder, you might see a prompt to launch it after the installation. You can choose to launch it now or later.
Step 9: Installation complete
Once the installation is finished, click “Finish” to exit the wizard.
Read also How to Install PostgreSQL on Ubuntu.
Press the Windows key, type “cmd”, and press Enter to open the Command Prompt window. Navigate to the PostgreSQL directory cd to C:\Program Files\PostgreSQL\16\bin, because the environment variables are not set up. Type the following command and press Enter:
psql --version
This should display the installed PostgreSQL version information.

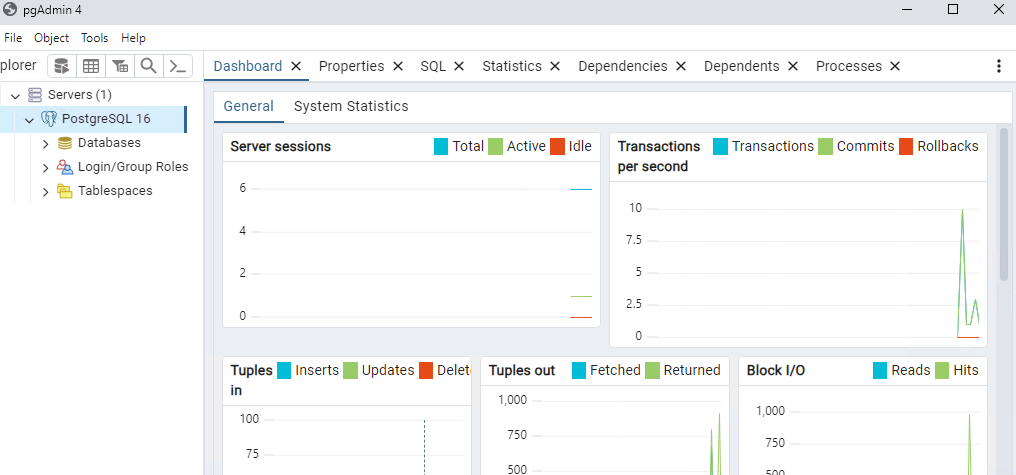
Locate the pgAdmin shortcut in your Start menu or search for “pgAdmin” in the Windows search bar. In pgAdmin, you’ll need to create a server connection. Provide the following details:
Once connected you can explore your PostgreSQL databases create new users like MySQL, manage users, and perform various database administration tasks using the pgAdmin interface.
Following are some additional configurations for installing PostgreSQL on the Windows operating system:
By following this guide you can create a setup PostgreSQL on your Windows system. With the server running and the pgAdmin interface you are now prepared to create and manage databases leverage PostgreSQL’s powerful features, and start your database development.
While installing PostgreSQL on Windows is possible it is not recommended for production environments due to limitations and compatibility issues. Upgrading to an Ultahost VPS hosting plan provides a more reliable and secure solution. This allows for a seamless installation and configuration process, ensuring PostgreSQL runs smoothly and efficiently.
PostgreSQL is a powerful open-source database system used to store and manage data.
PostgreSQL on Windows offers a reliable and scalable solution for database management.
Yes, PostgreSQL is free to download and install on Windows operating systems.
Yes, PostgreSQL supports installation on various versions of Windows, including Windows 10 and Windows Server.
No, the installation process for PostgreSQL on Windows is straightforward and does not require any special hardware or software.

Time To Live (TTL) is a numeric descriptor for how long...
OpenSSL is an open-source implementation of the SSL and...
Authentication plays a pivotal role in upholding securi...

RubyMine is an integrated development environment (IDE)...