How to Enable or Disable IPV6 on Ubuntu Linux
IPv6, also known as Internet Protocol version 6, offers...
Puppet is a popular open-source configuration management tool used to automate the deployment, configuration, and management of infrastructure and applications across various environments. It allows system administrators to define the desired state of their infrastructure and ensures that it remains consistent and up-to-date. By automating repetitive tasks and reducing manual errors, Puppet streamlines IT operations, improves efficiency, and reduces costs.
Installing Puppet on Ubuntu 24.04 provides numerous benefits, including simplified infrastructure management, improved system security, and increased compliance. With Puppet, Ubuntu users can easily manage and configure their systems, ensuring consistency and reducing the risk of human error. Additionally, Puppet’s automated reporting and auditing capabilities enable users to track changes and maintain regulatory compliance.
To install Puppet Ubuntu 24.04, users can take advantage of a robust and scalable configuration management solution that helps them to manage their infrastructure with ease. This powerful tool is particularly useful for Ubuntu users who need to manage multiple systems, deploy applications, or enforce security policies across their environment.
To install Puppet on Ubuntu 24.04, make sure your system meets the following requirements for optimal performance:
Before configuring Puppet, ensure your server and clients can recognize each other by setting up a DNS record or modifying the `/etc/hosts` file. Puppet clients, by default, check DNS for `puppet.example.com` as the Puppet Master server, where `example.com` represents your domain.
If your network setup includes a DNS server, create a CNAME record for puppet.example.com, directing clients to the Puppet Master server’s IP address. This step makes it easier for clients to locate the Puppet Master by querying DNS Servers.
If you’re not using DNS, you can manually set up host entries on the Puppet server and clients.
On the Puppet Server:
Open the `/etc/hosts` file on the server and add entries for the Puppet server itself and any known clients.
sudo nano /etc/hosts
Add the following lines:
127.0.0.1 localhost.localdomain localhost puppet
192.168.1.17 client1.example.com client1

Save and exit the file.
On Each Puppet Client:
Open the `/etc/hosts` file on each client machine and add an entry for the Puppet Master.
sudo nano /etc/hosts
Add the following line:
192.168.1.16 puppetmaster.example.com puppetmaster puppet

Save and exit the file.
By setting up either DNS or `/etc/hosts` entries, you’ll ensure reliable name resolution between Puppet server and clients.
Install Puppet on Our Ubuntu VPS!
Experience the reliability of the world’s top Linux distribution with the flexibility of a virtual server. Enjoy lightning-fast speeds and low latency.
To begin setting up Puppet, you’ll need to install the Puppet Master on the main server and the Puppet Agent on each client. This setup allows the Puppet Master to manage configurations across multiple clients.
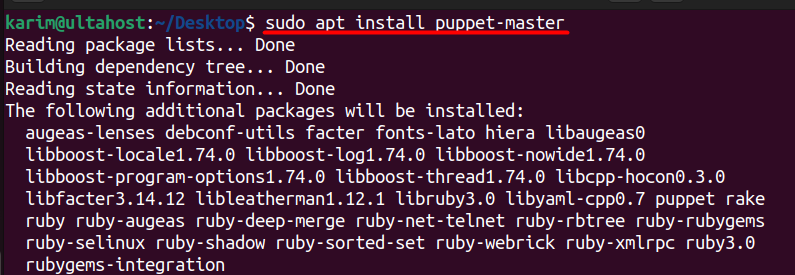
Run the following command on the server to install the Puppet Master software:
sudo apt install puppet-master

This will install the necessary components to run Puppet as the main configuration server, responsible for managing clients.
On each client machine that will be managed by Puppet, install the Puppet Agent by running:
sudo apt install puppet

The Puppet Agent allows each client machine to receive and apply configurations sent from the Puppet Master.
After installing Puppet, the next step is to set up the Puppet modules and ensure the Puppet Master and client can communicate correctly. In this example, we’ll configure Puppet to install and manage Apache2 on each client machine.
On the Puppet Master, create a directory structure for an Apache2 module. This module will contain the configurations to install and manage Apache2 on the client machines:
sudo mkdir -p /etc/puppet/modules/apache2/manifests

Inside the module directory, create a manifest file named init.pp to specify resources for managing Apache2:
sudo nano /etc/puppet/modules/apache2/manifests/init.pp
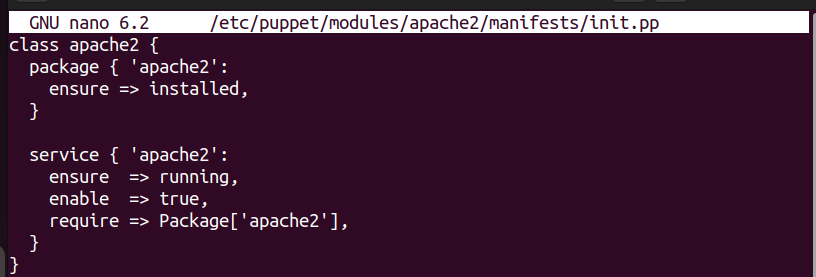
Add the following configuration to define how Puppet should handle Apache2:
class apache2 {
  package { 'apache2':
    ensure => installed,
  }

  service { 'apache2':
    ensure  => running,
    enable  => true,
    require => Package['apache2'],
  }
}

The apache2 class instructs Puppet to install the apache2 package and ensure that the service is both running and enabled to start at boot.
On the Puppet Master, create a site.pp file to specify which clients will receive the Apache2 configuration. This file is placed in the production environment directory:
sudo nano /etc/puppet/code/environments/production/manifests/site.pp
Add the following node configuration, replacing puppetclient.example.com with the actual hostname of your client:
node 'puppetclient.example.com' {
   include apache2
}

To activate the new configurations, restart the Puppet Master service:
sudo systemctl restart puppetmaster.service

On each client machine, edit the Puppet agent configuration to allow it to start at boot:
sudo nano /etc/default/puppet
Update the file as follows:
START=yes

Start the Puppet agent service to initiate communication with the Puppet Master:
sudo systemctl start puppet.service

On the client, run the following command to view the client’s certificate fingerprint, which uniquely identifies the client:
sudo puppet agent --fingerprint

On the Puppet Master, list pending certificate requests from clients:
sudo puppet cert list

To establish trust between the Puppet Master and the client, sign the client’s certificate:
sudo puppet cert sign puppetclient.example.com

Finally you can check the status of puppet whether its working correctly or not by executing the below command:
sudo systemctl status puppet

Learn also How to Install Sublime Text on Ubuntu.
Installing and configuring Puppet on Ubuntu 24.04 streamlines the management of system configurations across multiple client machines. By setting up the Puppet Master on a central server and installing the Puppet Agent on each client, you establish a robust framework for automated configuration management. This process begins with installing the necessary software and ensuring proper directory structures for module management.
Once Puppet is installed, defining resources like the Apache2 web server becomes straightforward. By creating manifests and configuring node definitions, you can efficiently apply desired configurations to clients. With the agent enabled and properly connected to the Puppet Master, you can easily manage updates and maintain consistency across your infrastructure, ultimately enhancing system reliability and reducing manual administrative tasks.
We hope this guide has helped you configure and install the Puppet on Ubuntu. Setting up the Puppet on a Linux system is simple with the right hosting platform. Ultahost’s Linux VPS hosting offers excellent performance and scalability for your projects as they grow.
Puppet is a configuration management tool that helps automate the management of server infrastructure. It allows you to define the desired state of your systems and ensures that they are maintained in that state.
A clean installation of Ubuntu 24.04, root or sudo access to the system, and an internet connection to download Puppet packages.
You can verify that Puppet was installed correctly by running:
puppet –version
Puppet’s configuration files are located in /etc/puppetlabs/puppet/. You can edit puppet.conf to configure the Puppet agent and its settings.
Yes, you can set up Puppet in a master-agent architecture. You would need to install Puppet Server on the master and the Puppet agent on the nodes.
Check the installation logs located in /var/log/puppetlabs/. Ensure your system meets all dependencies and has network access to the Puppet repositories.
Yes, the official Puppet documentation can be found at Puppet Documentation.