How to Install PostgreSQL on Ubuntu
PostgreSQL or Postgres as it is known, is one of the mo...
As a system administrator or developer, you are likely no stranger to the importance of databases in modern application development. In many cases, a relational database management system (RDBMS) like MySQL or PostgreSQL is the de facto standard for storing and managing data. However, there are scenarios where a more lightweight and self-contained solution is required, and that’s exactly where SQLite comes into play.
SQLite is an open-source, file-based RDBMS that offers a unique set of benefits, including zero-configuration requirements, minimal system overhead, and support for a wide range of programming languages. As a result, SQLite has become a popular choice for developers and system administrators who need to store and manage data in an efficient and scalable manner.
In this article, we will explore the process to install SQLite on Ubuntu 22.04 and its configuration, with a focus on best practices and practical examples. By the end of this tutorial, you will have gained a solid understanding of how to harness the power of SQLite to build efficient and scalable applications.
SQLite Ubuntu installation is a straightforward process that can be completed in a few steps.
Before installing SQLite, you need to update the package index. Open a terminal and run the following command:
sudo apt update && sudo apt upgrade -y

This command will update the package index and ensure that you have the latest package information.
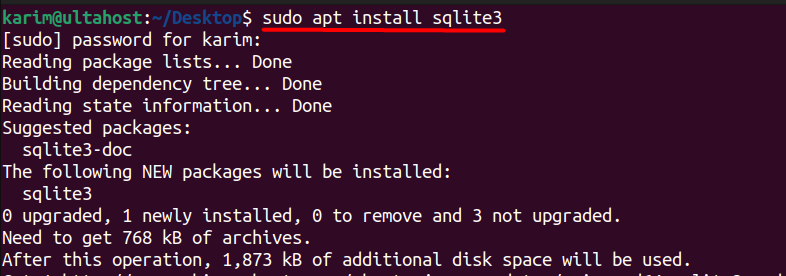
Once the package index is updated, you can install SQLite by running the following command:
sudo apt install sqlite3

This command will download and install SQLite on your Ubuntu 20.04 system.
To verify that SQLite has been installed successfully, you can run the following command:
sqlite3 --version

This command will display the version of SQLite Linux installation on your system.
Install SQLite on Our Cheap Ubuntu VPS!
Choose Ubuntu VPS for unparalleled reliability and flexibility, unlocking a powerful and customized hosting solution.
Now that SQLite is installed, let’s take a look at how to use it. SQLite provides a robust and flexible way to manage data, and in this section, we’ll cover the basics of creating databases, and tables, inserting data, and querying data.
To create SQLite database Ubuntu, you can use the following command:
sqlite3 mydatabase.db

This command will create a new database file called `mydatabase.db` and open the SQLite shell. The SQLite shell is an interactive command-line interface where you can execute SQL commands.
Note that if the database file already exists, SQLite will open the existing database instead of creating a new one.
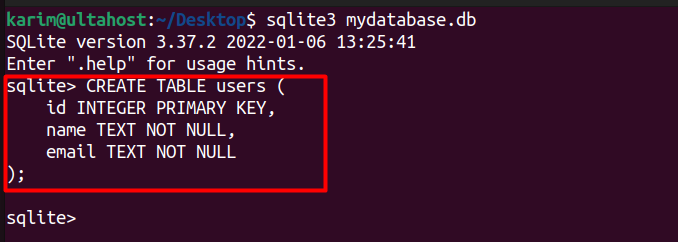
To create a table in the database, you can use the `CREATE TABLE` command. For example:
CREATE TABLE users (
    id INTEGER PRIMARY KEY,
    name TEXT NOT NULL,
    email TEXT NOT NULL
);

This command will create a new table called `users` with three columns: `id`, `name`, and `email`. The `id` column is defined as the primary key, which means it will uniquely identify each row in the table. The `name` and `email` columns are defined as text fields and cannot be null.
Here’s a breakdown of the syntax:
To insert data into the table, you can use the INSERT INTO command. For example:\
INSERT INTO users (name, email) VALUES ('karim ultahost', '[email protected]');

This command will insert a new row into the `users` table with the name `karim ultahost` and email [email protected]. Note that we don’t need to specify a value for the `id` column, as it will be automatically incremented by SQLite.
To query data from the table, you can use the `SELECT` command. For example:
SELECT * FROM users;

This command will retrieve all rows from the `users` table. The `*` symbol is a wildcard that means “all columns”.
Here’s a breakdown of the syntax:
To exit the SQLite shell, you can use the `.quit` command:
.quit

This will close the SQLite shell and return you to the terminal.
By following these steps, you can create databases, and tables, insert data, and query data using SQLite on Ubuntu 22.04.
Read also How to Install PostgreSQL on Ubuntu.
SQLite is a powerful, self-contained relational database management system that offers numerous features, including:
In this article, we explored the process of installing and configuring SQLite on Ubuntu 22.04. We found that download SQLite Ubuntu is a straightforward process that can be completed in just a few steps. By updating the package index, installing SQLite, and verifying the installation, we can have a fully functional SQLite database up and running on our system.
By following the steps outlined in this article, developers and system administrators can harness the power of SQLite to build efficient and scalable applications. With its zero-configuration requirements, serverless architecture, and support for standard SQL syntax, SQLite is an ideal choice for a wide range of applications, from small embedded systems to large-scale enterprise deployments.
We hope this guide has empowered you to download SQLite on your Ubuntu 22.04. Upgrading to an Ultahost dedicated server hosting empowers you with the control and security needed for a seamless connection that offers root access to your server allowing you to install and configure databases.
SQLite is a lightweight, self-contained SQL database engine that doesn’t require a separate server process. It’s ideal for embedded applications and is known for its simplicity and efficiency.
Yes, SQLite has libraries and bindings for many programming languages, including Python, C/C++, Java, and more. For example, in Python, you can use the sqlite3 module to interact with SQLite databases.
For a GUI-based interaction with SQLite, you can use tools like:
DB Browser for SQLite: It’s a popular, open-source tool for managing SQLite databases. Install it via:
sudo apt install sqlitebrowser
SQLite is primarily designed for local use and is not recommended for high-concurrency server environments. For server applications, consider using other database management systems like PostgreSQL or MySQL.