How to Install MATLAB on Windows
MATLAB a powerful numerical computing environment and p...
Visual Studio is a comprehensive integrated development environment (IDE) designed by Microsoft to help developers, programmers, and coding enthusiasts build, debug, and deploy applications efficiently. This powerful tool is specifically created to support various programming languages, including C++, C#, F#, JavaScript, and more. With Visual Studio, developers can write, debug, and test code in a single interface, streamlining their workflow and improving overall productivity.
Visual Studio offers a robust set of Windows user features that cater to developers’ needs. Its primary purpose is to provide a unified coding, testing, and debugging platform, making it an essential tool for anyone looking to create Windows applications, software, or games. By installing Visual Studio on Windows, users can leverage its advanced features, such as code completion, code refactoring, and project management, to accelerate their development process. With its intuitive interface and extensive support for various programming languages, Visual Studio has become the go-to choice for developers worldwide.
In this guide, we will walk you through the step-by-step process of installing Visual Studio Windows, ensuring a seamless and efficient setup experience.
To install Visual Studio on Windows, you can start by downloading the setup file from the official Microsoft website. The setup file is a small executable file of around 4.2 MB, which will download and install the Visual Studio Windows installer:

Once the setup file is downloaded, execute it to launch the Visual Studio installer. The installer will automatically download and install the necessary components required for the installation process:

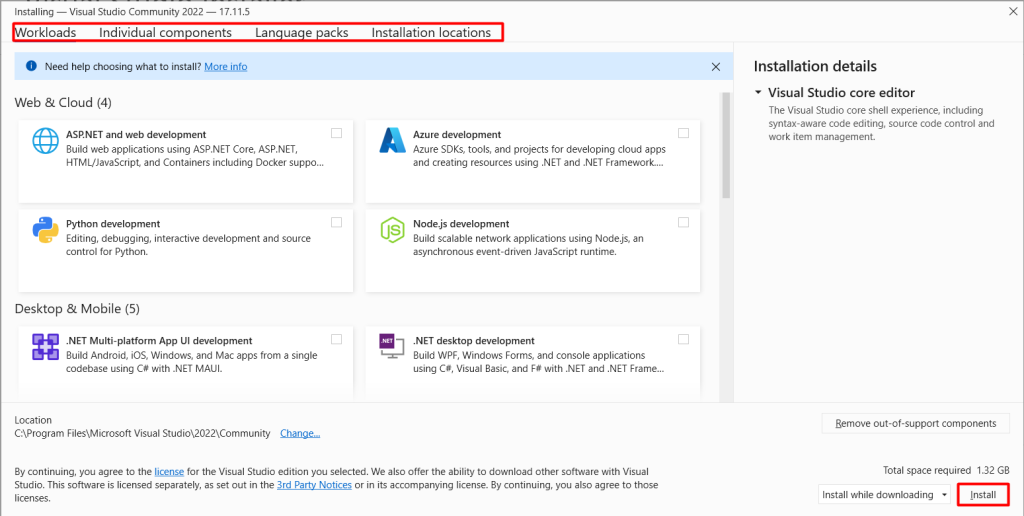
After the installer is launched, you will be presented with four main tabs: Workloads, Individual Components, Language Packs, and Installation Location. These tabs allow you to customize your Visual Studio installation to suit your needs:

Workloads
The Workloads tab allows you to select the development workloads you want to install. A workload is a collection of tools and features that are required for a specific type of development, such as web development, mobile app development, or desktop app development. Each workload includes a set of pre-selected components that are required for that type of development. You can select one or more workloads depending on your needs.
Individual Components
The Individual Components tab allows you to select individual components that are not included in the workloads. This tab provides a detailed list of all the components available for installation, including tools, libraries, and frameworks. You can select the components you need, but be aware that selecting too many components can significantly increase the required space.
Language Packs
The Language Packs tab allows you to select the language packs you want to install. Language packs provide support for additional languages, including language-specific tools and resources. You can select one or more language packs depending on your needs.
Installation Location
The Installation Location tab allows you to select the location where you want to install Visual Studio. You can choose to install Visual Studio on a specific drive or partition, or you can select the default location. The required space for the installation will be displayed at the bottom of the screen, so you can decide where to install Visual Studio based on the available space.
Install Visual Studio on Our Windows VPS!
With Ultahost, Hosting Windows VPS has never been easier or faster. Enjoy ultra-fast SSD NVME speeds with no dropouts and slowdowns.
After selecting the installation options, you will have two installation methods to choose from:
Install while Downloading
This option allows you to install Visual Studio while the required components are being downloaded. This method is faster, but it may require a stable internet connection to complete the installation.
Download all, then Install
This option allows you to download all the required components before starting the installation process. This method is more reliable, but it may take longer to complete, especially if you have a slow internet connection.
Once you have selected the installation method, click on the “Install” button to start the installation process. The installation may take several minutes to complete, depending on the components you have selected and the speed of your internet connection:

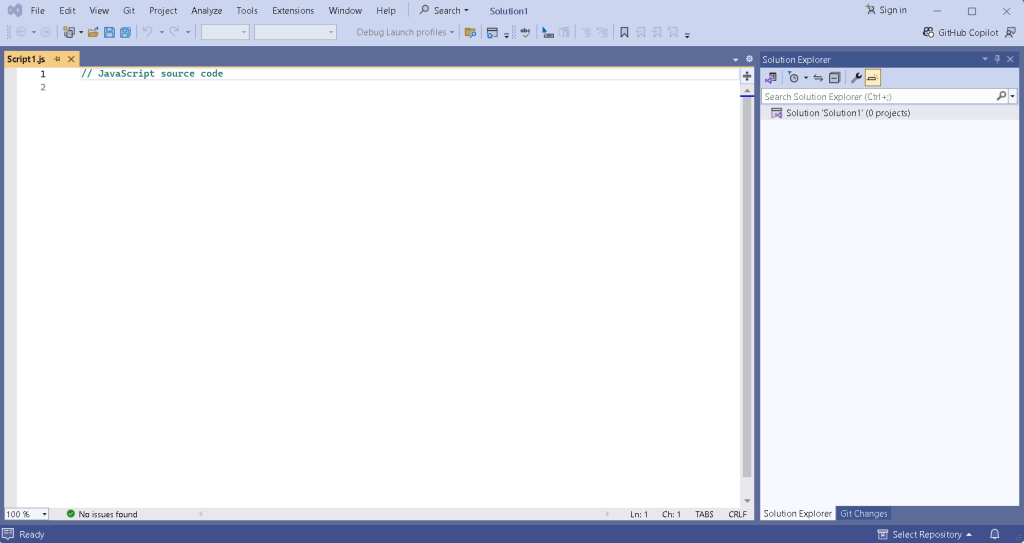
Depending on the features you opt to install, it may take some time and then it will be installed eventually:

Learn also How to Install Visual Studio Code on Windows
At the heart of Visual Studio is its advanced code editor, which supports multiple programming languages. It offers syntax highlighting, intelligent code completion, and customizable layouts to suit different coding styles. The built-in debugger provides a powerful way to identify and fix errors, with features like breakpoints, call stacks, and real-time code analysis. This ensures developers can create clean, efficient code.
Visual Studio offers a project management system that organizes code into solutions and projects, making it ideal for large-scale development. It allows for easy collaboration and version control, enabling developers to work seamlessly as a team. The ability to manage dependencies and resources efficiently is a significant advantage for complex projects.
The Visual Studio ecosystem provides a wealth of extensions and plugins, enhancing its functionality. Developers can customize the IDE to meet specific project needs, adding tools for database management, UI design, and more. This extensibility ensures that Visual Studio remains adaptable and relevant for various development scenarios.
Visual Studio supports building applications for various platforms, including Windows, web, and mobile. This versatility allows developers to create software for multiple devices using a single IDE, streamlining the development process for cross-platform projects.
Visual Studio’s features significantly boost productivity. Its intelligent coding assistance, advanced debugging tools, and project management capabilities allow developers to write and maintain code efficiently, reducing development time and effort.
The IDE facilitates collaboration with built-in version control and team collaboration tools. Developers can work together seamlessly, ensuring project consistency and efficient teamwork, which is crucial for large-scale projects.
Visual Studio promotes consistent coding practices with its code analysis tools and standardized project templates. This leads to higher-quality software, as developers can maintain a uniform coding style and adhere to best practices.
With a large user community, Visual Studio offers extensive support. Developers can access a wealth of resources, tutorials, and forums, ensuring they have the guidance and assistance needed to tackle any development challenge. This community-driven aspect sets it apart from other editors.
In this article, we discussed the installation process of Visual Studio on Windows. We started by downloading the setup file, which launched the Visual Studio installer. We then explored the four main tabs in the installer, including Workloads, Individual Components, Language Packs, and Installation Location.
These tabs allowed us to customize our installation to suit our needs, but also significantly impacted the required space for installation. We also discussed the two installation methods: Install while Downloading and Download all, then Install. By following these steps, you can successfully set up Visual Studio Windows desktop application and start leveraging its powerful features to streamline your development process.
We hope this guide will help you to install Visual Studio on Windows. Consider Ultahost’s fully managed dedicated server plans which offer the flexibility and control of a dedicated server which means you can easily fulfill your requirements and configure your server settings to optimize performance for your workloads.
Visual Studio requires a compatible version of Windows (Windows 10 or later). Check the official Visual Studio website for detailed specifications, including RAM, disk space, and processor requirements.
Visit the Visual Studio website and choose the version you want to download (Community, Professional, or Enterprise). Click the “Download” button to get the installer.
Yes, you can create an offline installer. Use the command line to download the installation files for offline use. Instructions are available on the Visual Studio documentation site.
The Community edition is free for individual developers, open-source projects, academic use, and small professional teams. Professional and Enterprise editions offer additional features and support for larger teams and enterprises, usually requiring a paid subscription.
The installation time varies based on your internet speed and the components you select. It typically takes anywhere from a few minutes to over an hour.
It depends on your development needs. Common workloads include .NET desktop development, ASP.NET web development, and mobile development with Xamarin. You can customize the installation to include only what you need.
Yes, during installation, you can select specific workloads and components based on your development requirements.