
How To Fix The “NPM command not found” Er...
Node Package Manager (npm) is an excellent tool for Jav...


Security is the most important element in the website which involves implementing an SSL certificate that encrypts data sent between your site and visitors protecting sensitive information and building trust. While standard SSL certificates secure specific domains compared to the wildcard SSL certificates offer an efficient solution for securing multiple subdomains under a single domain name.
In this article, we will discuss the difference between a standard SSL certificate and a wildcard SSL certificate. We will guide you through the steps of install wildcard SSL WordPress website.
Both SSL certificates and Wildcard SSL certificate WordPress are used to secure your website connection and encrypt data transfer but they differ in the scope of what they protect. If your website has a single domain and no subdomains a standard SSL certificate is sufficient. If you have multiple subdomains or plan to add more in the future a wildcard certificate is an effective solution.
Those kinds of certificates secure one domain name and technically one subdomain including www and non-www versions. It can be obtained with different validation levels including domain validation, organization validation, and extended validation generally the most affordable option.
Those kinds of certificates secure your main domain and an unlimited number of its first-level subdomains. It is perfect for websites with numerous existing subdomains and is usually only available with domain validation. Slightly more expensive than a standard SSL certificate.
If your WordPress site utilizes numerous subdomains a wildcard certificate simplifies the process by securing them all with one certificate. Following are the steps described for how to install a wildcard SSL certificate:
Step 1: Purchase Your Wildcard SSL Certificate
Choose a reputable SSL provider and select a wildcard certificate plan that suits your needs. Wildcard certificates usually cost more than standard certificates due to their subdomain coverage.
Start Securing your Website with an SSL Certificate!
Ultahost SSL allows you to encrypt all the data between a visitor and the server with high-quality encryption makes sure that every packet is unbreachable.
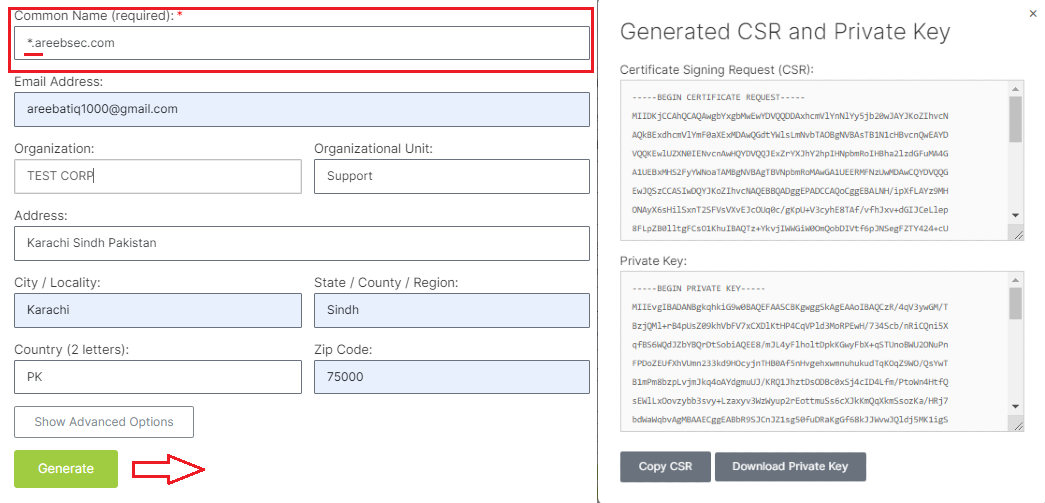
Step 2: Generate a Certificate Signing Request (CSR) Code
This code verifies your ownership of the domain and is required to create the certificate. The process varies depending on your hosting provider. Often, you can generate the CSR through your hosting control panel or command-line tools like OpenSSL. It is important to know that including an asterisk (*) before your domain name to activate the wildcard functionality. Following are the images of generated CSR requests from the SSL website:
Step 3: Upload Your CSR and Install the Certificate
To enable HTTPS on WordPress with wildcard, access your WordPress dashboard and navigate to Settings then General. Under “WordPress Address (URL)” and “Site Address (URL)”, choose “Use HTTPS” instead of HTTP. This enables HTTPS functionality for your main domain. Following are the screenshot of how to enable wildcard SSL WordPress:

After saving changes to WordPress wildcard SSL settings. Edit your website’s .htaccess file which is located in the root directory and add the following code snippet:
RewriteEngine On
RewriteCond %{HTTPS} off
RewriteRule ^(.*)$ https://%{HTTP_HOST}%{REQUEST_URI} [L,R=301]
This code automatically redirects all HTTP traffic to HTTPS, ensuring consistent use of the secure protocol across your entire site. This will activate wildcard SSL WordPress.
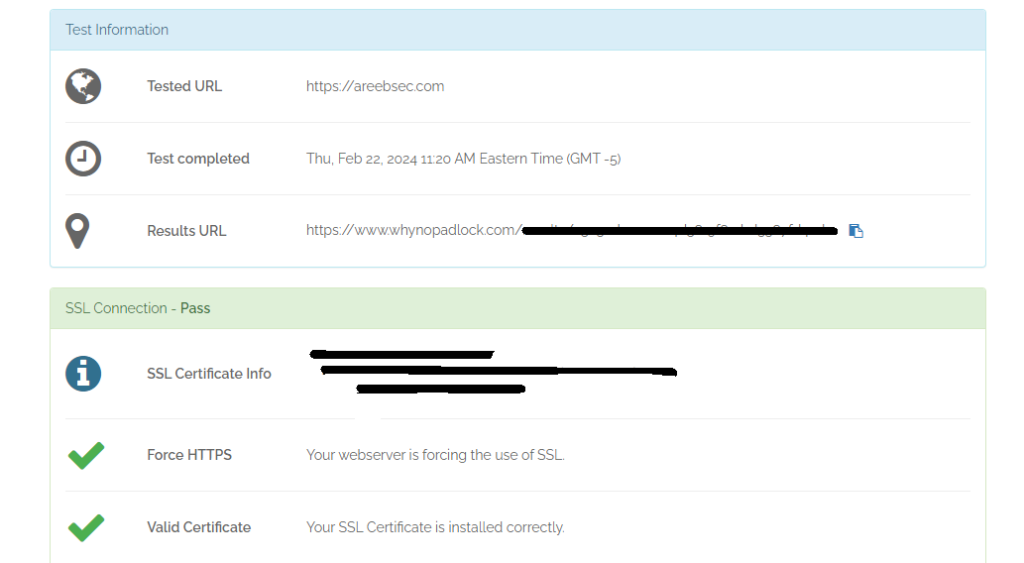
Step 5: Verify the Installation
Use online SSL checkers to confirm your certificate is correctly installed and functioning properly. These tools also identify any insecure elements within your site that might need HTTPS adjustments. For image purposes, the WhyNoPadlock tool is used below:
Following are the important notes on how to install a wildcard SSL certificate:
By following these steps, you can effectively install a wildcard SSL certificate on your WordPress site ensuring a secure and trusted online presence for your visitors. Remember, security is an ongoing process so stay updated on best practices and keep your SSL certificate renewed to maintain a safe and encrypted online environment.
When you successfully install a wildcard SSL certificate ensure a secure and encrypted connection for all your subdomains under your main domain. This means your visitors can now browse your website in a protected environment. Now that your website is secured, consider taking it to the next level with Ultahost’s affordable WordPress hosting. Get your WordPress website up and running in minutes with our user-friendly interface.
A wildcard SSL certificate secures your main domain and all its subdomains providing comprehensive protection for your WordPress site.
You can obtain a wildcard SSL certificate from a trusted Certificate Authority (CA). Follow their application process and validation steps.
Yes, you can install it manually. Most hosting providers also offer a simplified process through their control panel or support.
No, a single Wildcard SSL Certificate covers all subdomains of your main domain making it a cost-effective solution for securing your entire site.