
How to Offload Your Media on Google Cloud Sto...
Managing hundreds of thousands of media files in WordPr...


WordPress is one of the most popular content management systems (CMS) in the world, powering a significant portion of websites on the internet. Its popularity is due to its ease of use, flexibility, and extensive community support. For those looking to install or deploy a WordPress site, CyberPanel Cloud offers a streamlined and efficient way to get your site up and running.
In this tutorial, we’ll cover you through the step-by-step process of deploying a high-performance WordPress site using CyberPanel.
CyberPanel Cloud offers a way to maximize the performance of WordPress sites. Installing and deploying a WordPress site using CyberPanel Cloud is a straightforward process that can be completed in a few steps:
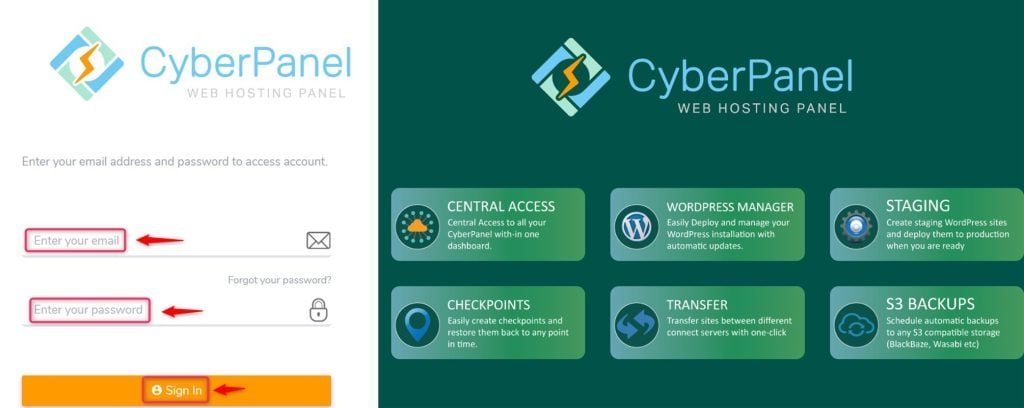
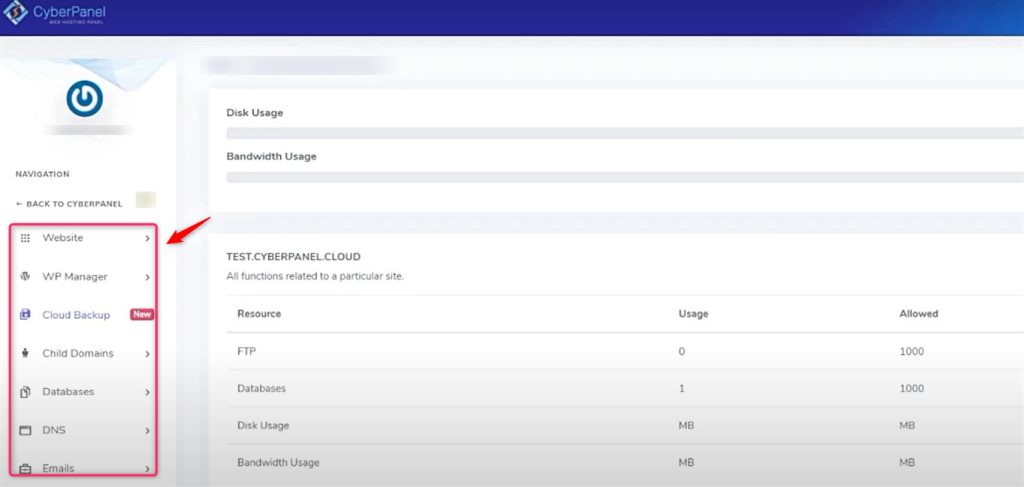
To access the CyberPanel dashboard, first, log in to the CyberPanel account using your username and password. It navigates to the CyberPanel dashboard where you will find various options related to website management:
If you have not installed CyberPanel yet, refer to our guide on installing CyberPanel on Ubuntu. To do this, locate and click on the “Connect CyberPanel” option within the CyberPanel dashboard. Here, you will see the “Deploy” button. Hitting this will begin the deployment process:
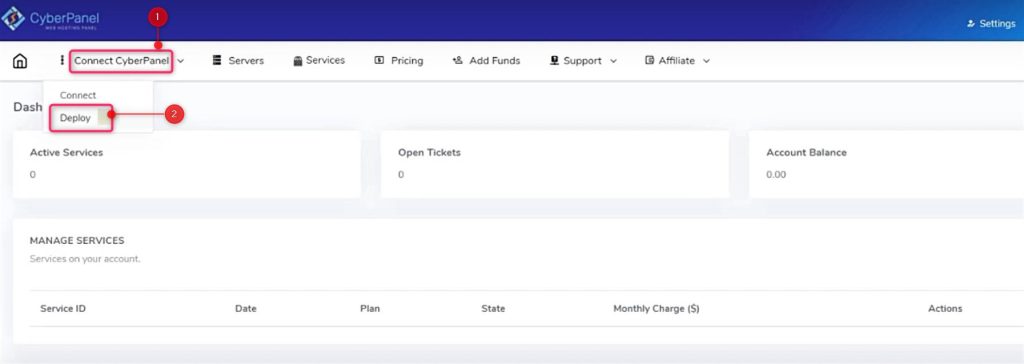
Note: Sometimes, this feature is part of the paid variant of CyberPanel, so ensure you have the necessary access.
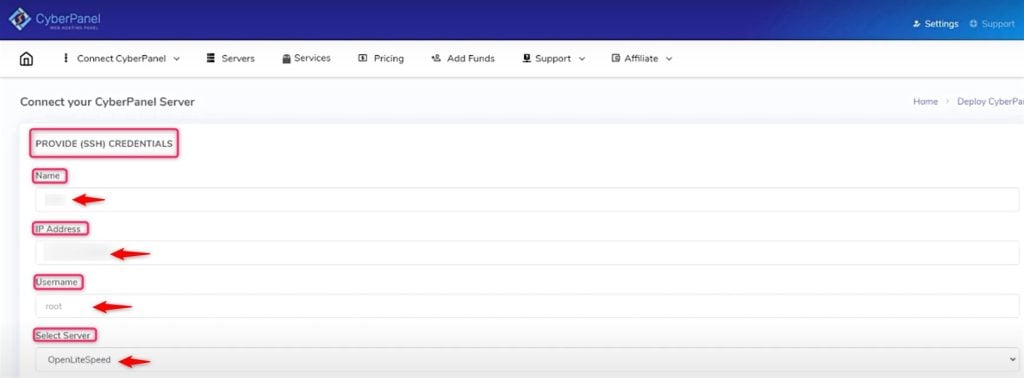
It prompts you to enter the necessary information for your WordPress site. This includes defining the server name, and server’s IP address and setting up the administrative credentials such as username and password. Let’s configure the server settings:
After entering all the required details, choose the desired server, Additional Features, and hit the “Deploy” button.
Start Managing Your WordPress Site with CyberPanel!
Install WordPress effortlessly with CyberPanel. Check out CyberPanel VPS hosting at Ultahost and enhance your website today!
CyberPanel will then proceed to set up your server deployment based on the information provided:

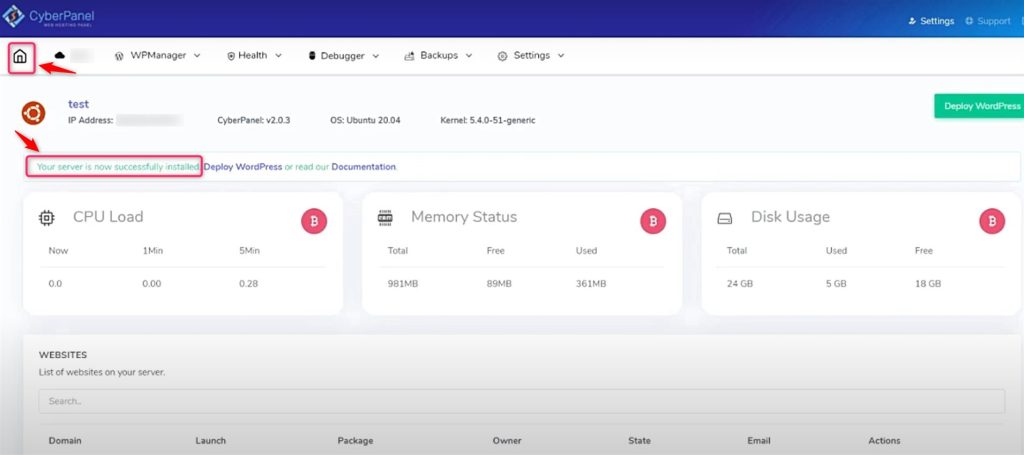
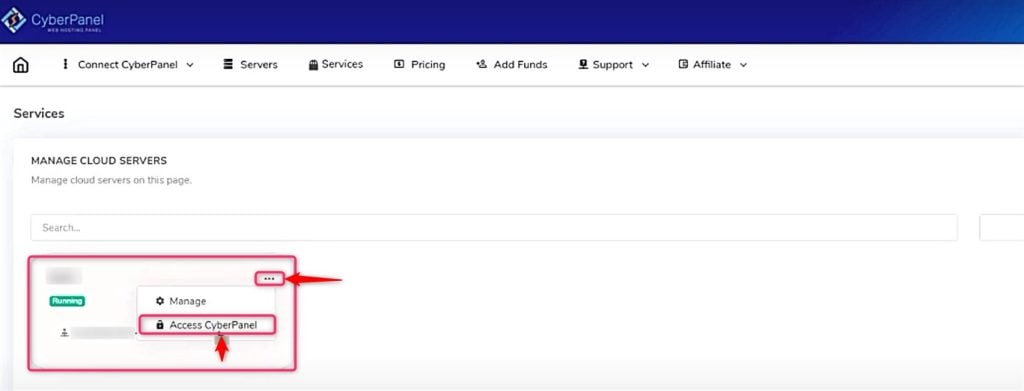
Once the test server is deployed, you can manage it by navigating to the Home button and then accessing the CyberPanel dashboard. This section allows you to view all your deployed servers and manage them accordingly:
By clicking on three dots and the “Access CyberPanel”, you will be redirected to the WordPress manager page. Here, you can view all your WordPress CyberPanel installations and access various management options:
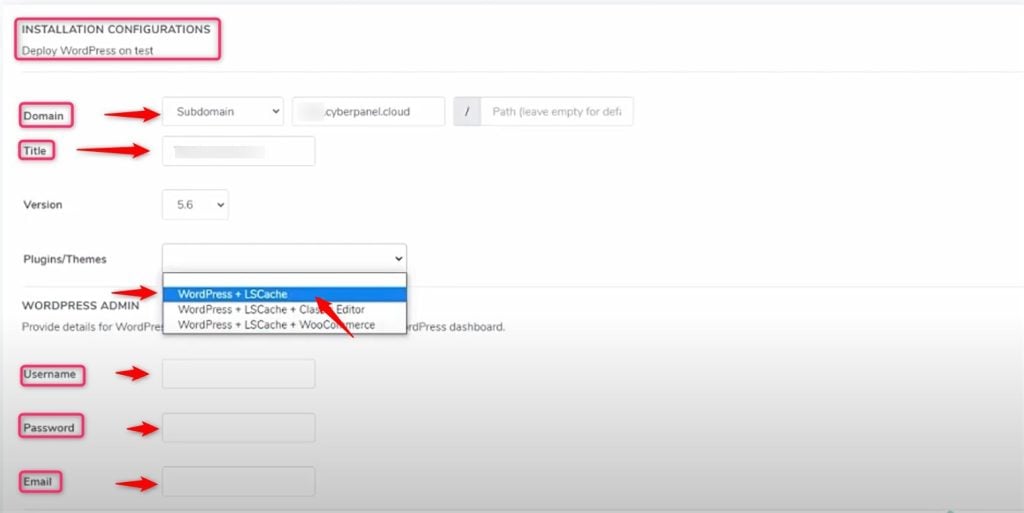
Install WordPress CyberPanel on your website directly from the CyberPanel dashboard. This page provides various tabs, each containing different sets of information and features that you can utilize for your site, Here, hit the “Deploy WordPress” button at the top right side of the window.
After this, assign a domain name to your website, and configure the Domain settings, Title, Version, Plugins, Username, Password, and required fields. The LiteSpeed Cache plugin is utilized for optimal performance:
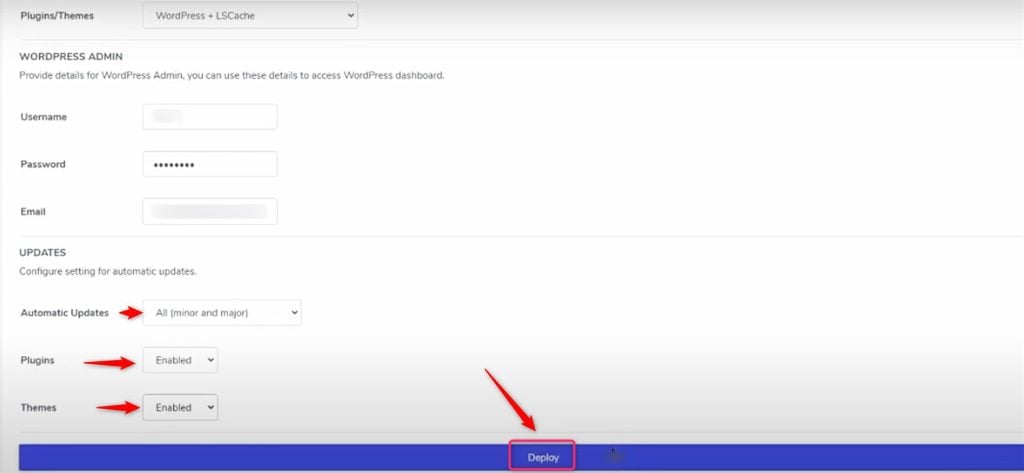
After entering all the required details, hit the “Deploy” button:
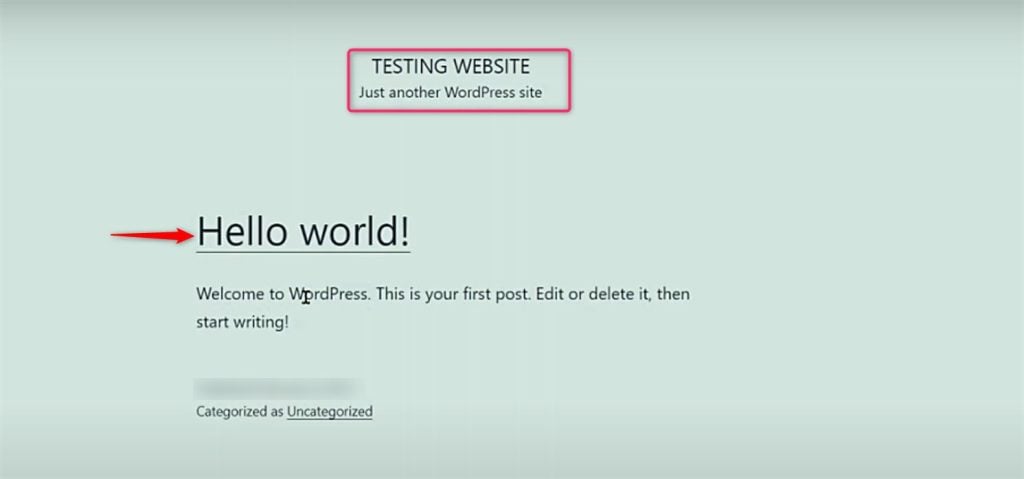
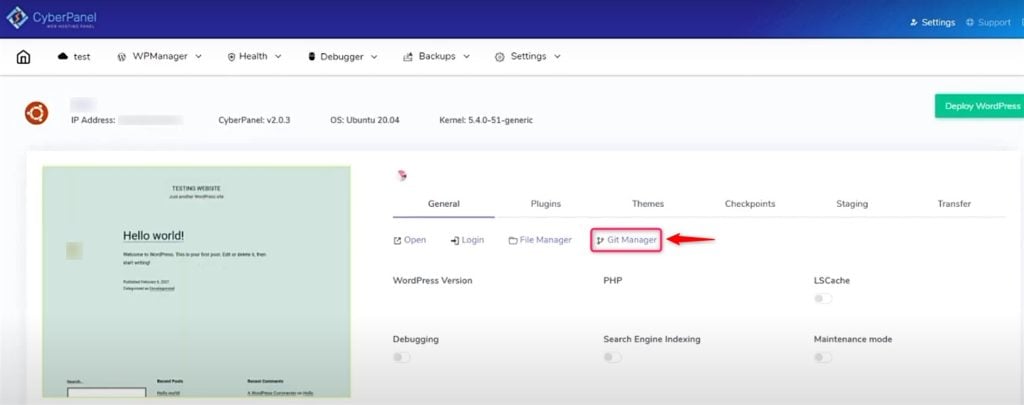
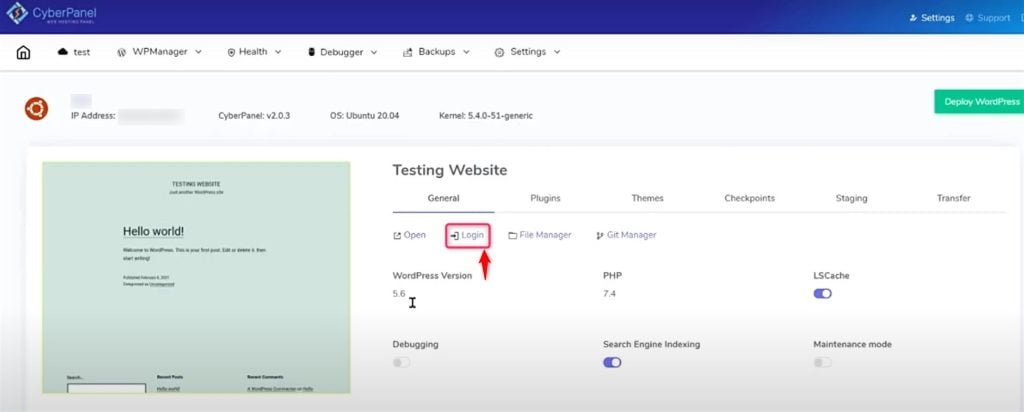
In the “General” tab, you will find an “Open” button which, when clicked, redirects you to your live website:
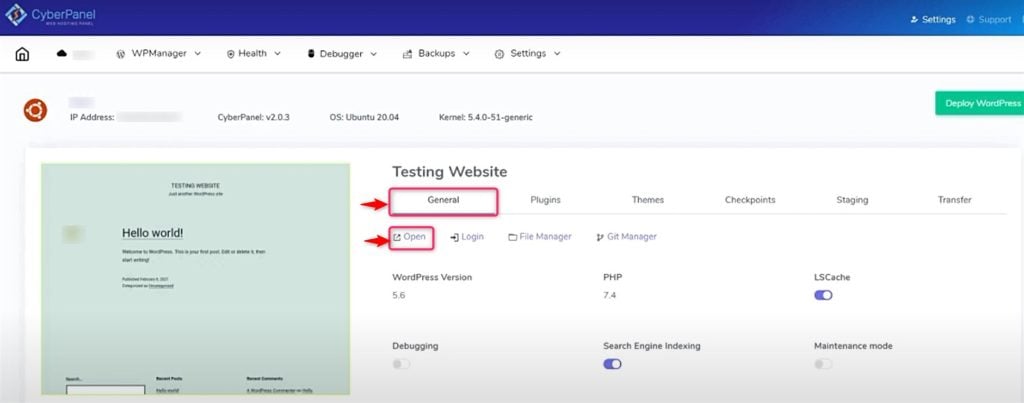
After pressing the “Open” button, it redirects to the live website named “Testing Website”:
Lastly, the Git manager is available for teams working with version control. This feature facilitates the sharing and updating of code among developers.
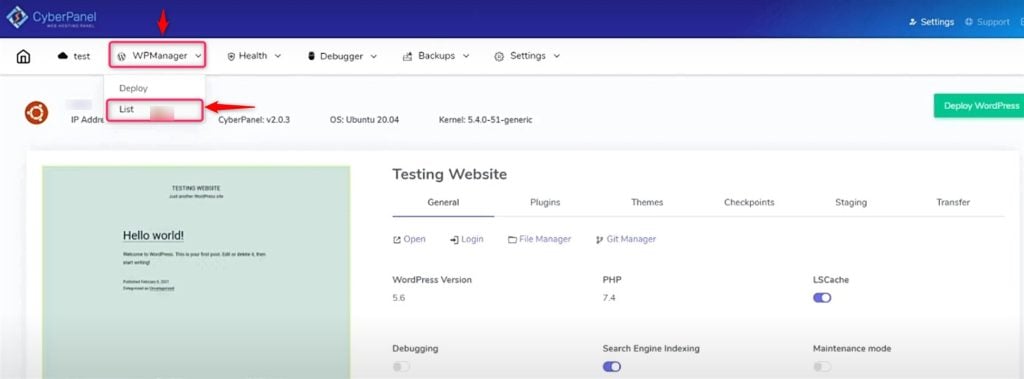
If you need to list the WordPress deployment, you can do so from the same “WPManager” section by selecting the site and clicking on “List”:
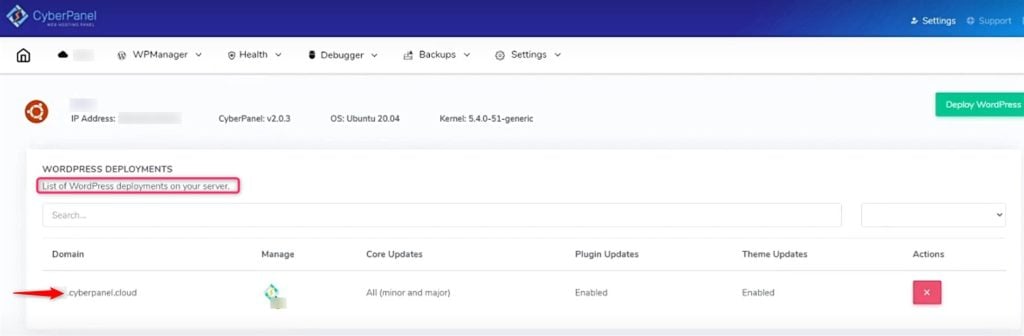
It lists the WordPress Deployment using the CyberPanel dashboard:
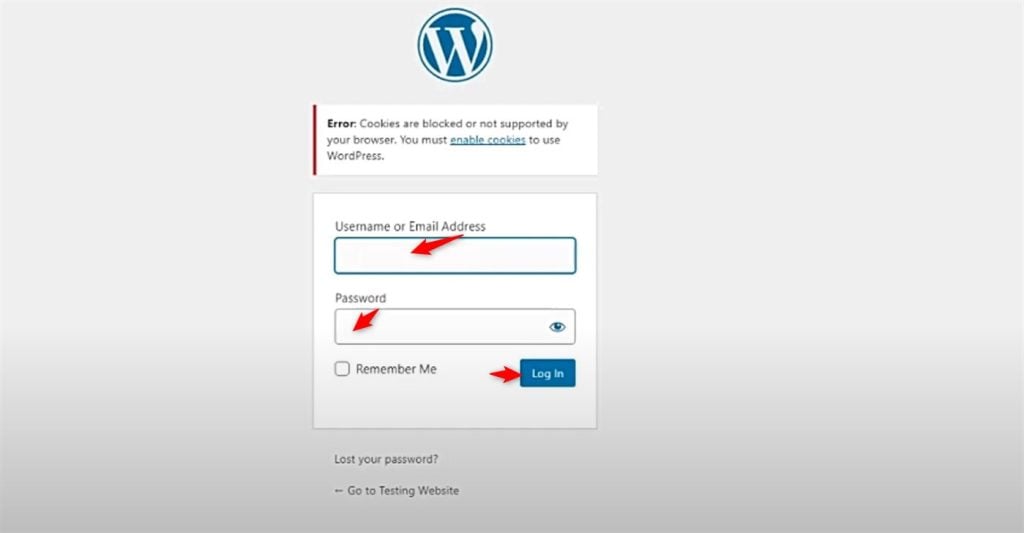
Now login to WordPress from the CyberPanel dashboard. Hit the “Login” button to access the webpage:
For convenience, there is an auto-login feature “Remember Me” that allows you to directly access the WordPress dashboard without manually entering the password each time. Let’s enter Username and Password and hit the Log in button:
Note: Remember to always back up your site before making significant changes and keep your WordPress installation updated for security and performance.
Keep your WordPress installation updated through CyberPanel’s auto-update feature. Regularly back up your site using CyberPanel’s backup solutions. Monitor your site’s security and apply patches as needed:
Following these steps, you can successfully install and deploy a WordPress site using CyberPanel Cloud.
CyberPanel Cloud provides a robust environment for running WordPress, with features that cater to both beginners and advanced users alike. Deploying a WordPress site with CyberPanel Cloud streamlines the process, making it accessible even for those with minimal technical background.
Remember, the key to a successful WordPress site is not just in its deployment but also in its ongoing maintenance and optimization. Keep your site updated, secure, and well-maintained to ensure it continues to perform at its best.
Ready to boost your WordPress website with CyberPanel? Discover our affordable WordPress hosting plans with Ultahost, which offer quicker page loading times for your visitors. These Ultahost’s hosting plans will take your online presence to the next level.
CyberPanel is a free and open-source control panel for Linux servers, designed to simplify server management tasks. It offers a user-friendly interface for managing websites, domains, databases, and other server resources.
CyberPanel provides a streamlined way to install and manage WordPress sites. It provides features, automatic updates, security enhancements, one-click WordPress installation, and performance optimization tools.
Yes, CyberPanel is compatible with most WordPress themes and plugins. It provides a standard WordPress environment, allowing you to use your preferred tools and customizations.
Absolutely! You can easily connect your custom domain name to your WordPress site using CyberPanel’s DNS management tools.
CyberPanel often offers automatic update features for WordPress. You can also manually update your WordPress installation through the CyberPanel dashboard.
Yes, CyberPanel includes security features like firewall rules, mod_security, and SSL certificate management to help protect your WordPress site from vulnerabilities.
Yes, CyberPanel allows you to manage multiple WordPress sites from a single dashboard. You can create separate accounts or use subdomains to organize your sites.

Managing hundreds of thousands of media files in WordPr...
Comments can be charming. Until they turn into spam jun...
Docker Compose is an exceptionally powerful tool that a...
Have you ever methodically created a blog post and sche...
Broken links are a common problem for WordPress users, ...
If you’ve ever opened your WordPress site and seen no...