
How to Create a Linux Swap File
A swap file is a designated space on a hard disk drive ...


Effective Linux storage management requires knowing how to Mount Drives in Linux. When you connect a hard disk, SSD, USB drive, or network storage, Linux doesn’t automatically make its files accessible. You must first mount the device, which links its filesystem to a directory in the system’s directory structure. Once mounted, users and applications can easily read from and write to the device.
When you no longer need a storage device, you should unmount it before removing it from the system. First, unmounting ensures that the system writes all pending data to the disk correctly. As a result, it prevents data corruption. However, if you remove the device without unmounting it, the system may not finish writing the files properly. Consequently, some files can become corrupted or even get lost. To manage storage devices safely, Linux provides several utilities. For example, tools such as mount, umount, lsblk, df, and blkid help administrators detect drives, mount filesystems, and unmount storage devices properly.
This tutorial covers the various ways to mount and unmount drives in Linux. Here you will learn to identify storage devices, mount partitions, automatically mount at boot time, and safely unmount drives.
On Linux, there is only one hierarchical file system, a hierarchy starting from the root directory(/), where every file and directory exists. Linux has a slightly different approach; unlike some of the other operating systems, it does not assign distinct drive letters like C:, D:, etc. Instead, Linux mounts storage devices onto directories called mount points. For example, if we mount a USB drive to /mnt/usb, the system makes all files on that drive accessible through that directory. As a result, we can view and manage the drive’s contents directly from the mount point.
Mounting attaches the filesystem of a device at a specific point in the directory tree. Unmounting breaks that connection, safely disconnecting the device from the system.
Experience Lightning-Fast Linux VPS Hosting!
Unlock powerful Linux VPS hosting with NVMe servers. Benefit from flexible plans, unlimited bandwidth, and exceptional performance, all at a budget friendly price.
Common mount locations include several key directories. For instance, /mnt serves as a temporary mount point for storage devices, while /media is the standard mount point for removable media. Additionally, /home stores partitions containing user data. Therefore, understanding mount points is essential when managing disks and filesystems in Linux, as it helps organize and access storage efficiently.
It is necessary to identify the attached storage device on the system before mounting a drive. Linux exposes storage devices by names like /dev/sda,/dev/sdb, or /dev/nvme0n1. Use the next command to get a list of all available storage devices.
lsblk
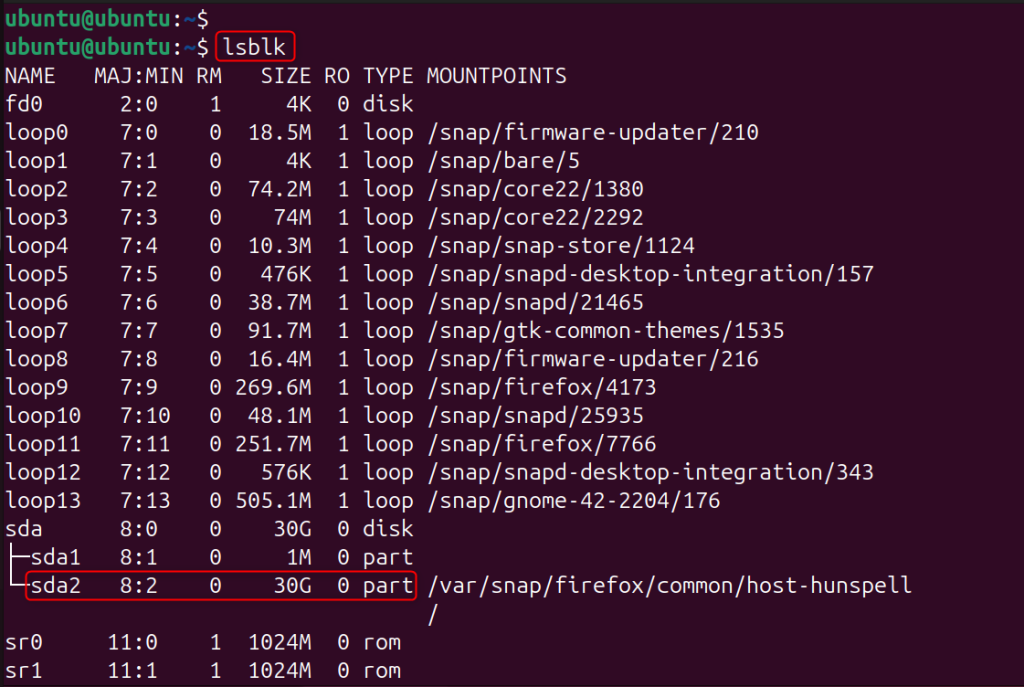
This command shows a tree listing of the disks and partitions attached to the system. The output shows disk name, partition names, filesystem type, mount points, and disk sizes.
You can also use another command, such as fdisk with the l utility, to identify drives in a sequence:
sudo fdisk -l
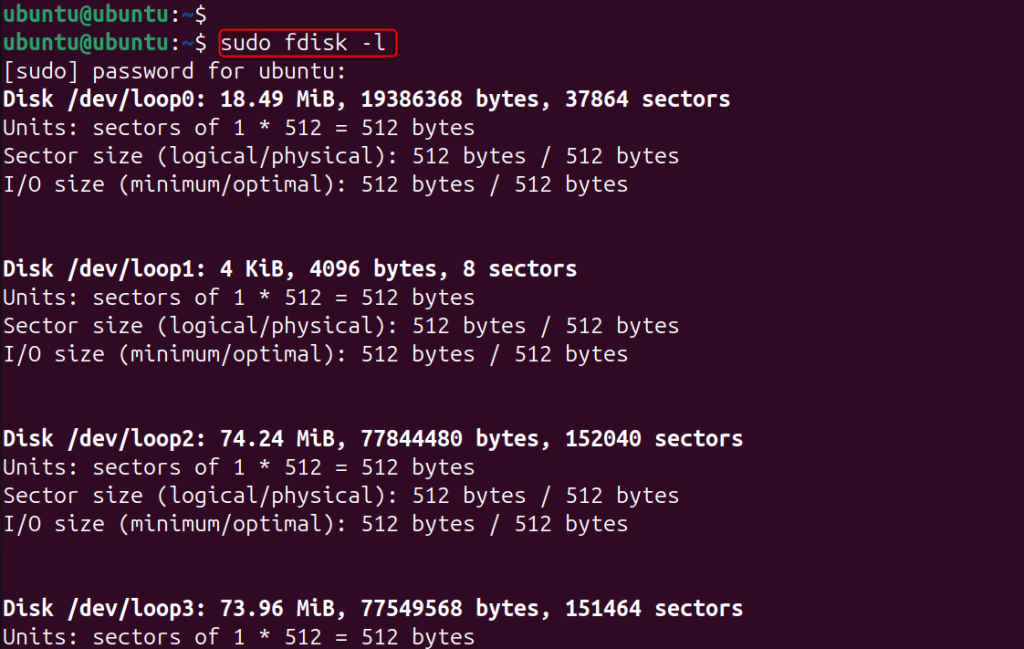
This command shows detailed information about all disks and partitions recognized by the system. You can observe the partitions you want to mount by critically analyzing this output.
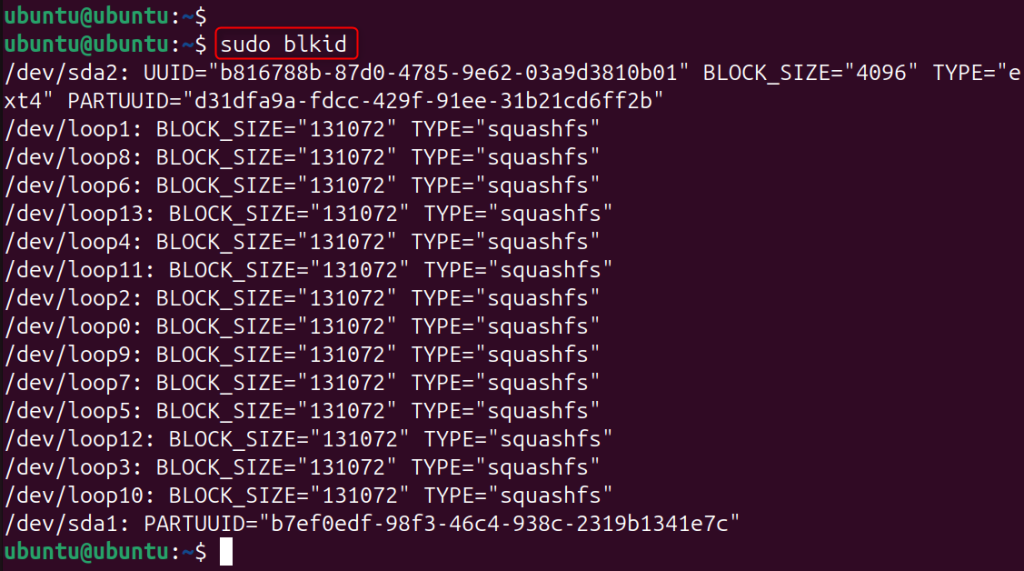
You may still want to confirm what filesystem the partition is using before you mount a drive. Some filesystems have different options when you mount. The following command allows you to see filesystem information.
sudo blkid
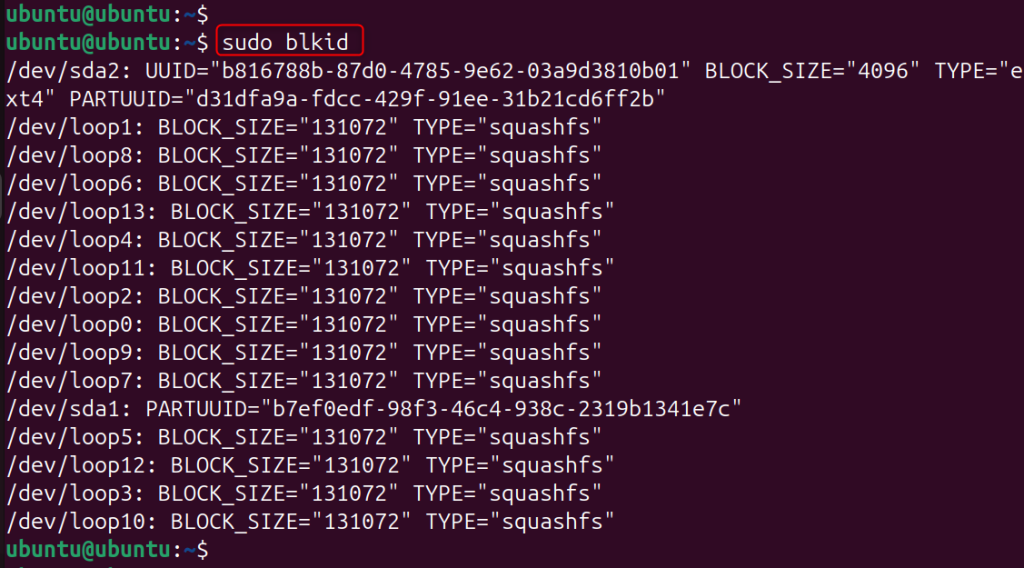
The blkid command lists the filesystem type, uuid and partition labels of all storage media.
The most common Linux filesystem types include ext4, XFS, Btrfs, VFAT, and NTFS. Understanding these types is important because it enables the system to apply the appropriate mount options for each filesystem. As a result, the system can handle data more efficiently and maintain compatibility with different storage devices.
The primary command used for attaching a filesystem to a directory is the mount command.
To mount a drive, you’ll first need to create a directory that will serve as the mount point. The command will create a mount directory.
sudo mkdir /mnt/drive1
This directory serves as the point where you can access the drive’s contents.

After creating the mount point, you can use the mount command to mount the drive.
sudo mount /dev/sda2 /mnt/mydrive1

Where /dev/sda2 is the partition you want to mount. It will mount the drive in the/mnt/drive1 directory. Once you run the command, you will be able to access the filesystem through its mount point.
Once you mount the drive, it is important to verify that everything worked correctly. To do this, first navigate to the mount point, and then list the mounted filesystems. This way, you can confirm that the drive is properly connected and accessible:
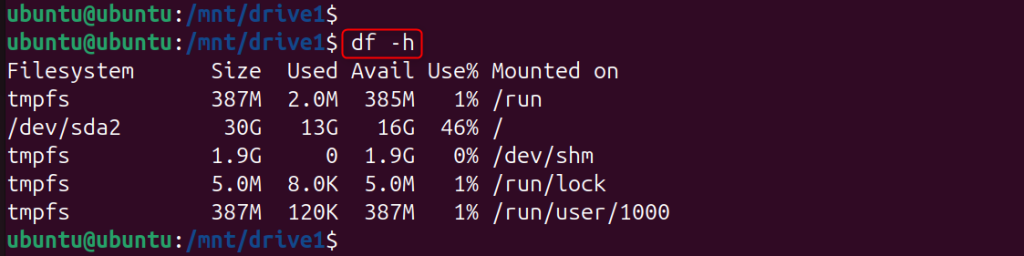
df -h
Here’s how you can immediately see all mounted filesystems and their disk usage.
You can also verify the mount with the grep utility by specifying the name of the storage device:
mount | grep sda2

In the output, if the system lists the partition, it indicates that the drive has mounted successfully. Consequently, you can start accessing its files and using the storage without issues.
In some cases, when you mount a drive, you need to specify what filesystem type it is. You use the -t option with the mount command to do this.
sudo mount -t ext4 /dev/sda2 /mnt/drive1

The ext4 argument here tells the system to mount this partition in such a way. You can set the correct type for other filesystems.
Mounting a FAT filesystem, you can execute the following command:
sudo mount -t vfat /dev/sdb1 /mnt/mydrive
Mounting an NTFS filesystem, you can run the command below:
sudo mount -t ntfs /dev/sdb1 /mnt/mydrive
Declaring the filesystem type avoids any compatibility issues.
To auto-mount a drive when the system boots, you will configure it in /etc/fstab. The fstab file controls how the system mounts filesystems. It determines which drives and partitions the system automatically makes available at startup.
First, we need to find the partition UUID. Device names can change after a reboot, so avoid using them. Instead, use UUIDs, which you can fetch for a partition with the following command:
sudo blkid
This will show the UUID of each partition.
We will open the fstab configuration file using any text editor.
sudo nano /etc/fstab
This allows you to mount the partition automatically on boot. Here, you specify the UUID and other relevant information:
<device> <mount_point> <filesystem_type> <options> <dump> <pass>
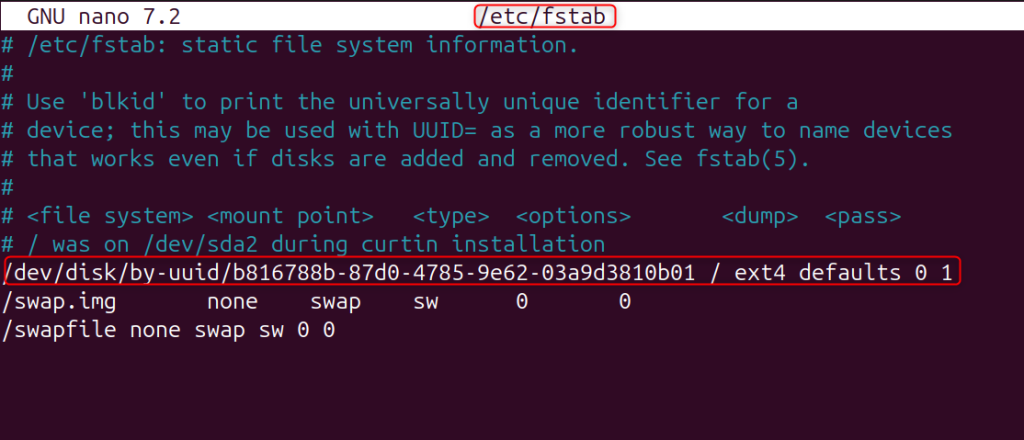
This entry instructs the system to mount the partition at /mnt/drive1 on boot time. Edit the file with your favorite editor and save the changes.
Now we need to test the configuration before we reboot the system. To test the fstab entries, you can use the command mount with the -a utility.
sudo mount -a

If there are no errors, the configuration is correct, and the drive will automatically mount whenever you start up your system next.
To safely disconnect a drive, one can run the umount command to unmount it. Unmounting your storage device to prevent data corruption. Before you remove a storage device, it always needs to be unmounted.
You can use the umount command to unmount a drive.
sudo umount /mnt/drive1
The output shows how to unmount a filesystem from the mount point.

You can also use the name of the device to unmount the drive.
sudo umount /dev/sda2

Both approaches are safe to detach the drive from the system.
There may be occasions when the system will show the device busy error. This typically indicates that files on the disk are currently open for use. You can use the command below to get processes that are using the drive.
lsof /mnt/drive1

After you close the active processes, attempt to unmount the drive once more.
If the system cannot unmount a device normally, you may need to forcefully unmount it. You can do this using the following command:
sudo umount -f /mnt/drive1
It forces the system to unmount a drive even if it’s already in use.

However, this approach can be risky, so use it with caution. If the system is still writing files, forcefully unmounting the device may cause data loss.
Local storage is a complex storage subsystem, and following best practices ensures safe and efficient use of storage. Some recommended practices include:
Such practices prevent filesystem errors and increase storage reliability.
As a Linux user and system admin, mounting and unmounting drives are one of the basics. Mounting attaches a storage device to the Linux directory tree and makes its files accessible at that point, while unmounting disconnects it in a way that avoids data corruption. There are many commands in Linux for managing storage devices, such as mount, umount, lsblk, df, and blkid. Through the /etc/fstab file, administrators are able to manually mount drives, define what filesystem types to use, or automatically mount them. The concept of mounting and unmounting drives safely in Linux systems, which helps administrators manage disks, external storage devices, secondary partitions, etc.
Mounting a drive means linking the filesystem of a storage device to a directory in the Linux filesystem. Once you mount the device, you can access its files through that directory.
The most common command to use when mounting drives is the mount command. It links a storage device or partition with a mount point in the Linux directory hierarchy.
You can mount drives with df -h, lsblk, or mount. These commands show active filesystems and their mountpoints.
Unmounting ensures that the system writes all data to the device before you remove it. If you remove the drive without unmounting, you risk data corruption or filesystem errors.
The system saves it in the configuration file /etc/fstab, which contains entries that tell the system which filesystems to mount during boot.
Yes, the system typically mounts devices automatically at boot based on the entries in the /etc/fstab file, where you specify the device UUID and mount point.
Experience Reliable VPS Hosting with UltaHost!
Enjoy full root access and high-performance SSD storage, perfect for backups and file management, along with unlimited bandwidth and fast, consistent speeds.