
How to Fix ERR_CONNECTION_TIMED_OUT Error
The error message ERR_CONNECTION_TIMED_OUT signifies th...


Custom post types in WordPress enable you to build dedicated sections for different kinds of content other than the default posts/pages. Instead of mixing everything together, you can build unique layouts and structures for items like products, portfolios, or movie reviews. It keeps your website structured and allows visitors to quickly locate the details they are looking for. Developers often use the WordPress Post API to create these post types through custom plugins. This gives each type its own fields, categories, and tags for better management.
WordPress includes several default post types by design, like posts, pages, media attachments, content revisions, and navigation menus. Custom post types extend this functionality, allowing you to tailor your site to its purpose. For instance, an eCommerce site may have a “Products” post type, a portfolio site could feature “Projects”, and so on. Even popular plugins like WooCommerce, WPForms, and MemberPress rely on custom post types to handle their content. This shows how essential they are for building a flexible and user-friendly website.
In this guide, we’ll explain the process of building custom post types in WordPress.
Typically, setting up a custom post type in WordPress requires inserting code into the functions.php file of your theme. The problem is that even a small error can cause your site to break, and if you update or change your theme, the code you added will be lost. That’s why editing functions.php directly is not recommended unless you’re an experienced developer.
Create Custom Posts with our WordPress Hosting!
Build and manage custom post types effortlessly on WordPress with Ultahost’s fast, reliable VPS hosting.
The WPCode plugin offers a simpler and more secure option. This tool lets you insert custom code snippets without touching your theme files and comes with a built-in library of ready-to-use snippets. It can also replace several single-purpose plugins, making your site lighter and easier to manage.
To create custom posts using WPCode, first, you need to install and activate the WPCode plugin:
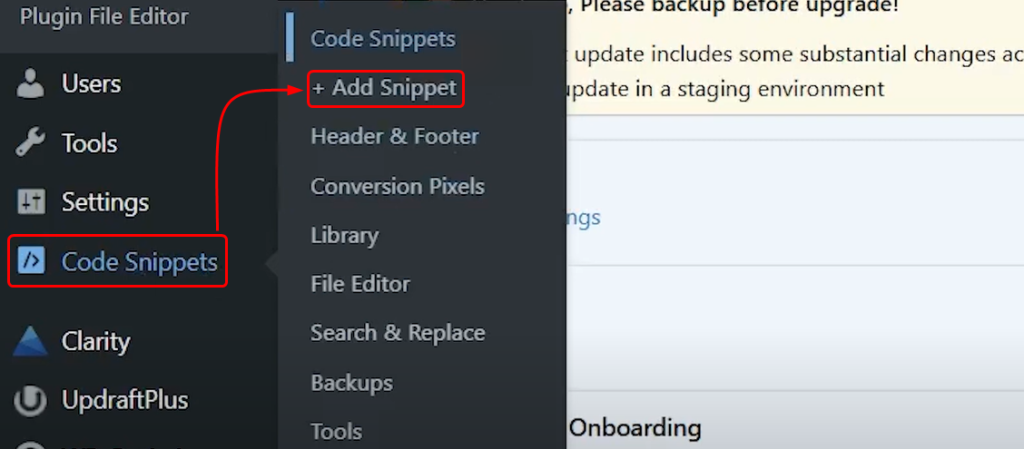
After activating the plugin, go to your WordPress dashboard and click on Code Snippets > Add Snippet:
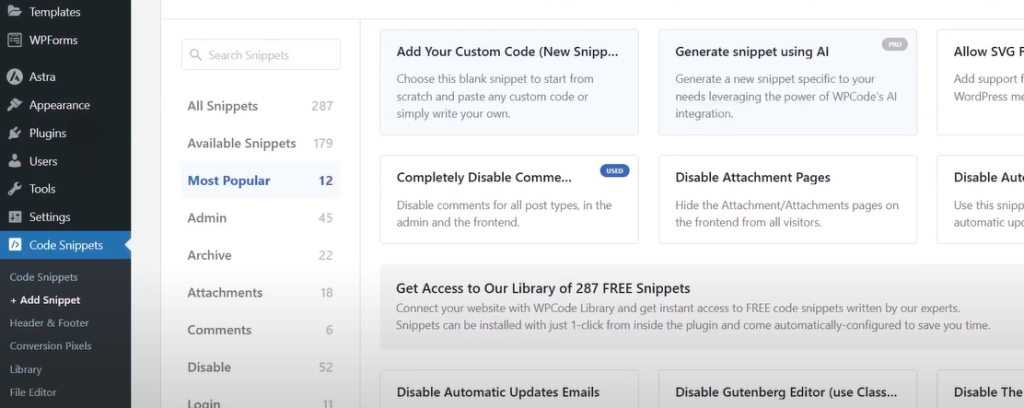
Here, multiple code snippet templates are available; choose according to your preferences:
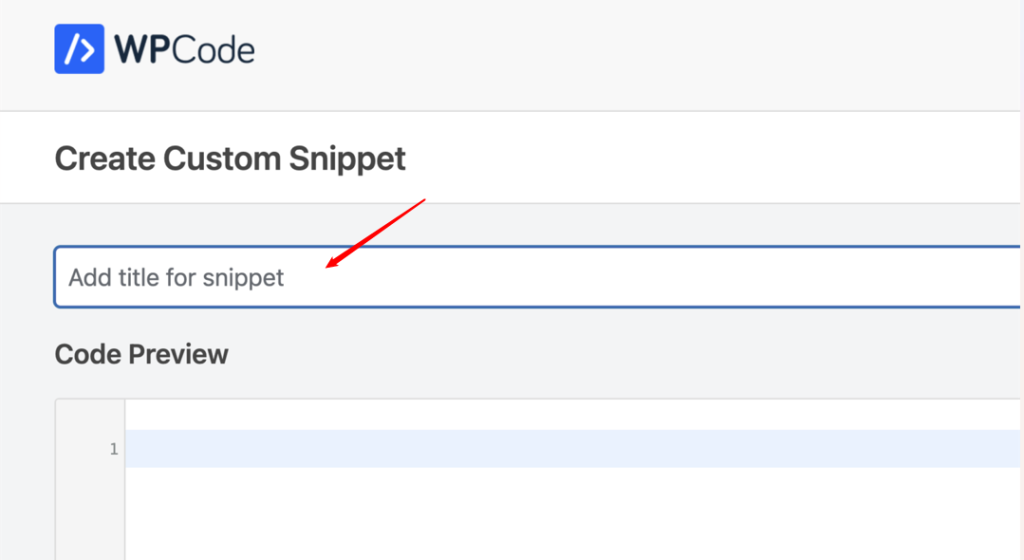
For instance, we select the “Add your Custom Code” option and then enter a title for our code snippet:
Next, paste the code below into the “Code Preview” box to create a custom post type called “Books”. This custom post will show up in your WordPress admin menu and can work with any theme:
// Function to register a custom post type
function register_books_post_type() {
    $labels = array(
        'name'               => __( 'Books' ),
        'singular_name'      => __( 'Book' ),
        'add_new'            => __( 'Add New Book' ),
        'add_new_item'       => __( 'Add New Book' ),
        'edit_item'          => __( 'Edit Book' ),
        'new_item'           => __( 'New Book' ),
        'all_items'          => __( 'All Books' ),
        'view_item'          => __( 'View Book' ),
        'search_items'       => __( 'Search Books' ),
        'not_found'          => __( 'No books found' ),
        'not_found_in_trash' => __( 'No books found in Trash' )
    );
    $args = array(
        'labels'             => $labels,
        'public'             => true,
        'has_archive'        => true,
        'rewrite'            => array( 'slug' => 'books' ),
        'supports'           => array( 'title', 'editor', 'thumbnail', 'excerpt' ),
        'show_in_rest'       => true,
    );
    register_post_type( 'books', $args );
}
add_action( 'init', 'register_books_post_type' );
If you want a simple setup, just replace the word “books” in the code with your own slug and change the labels to match your content type. Once done, click Update to save it.
An alternative, easy-to-use method for handling custom post types in WordPress is through the “Custom Post Type UI” plugin. First, install and enable the CPT UI plugin, then go to your WordPress dashboard, and navigate to CPT UI > Add/Edit Post Types to create your custom type:
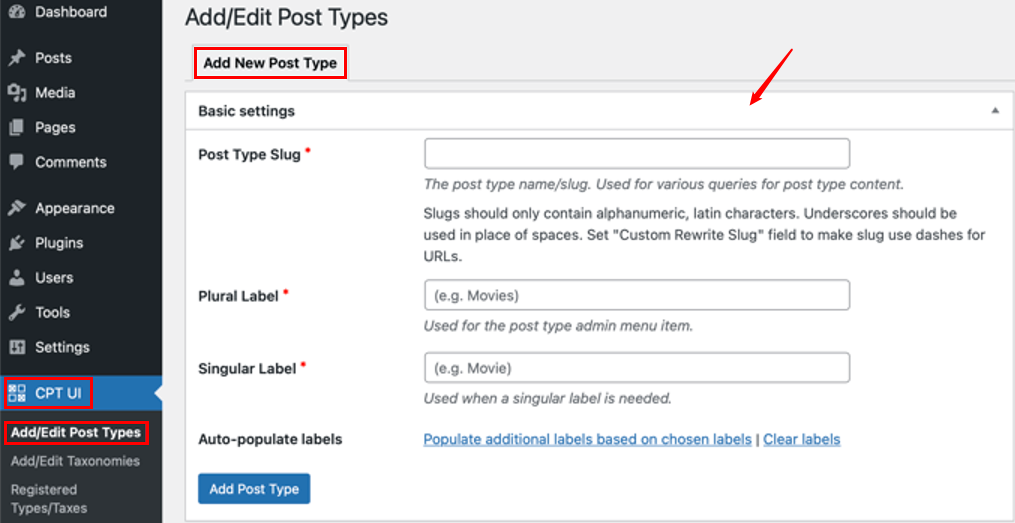
You’ll be asked to define a slug, like books or movies, which WordPress will use in URLs and queries. The slug must consist only of letters and numbers. You’ll also provide the plural and singular names, and if you want to save time, you can use the ‘Populate additional labels’ option to auto-fill the extra fields. Otherwise, you can manually add a description and adjust labels in the Additional Labels section. The labels you set here will appear across the WordPress dashboard when managing content for that post type.
Read also How to Fix REST API Error in WordPress
After this, you can move on to the settings, where you’ll find different options to configure its attributes, each with a short description to guide you:
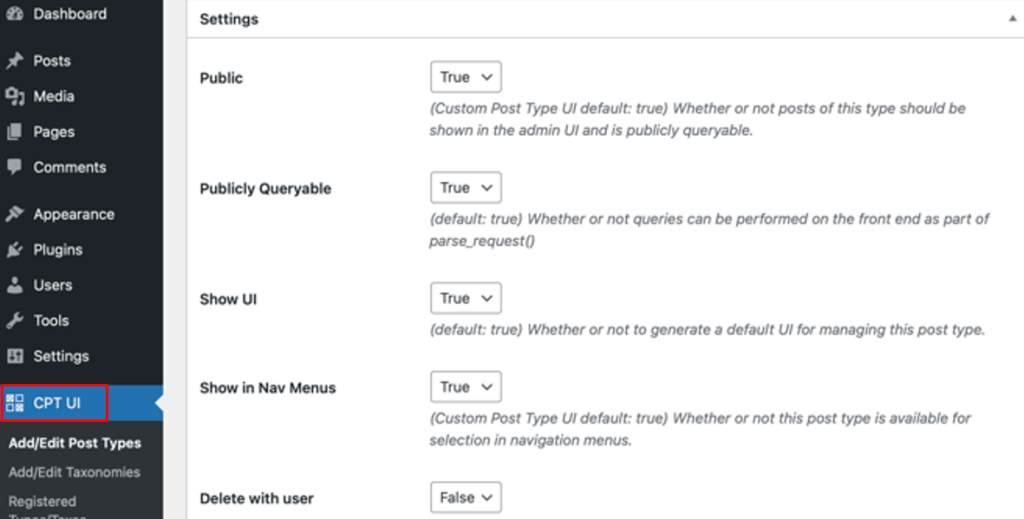
For example, you can decide whether your post type should behave like pages with a hierarchy or like posts arranged by date. Under the general settings, you’ll also find options to choose which editing features to enable. Just check the ones you need, and when you’re done, click “Add Post Type” to save and create it:
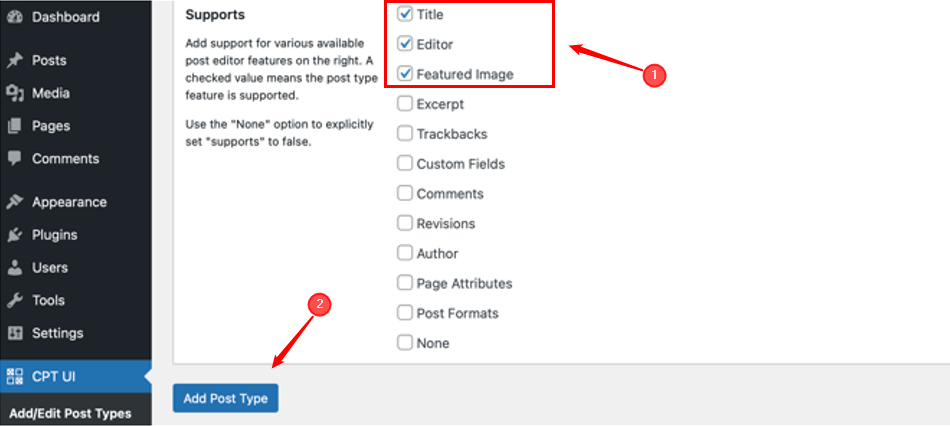
That’s it! Your new custom post type is set up, and you can start creating content for it immediately.
Custom post types provide an effective method to expand WordPress beyond regular posts and pages, making your site more structured and customized to your requirements. Whether you prefer the coding approach with WPCode or the beginner-friendly CPT UI plugin, both methods let you create and manage custom post types easily. Once set up, you can easily organize different types of content, improve user experience, and build a site that truly fits its purpose. In this WordPress custom post type tutorial, we demonstrated various ways to set up custom post types.
Creating custom post types in WordPress can be tricky, especially when organizing content for different sections of your site. Ultahost’s managed VPS hosting offers dedicated resources and easy-to-use management tools, making it simpler to build and manage custom post types while keeping your website fast and efficient.
A custom post type is a separate content format that you add to WordPress apart from the built-in options, such as posts and pages. Some common examples of custom post types include products, portfolios, events, or reviews.
They help you organize content better and give your site a clear structure. For example, you can separate blog posts from products or testimonials.
Yes, tools like CPT UI allow you to set up and manage them without writing any code.
WPCode lets you add custom code snippets safely, while CPT UI provides a user-friendly interface for beginners who prefer not to code.
Yes, custom post types generally work with all themes, but some themes may offer extra styling or layouts for specific types.
Yes, you can do that using the Advanced Custom Fields (ACF) plugin.
Yes, they can enhance SEO by helping you structure content better. You can also optimize them with SEO plugins like Yoast or Rank Math.
Explore Ultahost’s cPanel VPS Hosting
Easily host your website with Ultahost’s managed VPS cPanel hosting, providing dependable performance and simple management.
The error message ERR_CONNECTION_TIMED_OUT signifies th...
Search engines like Google cannot index websites hosted...
WordPress Multisite is a powerful feature that allows y...
Managing your WordPress site often requires direct acce...
Permalinks, short for "permanent links" are the URLs us...
Managing hundreds of thousands of media files in WordPr...