
How to Set Docker Environment Variables
Docker has revolutionized how we build, deploy, and run...


Nginx is one of the most popular webserver and reverse proxy, with high performance metrics. You typically use this for load balancing, or caching, and serving up static content. Nginx together with Docker, an application platform for containerizing applications, makes it possible to deploy scalable applications in a performant environment.
Follow this article to be able to set Nginx as a reverse proxy for your Docker containers, and run your apps correctly!
Before proceeding with this setup, please ensure you have the above configurations in place.
Setup Nginx Reverse Proxy for Docker on Fast VPS!
Upgrade your server performance with Ultahost’s lightning-fast VPS hosting. Enjoy the benefits of unparalleled speed, improved user experience, and seamless access.
These are the steps to configure Nginx reverse proxy for Docker containers:
First, if you have not already installed Docker, refer to our guide on how to install Docker on the Ubuntu Linux system. After that install Docker Compose by typing the following command in the terminal:
sudo curl -L "https://github.com/docker/compose/releases/download/1.27.4/docker-compose-$(uname -s)-$(uname -m)" -o /usr/local/bin/docker-compose

Docker Compose is a tool for defining and running multi-container Docker applications. Apply executable permissions to the Docker Compose binary:
sudo chmod +x /usr/local/bin/docker-compose
Verify Installation with the following command:
docker --version

Verify the Docker Compose installation:
docker-compose --version

To allow Nginx and your application containers to communicate, create a Docker network:
sudo docker network create nginx_reverse_proxy

Next, create a simple application container to demonstrate the reverse proxy setup. For this example, we will use a basic Nginx container:
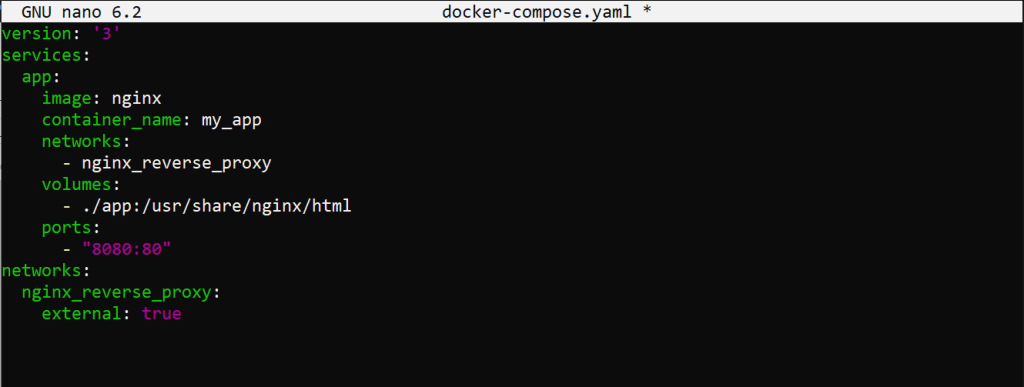
Create a Docker Compose file named docker-compose.yaml with the following content:
version: '3'
services:
  app:
    image: nginx
    container_name: my_app
    networks:
      - nginx_reverse_proxy
    volumes:
      - ./app:/usr/share/nginx/html
    ports:
      - "8080:80"
networks:
  nginx_reverse_proxy:
    external: true
Create a directory for your application and a simple index.html file:
mkdir app && echo "Hello, World!" > app/index.html
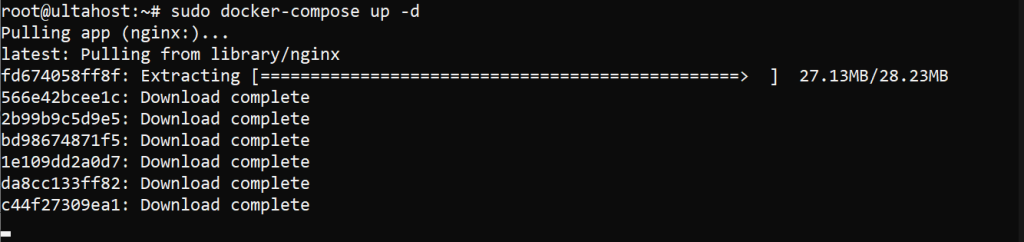
Start the application container:
sudo docker-compose up -d
Now, set up Nginx as a reverse proxy for your application container:
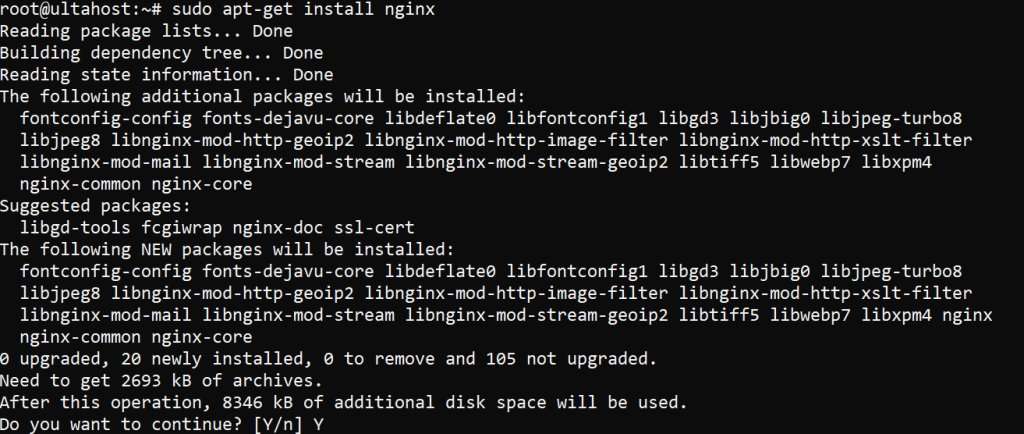
Install Nginx on your server with the following command:
sudo apt-get install nginx
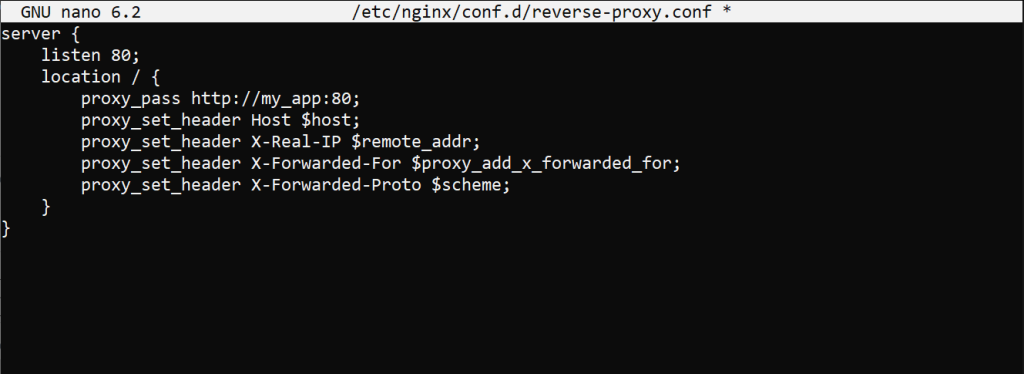
Create an Nginx configuration file for the docker reverse proxy:
sudo nano /etc/nginx/conf.d/reverse-proxy.conf
Add the following content to the docker Nginx proxy configuration file:
server {
    listen 80;
    location / {
        proxy_pass http://my_app:80;
        proxy_set_header Host $host;
        proxy_set_header X-Real-IP $remote_addr;
        proxy_set_header X-Forwarded-For $proxy_add_x_forwarded_for;
        proxy_set_header X-Forwarded-Proto $scheme;
    }
}
Save and exit the file. Test the Nginx configuration:
sudo nginx -t
Reload Nginx to apply the new configuration:
sudo systemctl reload nginx
To verify that Nginx is correctly set up as a reverse proxy for your Docker container, open a web browser and navigate to your server’s IP address. You should see the “Hello, World!” message from the Nginx container.
To secure your setup with SSL, follow these steps to obtain and configure an SSL certificate using Let’s Encrypt.
Install Certbot, the Let’s Encrypt client:
sudo apt-get install certbot python3-certbot-nginx
Obtain an SSL certificate for your domain:
sudo certbot --nginx -d yourdomain.com -d www.yourdomain.com
Follow the prompts to complete the installation and configuration. Certbot will automatically configure Nginx to use the SSL certificate. Your Nginx configuration file should now look like this:
server {
    listen 80;
    server_name yourdomain.com www.yourdomain.com;
    return 301 https://$host$request_uri;
}
server {
    listen 443 ssl;
    server_name yourdomain.com www.yourdomain.com;
    ssl_certificate /etc/letsencrypt/live/yourdomain.com/fullchain.pem;
    ssl_certificate_key /etc/letsencrypt/live/yourdomain.com/privkey.pem;
    location / {
        proxy_pass http://my_app:80;
        proxy_set_header Host $host;
        proxy_set_header X-Real-IP $remote_addr;
        proxy_set_header X-Forwarded-For $proxy_add_x_forwarded_for;
        proxy_set_header X-Forwarded-Proto $scheme;
    }
}
Test the Nginx configuration again then reload Nginx to apply the changes.
After successfully setting up Nginx as a reverse proxy for the Docker container. This setup not only enhances the performance and scalability of applications but also adds a layer of security with SSL encryption. By leveraging the power of Nginx and Docker you can deploy and manage your applications more efficiently and effectively. Keep experimenting with different configurations to optimize your docker Nginx reverse proxy setup further.
Experience top-notch security and performance with Ultahost’s VPS with DDoS protection. Safeguard your server while maximizing speed and efficiency for your Nginx reverse proxy Docker setup. Choose Ultahost for unparalleled reliability and peace of mind.
A reverse proxy forwards client requests to servers and sends the server’s response back to the client.
Nginx improves performance and security allows managing multiple Docker services easily.
Yes, you need Docker installed and running to set up a reverse proxy for its containers.
Yes, Nginx can route traffic to multiple containers based on the URL or hostname.
Nginx typically listens on port 80/443, while Docker containers use custom ports like 8080 or 3000.
A domain name is optional, but it makes accessing your services easier and more professional.
Yes, you can configure SSL/TLS in Nginx to secure traffic between users and your Docker containers.
Docker has revolutionized how we build, deploy, and run...
Docker containers allow applications to run with no int...
Keeping your containerized applications up to date is a...

Docker is known as the industry leader when it comes to...
Docker is a platform that allows you to build, deploy, ...