Enable / Disable Two Factor Authentication (2FA)
Enabling or disabling two-factor authentication (2FA) is nothing complex. You can simply follow the steps below.
1. Enable 2FA
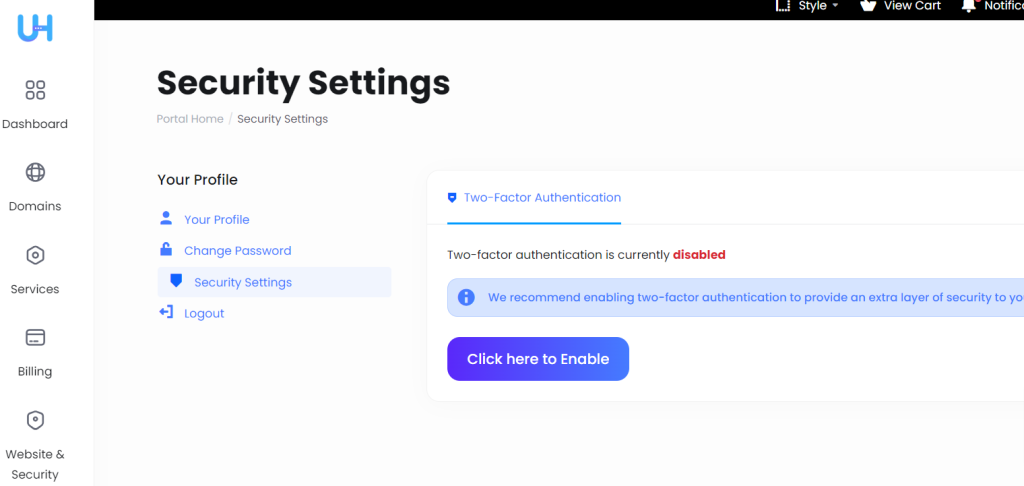
1. To enable 2fa, first login to Ultahost and navigate to the Security settings page either by clicking the top-right corner and click on ‘Security Settings’ from the dropdown menu or by visiting this URL directly https://bill.ultahost.com/user/security
2. Once you are on the security settings page, you can click ‘Click here to Enable’ to enable the 2FA

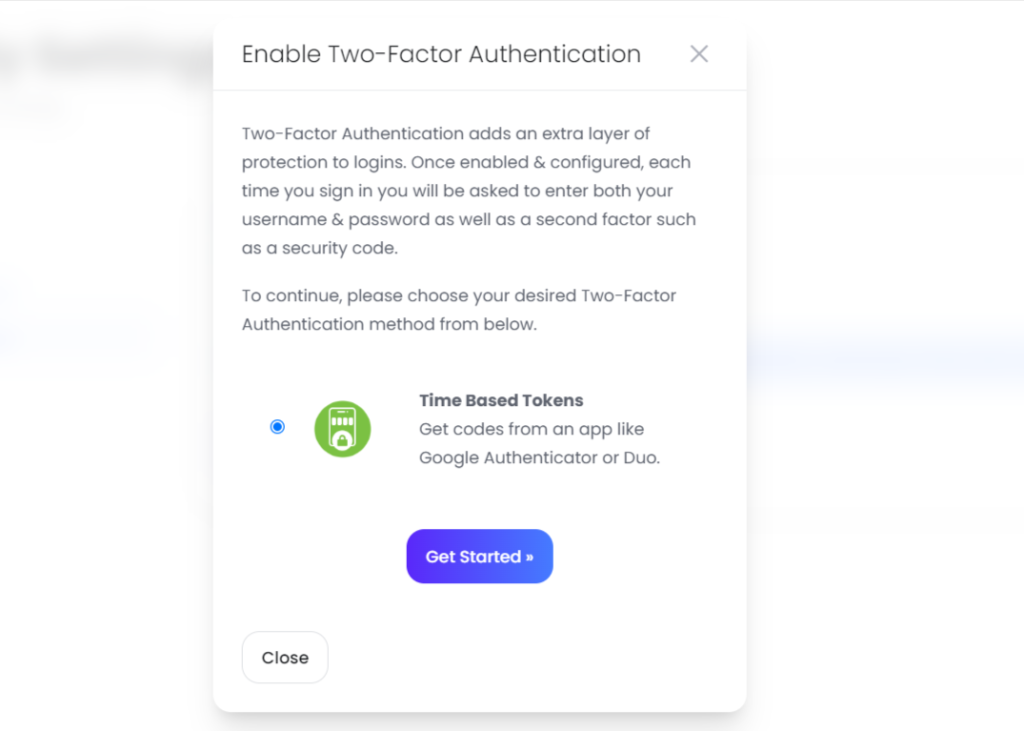
3. Next, click on ‘Get started’

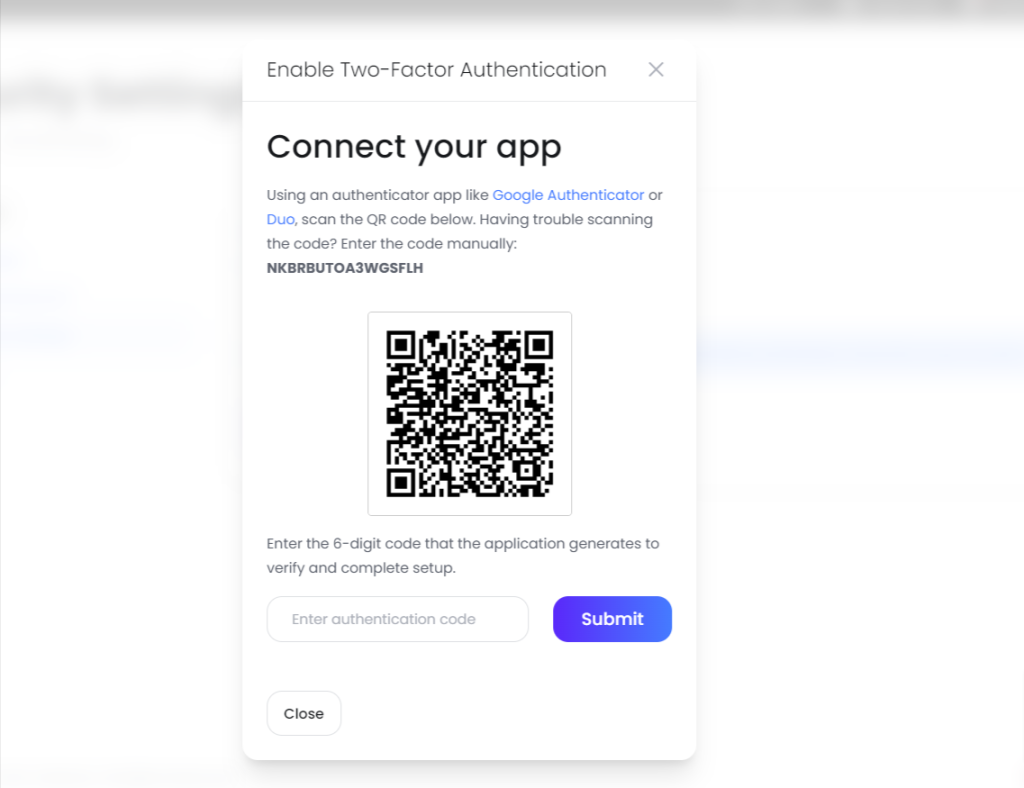
4. Scan the QR code with your mobile app (Google Auth or Authy) then enter the code here and click on submit

5. Once done, your 2fa security will be enabled on your Ultahost account.
Don’t forget to copy the backup code and save it on your side. This code can be used when you are unable to login with 2FA or if there’s any issue with your 2fa.

This is how you can enable 2fa on your Ultahost account.
2. Disable 2FA
1. To disable 2fa, login to Ultahost and navigate to the security settings page.

2. Next, click on ‘Click here to Disable’ button.
3. Then you have to enter your Ultahost account password like in the image below.

3. Enter your password and click on ‘Disable Two-Factor Authentication’ button. The 2fa will be disabled for your Ultahost account.

The second-factor authentication has been disabled successfully!
So, that’s all how you can enable or disable 2fa on Ultahost.


