
How to Check Apache Version in Linux
Apache is a widely used, open-source web server compati...


Port forwarding is a crucial technique for network administrators, which allows the redirection of internet traffic from one IP address and port to another. It is useful in navigating firewalls, NATs, and other security or structural barriers that prevent direct system access. Port forwarding enables remote access to services, such as hosting a web server or securing systems behind a firewall, ensuring they remain reachable over the internet.
Port forwarding facilitates secure and efficient network configuration by effectively managing traffic flow. In this article, we will guide you through the step-by-step procedure for forwarding ports with Iptables in Linux.
Before diving into the methods, it’s crucial to have a basic understanding of what iptables are and how they function. It is a CLI firewall utility that utilizes policy chains to allow or block traffic. When it comes to port forwarding, iptables modifies the destination address and port number of the traffic passing through a router or firewall.
Port forwarding, on the other hand, is a network address translation (NAT) technique that allows an external user to access services on a private network from the outside. It’s a way to redirect a communication request from one address and port number combination to another while the packets are traversing a network gateway, such as a router or firewall.
Before starting port forwarding on Linux, you must configure a web server, such as Apache or nginx. To configure a web server, follow our dedicated guide on how to install Nginx on Ubuntu Linux system.
The most common method of forwarding ports with iptables in Ubuntu 24.04 involves the NAT table and the PREROUTING chain. The step-by-step process with explanations is given below:
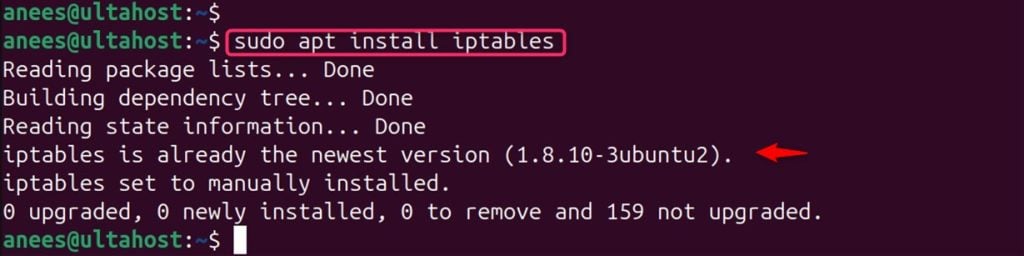
iptables is usually pre-installed, however, if it’s not installed, you can install it by executing the below-given command:
sudo apt install iptables
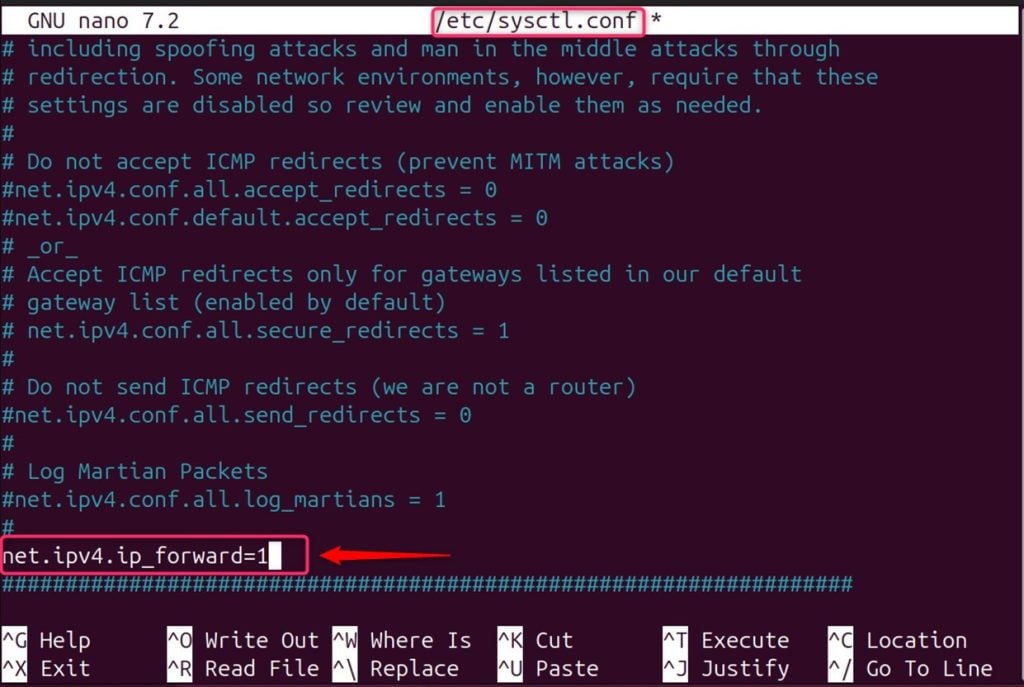
IP forwarding must be enabled to allow your system to forward packets from one network interface to another. By default, it is not enabled for network security. To enable this, let’s edit the /etc/sysctl.conf file:
sudo nano /etc/sysctl.conf
Add the below line in the configuration file, and then save, and exit the nano editor:
net.ipv4.ip_forward=1
Now apply the changes with the sysctl command:
sudo sysctl -p

After this, you can see the current iptables rules by running the iptables command with L option:
sudo iptables -L -n
This command lists all the rules, including any existing port forwarding rules:

In the Linux system, iptables is the go-to utility for managing network packet filtering and port forwarding. For forwarding traffic from one port to another port, you can use the PREROUTING chain to navigate the traffic to the specified destination. Here’s a basic command structure:
sudo iptables -t nat -A PREROUTING -p tcp --dport <original-port> -j DNAT --to-destination <destination-ip>:<new-port>
In the above command, modify <original-port> with the desired port you want to forward from, <destination-ip> with the IP address of the destination server, and <new-port> with the forwarding port number.
Read also How to Set Up an Nginx Reverse Proxy
Let’s forward external port 80 to internal IP 192.168.0.121 as well as the internal port 8080:
sudo iptables -t nat -A PREROUTING -p tcp --dport 80 -j DNAT --to-destination 192.168.0.121:8080
This command forwards traffic destined for port 80 to port 8080 on the internal IP address 192.168.0.121:

Iptables rules are not persistent by default, meaning they will be lost after a reboot.
Port Forwarding with Iptables on Our Linux VPS!
Ultahost Linux VPS provides flexibility for port forwarding with iptables, ensuring fast, stable servers while we handle administrative tasks and guarantee uptime.
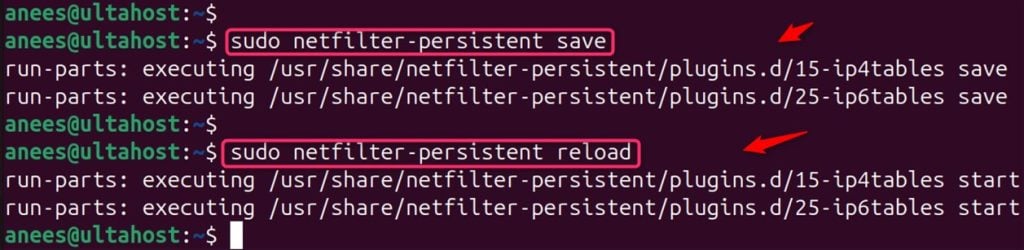
To save the rules, you can use iptables-persistent or manually save them to a file and restore them on boot:
sudo netfilter-persistent save && sudo netfilter-persistent reload
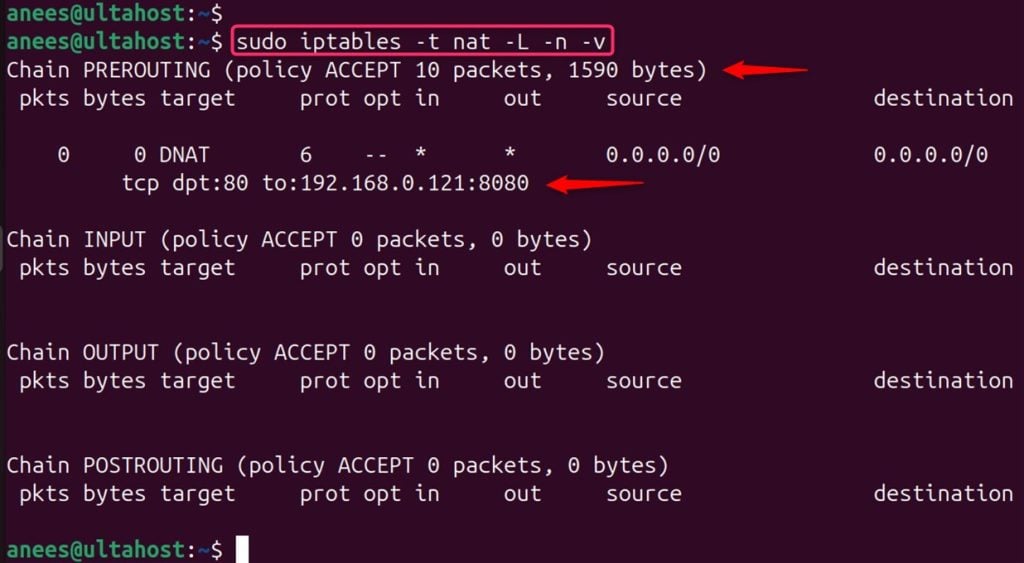
List the current iptables rules with the following command to confirm the new configuration is active:
sudo iptables -t nat -L -n -v
Check the PREROUTING chain for the rules you’ve added:
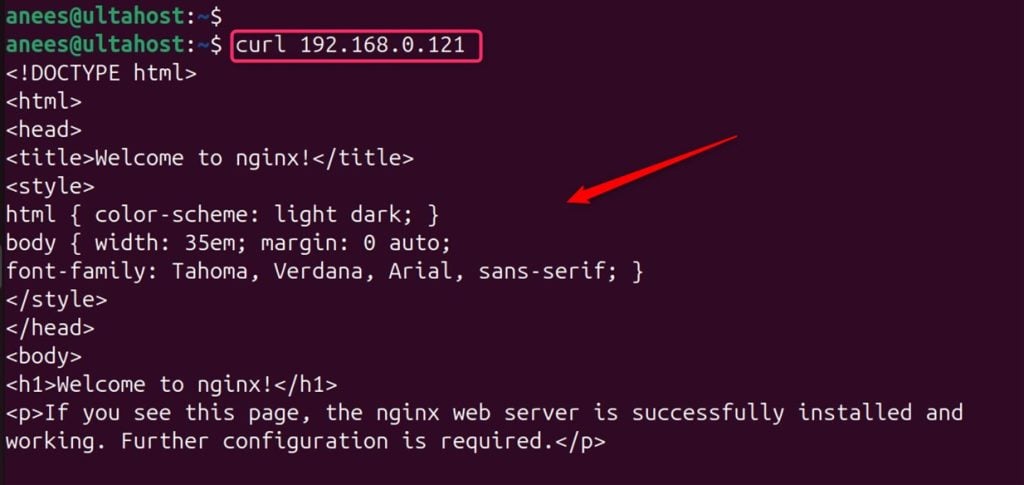
Finally, test the port forwarding Linux to ensure it’s working as expected. You can do this by attempting to access the service from an external system using the forwarded port:
curl 192.168.0.121
By following these steps and considering the additional factors, you can successfully configure iptables port forwarding in Linux to make services on your internal network accessible from the outside world.
In Linux, port forwarding with iptables is a powerful capability that can provide significant flexibility in managing network traffic. To forward ports with iptables in Linux, you can use a simple two-line command sequence. The first line typically adds a rule to the nat table’s PREROUTING chain to redirect the desired traffic, while the second line modifies the POSTROUTING chain to ensure the traffic leaves the correct interface. Remember to replace the port numbers and IP addresses with those relevant to your configuration.
UltaHost offers fully managed Cloudflare VPS Hosting perfect for configuring port forwarding with iptables. With Cloudflare integration, you can enhance security and speed for your applications and websites while forwarding ports efficiently.
Port forwarding is a technique used to redirect network traffic from one IP address and port number to another, often through a router or firewall.
It allows external users to access services on a private network and is essential for running servers that need to be accessible from the internet.
Iptables modifies the destination address and port number of traffic, directing it to the appropriate internal IP and port.
Yes, iptables can be configured to allow or block traffic using policy chains.
When configured correctly, port forwarding can be secure, but it should be used with additional security measures like firewalls.
A basic understanding of iptables is beneficial for effectively setting up port forwarding.
Setting up port forwarding with iptables involves defining rules that specify the incoming and outgoing ports and addresses.