How to Reset the WP Admin Account Password Wi...
Softaculous is a tool in cPanel that makes it easy to i...
Google AdSense is a popular advertising program that allows website owners to display targeted ads on their web pages. When visitors click on these ads you earn a commission. It is an amazing way to monetize your WordPress website especially if you have a steady stream of traffic.
In this post, we will guide you through the entire process of how to add Google AdSense to WordPress from creating an account to displaying ads and tracking performance.
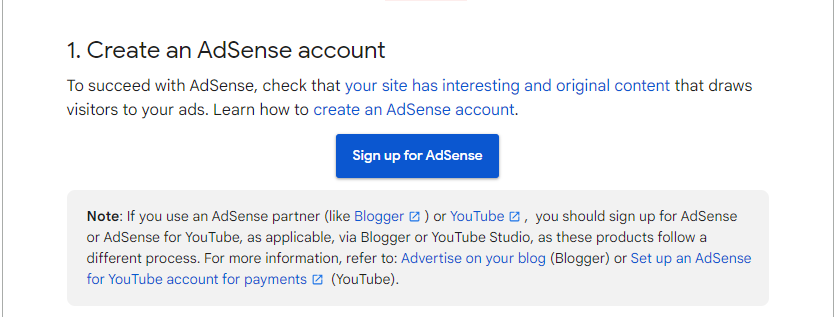
Before diving into WordPress you will need a Google AdSense account. The signup process is straightforward:
1. Visit the Google AdSense website and click “Signup For AdSense”.

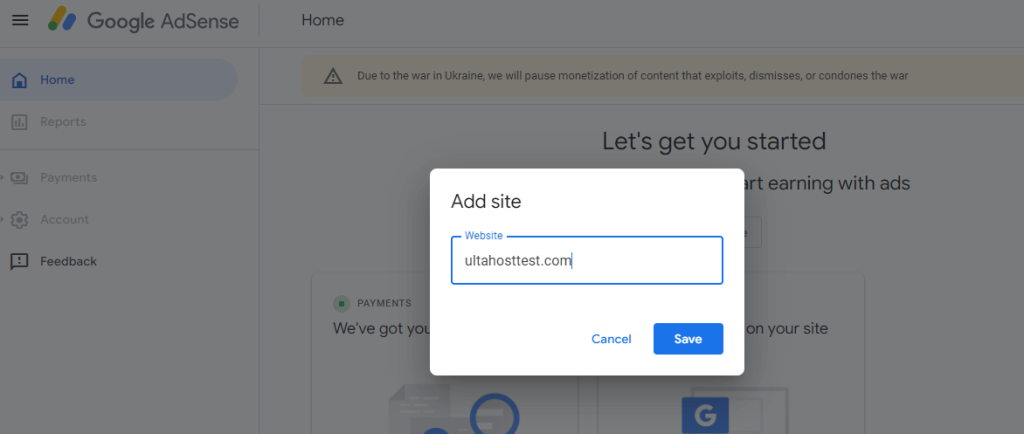
2. Fill in the required information, including your website URL and contact details.

3. Agree to the AdSense terms and conditions.
There are a few key terms you will encounter throughout the process:

Once your AdSense account is approved, it’s time to create your first ad unit:
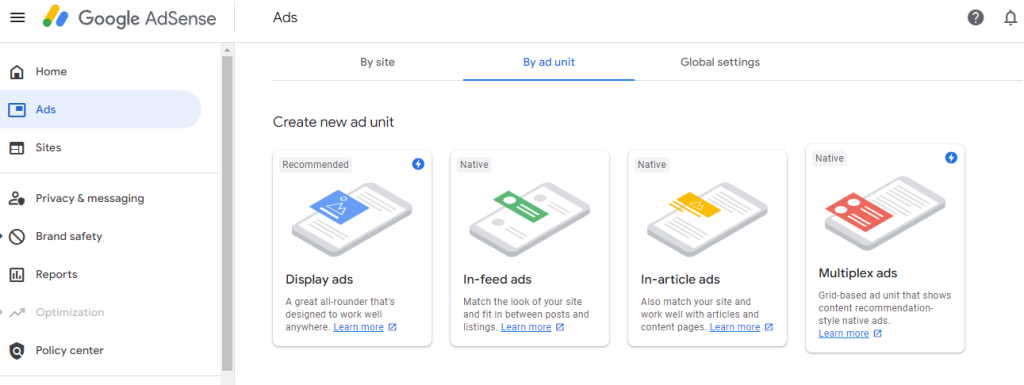
1. Log in to your AdSense account and navigate the “Ads” menu. Select “By ad unit” and navigate to “Create new ad unit”. Choose an ad type: Display ads are a good starting point.

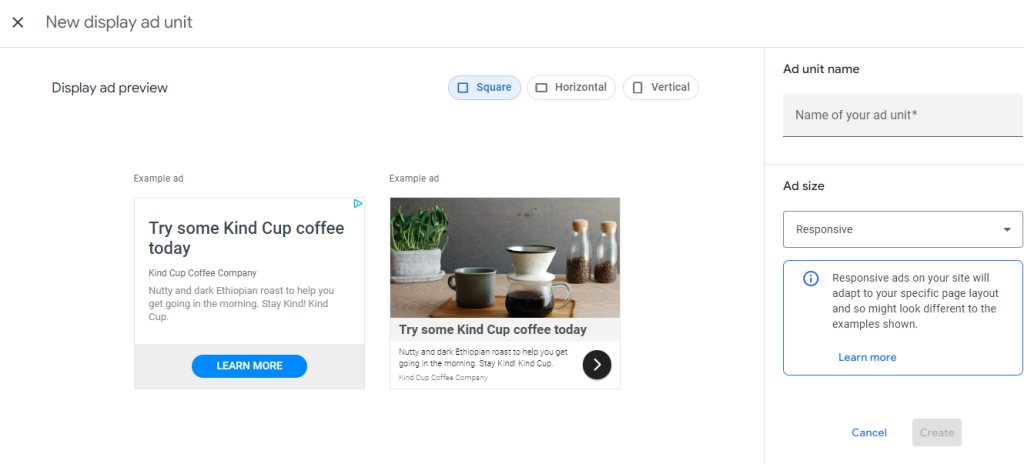
2. Give your ad unit a descriptive name for example Sidebar Ad. Select the ad size. Popular options include responsive sizes that adjust to different screen sizes. You can customize ad styles to match your website’s design to some extent.
Unlock the power of Ulta WordPress Hosting
Ultahost offers budget-friendly WordPress hosting plans with features like unlimited bandwidth, SSL certificates, and easy content management systems installation.
There are two primary ways to add a Google AdSense WordPress website:
Method 1: Manually Placing Ad Code
This method gives you how to add AdSense code to WordPress that controls ad placement but requires editing theme files. In your AdSense account after creating an ad unit copy the ad code.
Login to your WordPress dashboard and navigate to “Appearance” and then the “Theme Editor” option.

Choose the theme file you want to edit usually header.php or footer.php. Locate the <head> tag and paste the ad code just before it then save the changes.
Method 2: Using a Plugin
Plugins offer a user-friendly way to add AdSense without modifying theme files. Here’s how to use the popular “Site Kit by Google” plugin:
For this navigate to the “Plugin” section from your WordPress dashboard. Click the “Add New Plugin” section. Search for “Site Kit by Google” in your WordPress plugin directory and activate it.

Within the Site Kit, follow the “Sign with Google” to connect your Google AdSense account.
Site Kit might prompt you to set up AdSense. If not navigate to Site Kit then “Settings” then “Connected Services” then “AdSense” and enable it.
Site Kit can automatically place an AdSense code on your website. However, you can also choose to manage placement manually heading up to method 1.
Use Site Kit’s reporting features to track your AdSense performance, including impressions, clicks, and earnings.
Strategic ad placement plays an important role in maximizing making money from blogs. Here are some important tips:
Here are some important points to maintain a healthy AdSense account and avoid policy violations:
By following these steps and continuously optimizing your AdSense strategy you can turn your WordPress website into a valuable revenue stream. Remember, it requires patience, experimentation, and a commitment to providing high-quality content for your audience.
To unlock your website’s potential with a next-generation private server, consider Ultahost’s Virtual Private Server. You can buy Ultahost’s VPS now for maximum flexibility, unlimited bandwidth, and unbeatable performance.
Google AdSense lets you earn money by displaying ads on your website.
Yes, Google AdSense is free to sign up and use.
You can add AdSense to your WordPress site using a plugin or by inserting the ad code manually.
No, AdSense works with any WordPress theme, but responsive themes are best.
It can take a few days to a few weeks for Google to approve your AdSense application.